|
|
Post by Chris on Aug 12, 2010 12:39:53 GMT -5
CATastrophe Strikes!!!!!!Apparently last night one of my cats decided to use my Gem-like Turbo Offy engine as a Chew Toy!!! The damage consisted of 1 Cam Cover mangled (Russ is getting me a new one) the front cover needs a little work, a new water pump will have to be scratchbuilt and the Hole in the side of the block will have to be filled! Over all nothing that cant be fixed, just a delay while I fix that. And I dont know what I am going to tell my wife about the Cat being Shaved!!!!LOL.. OK so I did do some work yesterday and will post it later..Chris
|
|
|
|
Post by Patrick on Aug 12, 2010 14:43:10 GMT -5
What skunks! I hope you left a racing stripe of fur! Bad kitty!
Patrick
|
|
|
|
Post by illeagle10 on Aug 12, 2010 14:50:34 GMT -5
It sounds like the time my dog ate my homework! Spent the day in the cloakroom! Now, as far as the cat, if you lived a little closer I could take care of that cat for you real easy! All in fun Chris, I do empathize with you and hope the repairs are quick!
Jim
|
|
|
|
Post by Chris on Aug 13, 2010 2:04:24 GMT -5
Last night I worked on the seat belts and while researching it I found some interesting info, car #70 Hill had a back rest but no padding on the bottom or sides, just like the basic kit although I think MPC really just wanted to add a fire extingusher, Car # 40 Pollard had a botom and side cushions, so my car would have them too. I decided to cover the seat and sides in suede so I had ordered some MFH suede cloth a couple of weeks ago and did them up right. I also spent a great deal of time making up 1 1/2 sets of seatbelts, why 1 1/2 because the Cat ate the first half I made... here is the finished result and I like it.. 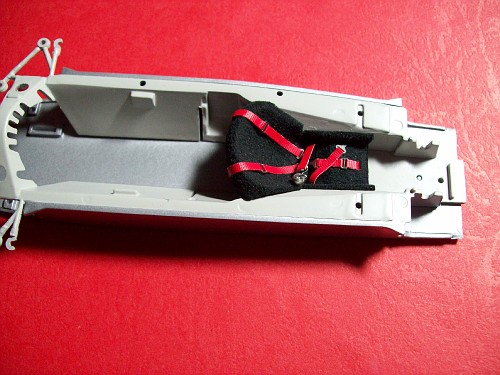 well I managed to get one pic posted but FOTKI has been down off and on all night so I will post the rest in morning. I had to add a cross bar to mount the seatbelt behind the seat.. Chris  |
|
|
|
Post by Chris on Aug 13, 2010 2:32:37 GMT -5
|
|
Deleted
Deleted Member
Posts: 0
|
Post by Deleted on Aug 13, 2010 6:14:17 GMT -5
CATS!!! About 5 years ago I made the mistake of leaving my spare decals box on the floor next to my modeling chair. Our cat promptly decided to use it as it's litter box. Years &years of spare decals (some very rare) were lost forever.
I don't have a cat anymore. ;D
Stu
|
|
|
|
Post by herk56 on Aug 13, 2010 11:58:55 GMT -5
Cats are naturally curious and also need some entertainment. If their humans don't intentionally provide them with toys and activities, the cats will find their own, inadvertently provided by humans! I have four cats and we never have a problem as they NEVER enter my modeling room. Looks like you are rebounding nicely from this setback. Great-looking seat and belts!
Brian
|
|
|
|
Post by Patrick on Aug 13, 2010 12:33:05 GMT -5
AH....dogs drool, cats rule! I am not called El Gato Supremo del gatos todos en la Tierra!
Patrick
|
|
|
|
Post by SWT500 on Aug 13, 2010 13:55:04 GMT -5
As an unapologetic cat lover, I can say that the cat is not to blame here. What you see as a beautiful work in progress is just another cat toy to them. I keep the door closed to the eBay room and my display cases have glass doors.
|
|
|
|
Post by Chris on Aug 16, 2010 18:07:05 GMT -5
Dont You love it when a plan comes together??? I got up this morning and decided it was time to put some paint on the bottom half of the body and to try out the theory that using a red base will give you a Great Fluorescent STP color...With the So Cal weather being right around 90 ( my favorite painting weather, I taped off the inside of the body and laid down a coat of light gray Tamiya primer, an hour later it was bone dry so I put down 1 coat of Tamiya Italian Red ( why not Bright Red? I didnt have any!!!) it went down smooth and no dust or garbage so I waited another hour until it was no longer tacky and Laid down the First coat of TS36 Fluorescent Red and WoW it was smooth and Glass like so I was stoked... It wasnt as Fluorescent as I wanted and since there was no sanding to do I waited another hour and laid down another coat and there it was the long debated STP color smooth, no dust, bugs anything just my reflection in it. 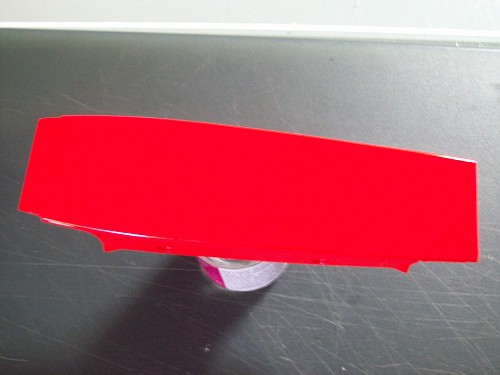 I paint on my patio, and use both airbrush and rattle can and usually the results do turn out this way, Tip sweep, and wet down the area to keep the dust down.. I wont have to clear this so it will just sit till tomorrow and then I can continue by starting to install the suspension and assorted parts... |
|
|
|
Post by sandysixtysfan on Aug 17, 2010 8:09:44 GMT -5
The finish and color are gorgeous ! Very clever way of applying the colors to achieve the STP look.
Sandy
|
|
|
|
Post by indy on Aug 17, 2010 17:33:30 GMT -5
Great details and now great paint!? Shoot, this is a really inspiring build to watch, thanks so much for posting it!!
Jordan
|
|
|
|
Post by Art Laski on Aug 18, 2010 12:18:17 GMT -5
Looks great, Chris!
-Art
|
|
|
|
Post by Chris on Aug 19, 2010 13:49:46 GMT -5
Thanks Art, I need some input Guys, for the Firestone tires on the 69 Indy cars What color is the Lettering??? I have White and I have Gold?? The Gold is beautiful and I am leaning towards it just for Looks but then there is that Acuracy Question?? I spent the day trying some ideas on making CV Boots from shrink tubing but I kept melting my master..LOL I am going to make one from brass today..Onward..
|
|
Deleted
Deleted Member
Posts: 0
|
Post by Deleted on Aug 19, 2010 14:46:31 GMT -5
Chris,
From 1964 on the Firestone lettering on tires were gold.
Best to you!
Russ
|
|
|
|
Post by Chris on Aug 22, 2010 23:58:32 GMT -5
Thanks Russ, I have been busy, 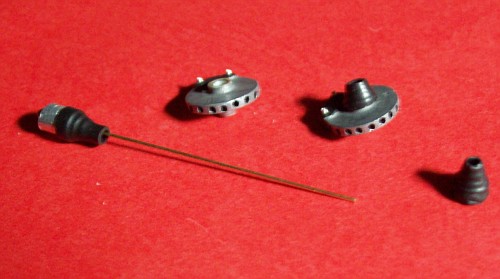 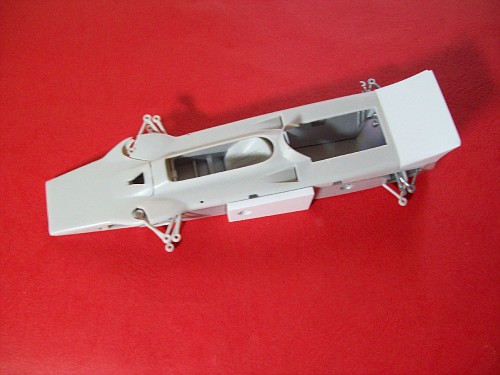 When i looked at the pics of the Lotus 56b I noticed each wheel has 2 CV boots so because I didnt like the look of the way the brakes mounted, I made a master from Aluminum tubing and using shrink tubing started making CV Boots, I also wanted to use Photo Etch brake rotors and seperate calipers but after ordering 3 (expensive sets) of brakes I still couldnt get a set that were small enough to fit and look right so I made a spacer and hand drilled 18 individual equaly spaced holes in the kit rotors.. Next I have a stock of Modelers a/n fittings I bought years ago, they come with assorted fittings, 1 size was perfect to use to add the braided lines ( really small stuff ) going to the mechanical gauges in the dash. They come anodized red but I found if I soak them in 90% alcohol they come out Chrome, so I used those and some brass colored fittings and some ultra small wire and did up the gauge wiring and hoses. 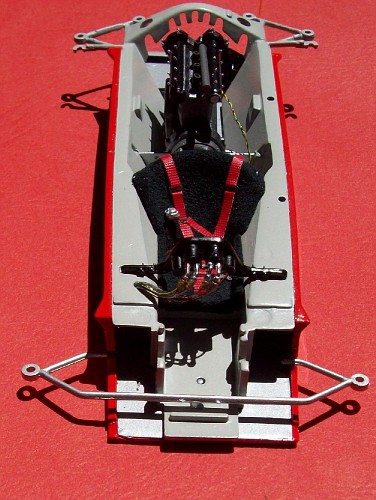 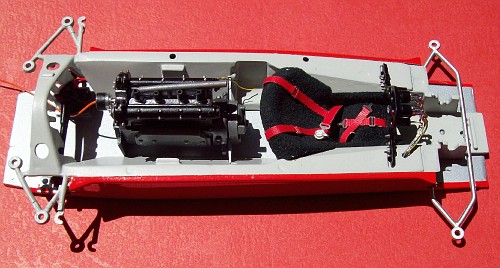 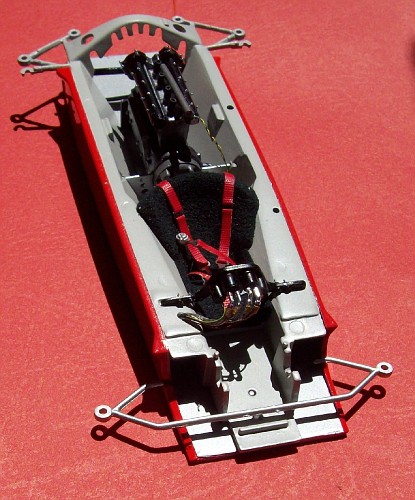 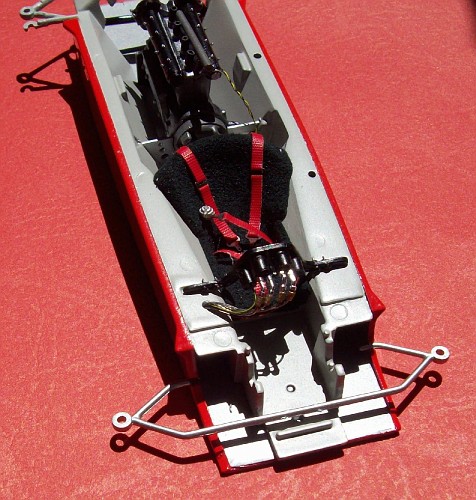 . I am a bit picky on detail and dont believe in over doing it but making it look right so I am trying different things and doing a lot of scratchbuilding to hopefully show everyone a couple of new things, like the wonders of shrink tubing...This next week the weather here will be in the 105 degree range, that means a lot more modeling time so look forward to a bunch more coming this week!!!!! ***EDIT: Narrowed up the post for less side scrolling ;D*** |
|
|
|
Post by Calvin on Aug 23, 2010 22:38:38 GMT -5
Why do you keep on showing us pics of the real car?!?!
|
|
|
|
Post by scalecentral on Aug 23, 2010 22:49:00 GMT -5
I really like your heat shrink tube idea for CV joints. I will have to try this.
Nic
|
|
|
|
Post by Chris on Aug 23, 2010 23:46:07 GMT -5
It works great!! I bought a box of multicolored tubing from www.allelectronics.com I think it was 100 4 in pieces in sizes 1/16th to 3/8 for $11.00 so far I got sparlk plug boots. Hoses both smooth and flex type, CV boots, Shifter handles, FI lines, Plenum Intake hoses and more.. I keep coming up with more every day...Chris  |
|
Deleted
Deleted Member
Posts: 0
|
Post by Deleted on Aug 24, 2010 13:44:51 GMT -5
Great stuff Chris nice work no the brakes your wiring nice and clean looking forward to more
|
|
|
|
Post by Chris on Sept 1, 2010 13:21:09 GMT -5
Sometimes You just cant catch a Break....Sorry for the week delay, I don't get out in public a lot but last week I had to go to the Post Office 2 days in a row and the average wait is 40 to 50 minutes, so with the 105 temp outside there was plenty of Hackin' and Coughin' persons in line and don't you know who came down with a Nasty Bug!!! Couldn't keep anything down (or in) for 5 days... On the good side I lost 15 pounds.. I did some work on the Lotus 56B mostly engine detail and today I am starting to feel better so I will get back on it. I did manage to order the decals from Mike at Indycals, who is graciously making up the number decals for this car, I got some supplies and even retrieved the Cannon EOS300 Digital ( the last pics were with my little digital camera) camera from my friend to shoot the rest of the build..YEAAAA!!!
|
|
|
|
Post by Chris on Sept 13, 2010 14:22:19 GMT -5
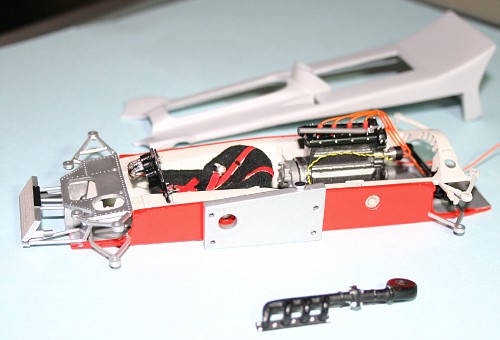 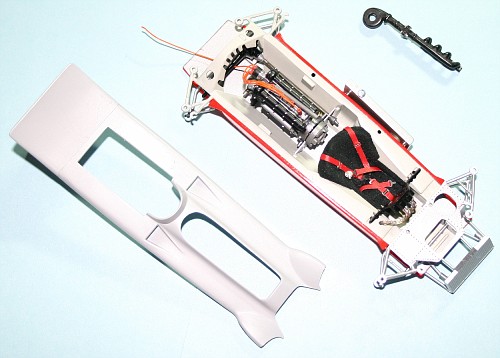 OK after Back Surgery and then the flu I am back and feeling much better, a special Thanks to everyone who left me a Get Better note. I have been working on detail small and large, starting with the Panard Oil Tank, I counter sunk the mounting bolts (RB) and drilled the body to mount it, a tip: on a recent trip to the bead store I found some 2mm OD X 1MM length Sterling silver Crimp connectors that spaced the tank out from the Body perfectly, I also drilled it for the oil lines. I have another P/E part of the Fuel Filler to put on the body before the tank is finally glued in place. The radiator was finished and I used 2 sizes of Evergreen rod to make the hose bungs, allowing a smaller size hose that is matching the largest part. I cut the kit drive shafts up and used the ends on an appropriate diameter thin wall stainless tubing to achieve a great look on both drive shafts. I finished the dashboard by applying gauge decals, hanpainting in markings and needles and filled them with Testors Clear cement to make lenses, came out great and looks very realistic. I bolted the exhaust pipe to the turbo and currently I am working on the Pop Off Valve to make it look more real. I made a new water pump for the engine and shrunk some Shrink tubing to make Spark Plug boots and distributor boots, I have to make a Hilborn fuel injection pump and add a water bypass hose and the engine will be done. The top rear part of the body was finished, I was able to use a minimal amount of filler on 2 seams (a really, really small amount) and then primed it and it awaits paint. I got the 68 Turbine deals from Micheal at Indycals and they are very nice, he is making up the Number decals for me, white #40 on black meatballs, I also git his Gold Firestone tire decals, the set I have was not the right diameter, I glad I bought those as they will make the resin tires Rock Out!!! 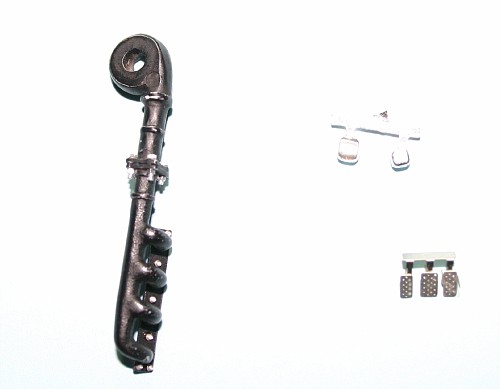 Here is a pic of my 3 Pedal assembly next to the 2 pedal kit piece, Have you ever wondered why modelers put nice P/E pedals but they don't connect to anything?? I attached 3 very small brass brackets to the back of the pedals so I can run, accelerator cable, brake rod (going to the master cylinder), and clutch rod (going to the slave cylinder) to add that detail most miss!! I am working on the re-do Intake manifold/turbo set up adding the oil line to the turbo and making up the turbo to plenum pipe. So after weeks of down time I am back on it and getting slowly closer to the completed car. 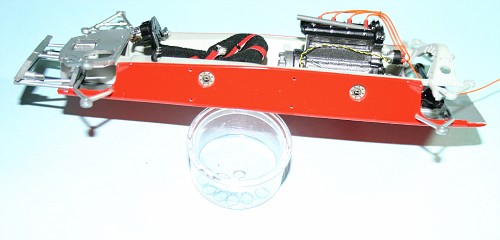  I have been in contact with Georgia Pollard, Arts wife and Mike Pollard, Arts son and they are searching for interior and engine pictures of this car so hopefully I will have some great detail shots to wrap this WIP up. I will be showing this car at the Desert Classic model show on Nov. 21 along side my fabled Ford Gt40 DOHC ( and hopefully Winning!!) For all you So Cal Members I look forward to seeing all of you again. I will not be a Vendor so I will have more time to Hang Out, I have volunteered to Judge the show so Watch Out!!! |
|
|
|
Post by Art Laski on Sept 14, 2010 22:20:25 GMT -5
Looking Good, Chris!
|
|
|
|
Post by Chris on Sept 15, 2010 10:09:27 GMT -5
Thanks Art, More Good Stuff to Come, I am working Hard this Morning on the car....Chis
|
|
|
|
Post by illeagle10 on Sept 15, 2010 10:50:33 GMT -5
Glad you're feeling better Chris. Hope this build acts like therapy for you. It is for me.
Jim
|
|
|
|
Post by Chris on Sept 15, 2010 11:15:02 GMT -5
Thanks Jim, I am getting stronger everyday, I am building a bit longer and coming up with more detail everytime I sit down at the desk..Chris
|
|
|
|
Post by Patrick on Sept 15, 2010 21:58:31 GMT -5
My Friend,
You are putting me to shame! Somehow I have to get back into building as your work on this car is absolutely TERRIFIC!
Patrick
|
|
|
|
Post by Chris on Sept 16, 2010 3:41:47 GMT -5
Patrick, your work was my inspiration to build a car of this magnatude, I can only hope to achieve the level of results I see in your conversions..Thanks, Chris
|
|
|
|
Post by harveythedog2 on Sept 16, 2010 17:44:34 GMT -5
Looking really great Chris. Makes me want to do something like this in 1/18th.
Stu
|
|
|
|
Post by pje on Sept 16, 2010 21:52:53 GMT -5
What did I say to you last week!
Paul Erlendson
|
|