|
|
Post by Calvin on Sept 27, 2015 10:58:33 GMT -5
Of course, the tape lines were all fairly sharp, except where there was no stripe between the two colors. I masked it off and repainted a sharper line. I use the razor blade trick to get my paint lines straight and crisp. I'll have to show some time.... But everything is looking really nice! It's really nice to see this coming a long, great motivation! |
|
|
|
Post by Patrick on Sept 27, 2015 14:00:06 GMT -5
It looks very good Art. I'm interested in the razor technique Calvin.
Patrick
|
|
|
|
Post by alterrenner on Sept 28, 2015 4:53:22 GMT -5
Razor technique--where you use a razor to cut a fresh, clean edge on the tape before masking with it?
--Frank
|
|
|
|
Post by alterrenner on Sept 28, 2015 4:56:45 GMT -5
Or cut the paint with a razor along the edge of the mask before pulling the mask off?
(I have no idea why I did the question as two posts!)
--Frank
|
|
|
|
Post by 2lapsdown on Sept 28, 2015 8:00:46 GMT -5
I'm looking forward to seeing how you handle the front suspension. I'm guessing some brass pins will be involved, but it seems like it will be somewhat fiddly. The paint and the foil look great, I'm really enjoying this.
John
|
|
|
|
Post by Art Laski on Sept 29, 2015 11:08:37 GMT -5
Thanks for looking, guys!
John, yes I pinned the front suspension. I think there are some photos earlier in the thread. I used beading wire for the pins.
|
|
|
|
Post by 2lapsdown on Sept 29, 2015 16:19:18 GMT -5
Of course you're right!!
John
|
|
|
|
Post by Gary Davis on Oct 3, 2015 17:11:14 GMT -5
Man ART...that paint, decals and gold foil.... looks GREAT bud!! That color combo has always looked great to me. Good job ART. Looking forward to more....
|
|
|
|
Post by indy on Oct 3, 2015 21:36:00 GMT -5
That gold with the great paintjob really makes the body pop. Very nice progress, excited to see this one progress.
Jordan
|
|
|
|
Post by Art Laski on Oct 11, 2015 2:23:51 GMT -5
Gary, Jordan, thanks for the comments! I got some time in on this one the last few days. I re-positioned some of the decals on the front. They were just a little too low. I moved the gold on the bottom chevron up just a bit so I then had room to move the decals up where they needed to be. I also doubled up the sunburst roundel on the cowl, because it was bleeding through just a little too much. I also made the Valvoline decals, and the electric switch sticker, and the fire extinguisher E decal that will go on the windshield later. I then cleared the body and polished it out so it wasn't too glossy and got all the junk out of it at the same time. Then I masked off the body so I could paint the aluminum tub. I used Aluminum Plate metalizer, and it looked pretty bitchen until I put the sealer on. I don't usually use the sealer, but this had so much area that was going to get handled, I felt like I had to. The sealer made it look like silver paint, but I'll live with it. The seat got painted, and belts will come later to cover the molded ones. Some screens were also added to the radiator vents. I threw in a few mock up pics also... 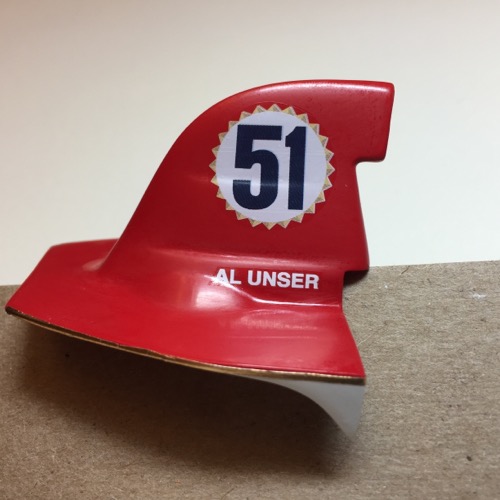 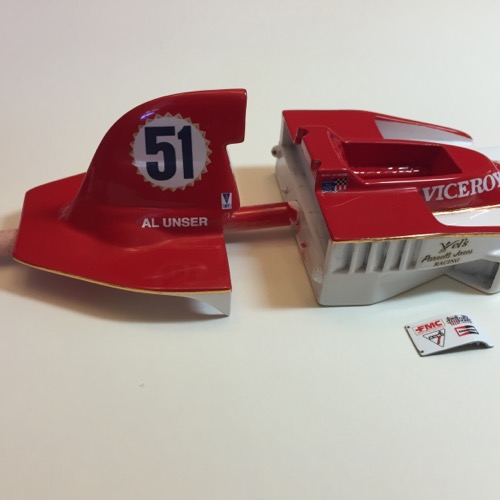 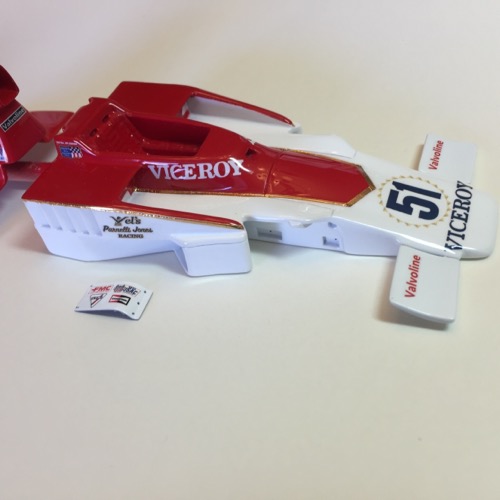 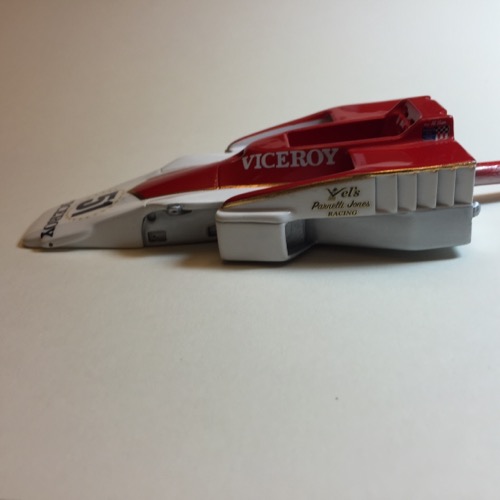 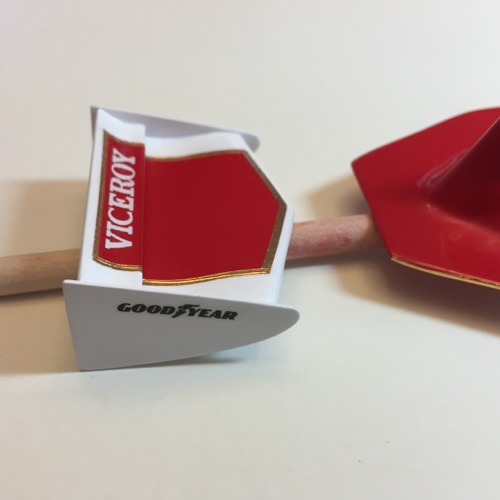 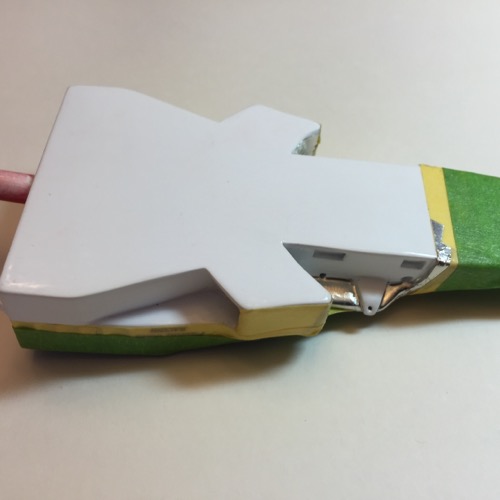 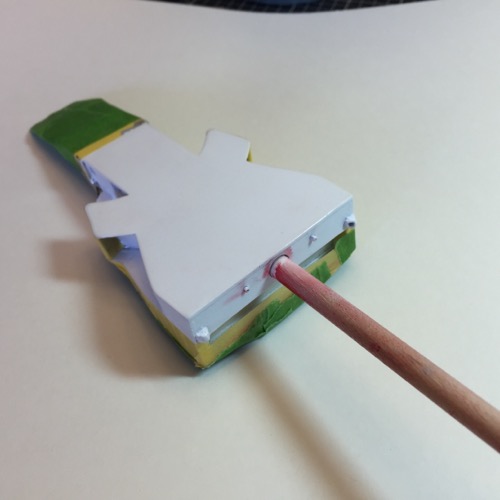 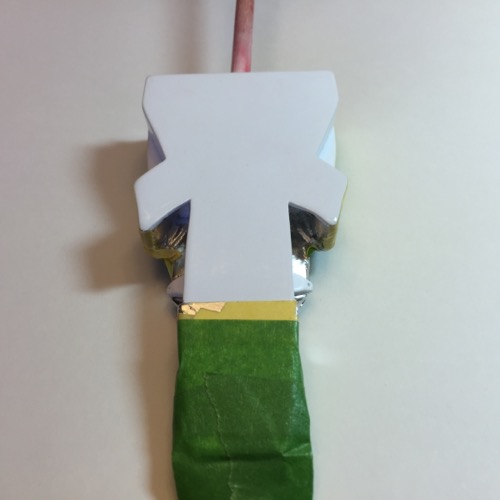 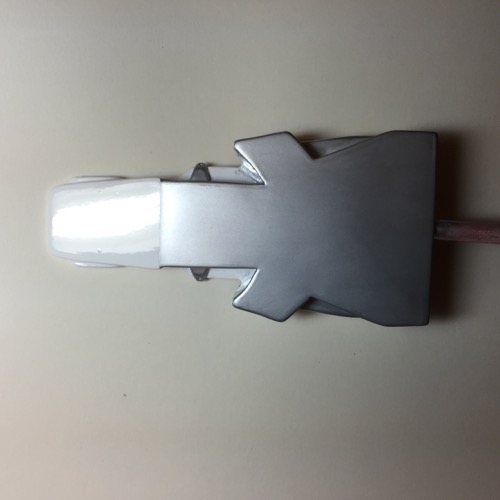 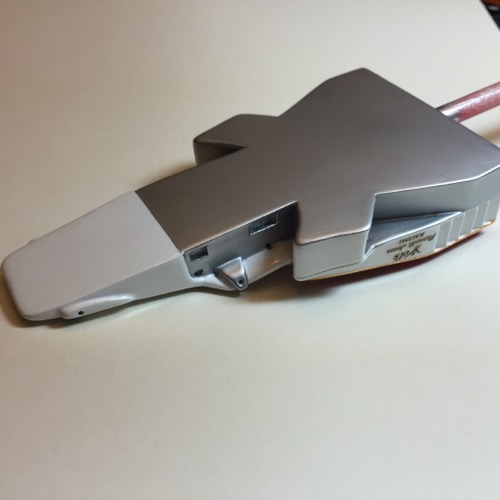 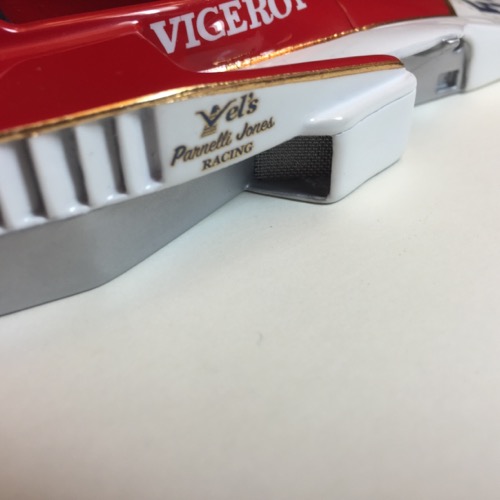 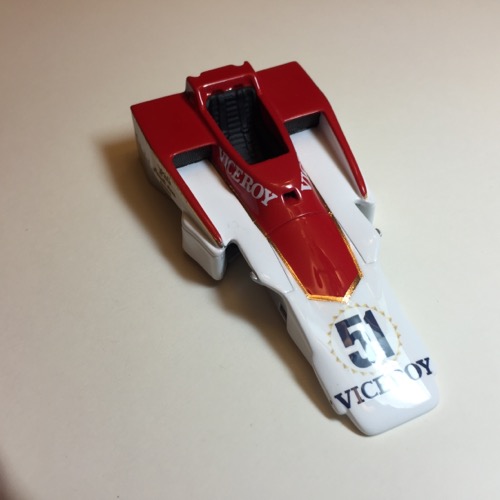 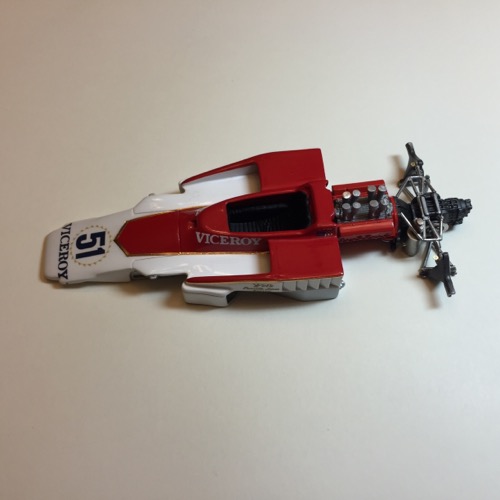 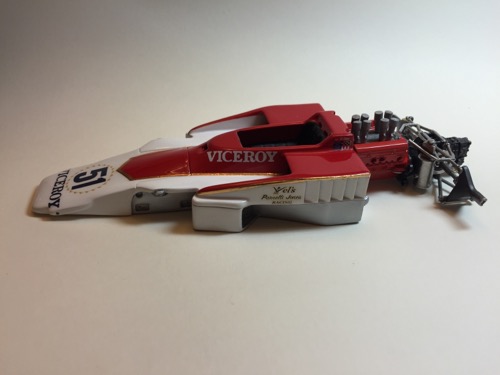 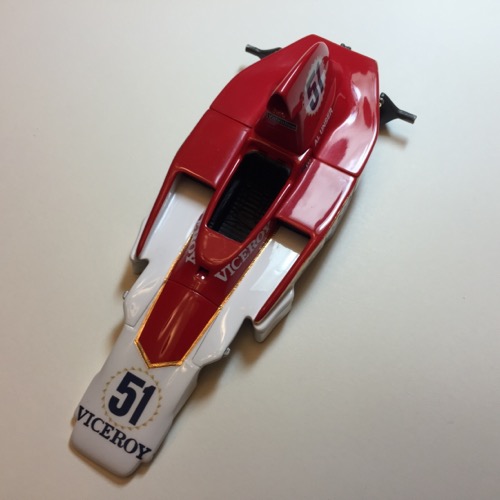 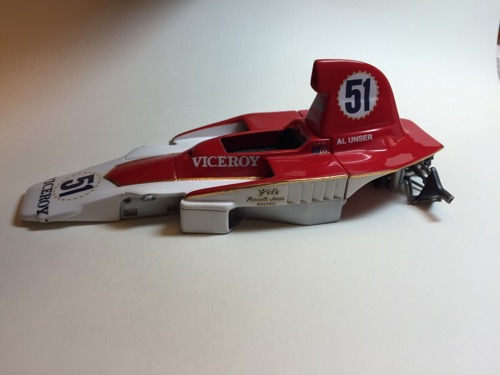 |
|
|
|
Post by racerbrown on Oct 11, 2015 6:00:51 GMT -5
looks nice art!
did the clear affect the bare metal foil at all?
duane
|
|
|
|
Post by sandysixtysfan on Oct 11, 2015 8:21:25 GMT -5
This is just amazing! Great wip. Thanks for posting.
Sandy
|
|
|
|
Post by Calvin on Oct 11, 2015 15:29:02 GMT -5
I wished we could just pay Art to do non-stop WIP's for us all day long....they are worth the entertainment!
|
|
|
|
Post by Art Laski on Oct 12, 2015 11:18:49 GMT -5
looks nice art! did the clear affect the bare metal foil at all? duane Duane, the clear didn't affect it at all. It still pops through very nicely, and has it all sealed in so it can't come up, which is nice. -Art |
|
|
|
Post by pje on Oct 13, 2015 0:11:54 GMT -5
Art, please don’t ever delete your photos of this project from your photo server as you are creating the manual on how to build this kit. I’ve been following closely and plan on using your W.I.P. as the guide for my build (Al’s team mate)  in the future. Great work! A really inspiring build and I can hardly wait to see the finished model. Paul Erlendson |
|
|
|
Post by indycals on Oct 13, 2015 0:19:25 GMT -5
That's a work of art/Art!  |
|
|
|
Post by 2lapsdown on Oct 13, 2015 5:47:23 GMT -5
Art, please don’t ever delete your photos of this project from your photo server as you are creating the manual on how to build this kit. I’ve been following closely and plan on using your W.I.P. as the guide for my build (Al’s team mate)  in the future. Great work! A really inspiring build and I can hardly wait to see the finished model. Paul Erlendson I agree, this has been invaluable to me also. I'm building two of these and this will be my guide for both. I love when Art shows the way. John |
|
|
|
Post by racerbrown on Oct 13, 2015 5:51:53 GMT -5
yep, another "art" lesson for us all.  duane |
|
|
|
Post by Art Laski on Oct 13, 2015 9:59:25 GMT -5
That's a work of art/Art!  Thanks Michael! Without your contributions to the hobby, this wouldn't be possible! |
|
|
|
Post by Calvin on Oct 13, 2015 10:57:20 GMT -5
Okay! Okay!....no more art/Art jokes! I'm sure Art has got that his whole life already!  Just like how I've been called little (expletive deleted) my whole life! |
|
|
|
Post by 2lapsdown on Oct 13, 2015 13:07:03 GMT -5
In the end, people get what they deserve Calvin.
John
|
|
|
|
Post by Art Laski on Oct 13, 2015 18:17:49 GMT -5
Okay! Okay!....no more art/Art jokes! I'm sure Art has got that his whole life already!  Just like how I've been called little (expletive deleted) my whole life! Calvin, I'll take it. Growing up, there are other words that rhyme with Art that kids think are funny...  |
|
|
|
Post by racerbrown on Oct 13, 2015 18:43:03 GMT -5
Okay! Okay!....no more art/Art jokes! I'm sure Art has got that his whole life already!  Just like how I've been called little (expletive deleted) my whole life! Calvin, I'll take it. Growing up, there are other words that rhyme with Art that kids think are funny...  And now you're getting to be and old art too!  Duane |
|
|
|
Post by Art Laski on Oct 14, 2015 0:12:38 GMT -5
Calvin, I'll take it. Growing up, there are other words that rhyme with Art that kids think are funny...  And now you're getting to be and old art too!  Duane Ain't that the truth!  |
|
|
|
Post by Art Laski on Oct 14, 2015 0:12:58 GMT -5
Art, please don’t ever delete your photos of this project from your photo server as you are creating the manual on how to build this kit. I’ve been following closely and plan on using your W.I.P. as the guide for my build (Al’s team mate)  in the future. Great work! A really inspiring build and I can hardly wait to see the finished model. Paul Erlendson Paul, No worries, I will not remove any of the pictures. Hopefully, FOTKI won’t do it for me like they have done in the past, but if you ever need any pics or advice, don’t hesitate to ask. |
|
|
|
Post by Art Laski on Oct 14, 2015 0:13:19 GMT -5
Since there are few of you following along for future builds of this kit, if you are building the VPJ version as purchased from Kevin, I’ll explain some things I’ve done on this build to be as correct as possible using the VPJ parts supplied by Kevin, as well as the decals available from Indycals. To begin with, Kevin has provided a special cowl for the VPJ version, as well as a different wing and bracket. Michael at Indycals has two decal sets for this kit, one for the ’74 season and one for the ’75 season. In ’74, VPJ ran this type of cowl, but they didn’t run the wing and bracket until late in the season. However, at that time, they didn’t run the type of wheels supplied in the kit in the rear. They also ran Firestone tires and Castrol oil, for which logos are supplied in the Indycals ’74 sheet. The ’74 sheet also has the sunburst-styled roundels for the numbers that I really like, however they didn’t use the roundels on the cowl until early '75, and then only for a race or two. I really liked the sunburst roundels, so I wanted to do a version with those, but I only found one possibility to use those, and that would be in the season-opening race in ’75 at Pocono (and possibly the second race at Mosport, but I couldn’t find many pictures from there). They also used the rear wheel style Kevin provided, as well as the rear wing and bracket. As an added bonus, there were some pretty good reference photos out on the net, of both Mario Andretti’s car as well as Al Unser’s from Pocono. Using the Andretti pics and Unser pics from Pocono, I am able to glean a pretty accurate picture of what the car looked like. I noticed one small difference in the logos, in that Andretti’s car has a Lola decal on the front, but this seems to be omitted from the Unser car. Too bad, I kinda like that little logo! The only problem, though, is that in ’75, VPJ switched to Goodyear tires and Valvoline instead of Castrol, and the contingency stickers on the side were also different, and they now had the driver’s names on the cowl like they did the rest of the season. So, I ordered both the ’74 and ’75 sheet from Michael. Problem solved! Actually, I ordered two of the ‘74’s so I could double up the roundel on the cowl, as there was a little bleed through of the red. I then made my own decals for the Valvoline decal on the front of the cowl above the driver’s head, and for the front wings. The 75 sheet has some Valvoline decals that I thought would work, but they looked a little undersized compared to the pictures when I got them on there. I also made the E decal for the windscreen and the “Off” decal on the cowl. (If anybody building this version would like some, I have a few extras and would be willing to share) There was also one issue I had to deal with, which is that there weren’t any good views of the rear wing in the Pocono pictures, but the paint was clearly different than ’74 and later ’75. But gleaning what I could from some references, and also seeing some pics of the VPJ F1 car around the same era that had a very similar scheme, I think I got it right. I used a photocopy of the ’75 wing decal as a pattern and it worked perfectly, and with the extra sheets I had, I had some extra white Viceroy logos to use on it. With the parts and decal combinations, I think you could accurately do the same version I am doing, and also the version with the white cowl below. So here are the pictures that support what I am talking about. Of course, I could have it all wrong, but who’s going to know! Here’s a ’74 version- the markings are available, but the wheels are incorrect. You would also need the stock wing from Kevin. 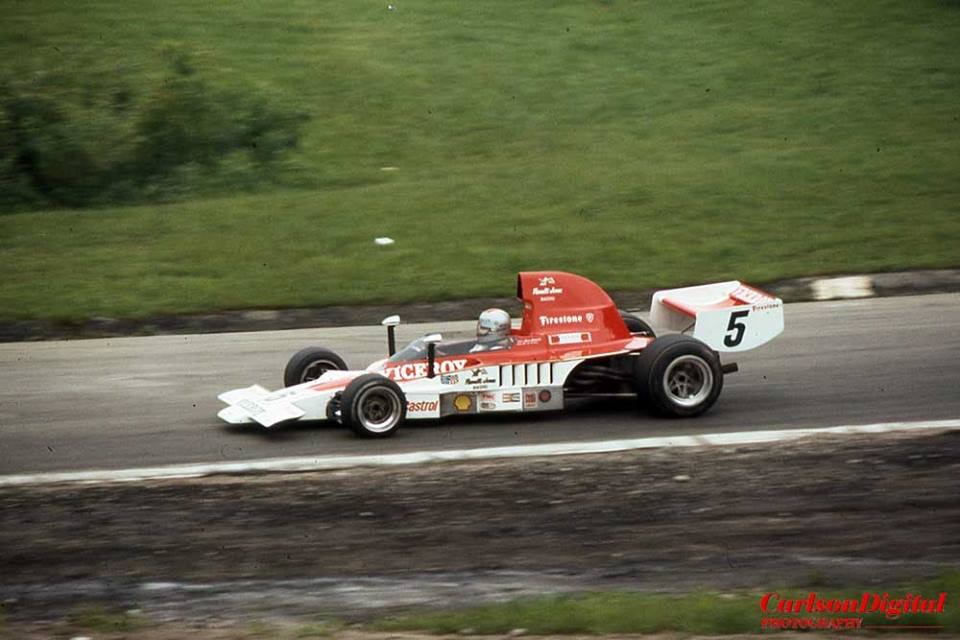 Here’s a shot from Riverside in late ’74. This is pretty much the scheme I liked, with the entire ’74 sheet markings from Indycals, but I believe that the rear wheels are not what’s in the kit. That’s Mario in the car using a borrowed lid from JR. 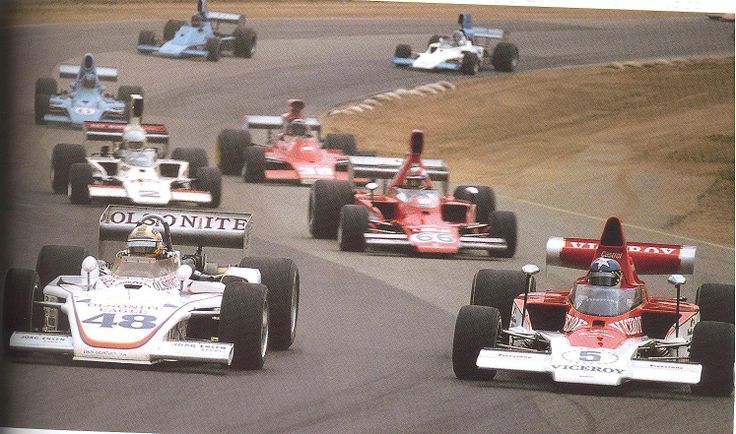 Here’s a shot of Unser later in ’75. Markings, wing, and wheels are correct, but the cowl does match the VPJ cowl in the kit. 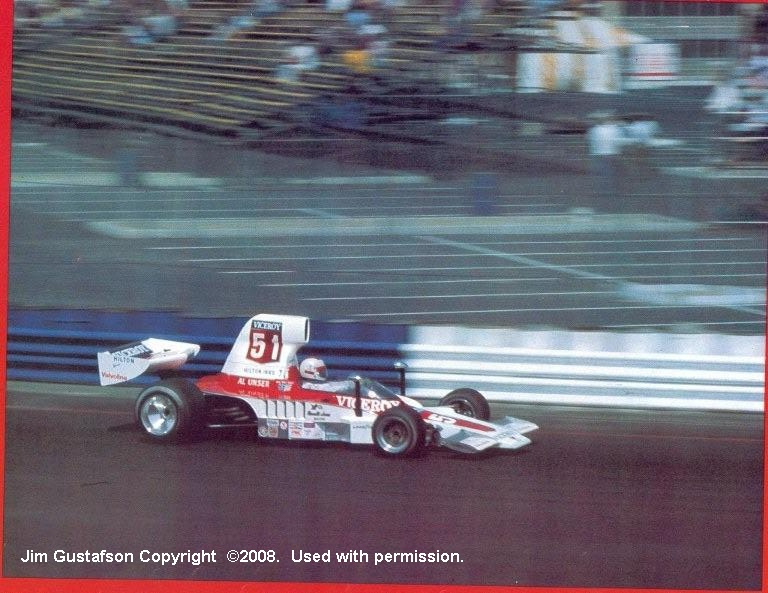 Here are the Pocono shots I mentioned that had a lot more reference detail than anything else I found, along with the livery I liked the best. A few shots of Andredtti’s car: 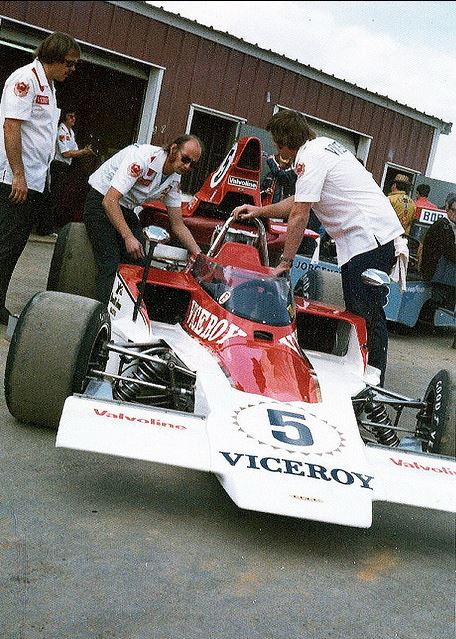 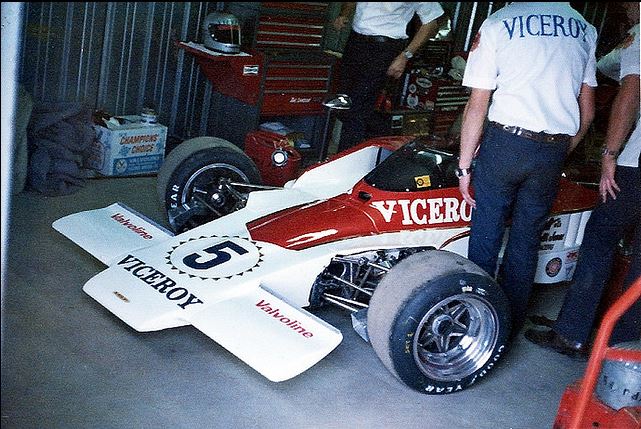 I didn't realize it until I posted it, but this shot shows the wing pretty well. 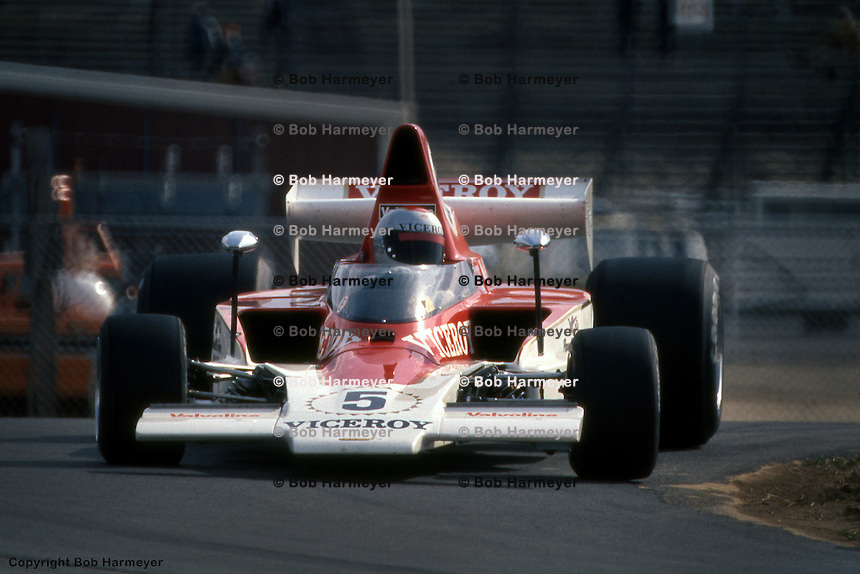 Here are some shots of Unser’s car. 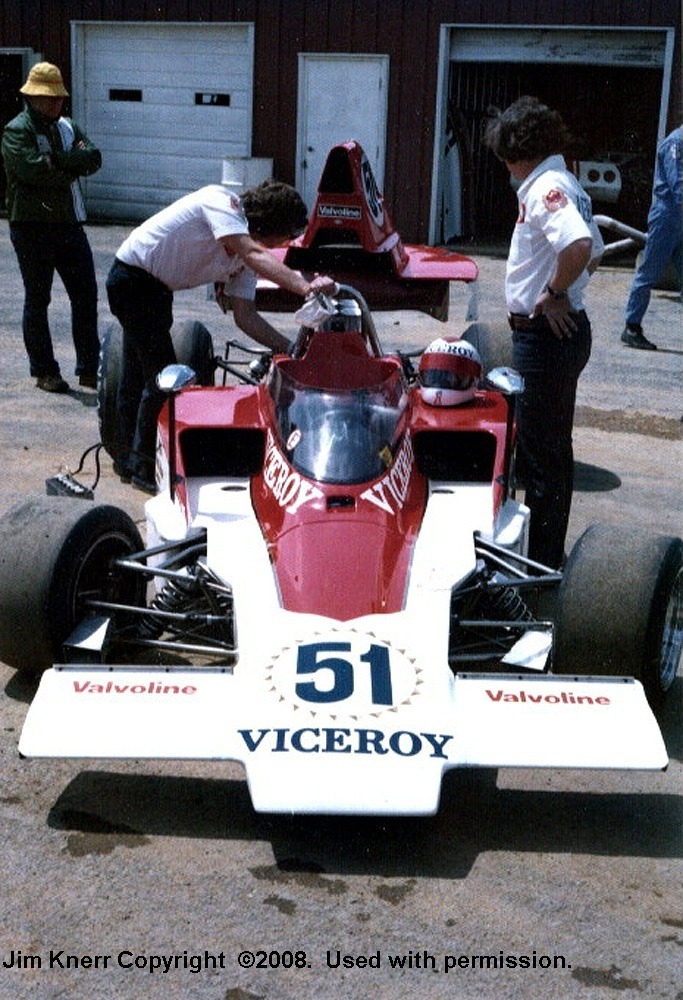 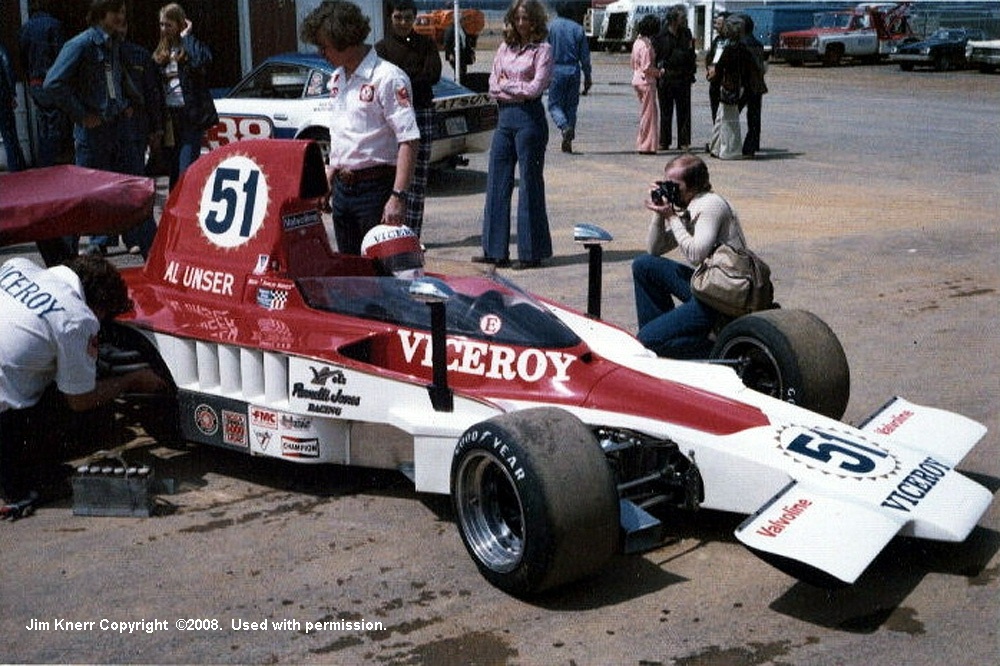 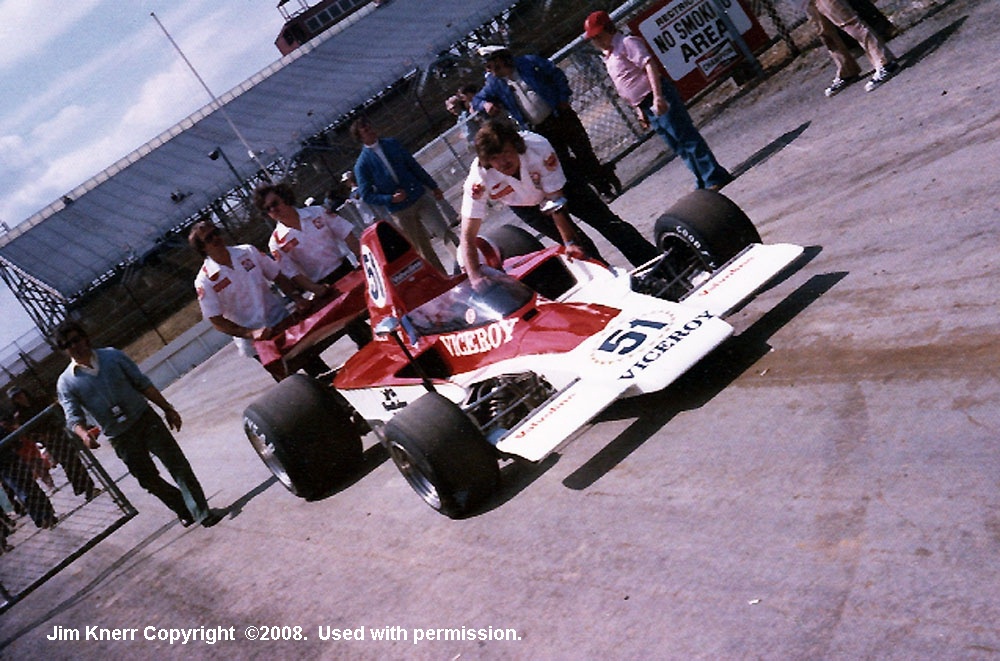 Here’s a not so clear shot of the same livery, but I’m not sure of the location. What it does show, though, is that the rear wing doesn’t have the red wrapping around the bottom like it did in ’74. 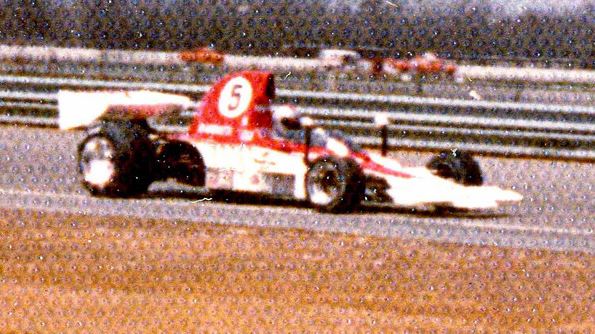 Here are some great detail shots of Andretti’s Pocona car that show the engine detail. This is what I am using for my reference. 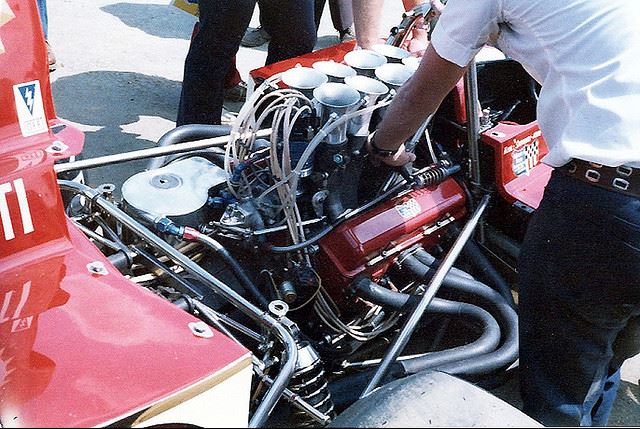 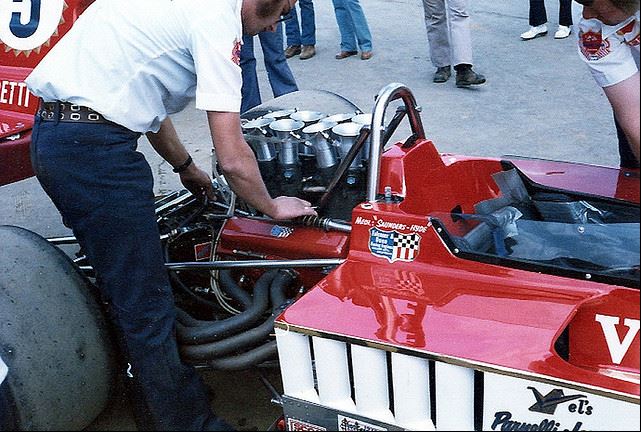 Here’s a shot at Watkins Glen, still early in ’75, where the livery changed. All the kit parts and decals line up for this version also, I believe. It’s also the picture I was able to print and use as a template for my rear wing end plates. 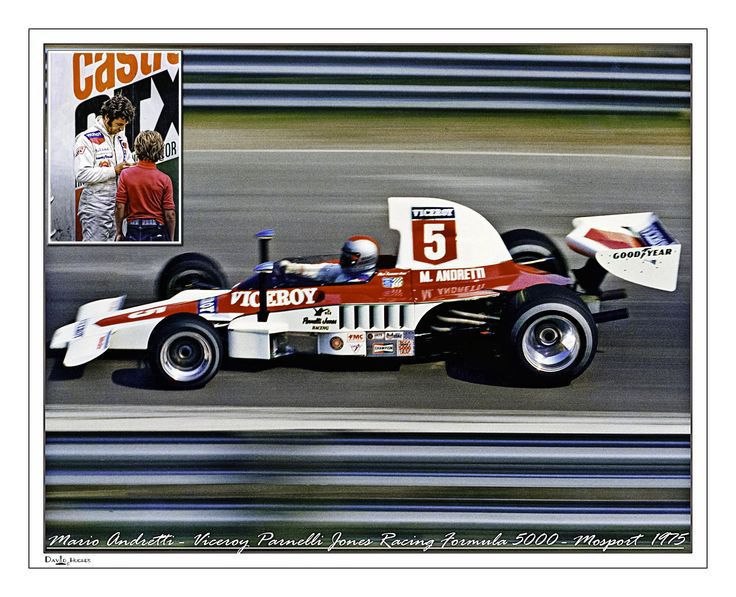 Anyway, hope this helps some of you guys out. If any of you know that anything I said here is incorrect, let me know! -Art |
|
|
|
Post by mjjracer on Oct 14, 2015 17:35:40 GMT -5
Awesome pics! I especially like the one from Riverside. I was there and this pic was from the second heat. Notice that Mario is wearing a very different helmet - his was stolen between heats, so he ended up using Rutherford's, who had retired in the first heat.
I know this doesn't pertain to your build, but rather the later '75 cars. I know there was discussion on this before and Michael's decals for the '75 have the two-toned shields, with slightly different shades of red - easily seen on the last pic.
However, at the Monterey Historics there was a restored version of this car. I know restored cars are often incorrect, but I was interested to see that the two-toned red on the shield is carried over to the paint on the car, with half slightly darker.
Maybe this was already discussed, but I frequently forget my name, so I may have forgotten. Well, maybe not my name, but my grand kid's names!
MJ
|
|
|
|
Post by 2lapsdown on Oct 14, 2015 20:11:53 GMT -5
Geez, I'd forgotten about the two red colors on the version I'll be doing. At the risk of opening Pandora's box, what two colors should I use? John
|
|
|
|
Post by indy on Oct 14, 2015 21:48:20 GMT -5
Why would the car have Castrol and Shell? Car sponsor and series fuel supplier?? The build looks great Art and the research is solid. Jordan |
|
|
|
Post by beardogracing on Oct 14, 2015 22:43:11 GMT -5
Why would the car have Castrol and Shell? Car sponsor and series fuel supplier?? The build looks great Art and the research is solid. Jordan Castrol Oil, and Shell gasoline. |
|