|
|
Post by Art Laski on May 13, 2015 16:37:39 GMT -5
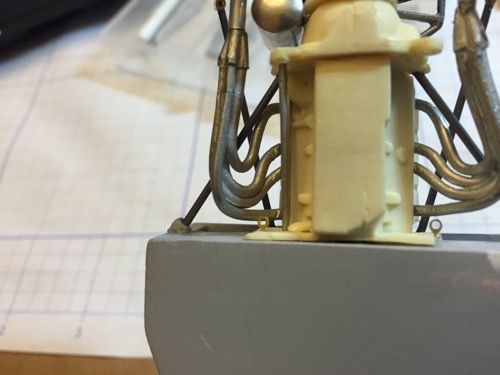
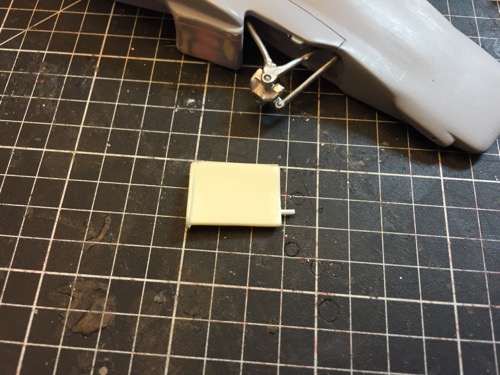
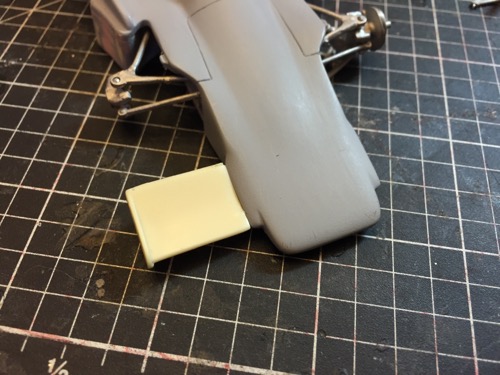
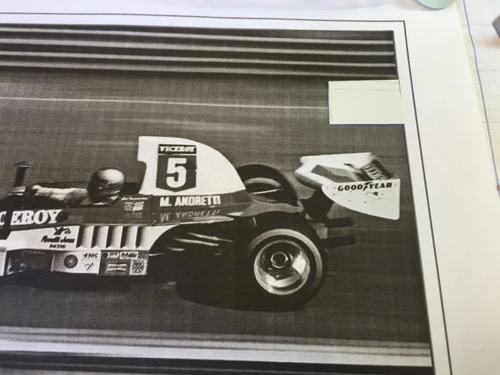
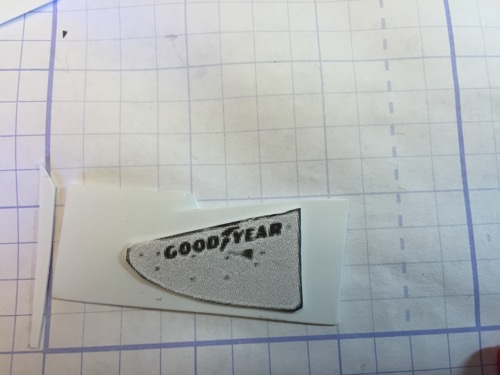
I've been dying to get to this kit for a year now, and I finally just decided to dive in, even though I still have some other projects in motion. This is Kevin Kuzman's Silver City Models resin and white metal kit, which will be my first of this type. It's going to be fun getting this one built. Like many race cars, there were multiple liveries, but I am going to do this one of Al Unser: 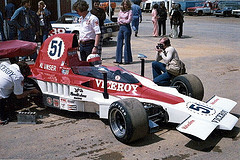 Here's the kit: 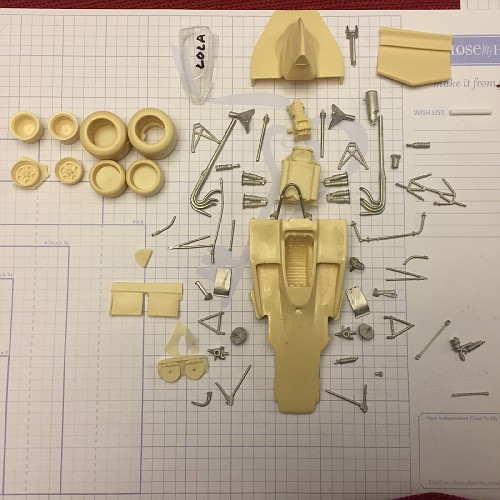 Right now I am just in cleanup mode, and getting ready to mock it up. In doing so, I'm looking at areas that I could improve upon without creating a major project out of this. One thing that jumped out at me right away were the brakes. Since they are so visible on this kit, I figured they could use an upgrade. I had some Detail Master vented discs that are the perfect size, along with some calipers as well, but I needed to make some brake hats to be able to use the rotors. This looked like an opportunity for me to use my lathe for the first time. I have no machining skills (yet), but this is a simple enough project to learn on. The material I had was too soft, but I still managed to make something usable, ugly, but usable. Hey, I made something! 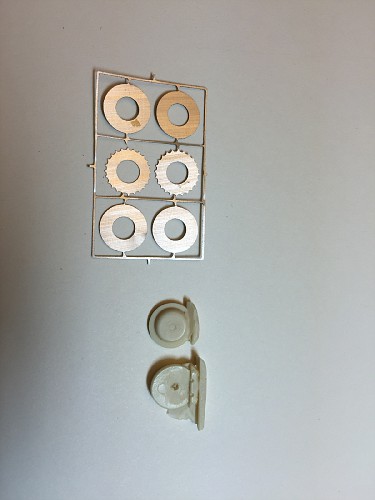 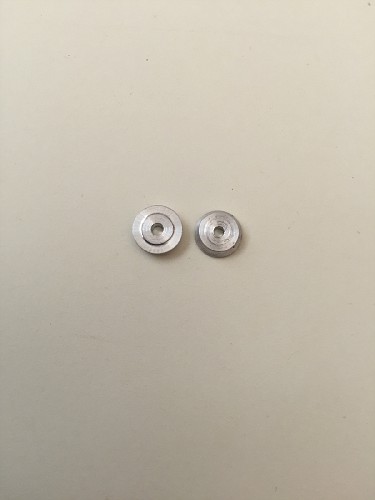  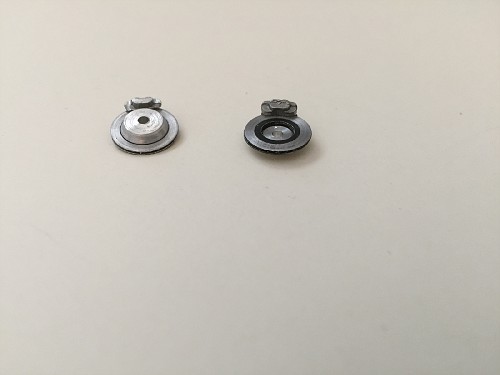 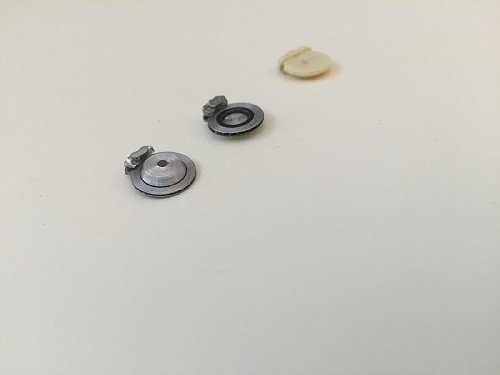 |
|
|
|
Post by Calvin on May 13, 2015 21:48:41 GMT -5
Awesome! Kevin's kits are top notch stuff! Ironically I plan to do the same car! We sure have similar plans lately.  |
|
|
|
Post by Art Laski on May 14, 2015 1:20:30 GMT -5
Nice, Calvin! Now you need to start a midget ;-)
|
|
|
|
Post by Calvin on May 14, 2015 1:38:56 GMT -5
Nice, Calvin! Now you need to start a midget ;-) Ah.....no. Too hard for me!  |
|
|
|
Post by harveythedog2 on May 15, 2015 7:17:43 GMT -5
Great stuff Art!
|
|
|
|
Post by Art Laski on May 22, 2015 17:06:37 GMT -5
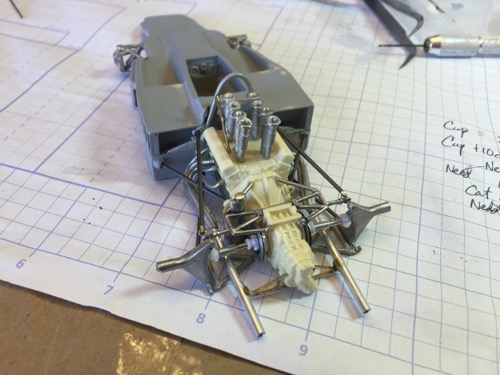
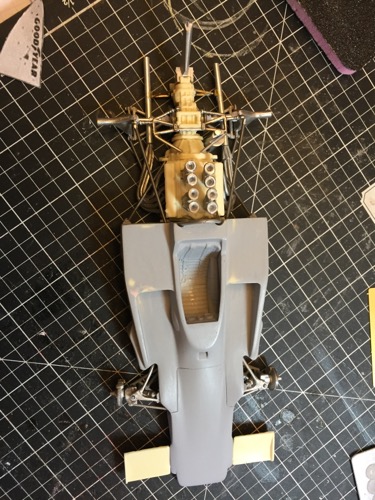
Thanks, Stu! Here are a few more mock up shots. Sorry for the lack of focus on these. 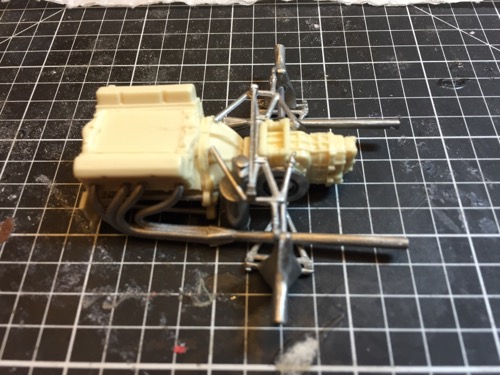 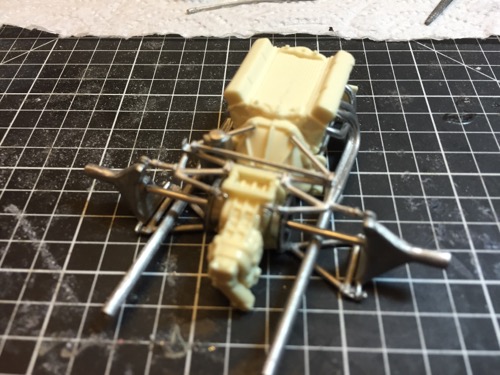 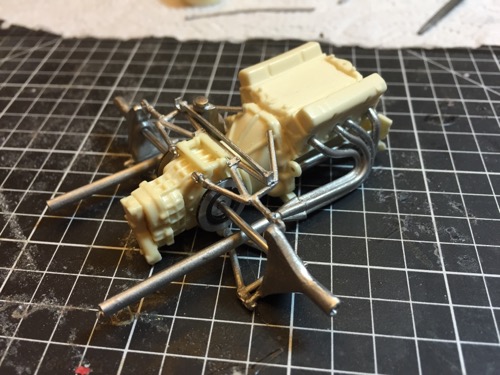 |
|
|
|
Post by 2lapsdown on May 22, 2015 18:55:53 GMT -5
I'm going to enjoy this as I have 2 of these kits. One for a Mario Viceroy and one Boraxo, show us the way Art.
John
|
|
|
|
Post by racerbrown on May 23, 2015 6:00:08 GMT -5
such a cool looking car and we all know art will do it justice.  duane |
|
|
|
Post by shunter on May 29, 2015 4:11:34 GMT -5
I love these old beasts....look forward to this Art.
|
|
|
|
Post by Art Laski on Jul 6, 2015 0:06:30 GMT -5
|
|
|
|
Post by 2lapsdown on Jul 6, 2015 5:57:10 GMT -5
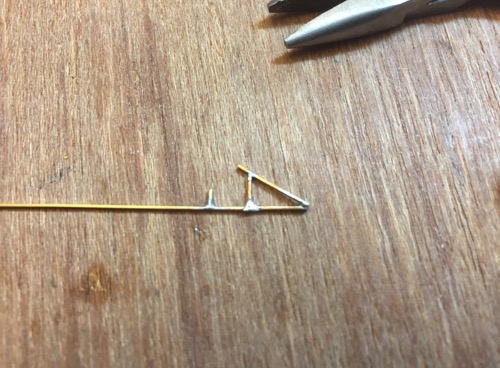
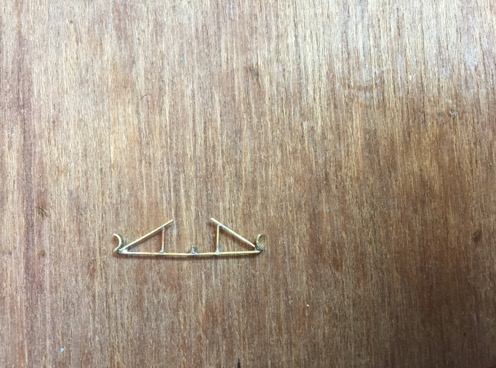
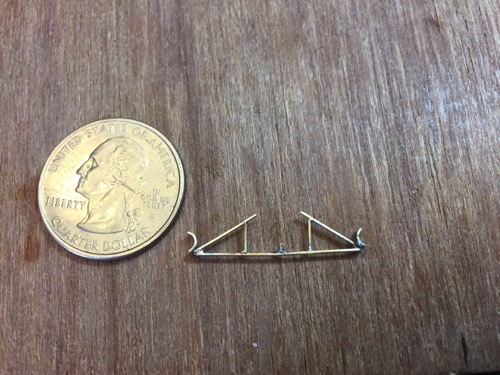
I've already learned something with the exhaust brace, and I'm sure there's more lessons to come. I'm so glad to see you doing this as I have 2 of these kits and I hold your work in the highest regard.
John
|
|
|
|
Post by racerbrown on Jul 6, 2015 6:00:40 GMT -5
scratch building at it's best!
duane
|
|
|
|
Post by clm1545 on Jul 6, 2015 9:57:19 GMT -5
More magic from Art. Always impressive.
|
|
|
|
Post by Calvin on Jul 6, 2015 10:38:08 GMT -5
Beautiful! You're always doing incredible things! Gosh dang it! |
|
|
|
Post by Art Laski on Jul 6, 2015 11:23:44 GMT -5
Thank you, guys!
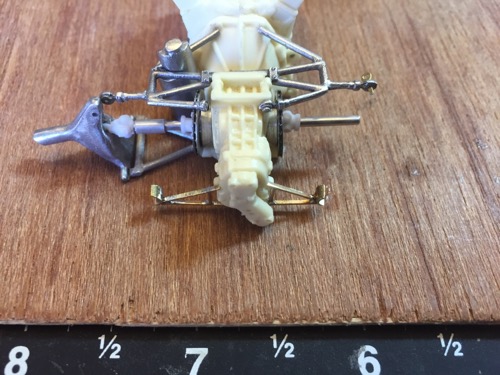
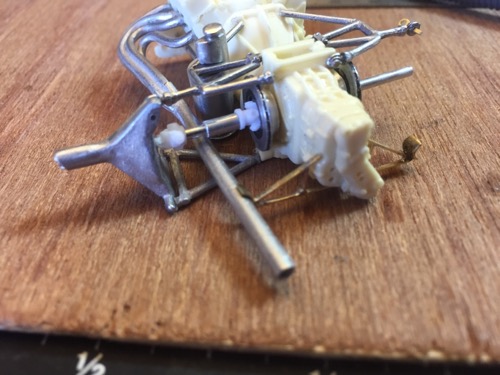
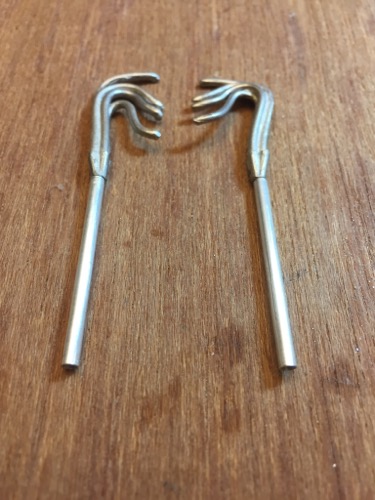
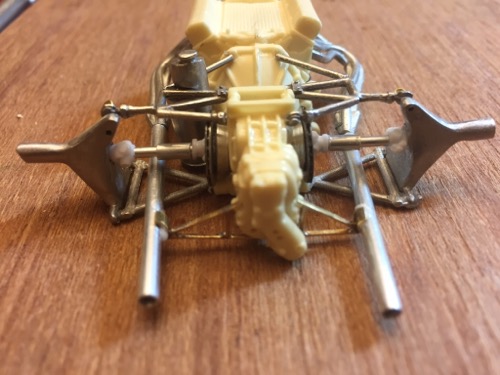
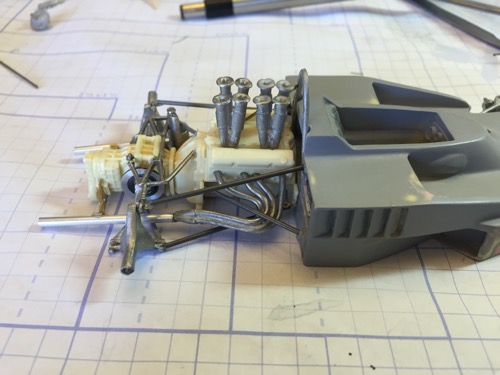
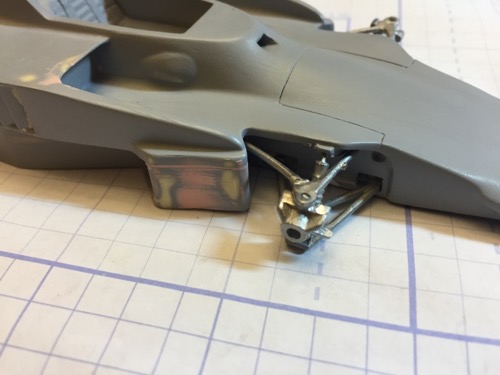
John, if you're looking for lessons, there are a couple of other things in the pictures you may notice that I didn't mention yet. One is that I drilled the top of the uprightsand the brace so I can pin them. I'm going to use a Dirt Modeler PE rod end in there as a clevis, which you'll see later. I sort of misdrilled the hole on the left a little, but I'm going to fill in the hole on the backside on that one and cover it with a photo etch bolt head.
Also, most of the pics of that era have half shafts with universal joints as opposed to the drive shafts with CV joints that the kit provided, so I made my own, stealing the u-joints from a Monogram Corvette kit. These aren't glued up yet, but when they are I will align the u-joints with each other.
I really appreciate the compliments. More to come!
|
|
|
|
Post by 2lapsdown on Jul 6, 2015 13:32:48 GMT -5
I see that now, that's why I love seeing your techniques. Amazin'
John
|
|
|
|
Post by 2lapsdown on Jul 30, 2015 9:36:56 GMT -5
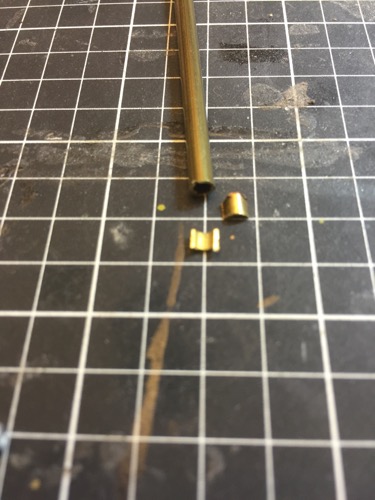
Art, I'm only asking this because I don't use solder. Why did you go that way on the exhaust brace? Also, is that rectangular stock or round? I can't quite tell. I'm definitely going to add that brace to mine. Also, what size tube for the exhaust? Sorry for all the questions, but it's hard not to tap in to a resource like yourself. Thanks.
John
|
|
|
|
Post by Art Laski on Jul 31, 2015 10:56:01 GMT -5
John,
I chose to use brass and solder on the bracket for two reasons. First, I have been using brass lately and I like working with it. I know making this piece would be a challenge because of the proximity of the joints and I was up for that challenge.
Secondly, I thought the strength of the brass might be beneficial. Since I like to travel to model shows, and this model is going to be quite heavy (and the headers are metal), it seems there my be some stress on it while it's being handled and riding in cars.
I'm sure styrene would have worked fine, especially for a shelf model, and probably would have been much easier to construct!
I replaced the exhaust pipes with 3/32 aluminum tube and the brass bracket is 1/8 tube.
I need to get back on this this weekend!
-Art
|
|
|
|
Post by racerbrown on Jul 31, 2015 11:25:58 GMT -5
i think we should call them "laski brackets". duane |
|
|
|
Post by Art Laski on Aug 2, 2015 23:58:49 GMT -5
|
|
|
|
Post by Art Laski on Aug 2, 2015 23:59:25 GMT -5
|
|
|
|
Post by Art Laski on Aug 3, 2015 0:00:10 GMT -5
|
|
|
|
Post by Art Laski on Aug 3, 2015 0:00:41 GMT -5
|
|
|
|
Post by Patrick on Aug 3, 2015 2:54:57 GMT -5
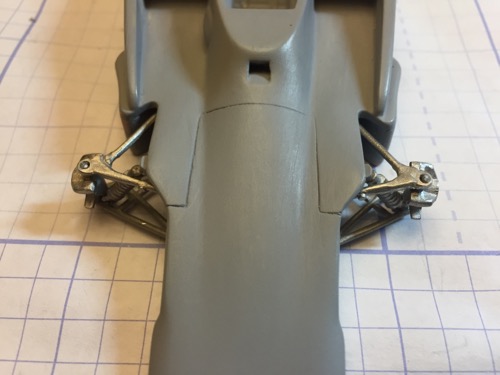
Excellent job Art! I'm not confident drilling and pinning the suspension. I'm afraid of not drilling straight and damaging the suspension piece.
Patrick
|
|
|
|
Post by sandysixtysfan on Aug 3, 2015 7:06:31 GMT -5
This is amazing! Just plain amazing.
Sandy
|
|
|
|
Post by racerbrown on Aug 3, 2015 7:09:30 GMT -5
Excellent job Art! I'm not confident drilling and pinning the suspension. I'm afraid of not drilling straight and damaging the suspension piece. Patrick amen to that patrick but as art shows us "practice makes perfect". i definitely need more practice. duane |
|
|
|
Post by 2lapsdown on Aug 3, 2015 7:12:49 GMT -5
I'm with Patrick. Up until the point where you drill the suspension I was happily following along. How in the world do you do the voodoo that you do? With every project I gain more respect for you talent.
John
|
|
Deleted
Deleted Member
Posts: 0
|
Post by Deleted on Aug 3, 2015 8:18:00 GMT -5
Interesting that your name is what you produce. Simply unbelievable detail and workmanship.
A big Thumbs Up.
|
|
|
|
Post by clm1545 on Aug 3, 2015 8:50:58 GMT -5
Damn, Art You are GOOD. I don't understand why you travel to shows, seems, to me, that you could just send your entry, and they would send you the trophy. |
|
|
|
Post by Art Laski on Aug 3, 2015 13:37:03 GMT -5
I'm with Patrick. Up until the point where you drill the suspension I was happily following along. How in the world do you do the voodoo that you do? With every project I gain more respect for you talent. John Thanks for the compliments, guys. I really do appreciate it. I am just about to start getting some color on thing and I can't wait. If it wasn't for reading glasses, an Optivisor, and really small drills, I couldn't do it either. But it's a bit easier when you make it bigger! Missing the mark is a real concern, but usually I can fix it. On the front wing, I missed the mark on the left side of the body, so I filled in the hole with styrene rod and re-drilled it. It's a little dicier with the metal. I had to get that right. Making a pilot mark with an exacto blade helps... |
|


 Pro Tech | MAD | Scale Motorsport