|
|
Post by Gary Davis on Jul 18, 2014 20:37:29 GMT -5
Finally getting to this build. This car was built by Todd Carmichael( My Cousin) and his Crew. They ran on the West Coast(mostly Northern calif., Oregon and Wa.) with this car in 2003 and 1/2 of 2004. The motor broke 1/2 way thru the 04 season and they couldn't come up with the $50K to get another motor to finish the season. But....they did win an "A" Main and Ran well with the WoO guys when they did the WEST COAST SWEEP. He ran at the Silver Dollar Speedway..."DIRT CUP"( 3 seasons..this car twice and the 33 car once) in Chico Calif..... before Leaving the dirt and moving over to Asphalt. This Chassis started out as one of the Stealth chassis' from a Monogram kit,which is a "LOW BAR" chassis(no down tubes from Cage to front end). A lot of the bottom bar work is the same as the J&J chassis(HIGH BAR chassis...two down tubes from roll cage to front end) so I didn't have to replace them or start from "SCRATCH" completely. I did Research on the NET and also talked with TODD quite a bit to get some of the small details on his car. I'll explain the build as I go. Here are a few pics of the chassis and the new barbar work. A Reference picture of His 1/1 at speed..( please forgive the Quality as I didn't shoot the pic) 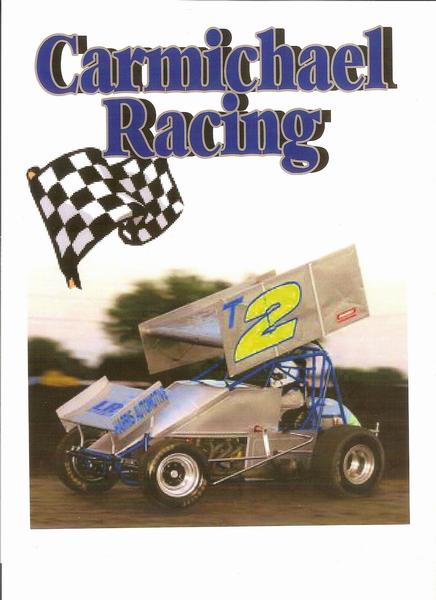 annnd here's what I've got done so far... 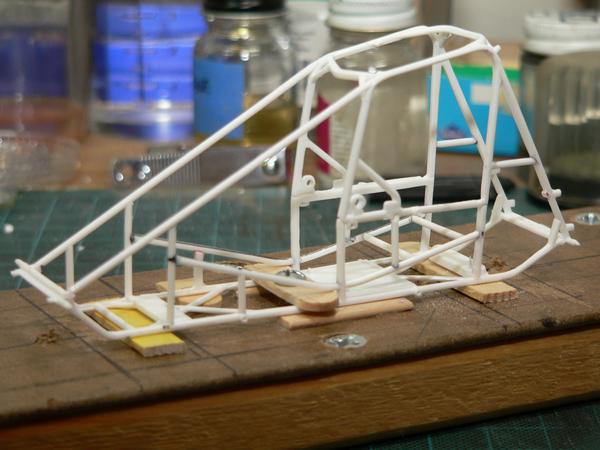 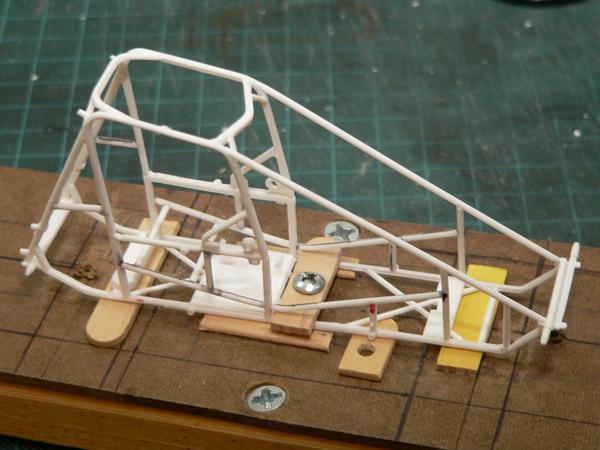 With the Seat in mock up... 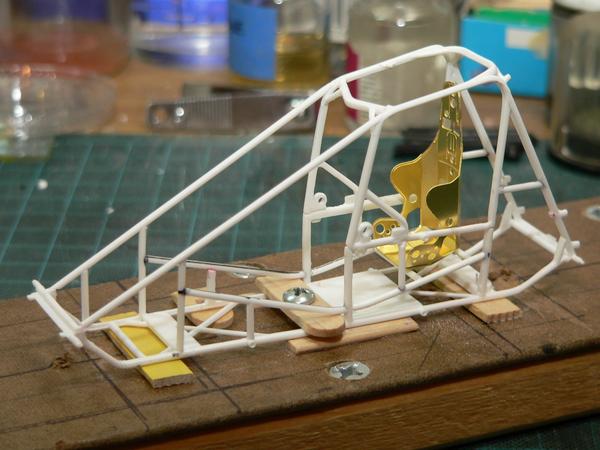 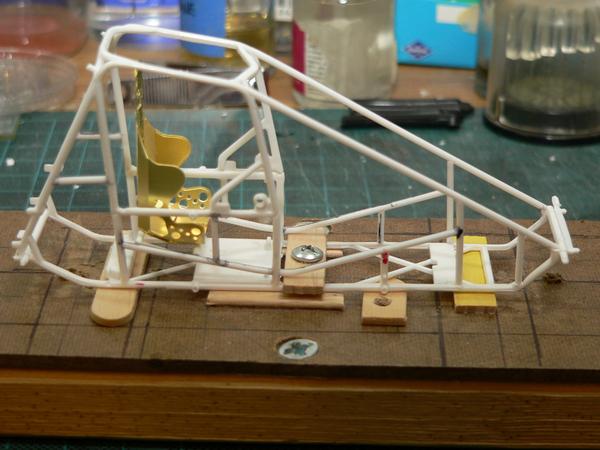 |
|
|
|
Post by 2lapsdown on Jul 18, 2014 21:18:57 GMT -5
This should be fun, I love dirt cars. And I really like your frame jig.
John
|
|
|
|
Post by mjjracer on Jul 19, 2014 0:02:28 GMT -5
Really nice and inspiring. I have kinda stalled out. I have made most of the same mods, though yours is much cleaner - even have the same seat.
Thanks for the nudge. Really looking forward to this.
MJ
|
|
|
|
Post by Calvin on Jul 19, 2014 0:18:50 GMT -5
This is quite the build!
|
|
|
|
Post by racerbrown on Jul 19, 2014 5:49:49 GMT -5
my favorite form of racing!
thanks for sharing.
duane
|
|
|
|
Post by Gary Davis on Jul 19, 2014 11:39:02 GMT -5
Thanks for the compliments guys...This will be an enjoyable build for me as it is part of the family racing history thing I'm doing.
Hey MJ...I'm glad this wip can( in some way) give you the fire that's sometimes needed to get back on track( No pun intended...lol). The higher the car count....the better the racing...right?
|
|
|
|
Post by Art Laski on Jul 19, 2014 11:52:45 GMT -5
I love it, Gary!
|
|
|
|
Post by indy on Jul 19, 2014 12:38:35 GMT -5
I'm always in awe of scratchbuilt frames - this looks great with lots of good details already on the frame.
Jordan
|
|
|
|
Post by kip on Jul 20, 2014 12:20:22 GMT -5
Looking forward to closely following this WIP. I grew up with dirt track racing and I should do more dirt builds. I have a Doug Wolfgang Mr. Beef conversion that I did years ago sitting around here somewhere. I know it needs some repair, maybe I'll start with that. I also love that frame jig.
kip
|
|
|
|
Post by Gary Davis on Jul 25, 2014 15:35:46 GMT -5
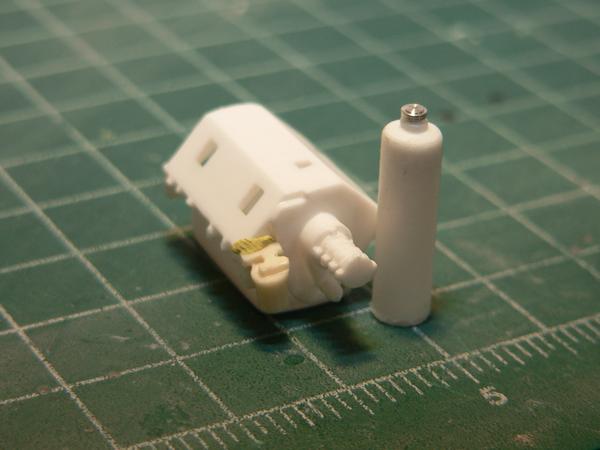
Thanks again for the compliments folks. Well...here's a few pics of the block with the new oil pan and oil tank.
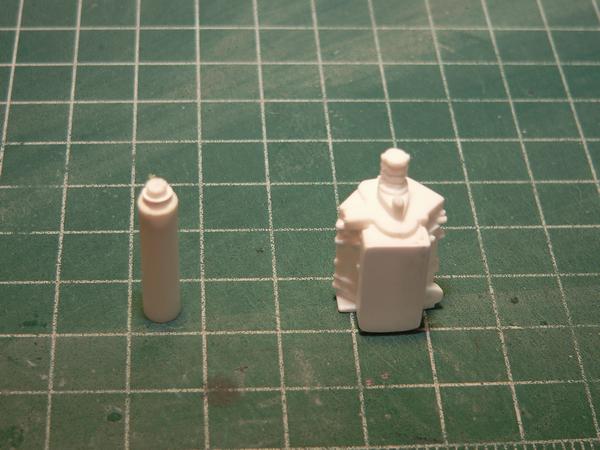
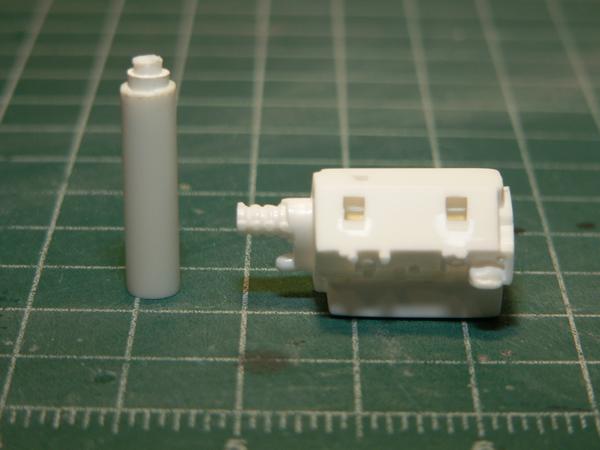
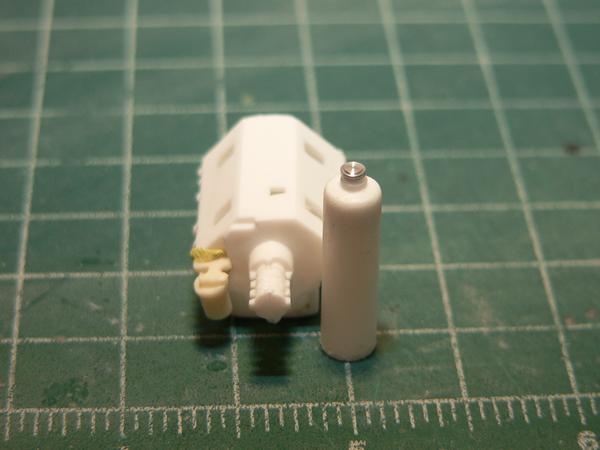
Here are updated pics...The oil tank is almost completed(need to build the Hose connecting points on the tank) and the oil filter(which mounts on the front of the block) is in mock up for a test fit.
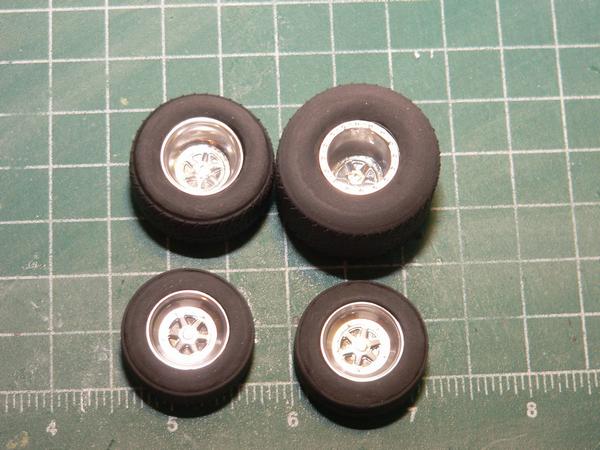
Here's a pic of the Tires and wheels. The Good Year has been sanded off and Hooser will be added. The spokes on the wheels will be painted semi gloss black also.
That's it for now...thanks for looking in...
|
|
|
|
Post by kip on Jul 25, 2014 16:11:47 GMT -5
Very nice work. I was not aware of how they do the oil tanks these days. Was that in the kit or is it from scratch?
kip
|
|
|
|
Post by Gary Davis on Jul 26, 2014 13:07:49 GMT -5
Hey W.G....Thank you for the compliment bud.... The Oil Tank and the oil pan are Fabbed out of plastic tube(the Tank) and sheet for the pan... I've also got most of the bar work complete. I'll post pics after it gets primed. I still have to build the gauges(3 of them)...toggle "ON" switch and the inboard Brake Master cylinder. Once that's done...I can prime it.
|
|
|
|
Post by Gary Davis on Aug 22, 2014 21:25:21 GMT -5
Here's an overdue update. The cross bar that supports the KSE steering is added. The front shock mounts on the Down Bars were also fabbed. New front wing mounts had to be made and added to the down bars also. The side panels on the front wing were also fabbed and are in mock in these pics. I pinned them so they can be removed to paint. All the wing Panels( front and Top) were body color. The Shocks have to be built and that is next. Here are a few pics...thanks for looking in...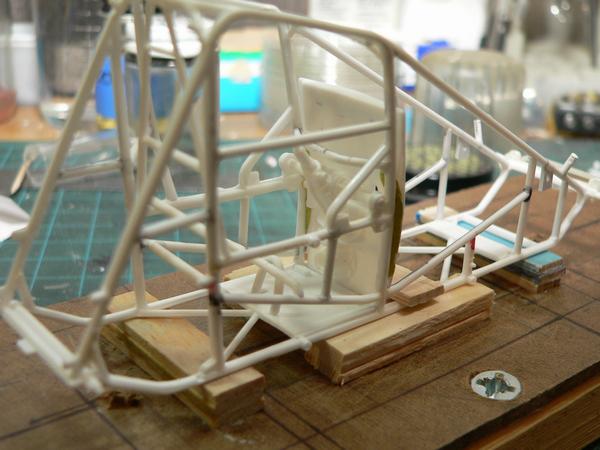 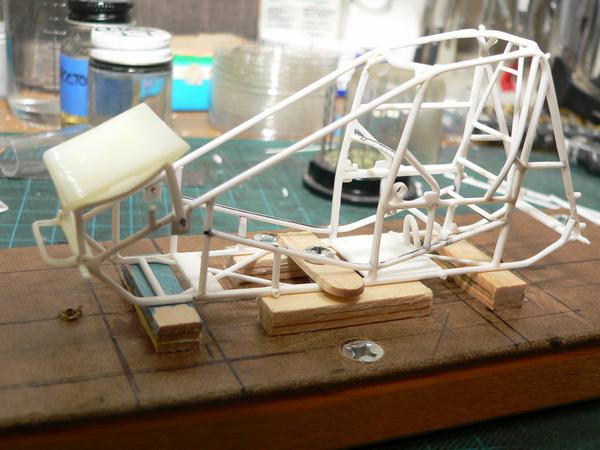 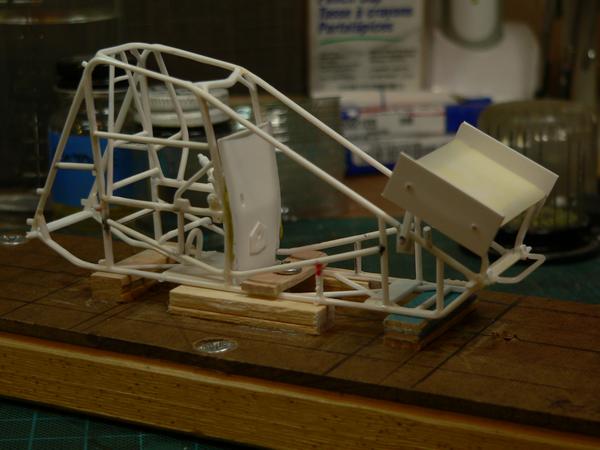 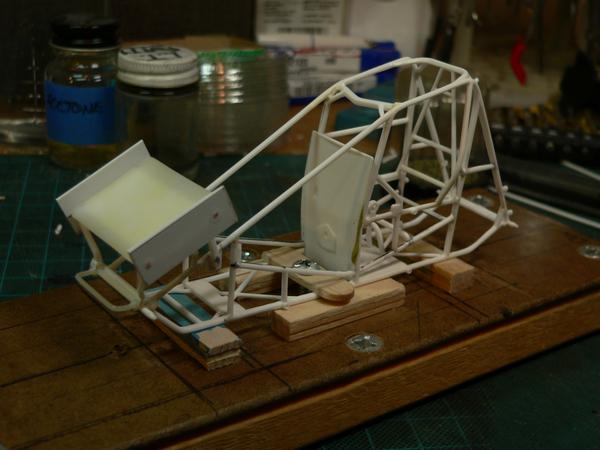
|
|
|
|
Post by Calvin on Aug 22, 2014 22:46:18 GMT -5
This is an engineered masterpiece already!
|
|
|
|
Post by kip on Aug 23, 2014 7:56:30 GMT -5
Been checking every day for an update on this WIP. It was worth the wait. Fantastic. Great job. When you finish this you will be able to build a real one. More, more!!!
kip
|
|
|
|
Post by Gary Davis on Aug 23, 2014 13:38:59 GMT -5
Thanks C.2k for the comment. I still have a little more to "re-do" to make it like his car. The brake Master cylinder and the brake pedal ( 1" bar painted red)have been fabbed. The gas pedal needs to be made along with the in/out handle and hold down brackets (with cable) that go to the Winters Quick change rear end. Been checking every day for an update on this WIP. It was worth the wait. Fantastic. Great job. When you finish this you will be able to build a real one. More, more!!! kip
|
|
|
|
Post by Gary Davis on Aug 28, 2014 19:27:21 GMT -5
Here's a Rear end(quick change) and WING update. Both wings are mocked up to get the correct angle so I can build the brackets for the big wing back bar mounts. I also wanted to see the relationship between the front wing.....down bars....and top of the rollcage. Looking at the picture and comparing it to that...it looks pretty darn close... Also...I got the Franklin quick change made into the winters. I still have to make the brackets for the cable and also the bar that the cable connects to...that will be finished this week....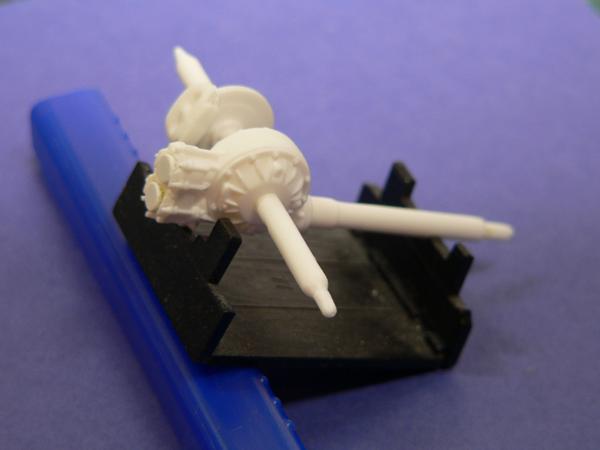 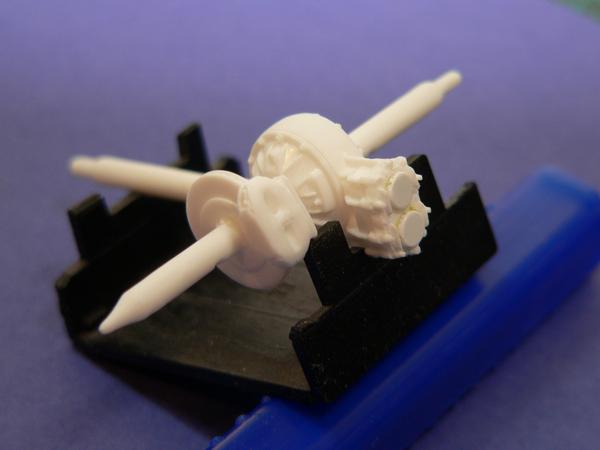 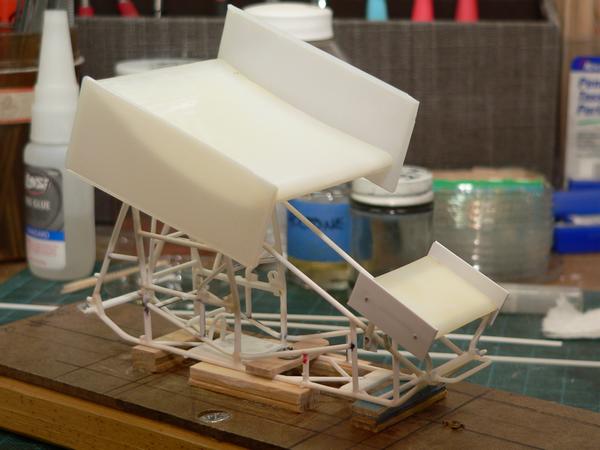 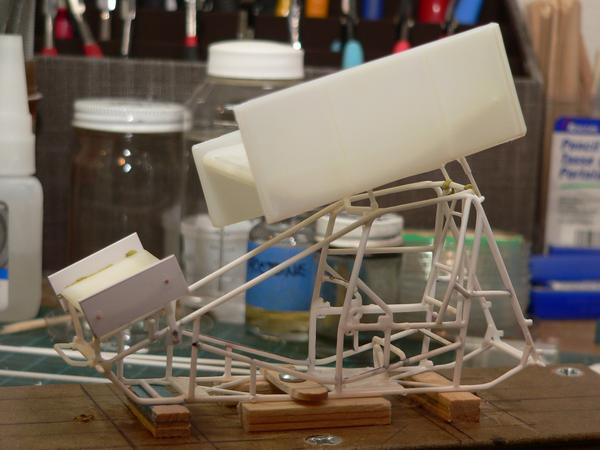 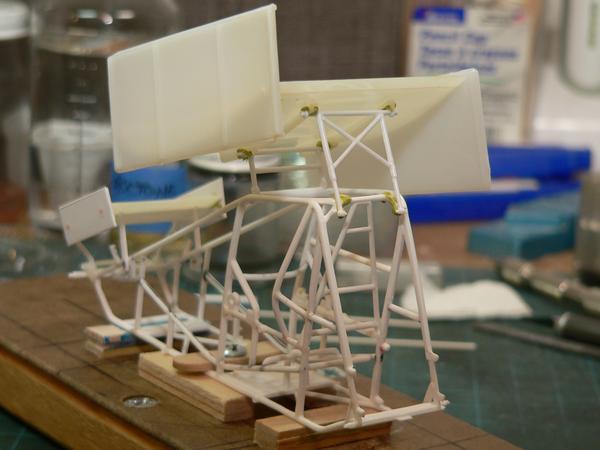
|
|
|
|
Post by racerbrown on Aug 29, 2014 6:54:27 GMT -5
it's coming along nicely.
looks like you've done this before :-)
duane
|
|
|
|
Post by kip on Aug 29, 2014 11:47:27 GMT -5
I am loving this. The jigs you use are blowing my mind. If it wasn't for the large bottles and jars in the background, I would bet money that this is the real thing. With the detail you are adding, I can't wait to see what you do with the engine.
cheers, kip
|
|
|
|
Post by kip on Aug 29, 2014 11:47:52 GMT -5
I am loving this. The jigs you use are blowing my mind. If it wasn't for the large bottles and jars in the background, I would bet money that this is the real thing. With the detail you are adding, I can't wait to see what you do with the engine.
cheers, kip
SORRY, DID NOT SEEM TO BE POSTING SO I HIT THE BUTTON TO OFTEN. MODERATOR< MAYBE YOU CAN DELETE THIS FOR ME. I DON'T KNOW HOW.
kip
|
|
|
|
Post by kip on Aug 29, 2014 11:48:03 GMT -5
I am loving this. The jigs you use are blowing my mind. If it wasn't for the large bottles and jars in the background, I would bet money that this is the real thing. With the detail you are adding, I can't wait to see what you do with the engine.
cheers, kip
SORRY, DID NOT SEEM TO BE POSTING SO I HIT THE BUTTON TO OFTEN. MODERATOR< MAYBE YOU CAN DELETE THIS FOR ME. I DON'T KNOW HOW.
kip
|
|
|
|
Post by Gary Davis on Aug 29, 2014 13:10:22 GMT -5
Thanks Duane and Kip. I've built a few of these beasts. But....Not the J&J Chassis. It's been a ball doing all the research and talking with Todd about his car. It's very rewarding( to me) to be able to replicate something almost to the "T"....specially when it's a part of ones family...( not FRAMILY...LOL)
Hey kip...I'm working on that 410 Kinsler engine this weekend. I've got the front motor mount on the block. Need to fab the oil tank bracket now. Todd used the Hilborn injection system...not the Kinsler system. I'll post pics as soon as I have something. Thanks again folks for looking in and chatting....
|
|
|
|
Post by Gary Davis on Sept 1, 2014 18:57:53 GMT -5
Here's a small update to show the small stuff. The shocks( front and rear) where cut off and new built. They are in mockup in the pics. The small shock(or cylinder) on top is the hydraulic wing adjuster that is also fabricated. The left Top wing panel also has been dropped 3". It's hard to see that in a pic so I won't post it. It's starting to look kinda like a 410 Sprintcar. Still a ways to go but it's getting there. 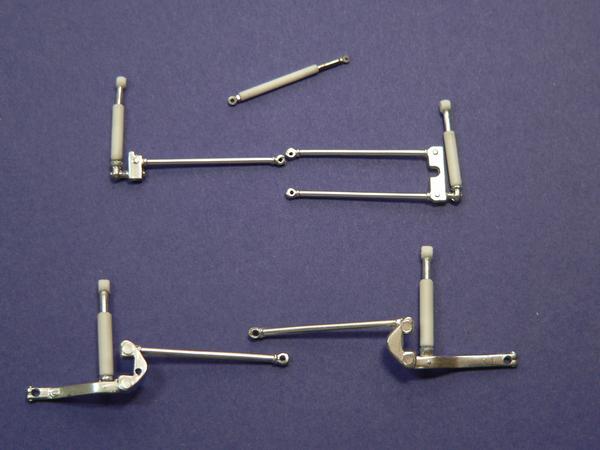
|
|
|
|
Post by kip on Sept 1, 2014 19:36:45 GMT -5
Unbelievable work. Are you sure this isn't 1/1 scale.
kip
|
|
|
|
Post by Chris on Sept 2, 2014 11:27:39 GMT -5
I like all the linkage , what are you using to attach the eyes to the rod? , aluminum tubing and styrene, is my guess but what are you fastening them with ? Adhesive etc...Chris
|
|
|
|
Post by Gary Davis on Sept 2, 2014 14:03:07 GMT -5
Thanks for the comps W.G..... I like all the linkage , what are you using to attach the eyes to the rod? , aluminum tubing and styrene, is my guess but what are you fastening them with ? Adhesive etc...Chris Hey chris...I use CA glue on all the metal material that has to be attached to plastic. I use M.E.K. (liquid cement) for ALL the plastic. Every once in a while I'll use Testors RED tube glue if I need to Tack the part in place. I'll also probably be using SCALE HARDWARE bolts in the eyes of the shocks. The front shocks will probably get a copper wire rod the correct size to mount on and then the bolt on the outside. Hope this answers your question. |
|
|
|
Post by Art Laski on Sept 2, 2014 17:15:36 GMT -5
Top Notch work, Gary!
|
|
|
|
Post by Gary Davis on Sept 2, 2014 18:21:18 GMT -5
Thank you ART. It's good to hear from you....
I've got the slider in mock up. The bolts are not glued so it can come apart for painting. Now...it's time to get the slider valve made...
with out the wing attached....
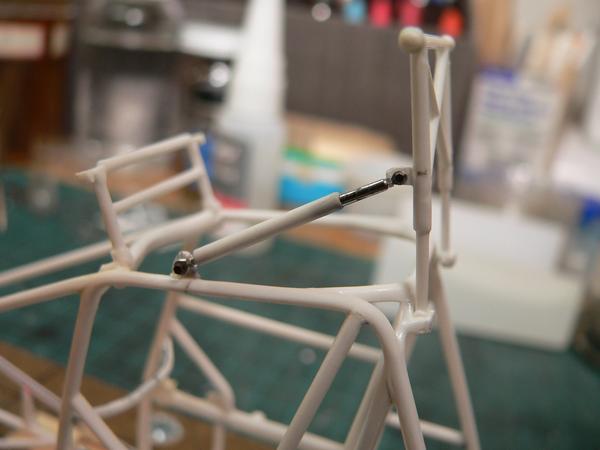
With the wing on....
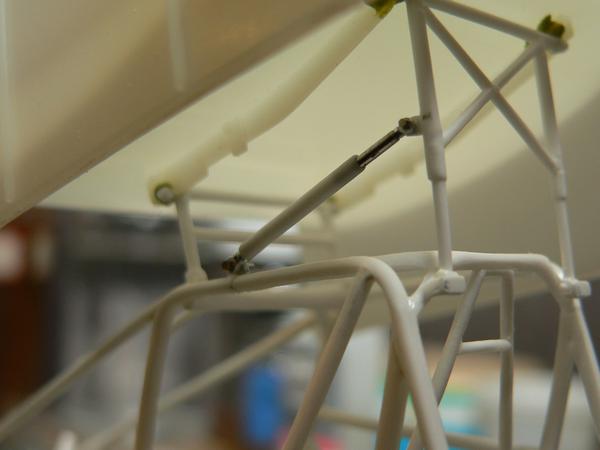
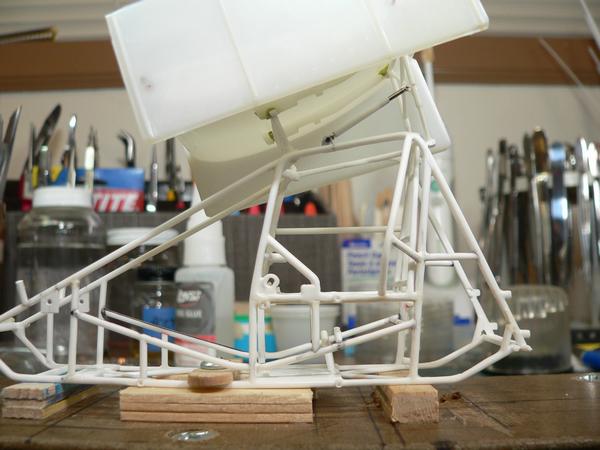
|
|
|
|
Post by Gary Davis on Oct 4, 2014 20:36:29 GMT -5
Finally been able to get a few things done on this car. These are the headers with mufflers that were mandatory. I also had to make a new dash as the gauges were to low. I'll show update pics of that later as it is mocked up in the chassis for measurements.
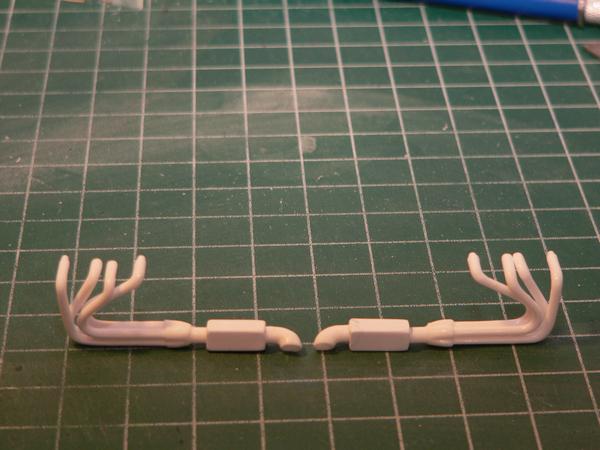
|
|
|
|
Post by racerbrown on Oct 5, 2014 7:19:16 GMT -5
good to see you making progress again gary. :-)
thanks for sharing.
duane
|
|