|
|
Post by harveythedog2 on Jun 11, 2015 7:03:35 GMT -5
|
|
|
|
Post by IndyCarModels on Jun 11, 2015 9:49:01 GMT -5
Nice work. I'm building some in 1:64 and you're right. Lots of modications and a lot of do overs.
|
|
|
|
Post by indy on Jun 11, 2015 10:16:08 GMT -5
Good looking start on the airbox, Stu. I like the added detail in the cockpit. Will be watching your progress on this one closely.
Jordan
|
|
|
|
Post by Calvin on Jun 11, 2015 10:22:05 GMT -5
I've been wondering about this!  |
|
|
|
Post by senn65 on Jun 11, 2015 16:45:40 GMT -5
Nice start Stu. My modeling stops at 2014. Side pods shouldn't be too tough almost like 2014, lots easier than Chevy.
|
|
|
|
Post by chromehorn08 on Jun 11, 2015 16:54:16 GMT -5
Very cool! Lots of work on these Hondas! Good start on this one stu.
|
|
|
|
Post by IndyCarModels on Jun 12, 2015 9:36:48 GMT -5
I'm starting over and I'm going to follow you from beginning to end if that is okay?   |
|
|
|
Post by harveythedog2 on Jun 12, 2015 14:43:51 GMT -5
Okay Micro Machine. Hope I don't go to slow! LOL
Next update is the finished engine cover (Minus paint) and the side pod mods.
Should have my 3D bumper in the mail today!
Stu
|
|
|
|
Post by IndyCarModels on Jun 12, 2015 18:11:04 GMT -5
Now where do I get 3D bumpers in 1:64 scale?
|
|
|
|
Post by Calvin on Jun 12, 2015 18:39:54 GMT -5
Now where do I get 3D bumpers in 1:64 scale? 3d printers don't like 1/64 because it would be too thin.....1/25 is already cutting it close for thinness in some cases....and there is a minimum thinness for 3D printing. |
|
|
|
Post by IndyCarModels on Jun 12, 2015 19:18:08 GMT -5
So Calvin, where can I get some bumpers?
By the way, I have been using your bumpers from last year and cutting them to make worth. Not exact but close.
|
|
|
|
Post by Calvin on Jun 13, 2015 2:42:06 GMT -5
So Calvin, where can I get some bumpers? Terry, you sure picked a hard scale to find parts for.... If you choose to build in 1/25th scale you could be on Fantasy Island like a lot us are right now living the high life being spoiled with never ending kits and parts. (I'm just saying) |
|
|
|
Post by harveythedog2 on Jun 15, 2015 7:08:04 GMT -5
Had a rough weekend and didn't get as much done as I wanted to. Friday night my wife and I got in an auto accident. Just sitting at a light waiting for it to turn green and this kid rear ends us! Anyway, my wife got whiplash so many hours were spent at the hospital and taking care of her. Got the exhaust port carved out for the new style exhaust. 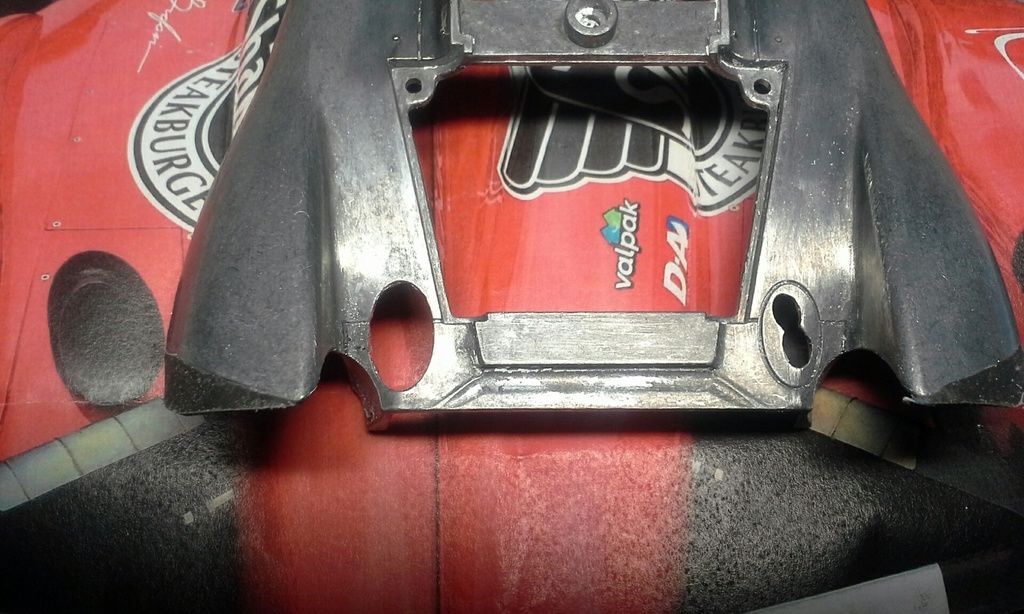 Test fitted the new 3D printed Honda rear bumper. Amazing technology. 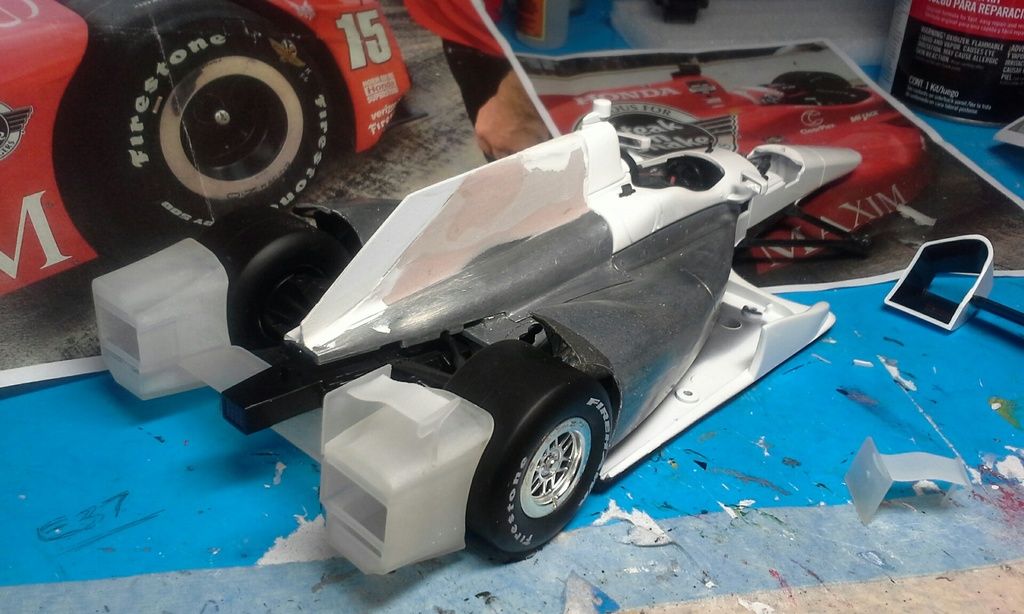 |
|
|
|
Post by harveythedog2 on Jun 15, 2015 7:15:46 GMT -5
Found one issue with the new 3D printed bumper and that was that it isn't wide enough. The boxes behind the wheels should extend out farther. The 3D bumper center piece is actually a tad shorter. What to do??? 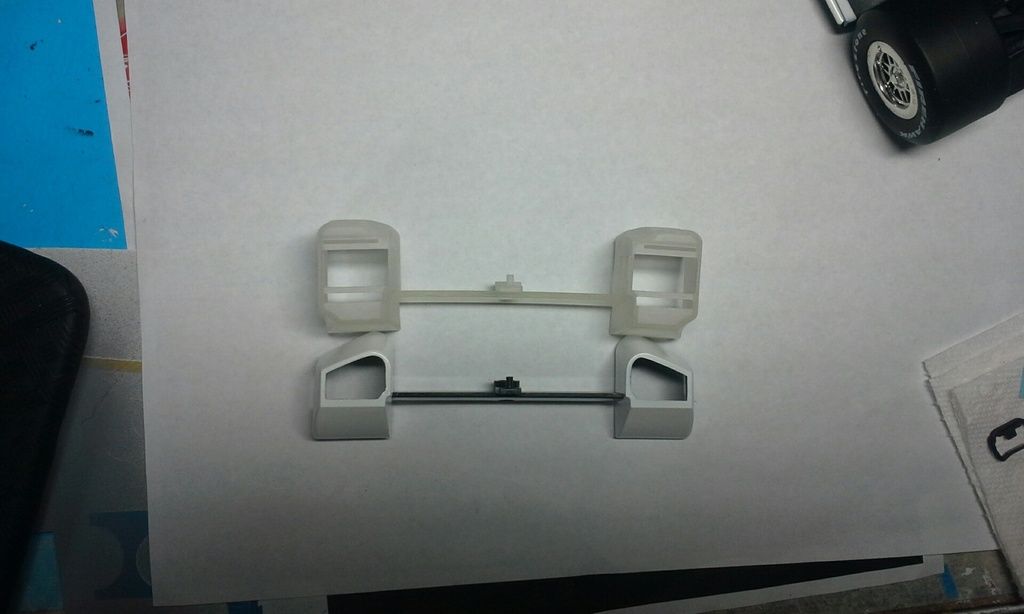 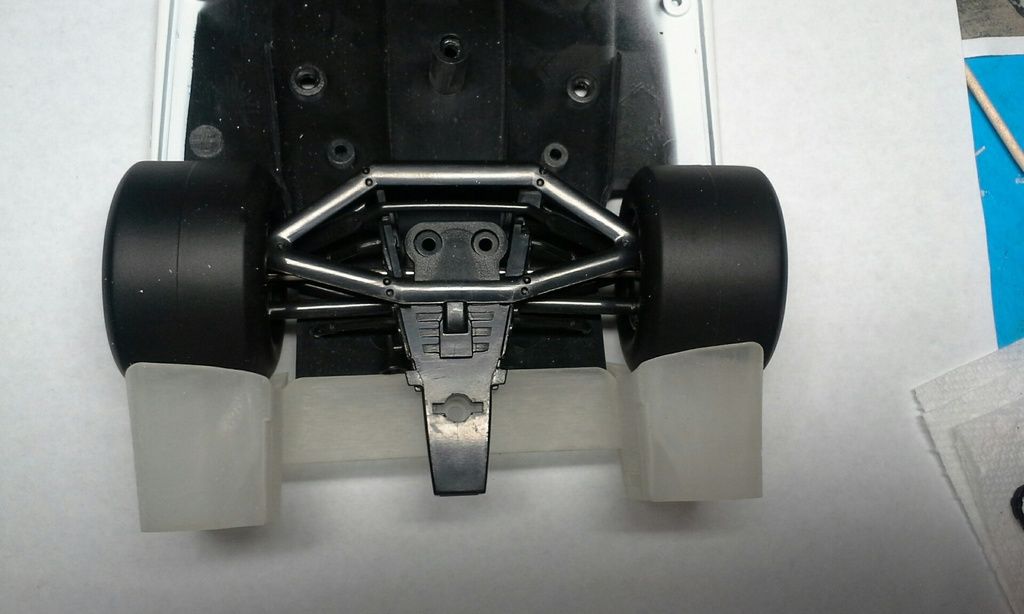 I decided to cut the 3D printed center out and use the center piece from the original and added another 1/16th on an inch material on both sides. Much better! 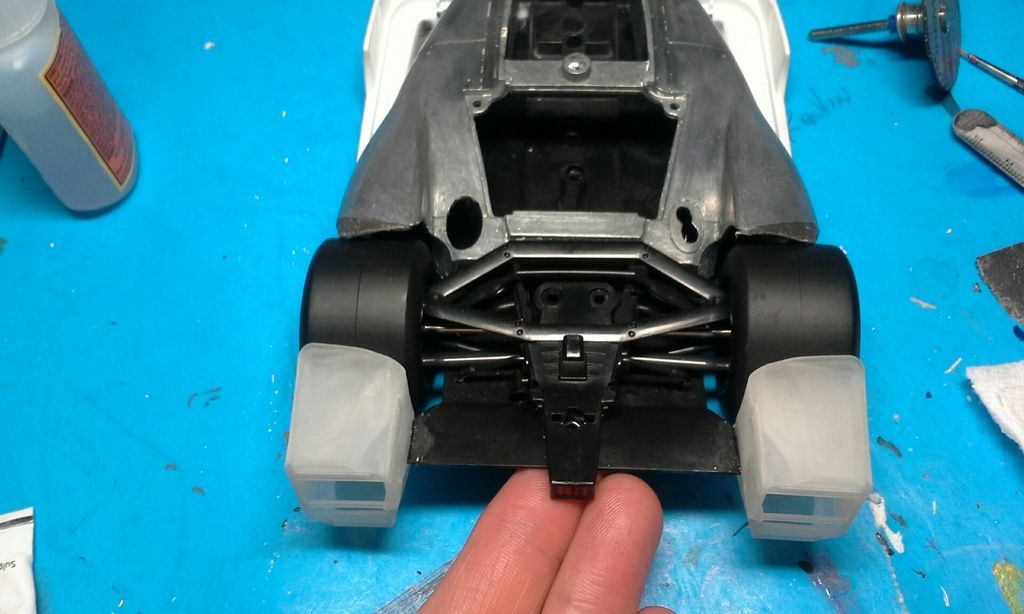 I also got the steering wheel done last night. Turned out pretty nice! 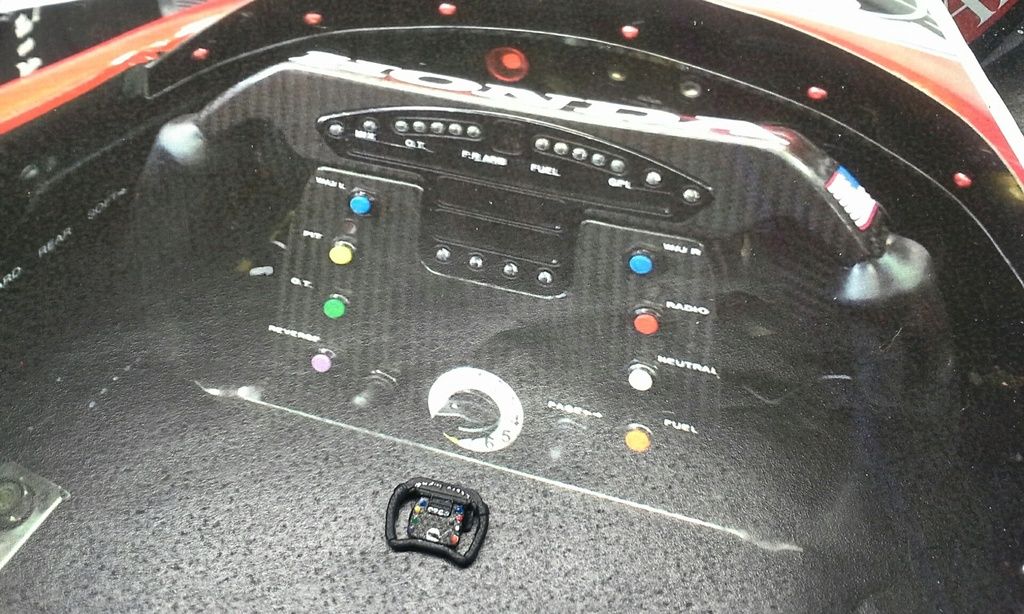 More later |
|
|
|
Post by IndyCarModels on Jun 15, 2015 8:03:40 GMT -5
Had a rough weekend and didn't get as much done as I wanted to. Friday night my wife and I got in an auto accident. Just sitting at a light waiting for it to turn green and this kid rear ends us! Anyway, my wife got whiplash so many hours were spent at the hospital and taking care of her. Got the exhaust port carved out for the new style exhaust.  Test fitted the new 3D printed Honda rear bumper. Amazing technology.  |
|
|
|
Post by IndyCarModels on Jun 15, 2015 8:04:25 GMT -5
Sorry to hear about your accident.
|
|
|
|
Post by chromehorn08 on Jun 15, 2015 8:21:26 GMT -5
Glad you and your wife are ok!
|
|
|
|
Post by harveythedog2 on Jun 15, 2015 8:30:48 GMT -5
Thanks. Everyone okay. Just sore!
|
|
|
|
Post by Calvin on Jun 15, 2015 9:31:05 GMT -5
That's too bad about the accident!
Your build is just incredible! Even if you stopped now it would be a show piece!
|
|
|
|
Post by clm1545 on Jun 15, 2015 9:49:36 GMT -5
Glad everyone is OK, Stu. The build is looking great.
|
|
|
|
Post by GrandPrecision on Jun 15, 2015 15:00:42 GMT -5
Found one issue with the new 3D printed bumper and that was that it isn't wide enough. The boxes behind the wheels should extend out farther. The 3D bumper center piece is actually a tad shorter. What to do???  More later Stu, any idea how much wider it needed to be? I'll revise and re-upload for future use. |
|
|
|
Post by harveythedog2 on Jun 16, 2015 8:27:06 GMT -5
Hey Chris. I just eyeballed it but it appears that the 3D bumper lower piece is not as long as the original.
Measure the original lower piece and then add 1/16th of an inch to both sides of that measurement and it should be spot on.
BTW - Still love what you have done. The boxes alone would have taken me forever and to get both symmetrical? Forget about it! Steering wheel and mirrors are awesome to. Thank Chris.
|
|
|
|
Post by harveythedog2 on Jun 17, 2015 6:49:27 GMT -5
Back at it again. I got the floor board cutout on the left side. 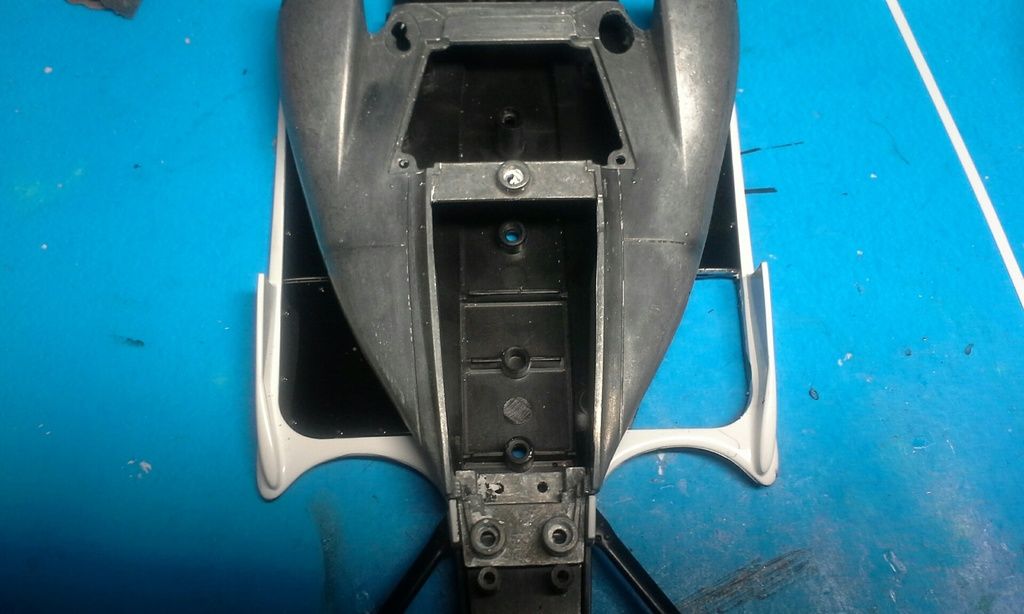 I also started the body mods to the left side. I figure once I am happy with the left side, it will be easier to duplicate it on the right side. Lots more filler and finishing to do of course. 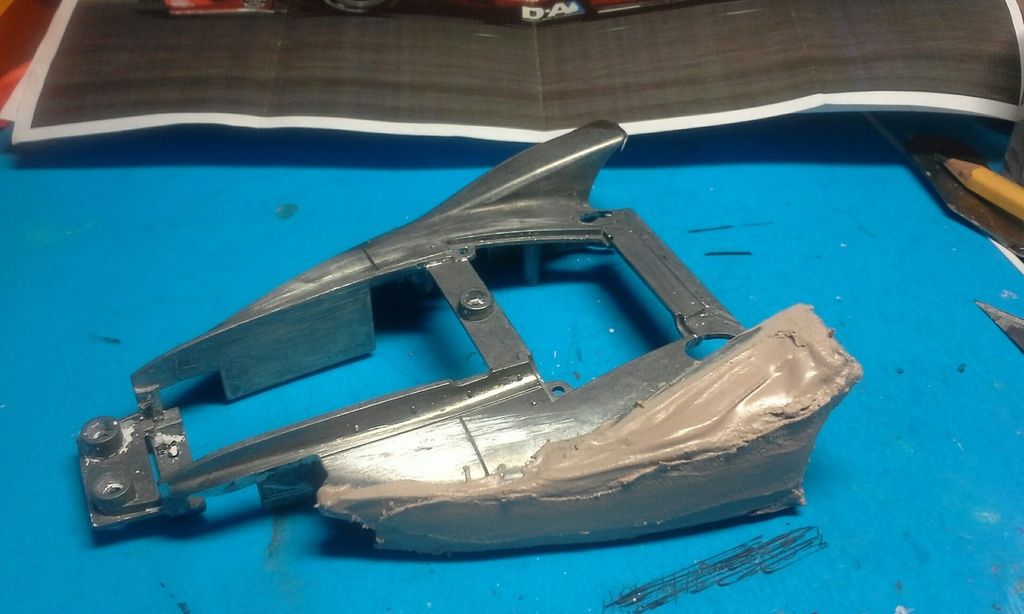 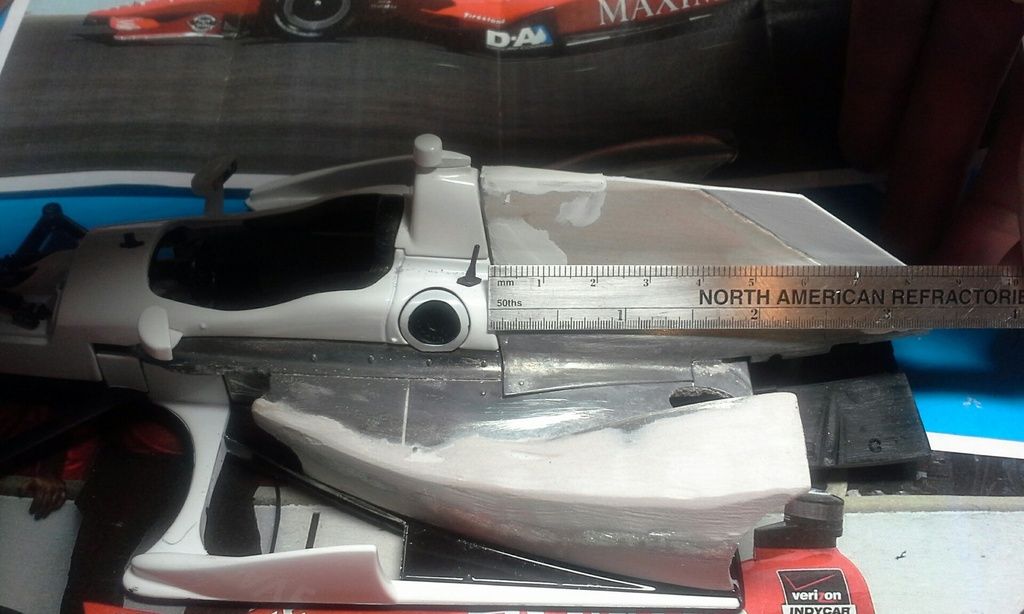 |
|
|
|
Post by mrpeters on Jun 17, 2015 9:34:55 GMT -5
I wonder if you could cut the sidepod off with a dremel and use that to cast a mold for a resin sidepod so you would always have perfect matches for future builds?
Looks awesome! I was looking forward to seeing how you did this. Looks like just regular old Tamyia Putty?
I have a "sidepod" piece from a broken kit if someone wanted to try my idea for making a mold. Be happy to send it to someone.
|
|
|
|
Post by Calvin on Jun 17, 2015 10:44:05 GMT -5
Hold the phone, here comes Stu with his expert building techniques!
This thread is like drinking a big can of motivation boost!
|
|
|
|
Post by IndyCarModels on Jun 17, 2015 10:54:40 GMT -5
I did something a little different. Let me now what you think please. I cut some card stock and applied it over the existing side pod. Now, I just have to sand the seam.   |
|
|
|
Post by harveythedog2 on Jun 17, 2015 12:10:47 GMT -5
Actually Mike the big putty work is actually Bondo auto body filler which is two part. Tamiya Putty would crack if put on to thick. Once I get the shape I want, I will use glazing putty for final shape and scratches, etc...
The mold is a good idea but you would have to have a lot of people wanting to do the conversion to make it worth it.
For me this is a one off and probably the only one I will do.
Stu
|
|
|
|
Post by Calvin on Jun 17, 2015 12:12:54 GMT -5
Let me now what you think please. If you say so. I highly recommend getting some Apoxie Sculpt to sculpt out your side pods. www.amazon.com/Apoxie-Sculpt-1-Lb-White/dp/B0013UDWXITrying to cut out thick plastic styrene is not going to make life easy in 1/64. Also you still need to go way thinner of styrene on your Honda Airbox fin.....and after you super glue on your styrene fin use the apoxie sculpt to blend in the transition between plastic and diecast. |
|
|
|
Post by harveythedog2 on Jun 17, 2015 12:15:41 GMT -5
MicroMachine, looks fine to me. I don't think I could work on such a small scale! Just try to mirror both sides.
Easy for me to say! That area is so small!
Stu
|
|
|
|
Post by IndyCarModels on Jun 17, 2015 12:35:27 GMT -5
Let me now what you think please. If you say so. I highly recommend getting some Apoxie Sculpt to sculpt out your side pods. www.amazon.com/Apoxie-Sculpt-1-Lb-White/dp/B0013UDWXITrying to cut out thick plastic styrene is not going to make life easy in 1/64. Also you still need to go way thinner of styrene on your Honda Airbox fin.....and after you super glue on your styrene fin use the apoxie sculpt to blend in the transition between plastic and diecast. I just ordered this. Will give it a try. thanks Calvin |
|