|
|
Post by sandysixtysfan on Apr 4, 2017 15:34:29 GMT -5
And it's another home run! A little seasonal commentary there. Just super in any lingo.
Sandy
|
|
|
|
Post by Art Laski on Apr 5, 2017 2:21:45 GMT -5
Rass, Sandy, thanks for your comments, my friends! Here are some shots of it after clear and some polishing. 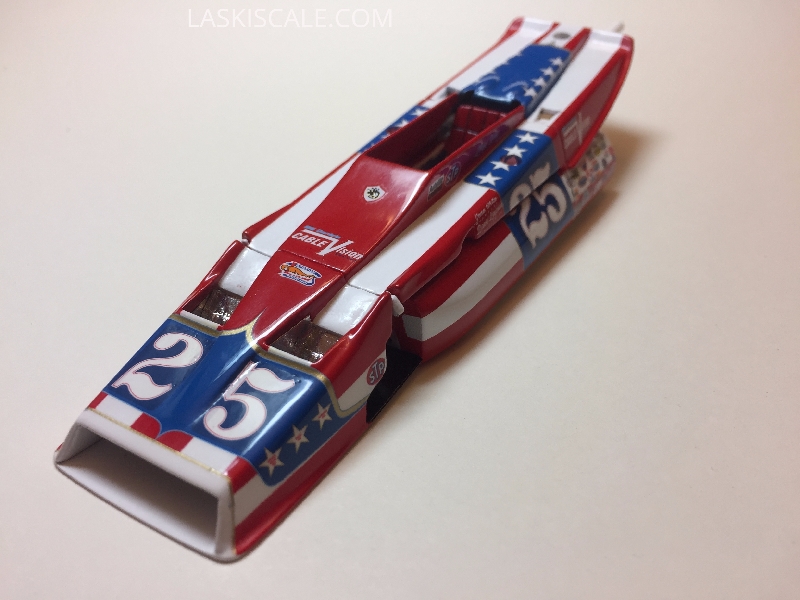 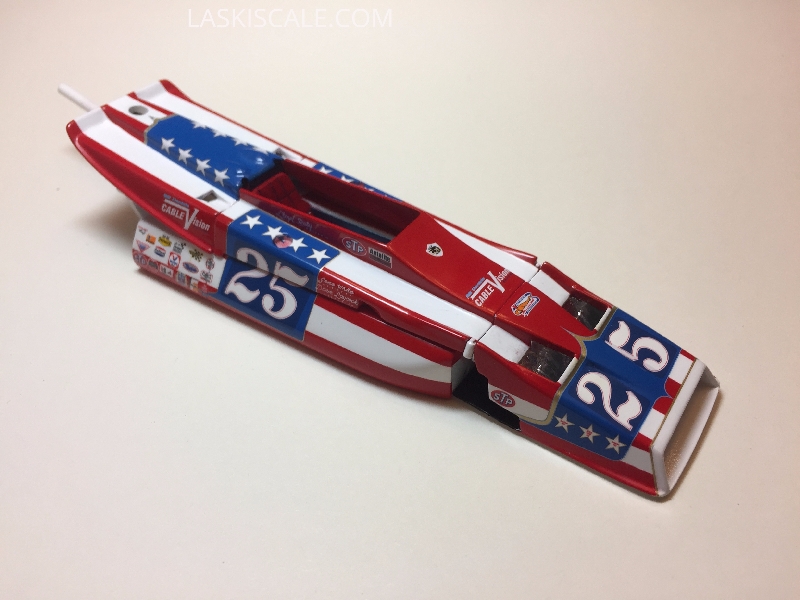 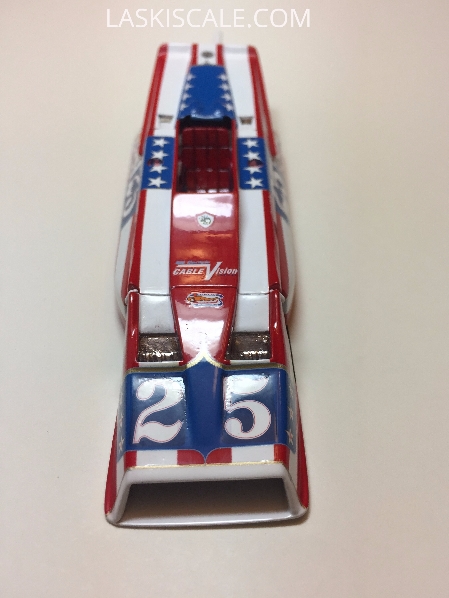 |
|
|
|
Post by pje on Apr 5, 2017 10:57:08 GMT -5
Another primer on building a kit where you can never remove your photos from Photobucket Art. Just outstanding work!
Paul Erlendson
|
|
|
|
Post by indy on Apr 5, 2017 12:06:27 GMT -5
The clear is another upgrade. This just keeps getting better!
Jordan
|
|
|
|
Post by Michael Chriss on Apr 5, 2017 12:21:11 GMT -5
Looking great Art!
|
|
|
|
Post by billj on Apr 8, 2017 10:20:05 GMT -5
A real beauty, can't wait to see it on wheels. Sorry I'll miss you at the DSC this Saturday, Art. Hope you do well there.
|
|
|
|
Post by Patrick on Apr 9, 2017 16:04:26 GMT -5
Art could you show me how you polish the metal? I don't polish mine because I'm afraid the will break.
Patrick
|
|
|
|
Post by kip on Apr 13, 2017 7:12:38 GMT -5
What a great paint/decal job. I really like the attention to detail in the upgrades you added. I would also like to know how you polish the metal.
kip
|
|
|
|
Post by Art Laski on Apr 17, 2017 19:35:23 GMT -5
|
|
|
|
Post by Art Laski on Apr 17, 2017 19:37:00 GMT -5
A real beauty, can't wait to see it on wheels. Sorry I'll miss you at the DSC this Saturday, Art. Hope you do well there. It's a shame you couldn't make it, Bill. The new venue is really nice. It should be a great show for years to come. I only wish I had this done in time, but I just couldn't make it. |
|
|
|
Post by racerbrown on Apr 17, 2017 22:16:49 GMT -5
those belts are really nice!
duane
|
|
|
|
Post by 2lapsdown on Apr 17, 2017 22:43:21 GMT -5
Art, you know how much I admire your work, but this time you've gone to far!! That interior is over the top. I really am at a loss for words on this one.
John
|
|
|
|
Post by joe on Apr 18, 2017 4:05:34 GMT -5
Art
Beautiful build, just incredible. What did you use for the white edging on the seat? One other question where did you get the star for the seat?
Thsnks
Joe
|
|
|
|
Post by indy on Apr 18, 2017 8:59:48 GMT -5
It is so easy to miss details when we just see the end result so it is great to see all of the care you are putting into this one, Art. There is a lot of good stuff to learn watching this being built.
Jordan
|
|
|
|
Post by Art Laski on Apr 18, 2017 10:21:05 GMT -5
Art, you know how much I admire your work, but this time you've gone to far!! That interior is over the top. I really am at a loss for words on this one. John Thanks, John! |
|
|
|
Post by Art Laski on Apr 18, 2017 10:29:15 GMT -5
Art
Beautiful build, just incredible. What did you use for the white edging on the seat? One other question where did you get the star for the seat?
Thsnks
Joe Hi Joe, The piping was some wire that a friend of mine gave to me a while back, and I'm not sure where he got it. But it doesn't have a vinyl coating, but rather appears to just be painted over the metal. It worked perfectly in this situation. The star and the seat belt opening rectangles were something new I tried. Model guys have been experimenting Cricut scrapbook cutting machines to cut styrene shapes which got it in my head, and my wife happens to have one. So I got some white decal paper and used the Cricut machine to cut a bunch of stars and rectangles. |
|
|
|
Post by speedracer on Apr 18, 2017 15:56:04 GMT -5
My wife is a serious scrapbooker and has 3 cricket machines. She keeps saying she will help me with my models but hasn't yet! They never cool down long enough! LOL  |
|
|
|
Post by Art Laski on Apr 18, 2017 16:03:43 GMT -5
My wife is a serious scrapbooker and has 3 cricket machines. She keeps saying she will help me with my models but hasn't yet! They never cool down long enough! LOL  Surely, she can spare one, Lew! You need to use the Cricut Explore so that you can use your own images. The older machines don't support that. |
|
|
|
Post by speedracer on Apr 18, 2017 16:18:01 GMT -5
She just told me she has the Explore 1 and Explore 2 wireless, I will have to be a good boy so she will help!
|
|
|
|
Post by Calvin on Apr 19, 2017 0:05:40 GMT -5
Like usual, we are amazed.
|
|
|
|
Post by Art Laski on Apr 19, 2017 1:41:49 GMT -5
Haha, thanks, Calvin. Made a wheel that matches the reference shot a little better than the kit wheel. I started with a wheel from another 70's AMT kit. 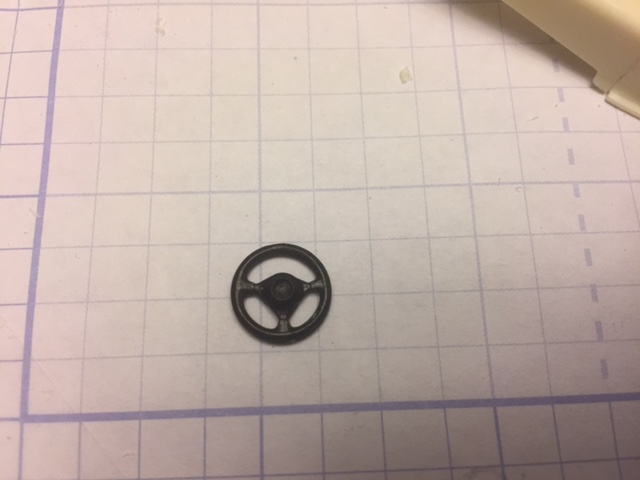 I tried to make a wheel center cut on a Cricut scrapbook machine, but that didn't work out. So I decided to use some printing plate aluminum my buddy Brad gave me just last weekend. Inspired by how my friend Randy D. uses his files to make parts to perfection, I thought I would give it a try on this. Not perfection, but as good as I could have hoped for. 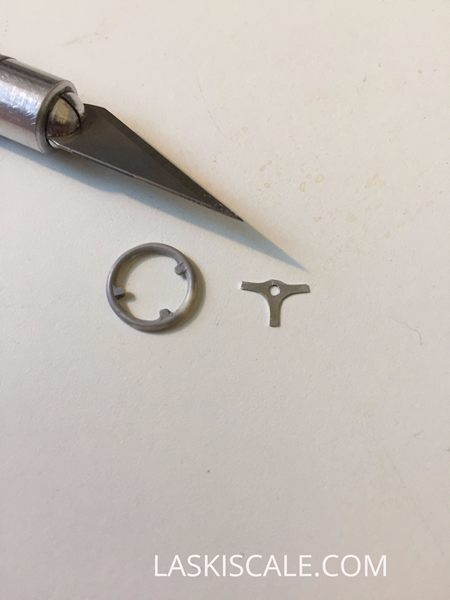 Polished it up and added some photoetch "bolts". 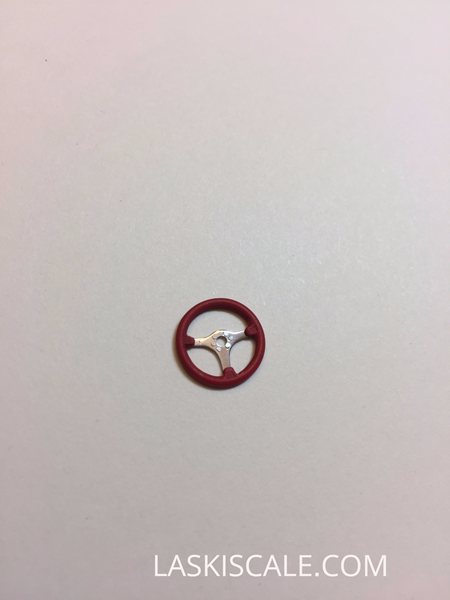 I also made a shifter mechanism. 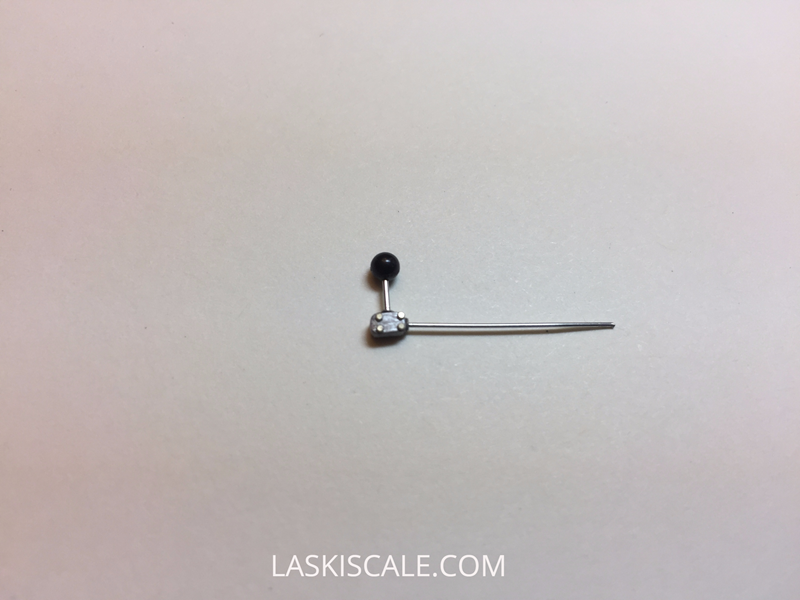 |
|
|
|
Post by bobbyc on Apr 19, 2017 6:00:30 GMT -5
You KNOW you're sick, right? LOL. Beautiful work, Art!
|
|
|
|
Post by Gary Davis on Apr 19, 2017 12:43:22 GMT -5
This is Art on art! Great work. That steering wheel..(along with the rest of the build)is up to your standards.
|
|
|
|
Post by indy on Apr 19, 2017 13:12:59 GMT -5
I am confused on the wheel center. Did the Cricut cut the thin aluminum, you did it by hand, or something else?
The steering wheel and shifter look really good. I really like the detail work on them both.
Jordan
|
|
|
|
Post by Art Laski on Apr 19, 2017 14:50:45 GMT -5
Hey Jordan,
Sorry for the confusion there. I initially used an image of a steering wheel in the Cricut to cut the center out of styrene, but the cuts weren’t all that clean or symmetrical when the image was shrunk down so small. But I was able to use the plastic cut outs as a rough template, then cut the actual center out of aluminum and hand filed it into shape.
-Art
|
|
|
|
Post by shunter on Apr 22, 2017 22:04:40 GMT -5
Loving it Art, the workmanship is outstanding..
|
|
|
|
Post by smbrm on May 2, 2017 14:52:43 GMT -5
I saw this build at GSL on the weekend. Very nicely done!
|
|
|
|
Post by Art Laski on May 5, 2017 17:26:25 GMT -5
I really appreciate all the comments. Stephen, it was great to see you again! I was trying hard to finish this build in time for the GSL last weekend, so I haven't made any posts. I did manage to finish it last Friday in my hotel room. Well, almost finished. There are a few things left I'd still like to do. I want to see if I can get a more accurate wheel set up, and I also need to male the fuel buckeyes on the left side of the tub. Here are some shots I manage to take during the push. When I got the kit, it didn't have any brake discs in it, so I turned a set on my lathe. (It's about all I can do with it  ) To complete the setup, I made a mold off of the spindle to cast additional brake calipers. 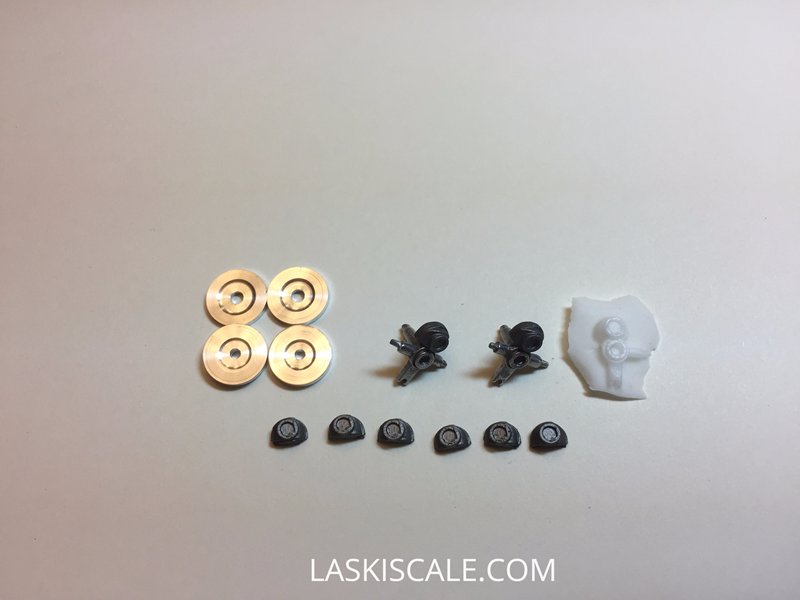 I cut the turbo off and added a Detail Master flange, and also so I can paint it separately. 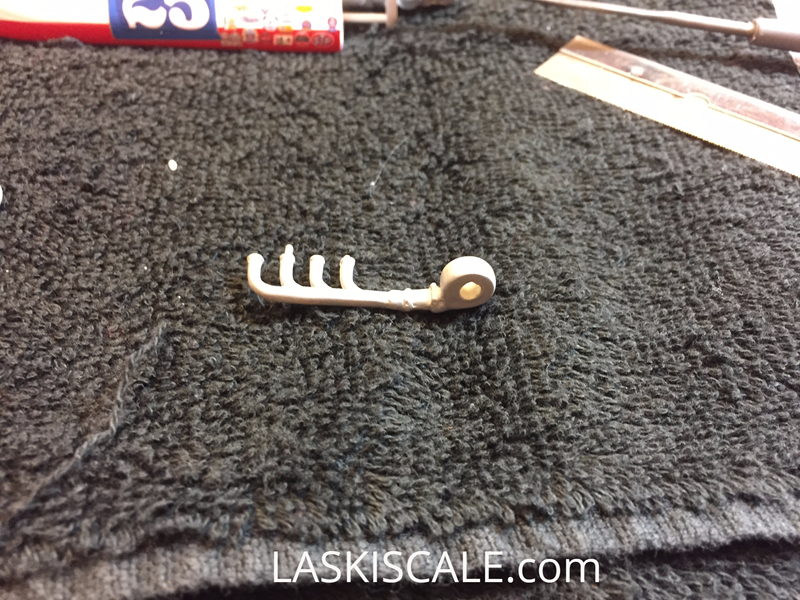 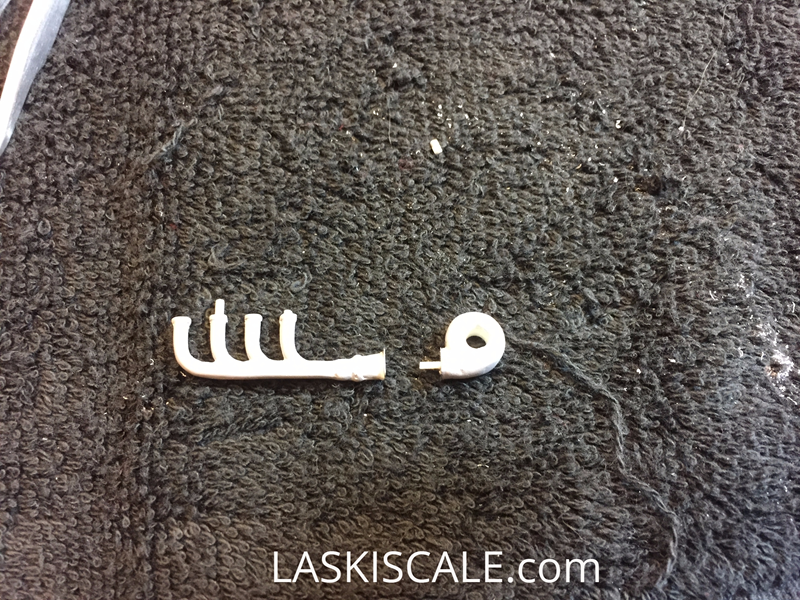 Here's the intake and exhaust all painted up. 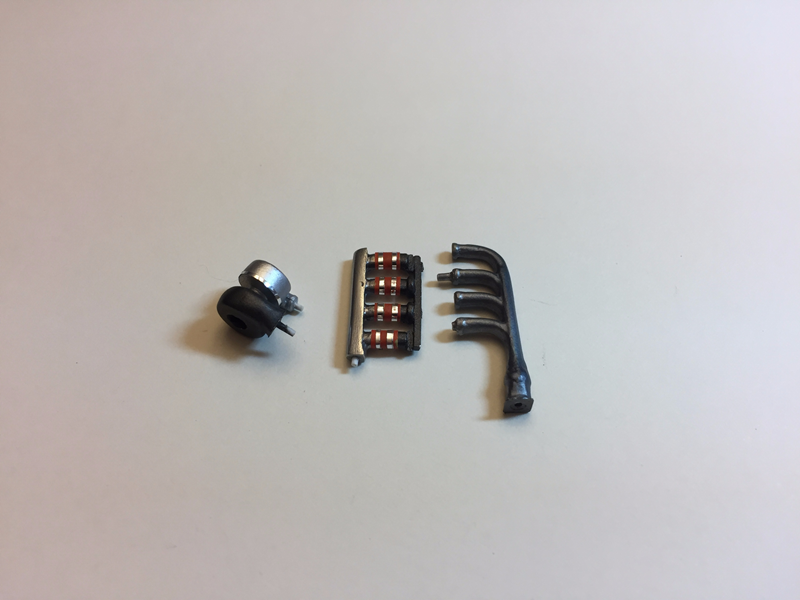 |
|
|
|
Post by Art Laski on May 5, 2017 17:26:49 GMT -5
|
|
|
|
Post by Art Laski on May 5, 2017 17:27:45 GMT -5
|
|