Deleted
Deleted Member
Posts: 0
|
Post by Deleted on Jul 8, 2015 12:40:48 GMT -5
So, i had this Tamiya Lotus 107B kit without decals and stumbled over the Studio27 Lotus 107C decals on ebay. So i decided to give it a try and create the 107C of the 107B kit. What driver and what race? Easy choice for me. It has to be Zanardi, one of the greatest persons ever lived. I was a fan of him since Laguna Seca 1996. As Cart came to germany in 2001, i tried to see the race on Lausitzring, but unfortunately (and thanks god) i could'nt see the race and his terrible crash. He lost both legs and thgey had to resuscitate him seven times. He now has more german blood in his body than i, i can tell you... But i was there in 2003 as he drove the last 13 laps of his race...and believe me, we all had tears in our eyes and it was one of the most emotional moments in my live! Hats off! 1994 was the last season for Lotus in Formula1, the car was just an evolution of the 1993 car and Alex only drove two races, Canada and Spain. I use the pictures of Wolfgang Reichert (Jaykay) as a reference for my build, don't know which chassis this is. To make it easier i bought the Studio27 etch parts for Lotus 107/107B and 107C. The plan was to use the parts as an template to make everything needed from styrene. This is gonna be a curbside model and a long time project. I've been working on this a couple of months already, so don't expect fast progress. This is the car i've been trying to build: 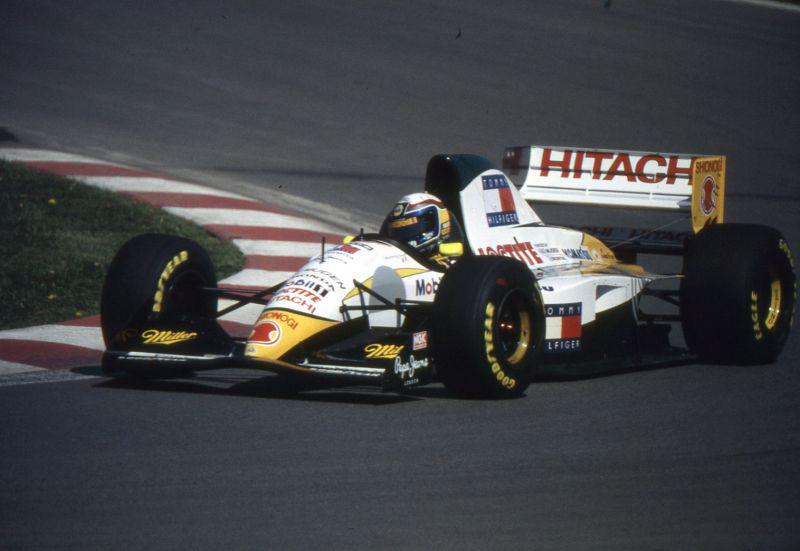 I hope i have piqued your interest. More tomorrow.  |
|
|
|
Post by racerbrown on Jul 9, 2015 6:47:36 GMT -5
I hope i have piqued your interest. More tomorrow.  well, you've got mine! duane |
|
Deleted
Deleted Member
Posts: 0
|
Post by Deleted on Jul 9, 2015 10:11:21 GMT -5
#1 Monocoque Usually i start with the monocoque. Both parts fit pretty well, so there were not much gaps to fill and sand. I won't add any details under the front damper cover, so this part was also glued in place. This makes it neccesary to modify the pushrods for later installation. 3 little bulges were modeled with Milliput to come closer to the 107C cover: 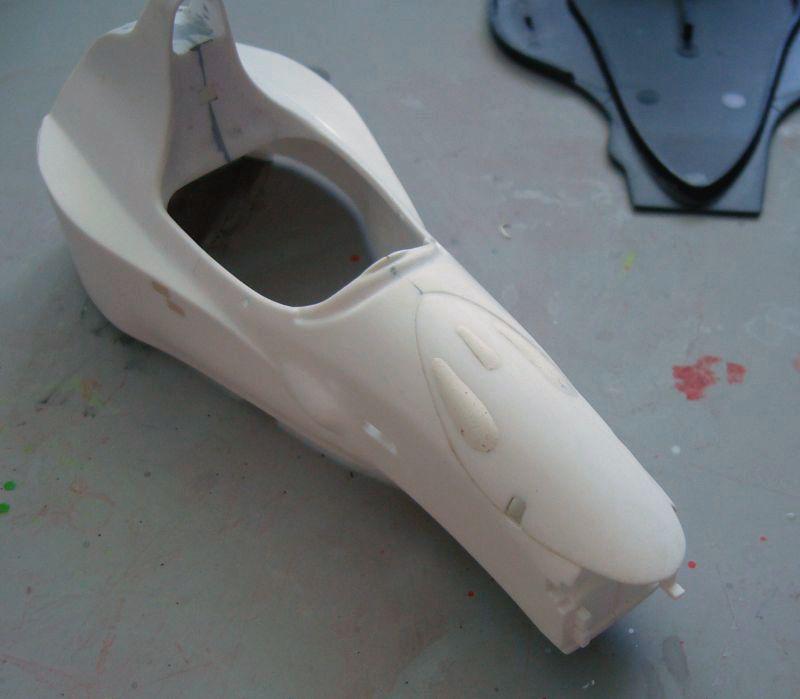 The pushrods (C7) were cut in 3 parts: 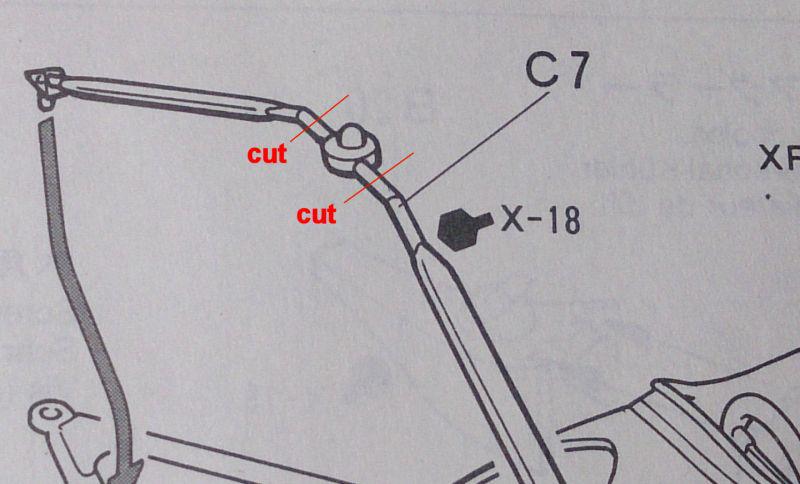 2 little pieces of brass tube were glued to the left and right side of the middle part, then the whole thing was glued into the monocoque: 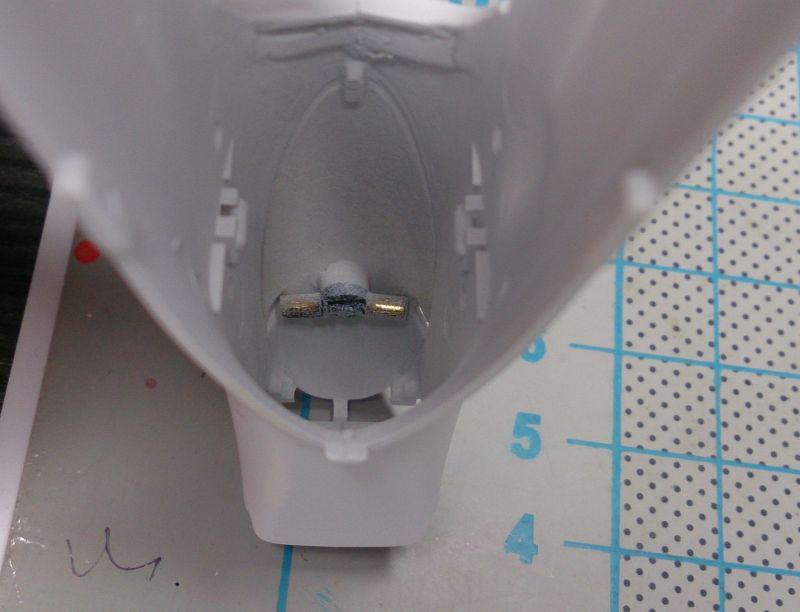 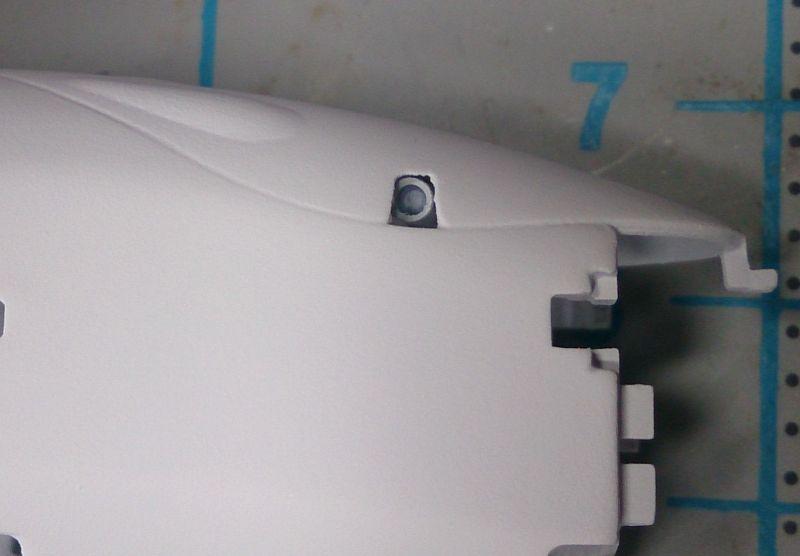 With this modification i can now just plug the pushrods in those little brass tubes from the outside, this makes it also very easy to adjust the ride hight of the front suspension. 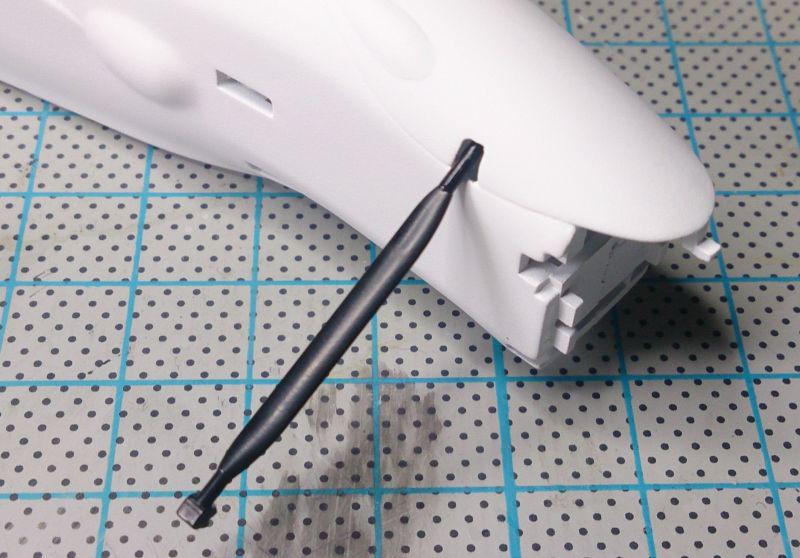 Thats it for now. |
|
Deleted
Deleted Member
Posts: 0
|
Post by Deleted on Jul 11, 2015 8:27:45 GMT -5
#2 The nose As a direct result of the black weekend in Imola, the fortex generators were banned and the size of the front wing side plates got limited. The front wing of the 107B kit was a-shaped, the 107C wing rectangular. So i had to add material to the left and to the right of the wing elements. So i cut a notch to the left and right side of the main element and stuck a piece of plastic in it. 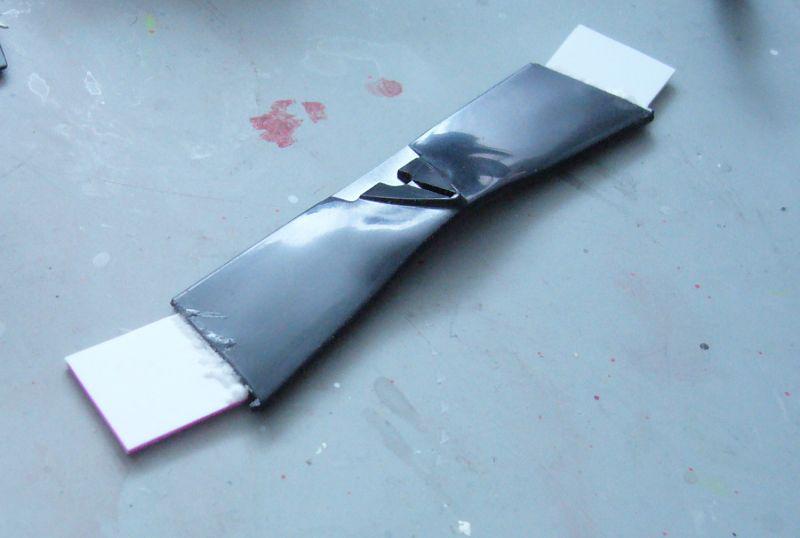 Everything was filled with 2k automotiv putty and sand back to the correct size: 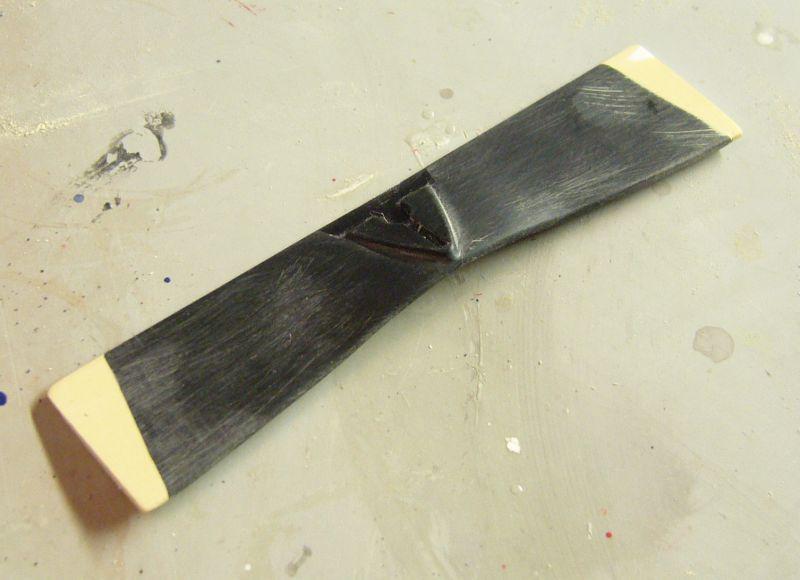 The upper wing elements were useless, so i had to modify some spare parts to get the right shape. The side plates of the front wing are complete scratch build. Front wing of the 107C Lotus: 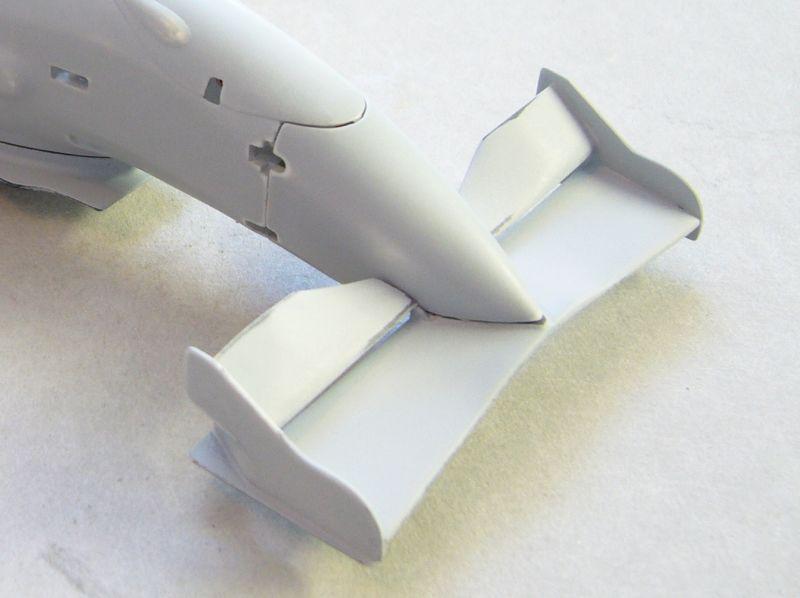 Any comments are very welcome! |
|
Deleted
Deleted Member
Posts: 0
|
Post by Deleted on Jul 11, 2015 8:50:36 GMT -5
#3 The seat O man, i hate this Tamiya F1 seats so much. The seat belts are so hard to remove, but absolutly necessary. The seat itself has the wrong shape and is missing the holes for the belts. At first i used my multitool to remove the plastic belts: 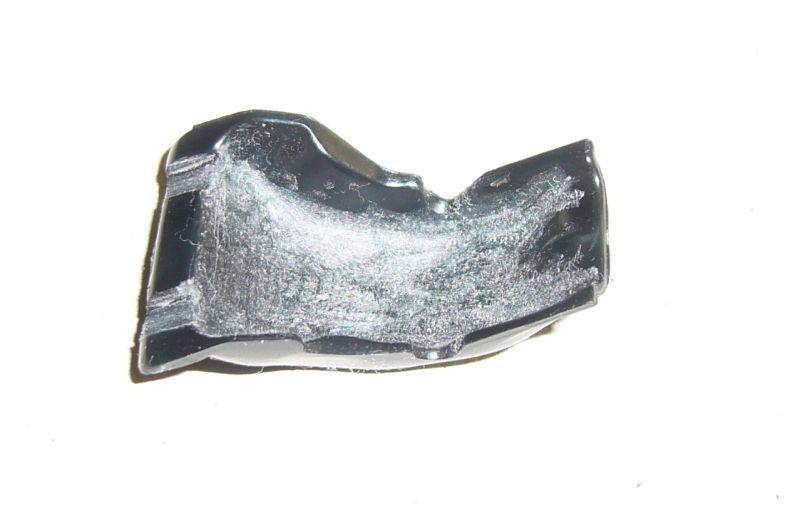 Then the whole seat was thinned out and milled and sand into the right shape. I had to add some sheet to raise the sides of the seat: 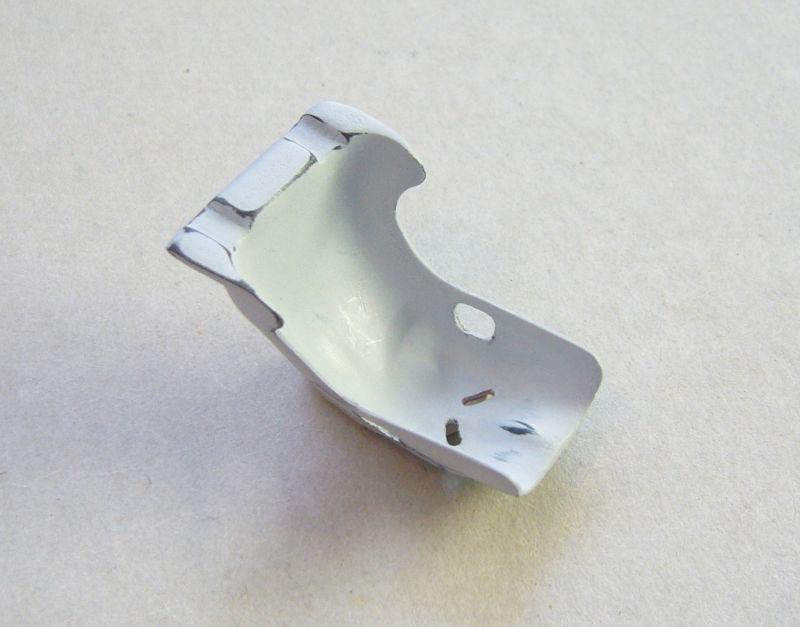 Next step is the texture of the whole thing. I will use Revell flat red and micro ballons to recreate the suede look of the original seat. This is how my Lotus 107B seat looks like, and the 107C seat will look exactly the same: 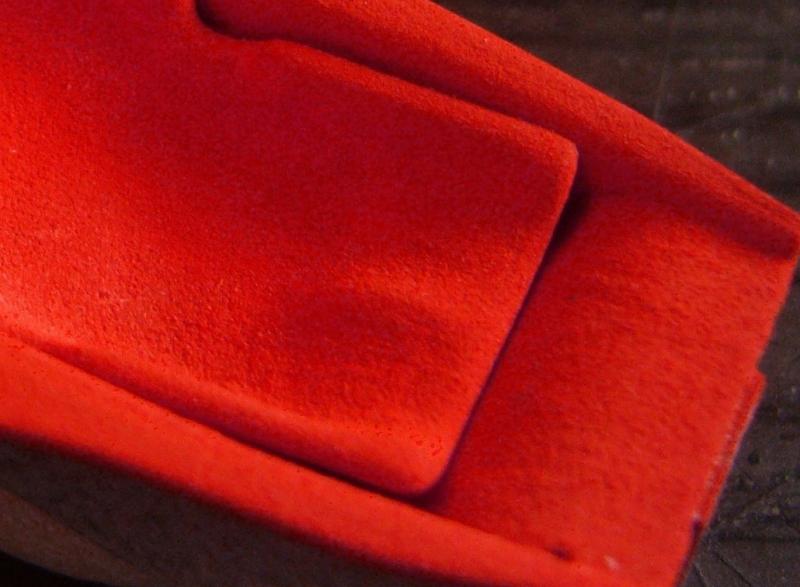 Thats it for now. |
|
|
|
Post by indycals on Jul 11, 2015 16:32:31 GMT -5
micro ballons? would that be like flocking material? Whatever it is the result is stunning!
|
|
|
|
Post by racerbrown on Jul 11, 2015 21:13:59 GMT -5
wow!
this one is really looking good!
thanks for sharing.
duane
|
|
Deleted
Deleted Member
Posts: 0
|
Post by Deleted on Jul 12, 2015 1:54:10 GMT -5
micro ballons? would that be like flocking material? Microballoons are glass bubbles in ultra-ultra-fine (1-5 micrometer). They are made as a filler for 2k putty or epoxy putty to reduce the weight of the mass. Finer than flour or dust and very light, not so lumpy. The bubbles don't stick to each other, so if you open and move the tin they almost look like a liquid. You have to be very careful, a cently brize and they flying everywhere. Better use a dusk mask. To get this result, you have to airbrush the seat with a color that stands wet for a couple of minutes. I prefer Revell enamels for this. Then dip the still wet seat in the bubbles and move it arround a little. Pull it out und knock of excess material. Let it dry and airbrush the seat in the color you need. You could also mix the bubbles with color (i.e. Tamiya XF-16) and airbrush the engine of a i.e. 1/12 Ferrari 312T, to get the look of cast aluminium. wow! this one is really looking good! thanks for sharing. duane Thank you! |
|
Deleted
Deleted Member
Posts: 0
|
Post by Deleted on Jul 12, 2015 9:30:11 GMT -5
Great thread. Love the idea of the tubes to receive the pullrods. And the seat! WOW!
Thanks for taking the time to share these tips. I have to say I have never fretted over a seat in my builds. The results are dramatic and very noticeable.
I have a 1970 312 build that was pretty much stopped by the seat.
|
|
Deleted
Deleted Member
Posts: 0
|
Post by Deleted on Jul 25, 2015 23:11:16 GMT -5
#4 Engine cover This is how the 107B kit part looks like: 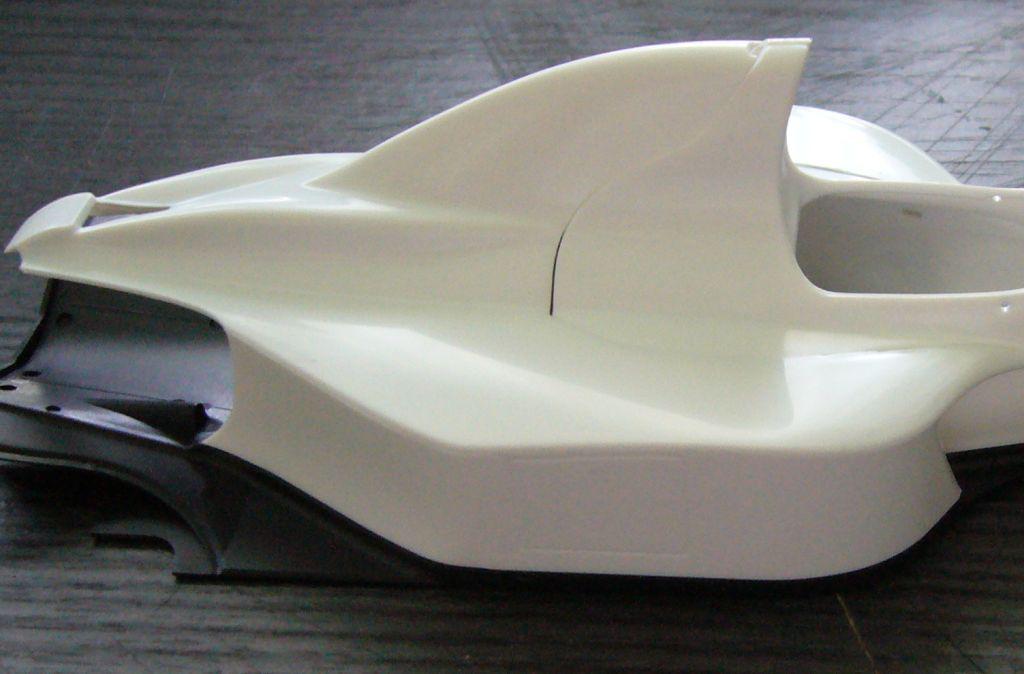 Lots of work to do. The first step was to open the cooler outlets and scratch build the inside of this area:  The little air scoop on the back was removed and closed with a piece of plastic sheet and putty: 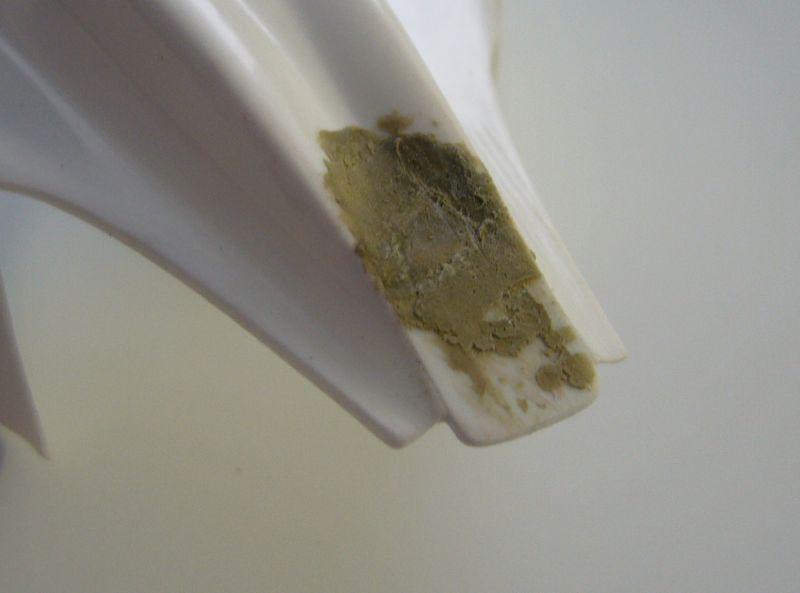 For the "Badwings" i used the etch parts of the Studio27 set a an template to make them from plastic sheet. The badwings were glued to the engine cover. The naca ducts were cut in the engine cover, again with the help of the etch parts: 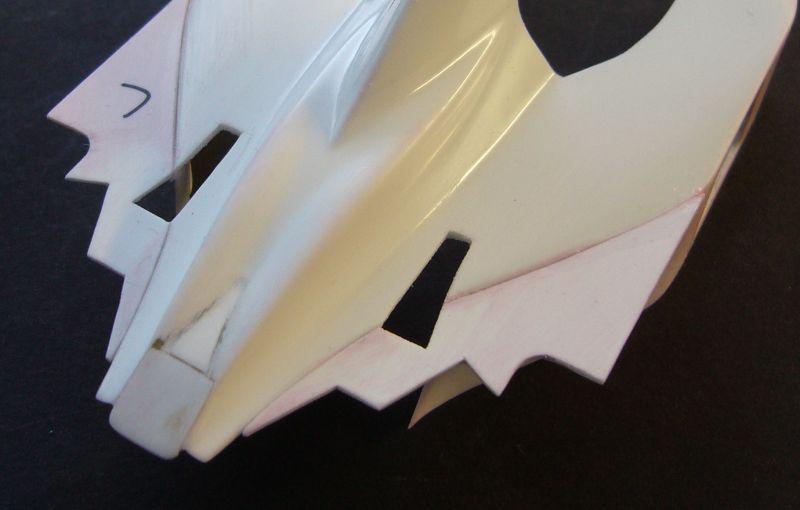 The underside of the naca ducts were scratched. Lots of putty and sanding was needed to get the correct shape of the underside of the badwings: 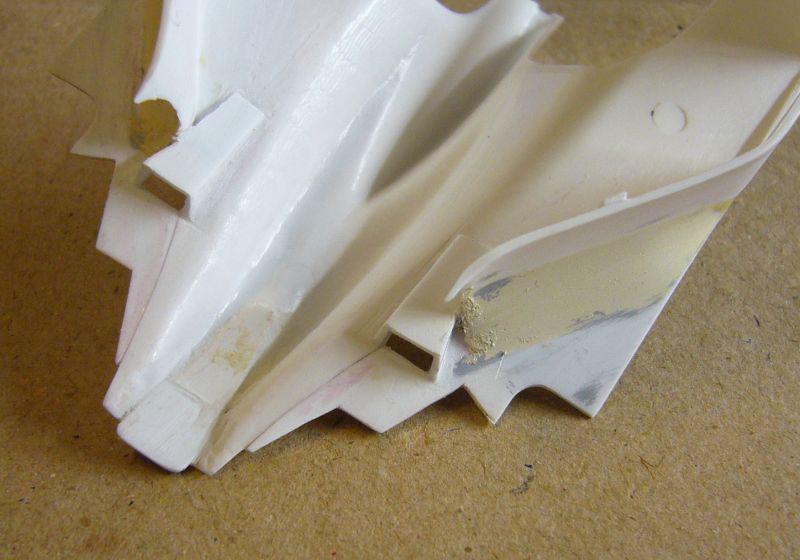 The last step before white primer was to cut two holes and two slices in the engine cover for the tension wire: 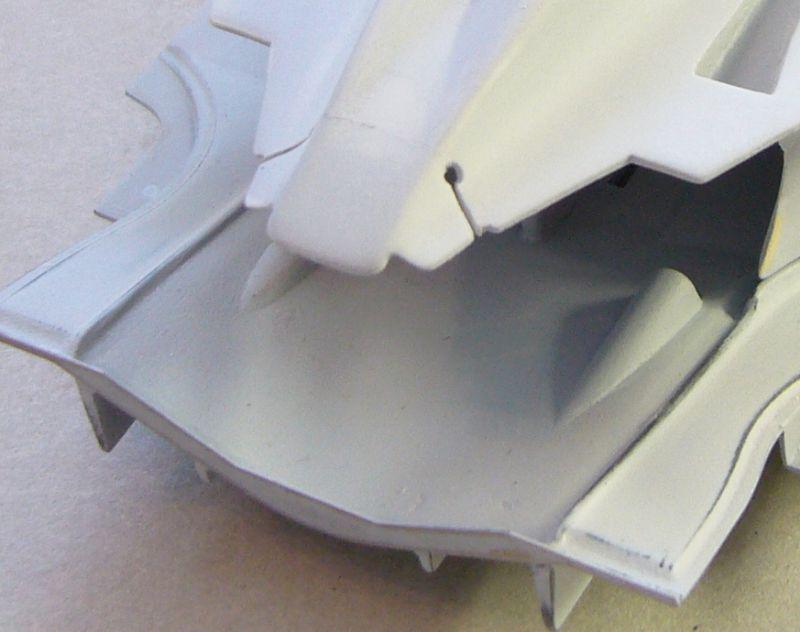 Test fit of the body: 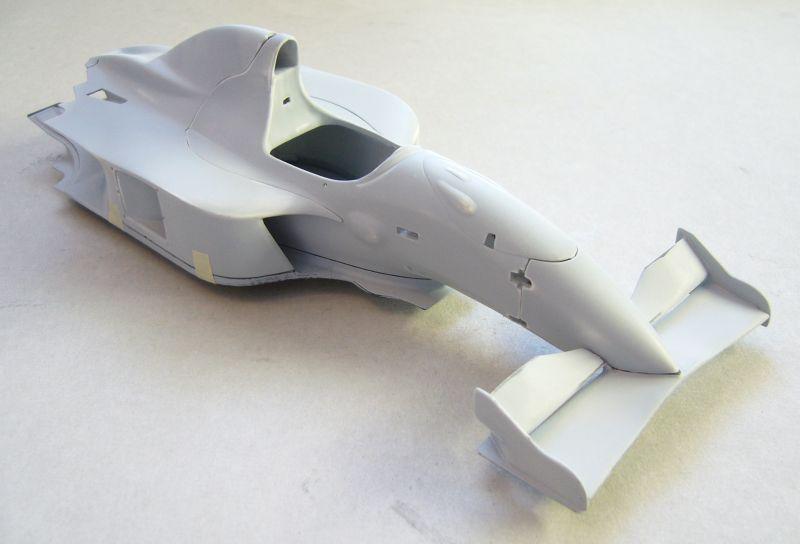 Thats it for now. |
|
|
|
Post by racerbrown on Jul 26, 2015 6:44:41 GMT -5
very impressive!
thanks for sharing.
duane
|
|
|
|
Post by chromehorn08 on Jul 31, 2015 23:24:39 GMT -5
Simply amazing work! Thanks for sharing!
|
|
Deleted
Deleted Member
Posts: 0
|
Post by Deleted on Dec 11, 2015 16:03:46 GMT -5
#5 Diffusor: Finally i found some time to work on the 107C again. This time the diffusor has to be modified. After the Imola weekend in 1994, F1 changed the rules and reduced the size of the undertray and diffusor. Problem is, there are no pictures or drawings available that show exactly what was modified. So i did my modifications based on this pictures: 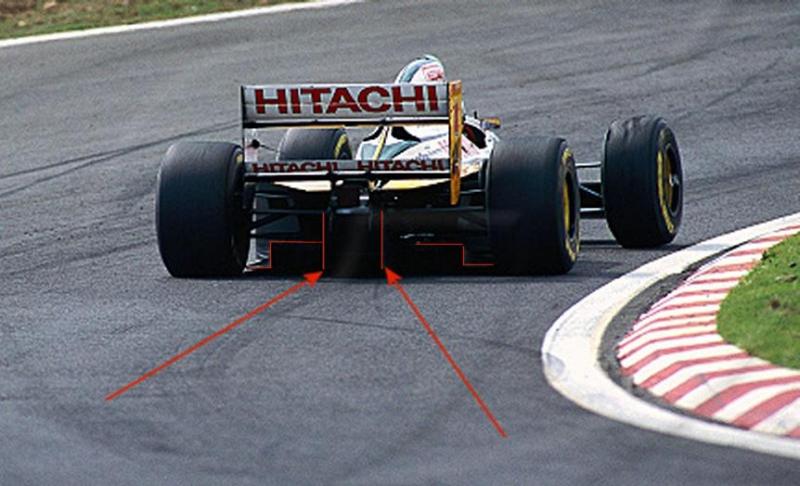 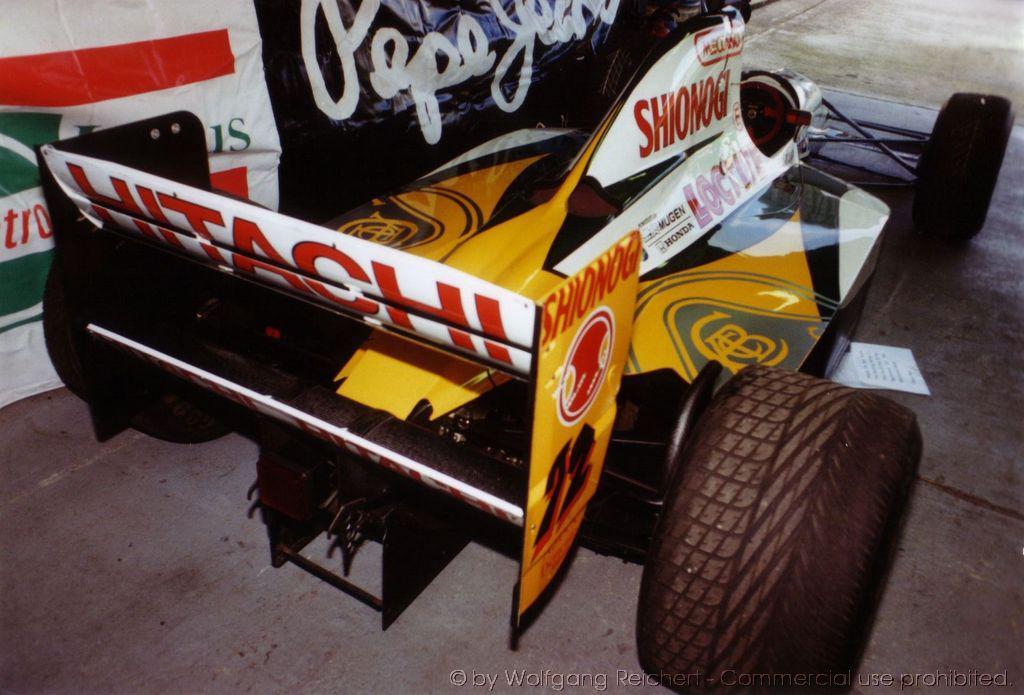 I know that the undertray had to be shortened to the driveshafts except for a 12'' wide area under the gearbox. With this informations i changed this: 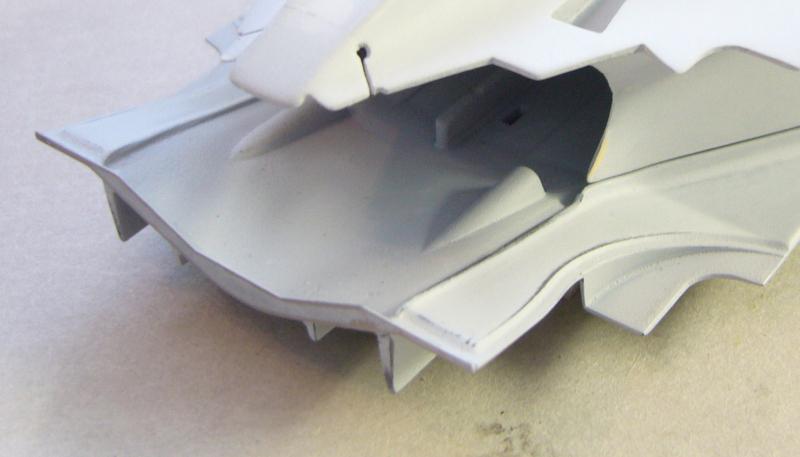 to that: 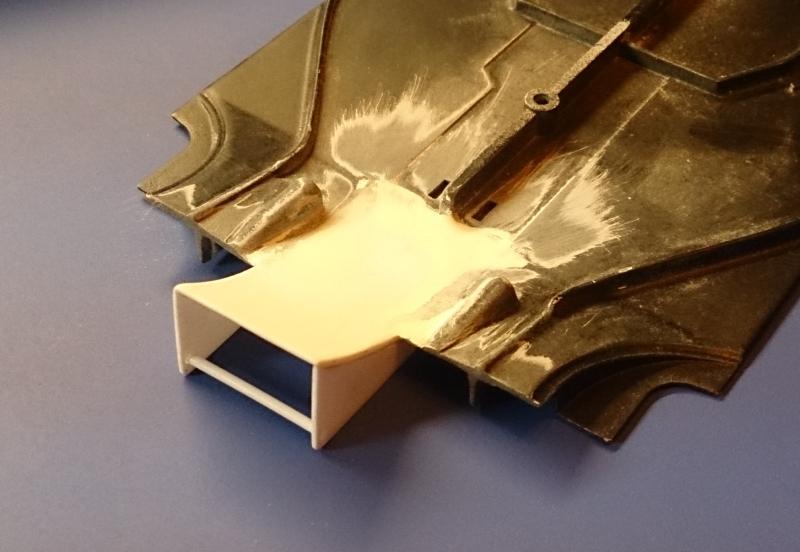 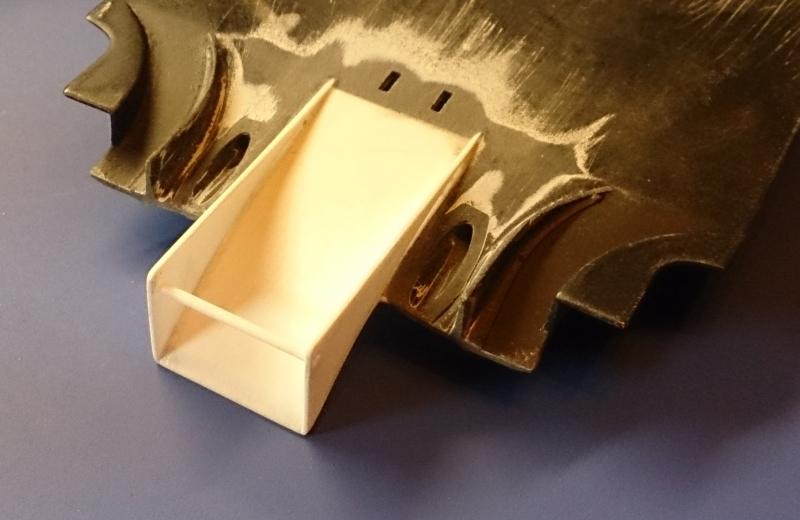 Test fitting the engine: 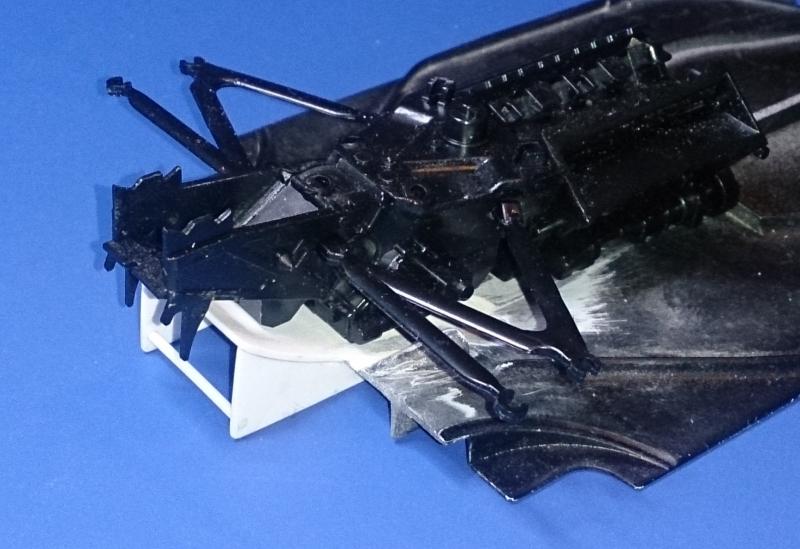 I know it's not exactly THE 107C diffusor and 50% fictional, but in my display case side by side with the 107B you can see a major difference, and thats all what i want. Next update will be the steering wheel. Have a nice weekend! |
|
|
|
Post by indycals on Dec 11, 2015 17:08:16 GMT -5
Nice to see an update on this!
|
|
|
|
Post by racerbrown on Dec 12, 2015 7:09:08 GMT -5
Nice to see an update on this! agreed!  duane |
|
Deleted
Deleted Member
Posts: 0
|
Post by Deleted on Dec 14, 2015 5:36:23 GMT -5
Looks great so far! I'm sure you noticed this, but if you're doing the post-Imola car, the FIA mandated a opening on the rear of the engine cover. On the Lotus, it looks like there are two smaller ones rather than one large one.
|
|
|
|
Post by indy on Dec 14, 2015 9:57:56 GMT -5
Lots of impressive work so far, I am enjoying getting to watch this one come together.
Jordan
|
|
Deleted
Deleted Member
Posts: 0
|
Post by Deleted on Dec 14, 2015 23:11:23 GMT -5
Looks great so far! I'm sure you noticed this, but if you're doing the post-Imola car, the FIA mandated a opening on the rear of the engine cover. On the Lotus, it looks like there are two smaller ones rather than one large one. After the Imola GP the teams were forced to change the cars in 3 big steps: for the Spanish Grand Prix: - the size of diffusers would be reduced, - the front wing end plates would be raised, - the size of the front wing would be reduced. - the fortex generators were banned for the Canadian Grand Prix: - the lateral protection of the drivers' heads would be improved by increasing the height of the sides of the cockpit, - the minimum weight of a Formula 1 car would be increased by 25 kg (changed to 15 kg by Canadian GP), - the front wishbones would be strengthened to reduce the possibility of a front wheel coming loose and striking the driver, - the cockpit would be lengthened to prevent drivers striking their head on the front of the cockpit, - the use of pump petrol would be introduced in a change to the fuel regulations, - the airboxes from the engines would be removed to reduce the airflow to the engines and thus decrease the power available. for the German GP: - a wooden plank had to be installed to set the ride high of the car to a minimum of 10mm So the car i trying to build still had the closed airbox and a flat bottom. |
|
Deleted
Deleted Member
Posts: 0
|
Post by Deleted on Dec 15, 2015 1:44:24 GMT -5
#6 Steering wheel The kit part: 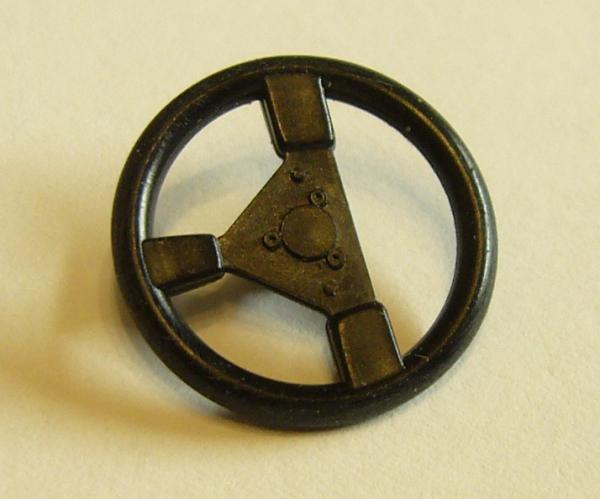 First step was to remove all the bolts and knobs at the front side of the wheel, they will replaced with Top Studio parts. The pin at the back side was cut be half and is used as a support for a little piece of brass tube. 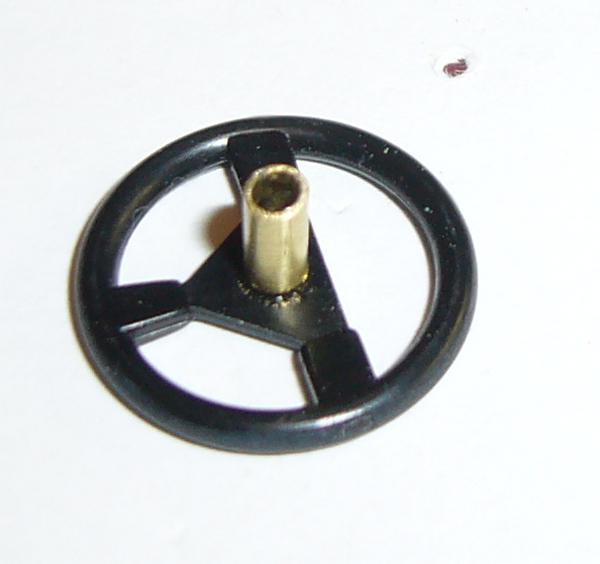 The hole in the dashboard was filled with a little plastik pin that matches inside the brass tube. This makes the steering wheel removable and a little more realistic. The 107C had some new knobs and switches on the steering wheel. Based on fotos i scratched the additional carbon plate that is sitting behind the steering wheel and prepared everything to install TopStudio parts later. 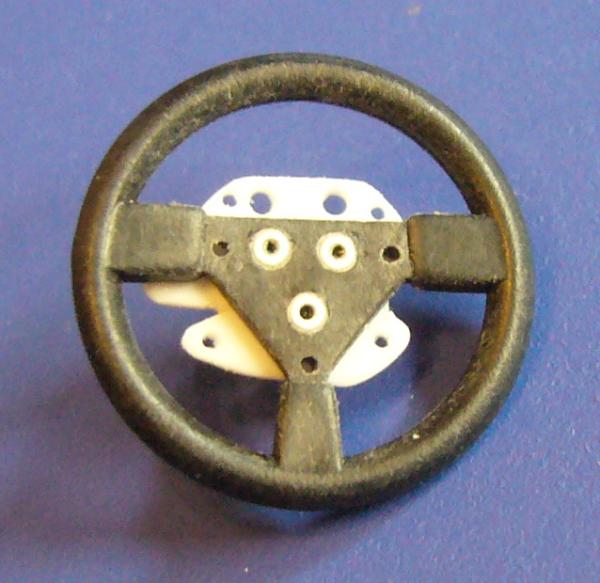 The "C" was the first Lotus with a semi-automatic gearbox and shift paddles behind the steering wheel. These paddles are part of the Studio27 etch parts for that car. 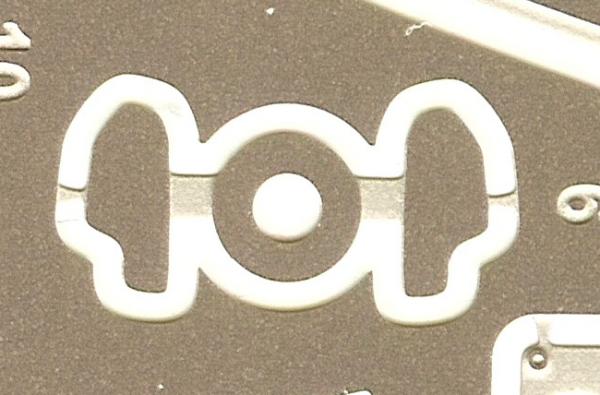 Sadly the part broke in 2 parts, so i had to scratch the center from styrene sheet and glue the paddles to this part. The remaining metal ring of the etch part was cleaned and is now used for the quick release system of the steering wheel. 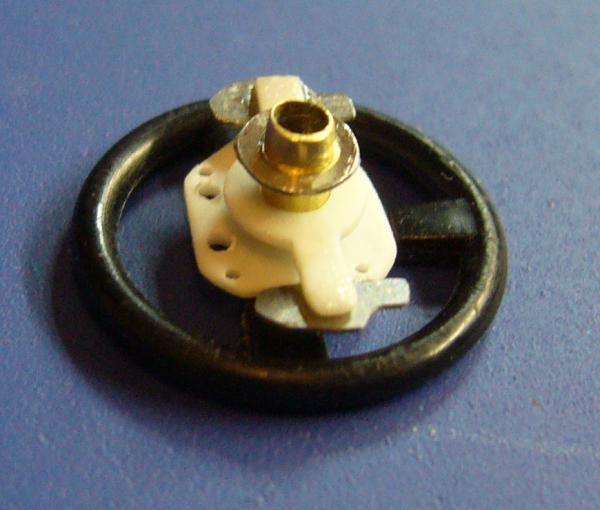 More with the next update! |
|
|
|
Post by harveythedog2 on Dec 15, 2015 7:40:01 GMT -5
Great stuff! Enjoying this!
|
|
Deleted
Deleted Member
Posts: 0
|
Post by Deleted on Dec 19, 2015 13:36:31 GMT -5
#7 Headrest 107C: 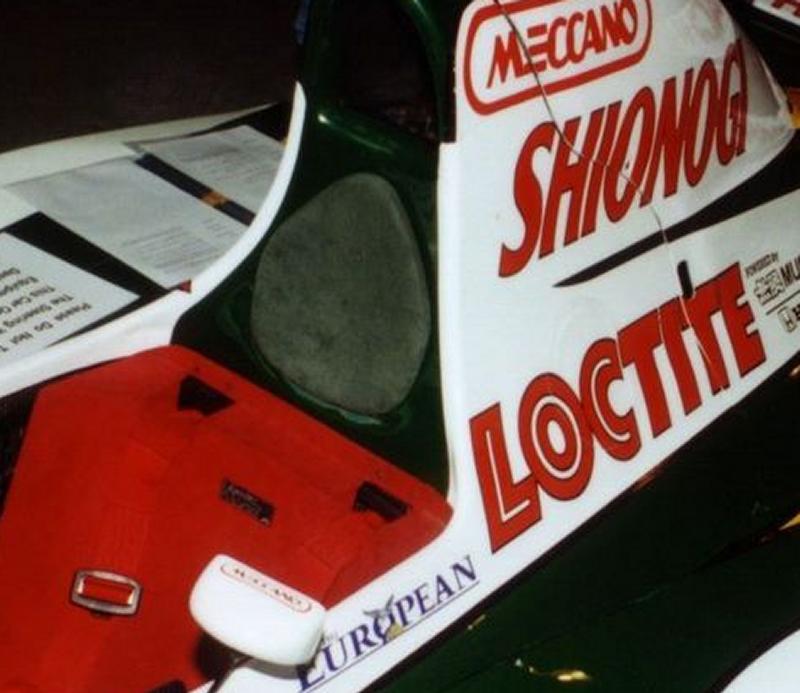 The kit part is totaly crap, wrong size and shape, absolutly useless. So i tried to find a way to build the new headrest from scratch, and this is what i did. First step was to use some tape and a permanent marker to draw the headrest on it: 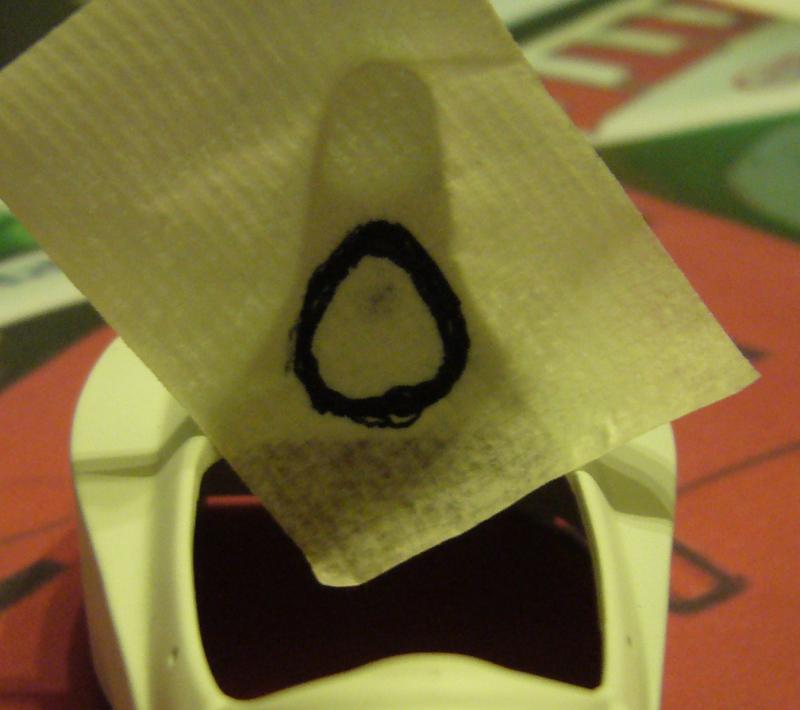 Then the piece of tape is scanned and photoshoped to make the templete symetric and to correct the shape a little bit. After 3 or 4 test-prints i finally finished with this: 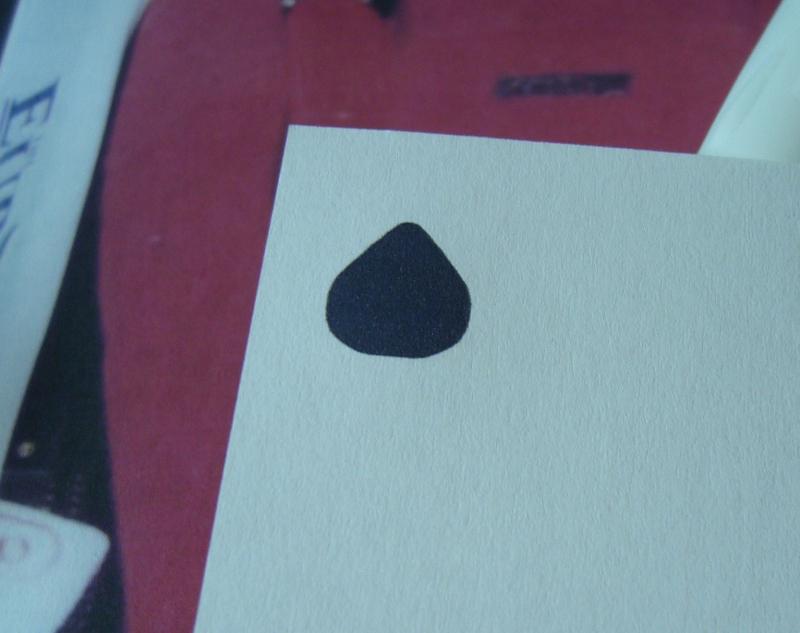 Test fitting the template on the monoqocue: 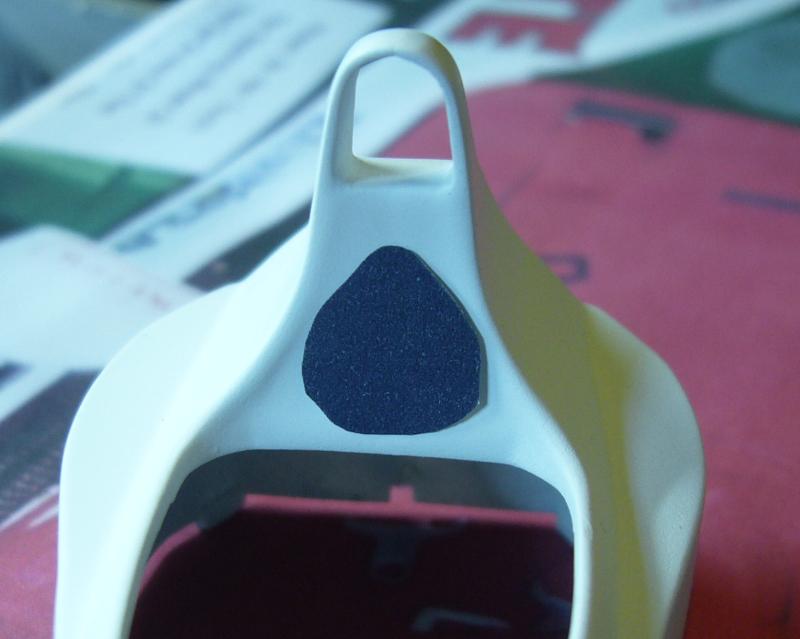 Now i can use the template to create the basic headrest from a piece of styrene sheet. This will be the next update. Wish you all a merry christmas! |
|
Deleted
Deleted Member
Posts: 0
|
Post by Deleted on Dec 23, 2015 13:55:41 GMT -5
#8 Headrest 2.0 With the help of the template i made the headrest from styrene, looks ok to me and is ready for painting: 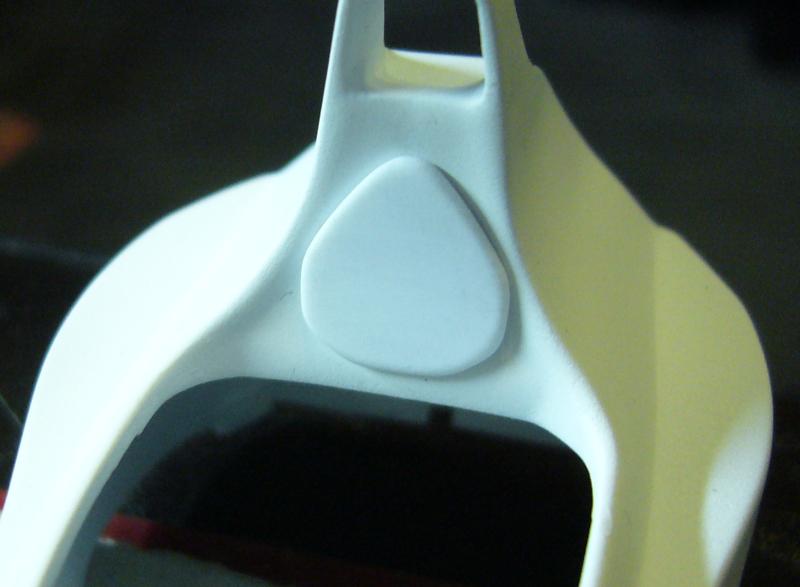 I prepared the steering wheel, the seat and the headrest for "balloning" - ceating the texture with micro ballons. The seat and the headrest were ready to go, the steering wheel is taped to keep the center clean:  This is what i did, step by step. 1. Two thin layers of flat red airbrushed on the seat as a base coat. Let them dry a couple of minutes. 2. A wet layer is airbrushed on the seat. Wet enough to let the color shine, but don't overdo it. This is how it should look: 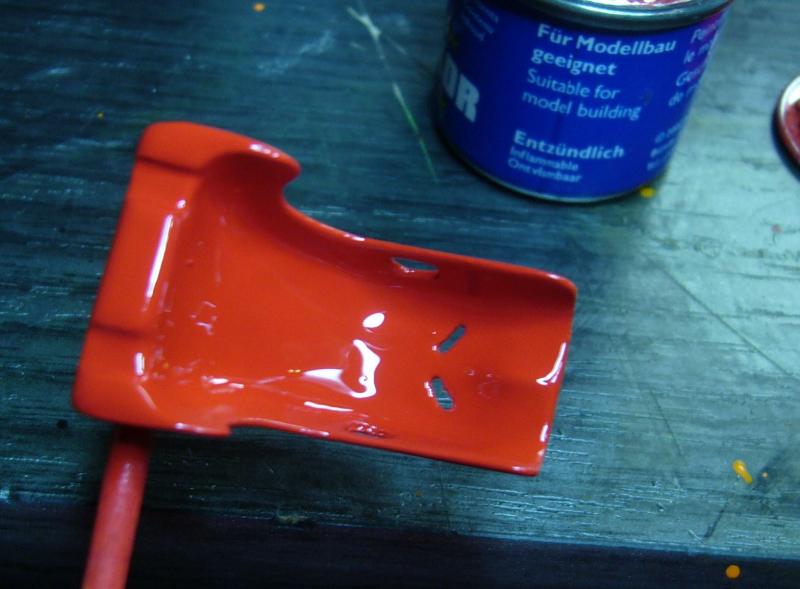 3. Don't lose to much time and don't let the color dry - just dip the seat in the micro ballons and move it around a little:  4. Knock of excessive micro ballons carefully and let the texture dry completly. Don't touch it, don't try to paint it with a brush: 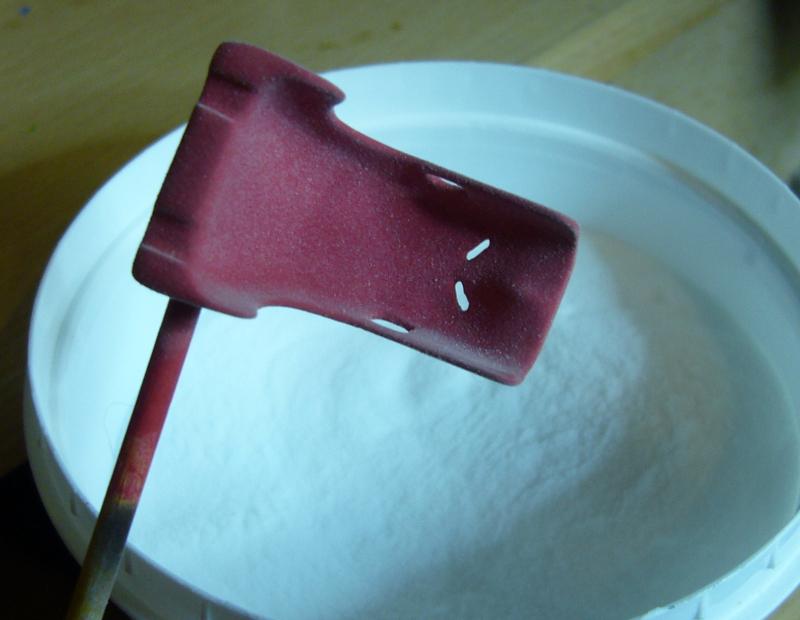 5. Finaly flat red is airbrushed to the seat. Be very careful and set up your airbrush to use very little color and much more air. You have to avoid wet spots, or the seat is ruined. Let it dry completly, if you like you can airbrush flat clear coat to make the texture more resistant. Or you can use your fingertips and rub some texture of to give it a dirty, used look. The final result, this is my 107C seat: 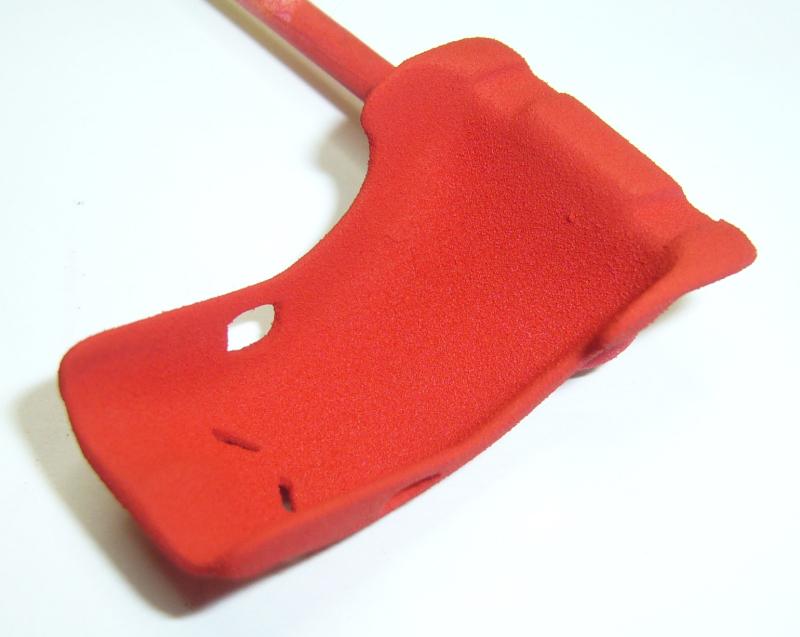 Merry christmas! |
|
Deleted
Deleted Member
Posts: 0
|
Post by Deleted on Dec 26, 2015 13:22:16 GMT -5
#9 Steering wheel, cockpit Steering wheel is ready, the cockpit parts and the dashboard is covered in CF decals. Currently working on the seat belt. The steering wheel got a light dry brush to simulat some dirt: 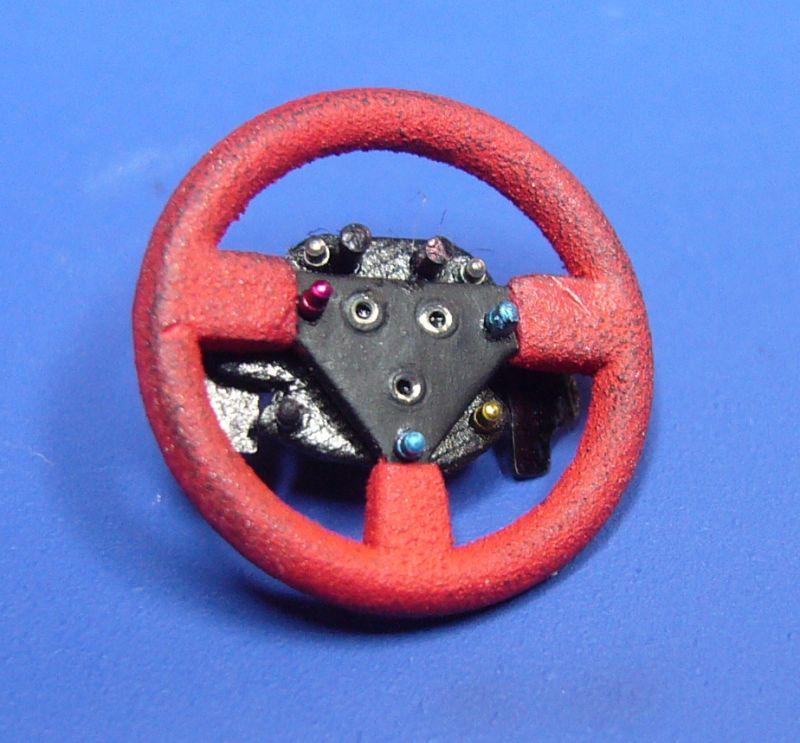 and this is the finished cockpit waitung for the seat: 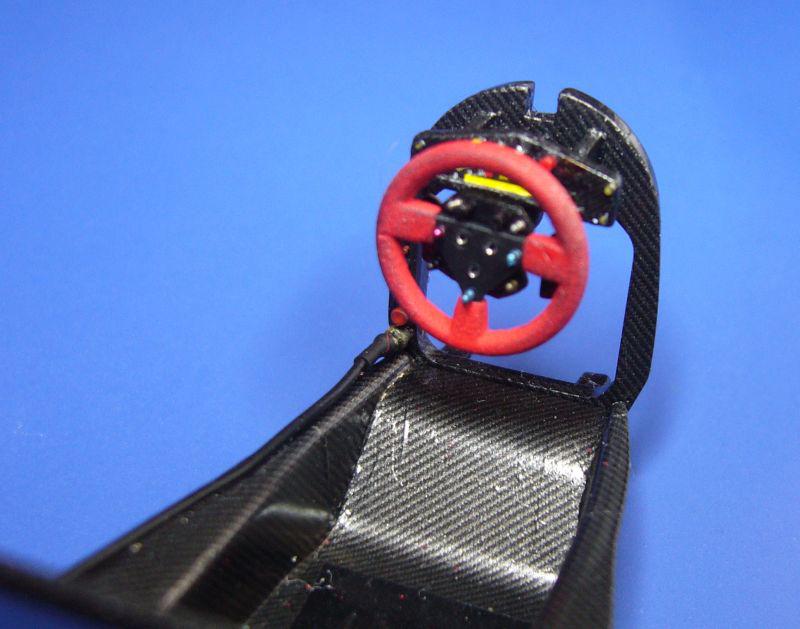 CU |
|
|
|
Post by Calvin on Dec 26, 2015 16:06:33 GMT -5
This is very impressive!
|
|
Deleted
Deleted Member
Posts: 0
|
Post by Deleted on Dec 28, 2015 13:17:51 GMT -5
#10 Seat belts Seatbelts are ready. I used etch parts from my spare box and Leukosilk tape to make them. Gave them a wash with very thin black water and glued them in space. So, cockpit is finished and ready to install: 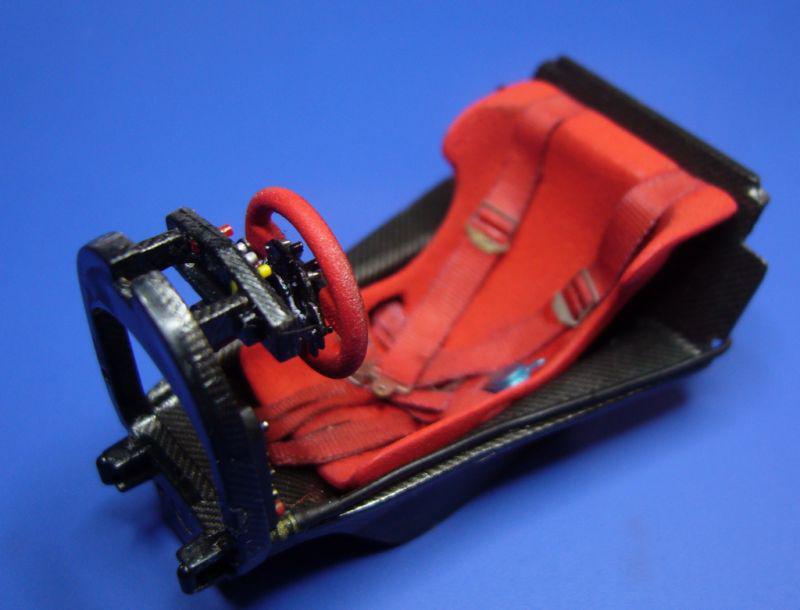 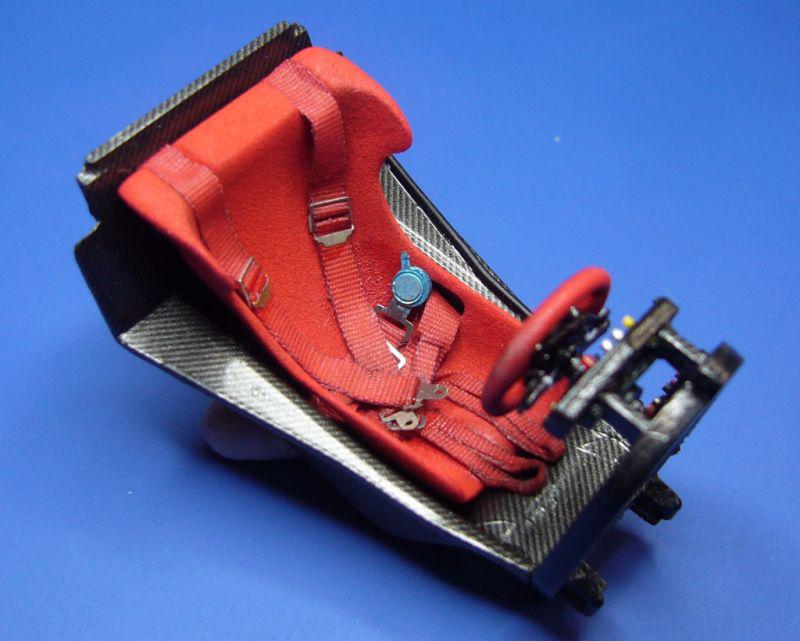 |
|
|
|
Post by shunter on Jan 1, 2016 19:04:54 GMT -5
This was a beautiful car and your work and details so far are exceptional....Please bring on more.
|
|
Deleted
Deleted Member
Posts: 0
|
Post by Deleted on Jan 2, 2016 7:05:44 GMT -5
I agree /\ never knew the kit was so messed up! /\
|
|
Deleted
Deleted Member
Posts: 0
|
Post by Deleted on Jan 4, 2016 8:48:53 GMT -5
#11 Painting Every car with such a complicated paint scheme has the same problem. What should i paint, what can be realised with decals. Looking at the Studio27 decal sheet brings some more problems. 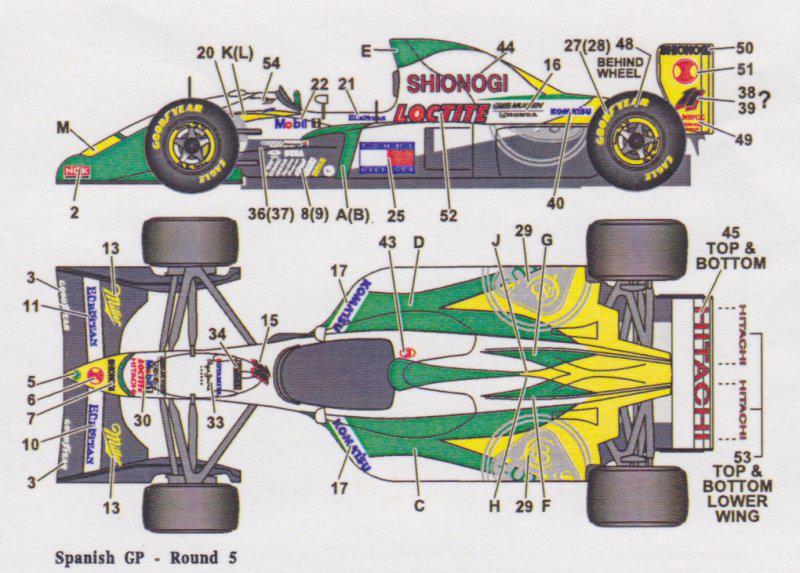 - I have a yellow decal for the nose (which is way to big), but no decals for the big yellow areas or the rear wing endplates - what is a matching color? Zero Paints Camel Yellow looks good to me. - The green of the decals is totally wrong, this should be darker (and metallic?), British Racing green maybe? - The green and yellow parts are surrounded by thin black lines, nearly impossible to airbrush I am still looking for a way to get this done, maybe i will use the decals to make templates, or bring the decals on the car and mask and overpaint them? For the beginning i've airbrushed the bottom half in black. 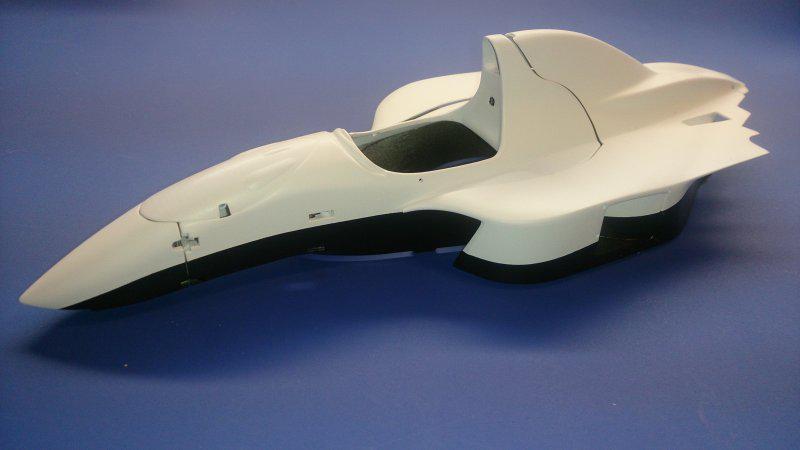 That's it for now. Thanks for your kind comments! |
|
|
|
Post by Calvin on Jan 4, 2016 13:50:51 GMT -5
Yeah this is one very complicated scheme! It would make my mind spin!
|
|
pg265
Front Runner
 
Posts: 231 
|
Post by pg265 on Jan 5, 2016 2:07:52 GMT -5
Hi,
Beautiful!
Pascal
|
|