Deleted
Deleted Member
Posts: 0
|
Post by Deleted on Sept 11, 2014 16:59:13 GMT -5
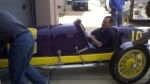
Hello everybody! I start my experience on this forum with my first singleseater project from many years... For so long time, I tried to collect all the World Champion cars of the 1500 cc Formula 1 (1961-1965), in 1/24 scale... all the cars had been reproduced in this scale by South Eastern Finecast, except the 1964 Ferrari 158... the only way to get this one seemed to convert an old Cox slot kit, but at a very high price... Some years ago, looking for a cheap offer for the Cox 158 on eBay, I found the resin model of the famed Fernando Pinto from Portugal (I noticed that you know him very well...). The model at that time was sold as "already built"... I wrote to Fernando to ask to him if he could sell it to me in kit form, but he answered to me that the kit was simply not available... this year I noticed that Pinto had started the production of several F1 resin kits, among them la 158... I immediately purchased the kit and I finally felt free to start the buildings.... The first model was the first champ: the 156 "sharknose" Ferrari This is one of the most reproduced racing cars in the scale models' world: impossible to remember all the 1/43rd replicas, but we have also two 1/20 kits (Model Factory Hiro and Revival), some awesome diecasts in 1/18 scale (Exoto, CMC), and a 1/12 resin kit (MG models)... The only 1/24 kit available still today is the one of the english firm South Eastern Finecast, a very old white metal kit from the '60s still produced in its original conditions...  Here are the pieces:  |
|
Deleted
Deleted Member
Posts: 0
|
Post by Deleted on Sept 11, 2014 20:02:29 GMT -5
Modellismo Leonardo made a nice 1/24th Sharknose and FPPM Fernanda Pinto still makes a nice 1/24th resin Sharknose. They are alot better than the South Eastern kit.
|
|
Deleted
Deleted Member
Posts: 0
|
Post by Deleted on Sept 12, 2014 2:44:13 GMT -5
You're right, Tommy, but Modellismo Leonardo's is out of production from a long time and very, very hard to find, while at the moment (at least according to what I saw on eBay) the Fernando Pinto's kit is not available... in any case, when the Pinto model was issued (I honestly don't remember the kit version), I had already purchased the SEF kit, and I didn't want to spend more money on this subject...
I tried to improve the SEF kit with the Fernando Pinto's wire wheels and with the modifications that I will show..
The same thing about the P57 BRM ('62 champ)... I noticed that Pinto recently issued is own kit (very well done, although with wrong wheels), but I already had the SEF kit in my stock... |
|
Deleted
Deleted Member
Posts: 0
|
Post by Deleted on Sept 12, 2014 7:42:34 GMT -5
I tried to improve the SEF kit with the Fernando Pinto's wire wheels and with the modifications that I will show..
The same thing about the P57 BRM ('62 champ)... I noticed that Pinto recently issued is own kit (very well done, although with wrong wheels), but I already had the SEF kit in my stock... Can't wait to see your model. The BRM wheels on the FPPM were a disappointment and are wrong for the 1962 car. I think that was a very old model done over 15 years ago as he now gets the details more accurate. I have had a SEF Sharknose kit also for many years but put it to the side after ML came out with their kit 10 years ago. Hope that FPPM can do more 1950's and 1960's Ferrari F1 cars some day, and maybe a few more BRM's from the 1960's and early 1970's also. He says he will!! |
|
Deleted
Deleted Member
Posts: 0
|
Post by Deleted on Sept 12, 2014 9:55:44 GMT -5
It would be nice to see here some images of your ML model, Tommy... For what regards the BRM P57 wheels I have some ideas... when the 156 will be finished I should start with this model, and then we will see... For now, some images of the 156 building... After having filed and sanded the body halves...   ...I cut away from the lower half the nose and the tail...  and I added the radiator grille, backed up by a piece of styrene sheet; this assembly was intended to be "locked" in the nose...   then I glued (cyano) and I soldered the nose and tail lower halves to the upper half of the body... after extensive puttying and sanding, this was the result: ![]()   In the same time, I opened the grilles behind the cockpit for the engine air intake...  A detail of the shark nose..  See you the next post... thank you for the attention! |
|
|
|
Post by indy on Sept 12, 2014 10:34:48 GMT -5
Nice start, very good work so far.
Jordan
|
|
|
|
Post by Calvin on Sept 12, 2014 10:40:32 GMT -5
This is already fun to watch! You are really going at! Nice job so far!
|
|
Deleted
Deleted Member
Posts: 0
|
Post by Deleted on Sept 12, 2014 10:49:59 GMT -5
Thank you very much! I hope my English is clear enough when I try to explain my building techniques... please feel free to correct my mistakes, as well as give me your tips...
|
|
|
|
Post by Chris on Sept 12, 2014 10:55:19 GMT -5
Thank You for posting this build, I have the Ferrari 156 and the Lotus 33 in the Wills Finecast and have hesitated a bit to build one until now, I will follow your trials and tribulations and hopefully make my build easier. I have a set of Herb Deeks Wire Wheels and his rare 50's F-1 tires for my build.. Thanks Again... Chris  |
|
Deleted
Deleted Member
Posts: 0
|
Post by Deleted on Sept 12, 2014 11:28:12 GMT -5
Thanks to you! I hope to be helpful to you in building your SEF kits... these are very peculiar kits that require very peculiar building techniques and a lot of thinking before doing every step... but I find them very challenging and fascinating... like the plastic kits by Merit, they are vintage kits of vintage cars, giving often the opportunity to get unique models... I always loved to improve old kits with today's techniques and aftermarket parts...
|
|
Deleted
Deleted Member
Posts: 0
|
Post by Deleted on Sept 12, 2014 11:30:17 GMT -5
... moreover, they are all still available from the factory at a very reasonable price (less than many 1/43 kits)...
|
|
Deleted
Deleted Member
Posts: 0
|
Post by Deleted on Sept 12, 2014 14:59:05 GMT -5
Coming back to building, after these first steps on the body, I concentrated myself on the suspensions and the cockpit...
The main feature of the SEF singleseaters kits is that they are intended to be build in the following phases: 1) assembly and painting of the suspension units; 2) assembly and painting of the cockpit on the lower body half; 3) assembly of the suspension units on the lower body half; 4) assembly of the upper body half on the lower; 5) body painting; 6) assembly of the wheels and ancillaries.
This probably because thes kits were engineered around 45 years ago, when most of car modelers painted their models' bodies with brush and enamel... today, a fastidious masking job is necessary before spraying the body... I made the nose and tail job in order to have a simpler job, localized at the sides only, when the body was closed...
The great limit of these kits is also that no panel lines are provided for the body: thus, after body assembly, puttying and sanding, it's necessary to scribe the separation lines and to put some rivets...
the photos on the next posts...
|
|
|
|
Post by 1961redlegs on Sept 12, 2014 17:04:41 GMT -5
Nice start on this kit, I have one of these that I'll build into Oliver Gienbien's yellow Ferrari.
I'll be looking to this build for pointers, keep up the good work!
|
|
Deleted
Deleted Member
Posts: 0
|
Post by Deleted on Sept 13, 2014 13:28:34 GMT -5
Thank you redlegs... I had this temptation, to build the yellow Ecurie Francorchamps car, in order to make something more unusual... but honestly I prefere the classic version, with the V120° engine... however, I'm doing a version from the same Belgian Grand Prix, the one of Phil Hill.... As I sais, the subsequent steps were the suspensions and the cockpit... first of all, I heavily modified the front and rear dampers... at right, the original part, at left the modified part with Evergreen tubes and metal wire spring...  below, the final result on the rear dampers:  I also drilled the holes for the dampers' pivots, that I reproduced with styrene rod... ![]()   to be continued... |
|
|
|
Post by alterrenner on Sept 13, 2014 19:35:51 GMT -5
You had me entranced when you mentioned soldering a white metal body!
|
|
Deleted
Deleted Member
Posts: 0
|
Post by Deleted on Sept 14, 2014 5:10:37 GMT -5
You must be careful because soldering can easily melt the white metal... in these cases I solder just some points in order to ensure a good bond... I don't trust the superglue alone when there is an heavy work on the body in prewiew... I use a cyanoacrilate glue fron Loctite that's enriched with rubber (Attak Flex Gel) to get more elastic, but it always tend to crack when heavily stressed...
|
|
|
|
Post by Calvin on Sept 14, 2014 18:20:15 GMT -5
Fantastic!
|
|
Deleted
Deleted Member
Posts: 0
|
Post by Deleted on Sept 15, 2014 8:34:46 GMT -5
Thank you Chaparral...
I must beg your pardon: I wrote "damper" for "shock absorber"... I got confused with German ("dampfer")... sorry!
I noticed that the front hub carriers (molded in one piece with brake discs and calipers) didn't featured any steering connecting rod...
I scratchbuilt these with a tube and a rod of Evergreen styrene... first of all, I made a hole in the tube to receive the rod, then I cut the tube and I thinned it at the rod thickness...
 
I further reduced the tube diameter and I glued and Painted the steering rods on the hub carriers: here you can see them with the completed front suspension; the red circle indicates the rod... there is a bit of "dirt" but painting was temporary...

Thank you for your attention... |
|
|
|
Post by indy on Sept 15, 2014 8:39:15 GMT -5
Enjoying the scratchbuilding on this one.
Jordan
|
|
spyder
Front Runner

Posts: 242 
|
Post by spyder on Sept 15, 2014 10:14:10 GMT -5
Hello Beppi. First let me say welcome to this forum. Next, let me say that I am thoroughly enjoying your building the 156. Because an American took it to the World Championship in 1961, American enthusiasts have a special fondness for this car. And, of course, it is a very interesting and attractive racing car. I am enjoying watching you take a "vintage" metal model and upgrade it to such a high standard. Please keep posting your work. You are a great addition to our band of open wheel modelers. spyder.
|
|
Deleted
Deleted Member
Posts: 0
|
Post by Deleted on Sept 15, 2014 10:44:45 GMT -5
Many thanks, Indy and Spyder, you are really kind... After the suspensions, I focused on the cockpit: this is an assembly composed by the sides, the dashboard and the rear wall whit the roll bar... the sides had to be be puttied 'cause the metal was too porous...  after sanding, I marked the points for the holes where I had to put the rivets (the sides were in fact the inner par of the fuel tanks); the blue plastic pieces tha you see are taken from a ribbon of the old Dymo label maker: self-adhesive and flexible, it works very well for tracing straight lines on curved surfaces...  in the holes I put little brass nails, with the head on the outside... I cut the nails on the inner part and sanded...   ...then I covered the part with Matte Aluminium Bare-Metal foil...  I left the rear ends free from BMF for a good Gluing with the rear wall. |
|
Deleted
Deleted Member
Posts: 0
|
Post by Deleted on Sept 16, 2014 8:19:29 GMT -5
Hello! After the cockpit sides, the gear shift... the kit provides the correct control unit with the correct lever bent... the part goes into the right side hollow (see above)... however, the whole part is a bit too simple...  |
|
Deleted
Deleted Member
Posts: 0
|
Post by Deleted on Sept 16, 2014 9:52:28 GMT -5
I eliminated the original lever, and I drilled a hole for the shift rod...  ...then, I took from my spares box a typical Ferrari shift lever grille, that I had to reduce in thickness... I obvoeuly drilled also the hole for the lever...  the lever itself was reproduce with a simple pin, bent in the correct angle...  the lever-grille-lever box asembly was then glues to its place.   After this step, I made the gear shift rod with an aluminium tube with a little Evergreen tube collar (painted in black)...  after having assembled the sides with the rear wall, I added a styrene lower wall (there was an unacceptable empty space) and I drilled a hole for the shift rod (red circle)...  This was the final result, with the rod in place...  Next step: the dashboard |
|
|
|
Post by indy on Sept 16, 2014 10:25:44 GMT -5
Enjoying seeing all of the updates on this one!
Jordan
|
|
|
|
Post by Calvin on Sept 16, 2014 17:59:33 GMT -5
Enjoying seeing all of the updates on this one! Jordan +1 I agree. Nothing boring about this WIP - very entertaining. |
|
|
|
Post by pje on Sept 17, 2014 0:09:46 GMT -5
I'm really enjoying your build. This is the car (along with Phil Hill) that got me interested in F1 way when I was 13 years old in 1961. Whose car and race are you replicating?
Paul Erlendson
|
|
Deleted
Deleted Member
Posts: 0
|
Post by Deleted on Sept 17, 2014 0:53:15 GMT -5
Many thanks to all!
Paul, I'm thinking to Belgian GP version, the first win of the year for Phil Hill.... the SEF kit depicts a first races version, with long engine fairing (ahead of rear wheels).
|
|
|
|
Post by Aurora on Sept 17, 2014 9:36:06 GMT -5
You had me entranced when you mentioned soldering a white metal body! It's great to follow along with the work your posting Bevita. The scratch building will make this special. I must admit that I was stopped in my tracks at your mention of soldering white metal. Even if you only solder a few points, what is your technique to avoid melting the white metal at those points? And are you using low-temperature solder? |
|
Deleted
Deleted Member
Posts: 0
|
Post by Deleted on Sept 17, 2014 11:17:25 GMT -5
Well, first of all I'm not a soldering pro, and I had often melting problems with white metal, even with this model... I repair the melted spots with two-components epoxy putty... in this kind of models you have to use tons of putty, just on the joints where you solder, thus it's not such an issue...
In any case, as in these buildings an heavy sanding, scribing and drilling job is prewiewed, i prefere to get before a very solid bond... on white metal, there is no glue that provides an absolutely solid holding, and some cracking in the middle of a structural part would be a disaster...
I use an electric 60W solder... Usually, I melt a good amount of soldering wire on the solder tip, then I "touch" the joint that I want to solder in few points...
I hope that my uncertain english has been understandable enough,,,
|
|
|
|
Post by Aurora on Sept 17, 2014 13:16:58 GMT -5
Your English is perfectly understandable...thanks for sharing your technique.
I haven't had any success soldering white metal. I've heard that low temp solder, maybe 70° C melting point is the key.
Anyway, your work looks great. It's nice to see an old kit built up.
|
|