|
|
Post by pntmachine on Apr 11, 2013 19:39:09 GMT -5
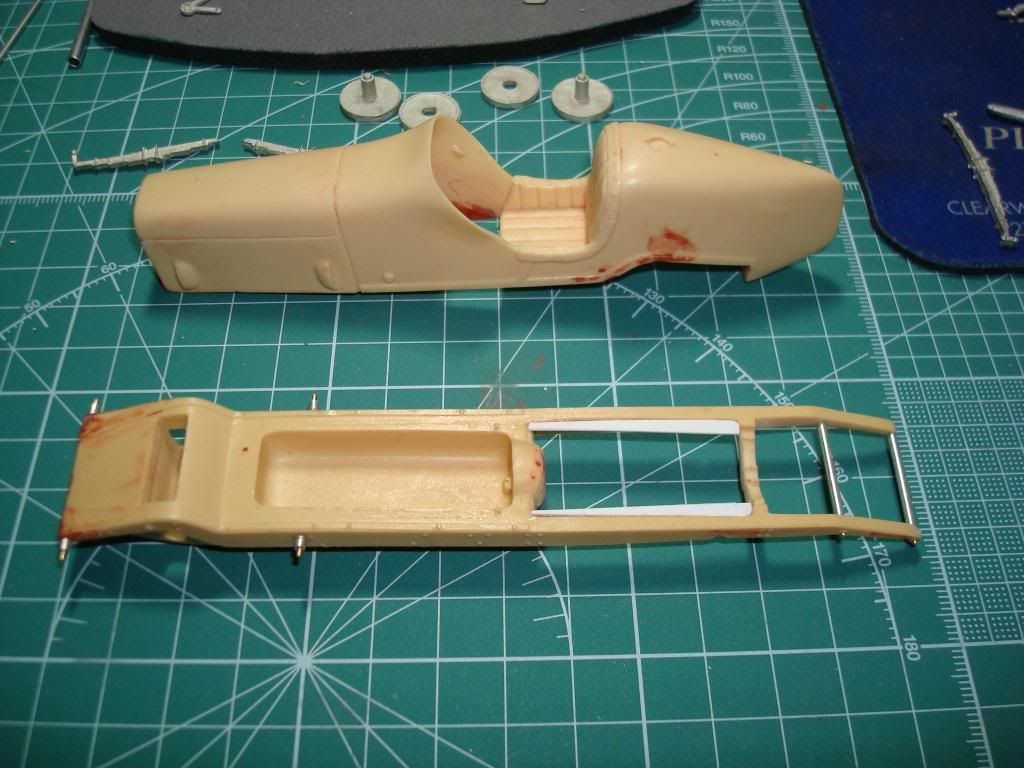
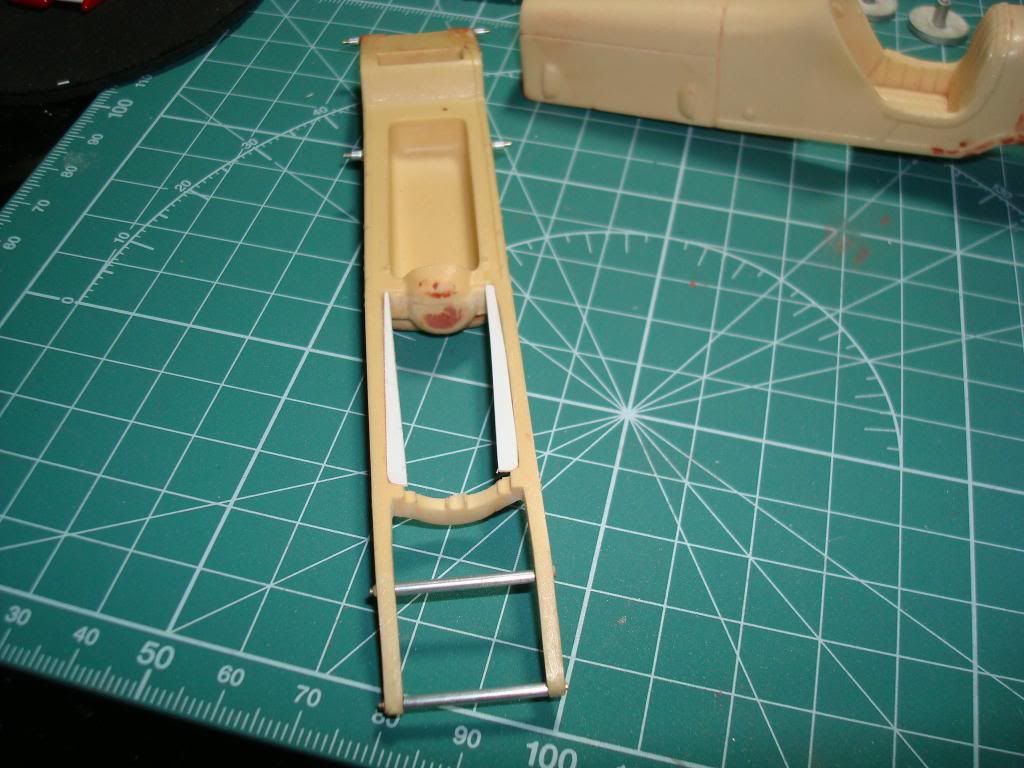
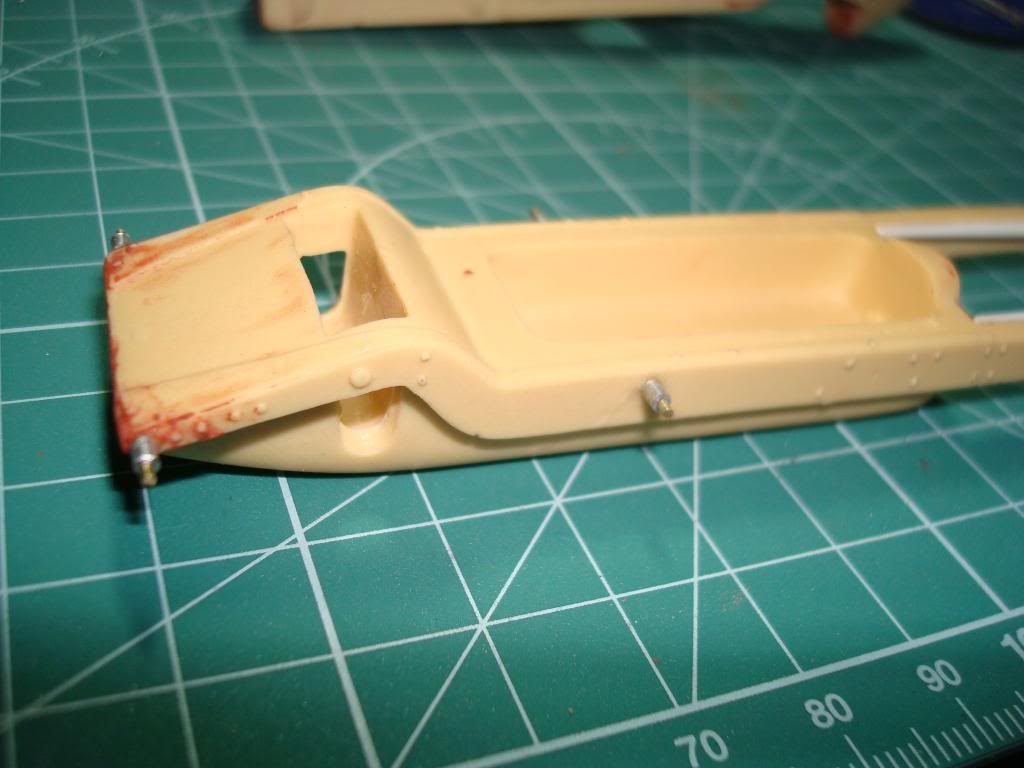
Doing a Bill Jorgenson Miller. Got the chassis pinned for suspension and added the front rods. Had to add some styrene to the frame that is molded on the Etzel chassis. Just some filling left. Almost ready to prime.    Kevin |
|
|
|
Post by Patrick on Apr 11, 2013 21:45:42 GMT -5
Millers are cool in my book. Have you picked a car/color scheme?
Patrick
|
|
|
|
Post by Art Laski on Apr 12, 2013 0:56:55 GMT -5
I agree with Patrick. Looking forward to watching this one.
-Art
|
|
|
|
Post by racerbrown on Apr 12, 2013 6:23:01 GMT -5
i'm ready to learn!
duane
|
|
|
|
Post by jamesharvey on Apr 12, 2013 8:37:02 GMT -5
Thanks for sharing this. I have the same car from Bill and have been considering building it instead of the Ertzel kit I want to keep. You are off to a good start. Like the pictures and look forward to more.
Jim
|
|
|
|
Post by indy on Apr 12, 2013 9:05:19 GMT -5
Gotta love a Miller build!
Jordan
|
|
|
|
Post by cobra276 on Apr 13, 2013 9:54:16 GMT -5
The Etzel Miller was the first resin kit I tried and hooked me into doing more. Can't wait for the progress pictures.
Dave
|
|
|
|
Post by pntmachine on Jan 29, 2024 23:08:53 GMT -5
I got this out the other day and looked thru it to see where it was at and remembered I had started thread on this. Back in 2013 my parents had gotten to the point of needing help so I stepped away for a few years. I came back in 2016 after there passing and started getting back on to get myself motivated. Anyway I got back into this kit and going to post some progress. This is where I am so far.  I removed the .062 aluminum tubing I had on the front rail supports a just went with the .031 brass rod. I painted the frame and prepped the body. I’m missing a few pieces so I have to find some donor parts. I had a lot of filling on the body to get the gap between the frame to look right. There was a lot of missing rivets along the body a lost more during the filling so I removed the remaining. I decided to use some resin rivets on transfer film. I have had it for years but will give it a try. I know it’s used on rail cars and tanks so I’ll see how it goes. The tranny in the picture is from an Etzel kit and I won’t be using it here. I chopped the converter off of the engine case because it’s molded into the frame. I stacked styrene on the lower case to bring it down so it sat at the right height. I als put some on the underneath of the body and used it to help align the body on the frame. On the front spring I made a small frame bracket out of thin styrene to mount it to the frame. This is molded in the frame on the Etzel kit.  |
|
|
|
Post by kyledehart5 on Jan 29, 2024 23:19:32 GMT -5
Sweet!! I’m in to follow this
|
|
|
|
Post by jamesharvey on Jan 30, 2024 14:28:44 GMT -5
Kevin,
I still have this kit from Bill and the Ertzel. What parts are you missing? Please let me know and I'll see what I can do to help. Glad you are getting back to this.
Jim
|
|
|
|
Post by pntmachine on Jan 30, 2024 20:35:32 GMT -5
Kevin, I still have this kit from Bill and the Ertzel. What parts are you missing? Please let me know and I'll see what I can do to help. Glad you are getting back to this. Jim Thanks Jim I am working thru some of it now and I really appreciate that. I work out a gear box by modifying one from a plastic kit. I cut it off and filled it with bondo. Then took some rat tail files and flat jewelers file and shrunk it down some. I will have to mock up some pedals as well but I think it’s going to work. It didn’t have axles as well but had the rotors and front stub axles. I think I might be able to make those as well. Front will be a little tricky. The grill will be the hardest to come up with. I don’t know if ARM made a photoetch insert or not. Here’s a pic of what I have going on with the tranny. Got the body primed as well.   |
|
|
|
Post by kyledehart5 on Jan 30, 2024 22:08:54 GMT -5
Great work!! Everything is looking wonderful.
|
|
|
|
Post by jamesharvey on Jan 31, 2024 11:12:49 GMT -5
Nice work and solution on the gear box. The body looks good on the frame. Chris Ertzel cast the grill shell and radiator separately in metal and the grill inset is photo etched so there are three pieces to it in his kit. Bill cast the grill shell as a solid piece in resin so there is no radiator. I don't think he did an insert. The grill lines are horizontal. I am not a perfectionist, so I have made photocopies of some grill inserts and of some photos, reduced to scale, to fill in blank grill openings. Not great but maybe better than a blank. Thanks for sharing your progress. Good on you.
Jim
|
|
|
|
Post by pntmachine on Feb 1, 2024 9:52:32 GMT -5
I got the body and chassis painted.  I am working on the axles and linkage. For the front axle I telescoped a 3/32 tube over a 1/16 rod, bent the offset and crimped the tubing to form a hub to go in the stub axles. The steering linkage covers the bottom and the pitman covers the top on the left side. On the exposed top right I am going to add a cut off aluminum rod to fill the slot and look like a king pin in the hub. For the rear I did the same 3/32 over 1/16 rod to and left a little sticking out for the knock offs to mount which I don’t have yet. I the created short stub axles out of 1/8 and inserted into the disks similar to the front. I then cut a 1/8 the length between the disk stops on an Etzel kit axle to sleeve over the 3/32 to form the stops. Seems like a lot but it kept me from have to glue the disks straight to the axle. The steering hardware came from a white metal upgrade package for a Kurtis from ARM. I just cut the loop open and formed a pin.   I got the tranny and steering box in and mocked up some pedals. Little larger in scale but was the smallest aluminum rod I had.  |
|
|
|
Post by alwaysindy on Feb 1, 2024 10:28:29 GMT -5
Kevin:
This is an outstanding piece! I love the scratch building, and the paint is spot-on. Keep up the good work!
Tim
|
|
|
|
Post by jamesharvey on Feb 1, 2024 12:18:15 GMT -5
Kevin,
Everything that Tim said. The axles are clever and look great. Your gold paint job is terrific. What paint did you use? The attachment points for the rear springs that you added on the frame are an example of real skill. Bill's kits take a fair amount of scratch building and you are doing great.
Jim
|
|
|
|
Post by Art Laski on Feb 2, 2024 12:20:48 GMT -5
It's coming to life! Loving the progress.
|
|
|
|
Post by kyledehart5 on Feb 2, 2024 19:46:42 GMT -5
I can only agree with everything that has already been said. Absolutely brilliant work.
|
|
|
|
Post by pntmachine on Feb 3, 2024 12:13:16 GMT -5
Kevin, Everything that Tim said. The axles are clever and look great. Your gold paint job is terrific. What paint did you use? The attachment points for the rear springs that you added on the frame are an example of real skill. Bill's kits take a fair amount of scratch building and you are doing great. Jim Jim I used Tamiya Gold TS 21 and I am going to use Gloss TS13 for the clear. I use the semi more than I do the gloss but on this one I am going full gloss. I agree Bill’s can be a challenge but it’s been fun. Thanks for the encouragement. |
|
|
|
Post by pntmachine on Feb 3, 2024 12:31:44 GMT -5
|
|
|
|
Post by kyledehart5 on Feb 4, 2024 0:08:32 GMT -5
Stunning!! I love it. This is coming along really well
|
|
jj66
Podium Finisher
  
Posts: 363
|
Post by jj66 on Feb 4, 2024 11:16:19 GMT -5
Fantastic work! And big improvement on the front axle
|
|
|
|
Post by jamesharvey on Feb 4, 2024 20:25:43 GMT -5
Really stunning and clever work on the axles. Your finished product is really crisp. Never would have thought about the small pin holes in the brake drums and how you pulled that off. Thanks for the paint info. This car has always stood out to me in the IMS Museum. I understand that part of it is original but also includes pieces for other cars of that era. Did the wheels and tires come with the kit? They look great. Please continue to wow us.
Jim
|
|
|
|
Post by pntmachine on Feb 5, 2024 9:26:25 GMT -5
|
|
|
|
Post by kyledehart5 on Feb 5, 2024 19:20:36 GMT -5
That is beautiful.
|
|
|
|
Post by pntmachine on Feb 9, 2024 16:48:27 GMT -5
|
|
|
|
Post by alwaysindy on Feb 9, 2024 17:05:56 GMT -5
Kevin:
I now appoint you as “Early Indycar Grill Master.” Please make about a dozen of these so we can update our old Miller and Duesenburg builds and kits!
Seriously, I believe you just hit a home run and it’s not even baseball season…
Keep it up: this is gonna be awesome!
Tim
|
|
|
|
Post by jamesharvey on Feb 9, 2024 17:07:50 GMT -5
Really clever. It looks great. Your attention to detail is remarkable.
Thanks for sharing.
Jim
|
|
|
|
Post by alwaysindy on Feb 9, 2024 17:15:33 GMT -5
Kevin:
Regarding the color of the numbers: I looked, but couldn’t find the thread. I believe it was Michael that knew the story(?). The car was NOT gold, but when it was sold right before the race(?) it was painted gold but retained the numbers that matched the original paint. It was a while back and my memory is hazy…
Tim
|
|
|
|
Post by alwaysindy on Feb 9, 2024 17:29:02 GMT -5
Kevin:
From Indycals website…
“Although it was his first start at Indy, Meyer is not considered a rookie winner as he drove 41 laps in releif of Wilbur Shaw in 1927. Nevertheless, 1928 was the third consecutive year that a first year starter won the 500 - the only time in history that has happened, (the only other time first year starter won in consecutive years was 2000 and 2001).
Driving for car owner Alden Sampson, Meyer took the lead with 19 laps left to take what would be his first of three Indianapolis 500 wins. This was also the first year the winner got to take home the pace car.
This car was previously owned by Alfred Champion - founder of AC Delco and Champion Spark Plug. Prior to 1928 the car was being used to test an experimental new fuel pump for AC Delco. The 'blue and red' numbers were representative of the AC Delco company colors. When Champion died in October 1927, the car was sold to Alden Sampson and put into service for the 1928 Indianapolis 500.”
So I guess it was gold all along?
Tim
|
|