|
|
Post by Calvin on Aug 9, 2011 0:07:07 GMT -5
A few weeks ago when I was really in a 50's mood. I picked up one of the new Kurtis' at the hobby store for $15. Its a pretty simple kit but it should be fun. 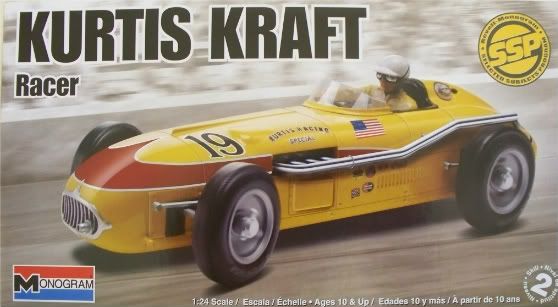  So, after I got the kit I got the upgrade kit from Tim and Russ which I got it today! It looks really good! Lots of hard work went into doing this upgrade resin kit. Thanks guys!  ----------------------------------------------------------------------------------------------------------------------------- So being the "Machine" that supposedly em, I started off an hour ago an look were I'm currently at thus far! LOL  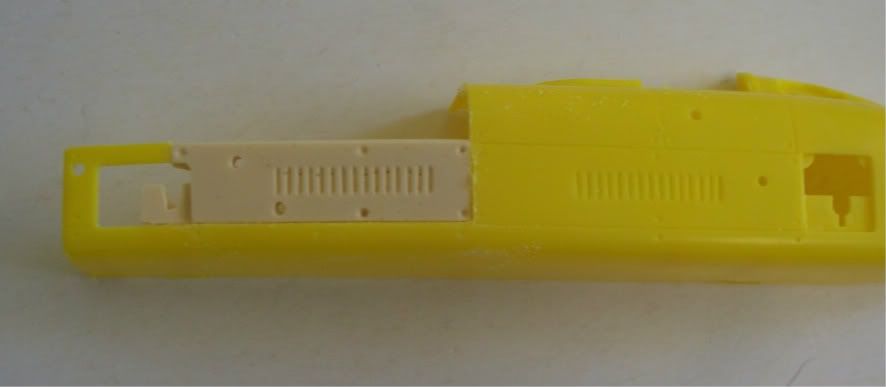 ----------------------------------------------------------------------------------------------------------------------- 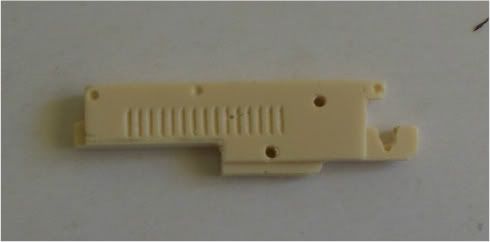 This is where I had to cut out the area for the exhaust pipe which is funny enough on the bottom right side of the car.  ---------------------------------------------------------------------------------------------------------------------------  Then I glued in the fire wall/transmission along with the two halves of the car. I also had to take some rod and beef up the front end to keep things in line.  Next I sanded off that hump on the hood, then glue up the original spot for the exhaust exit. This model so far reminds me of thanksgiving dinner, you work hours to make the meal and when its done it only takes 15mins to wipe it out! Well same with this, Tim and Russ have worked for months on this upgrade kit and then some punk like myself comes along and glues it up in a hour. ;D |
|
Deleted
Deleted Member
Posts: 0
|
Post by Deleted on Aug 9, 2011 8:08:43 GMT -5
Great Job So far, keep the pics coming
|
|
Deleted
Deleted Member
Posts: 0
|
Post by Deleted on Aug 10, 2011 10:27:18 GMT -5
Yeah, good job. gonna enjoy watching this. more pics please
|
|
|
|
Post by Calvin on Aug 18, 2011 23:50:45 GMT -5
This is kind of a double post from my other post in the general forum but it needs to with this post also. This is a very impressive web site but sadly the guy who built it, Rex Dean from what I hear past away last week.  www.vukovichaccident.com/index.html www.vukovichaccident.com/index.html |
|
|
|
Post by Calvin on Sept 25, 2011 14:24:59 GMT -5
I almost forgot to show these pics..... I super glued in the firewall/Trans. into place. I used styrene to fill in the open places around in the cockpit. The used milliput to fill in the gaps.   -------------------------------------------------------------------------------------------------------------------- I simply "Dremeled" out the grill and I'm going to use, just like everyone else uses, the Custom Grills: Horizontal Bar |
|
|
|
Post by Calvin on Oct 4, 2011 0:24:32 GMT -5
I think I want to use Tamiya TS-50 Mica Blue on this build?
|
|
|
|
Post by Calvin on Oct 4, 2011 1:45:38 GMT -5
Did this car have a seat belt?
|
|
|
|
Post by mrindy77 on Oct 4, 2011 6:42:40 GMT -5
This is snippet from a detailed accident investigation report... In reference to safety restraints in regards to the accident, it is safe to say that in those days racecar safety was not an area that got a lot of attention. In the case of Vukovich he was wearing basically the standard seatbelt arrangement that most drivers wore. This consisted of a lap belt and something called a Sam Brown belt which was a leather harness that went around the driver's midsection and then, in conjunction with a strap that went over the driver's shoulder and connected to the frame of the car, kept the driver from being pulled to the right by centrifugal forces in the turns. But the Sam Brown belt did little to keep the driver from going forward in an impact and that is exactly what happened to Vukovich when the nose of the car made initial contact with the ground. It is deceiving to look at photos of some of the drivers in those days because the way the belt did appear to the uneducated eye was that it could have been a full five point harness system. But that was not the case. Part of the belt system can be seen below...this is proir to the start of race.  |
|
|
|
Post by Calvin on Oct 4, 2011 14:43:27 GMT -5
Thanks for the info!
|
|
|
|
Post by Calvin on Oct 4, 2011 23:14:55 GMT -5
|
|
|
|
Post by Calvin on Oct 4, 2011 23:22:08 GMT -5
The edge of the cockpit upholstery needs to be added to the resin side attachment. Then Milliput the lip and sculpt out the rest to line up with the original upholstery line. 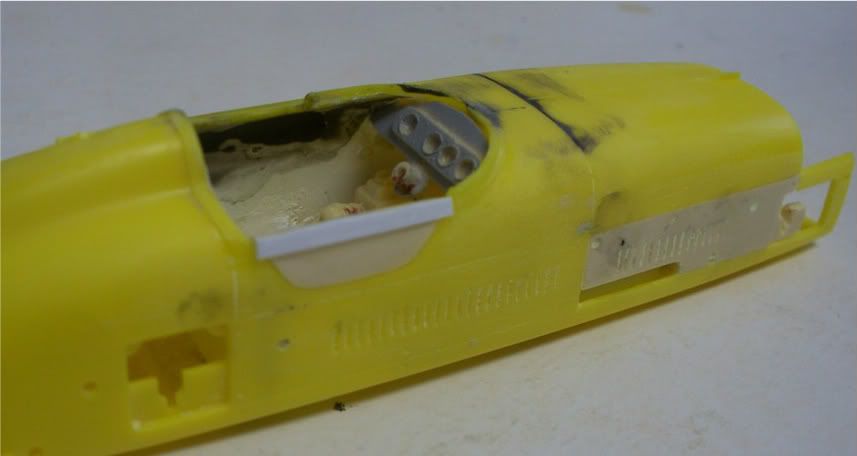 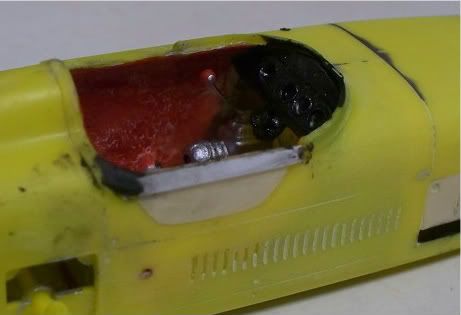 |
|
|
|
Post by Calvin on Oct 4, 2011 23:23:53 GMT -5
Add the main suspension parts. And paint up the insides with a brush. 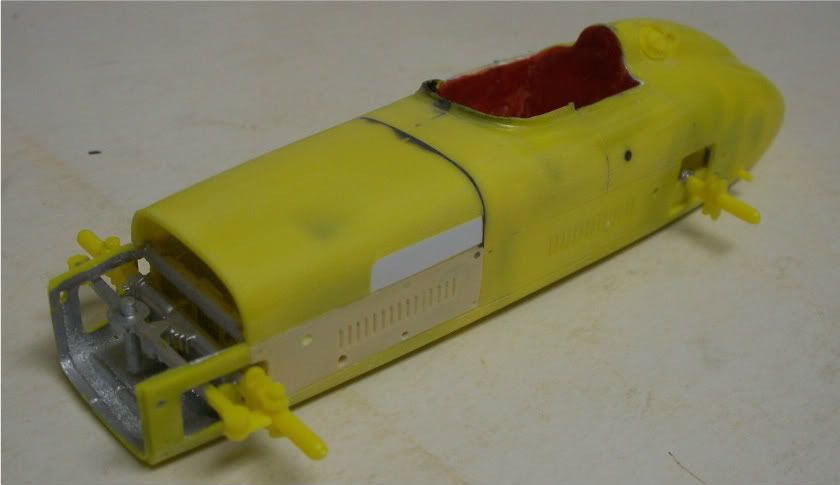 |
|
Deleted
Deleted Member
Posts: 0
|
Post by Deleted on Oct 12, 2011 19:55:19 GMT -5
Good looking resin set. I had no idea that that was available when I did mine. I used the Mica blue and I thought it looked good. I didn't do anything with the wheels and I should have  |
|
|
|
Post by Calvin on Oct 12, 2011 20:05:56 GMT -5
Good looking resin set. I had no idea that that was available when I did mine. I used the Mica blue and I thought it looked good. I didn't do anything with the wheels and I should have Your build looks great! The Mica Blue looks good for this car IMO also. Alwaysindy has a thread about this resin kit. mb2501.proboards.com/index.cgi?board=4162&action=display&thread=2900 |
|
|
|
Post by indycals on Oct 12, 2011 20:19:46 GMT -5
Great looking build Daryl! And I too think Mica blue is the color for this car.
|
|
|
|
Post by Patrick on Oct 12, 2011 22:47:09 GMT -5
I'd like to chime in and state that the resin kit is a great start for the famous Kurtis-Ferrari! (Go crazy and make a Chevy 6 cyl. have a twin cam head with 3 duel throat Webers) Only a simple modification to the nose and the decal set will give a good representation of that car, too. That a way to do it Calvin. Great process as always.
Patrick
|
|
|
|
Post by sandysixtysfan on Oct 13, 2011 8:34:47 GMT -5
Good looking resin set. I had no idea that that was available when I did mine. I used the Mica blue and I thought it looked good. I didn't do anything with the wheels and I should have  Really nice work Daryl, good looking model! Tim's resin set is highly recommended if you build another Kurtis. Sandy |
|
|
|
Post by Calvin on Oct 27, 2011 0:09:21 GMT -5
|
|
|
|
Post by Calvin on Oct 28, 2011 18:39:42 GMT -5
|
|
|
|
Post by kurzheck on Oct 28, 2011 19:05:08 GMT -5
Gorgeous!
|
|
|
|
Post by racerbrown on Oct 28, 2011 22:56:37 GMT -5
WOW! that color really pops!  duane |
|
|
|
Post by Calvin on Oct 29, 2011 0:54:22 GMT -5
|
|
Deleted
Deleted Member
Posts: 0
|
Post by Deleted on Oct 29, 2011 20:54:29 GMT -5
Looking good Calvin! I didn't see many mistakes!
BEST YOU YOU!
Russ
|
|
|
|
Post by Calvin on Nov 1, 2011 21:41:38 GMT -5
Its done now. It came out OK. I had to fix a lot of silly mistakes, but got lucky on a few. I over-killed the wheels with the wash but the overall build is a good solid B- grade in my book. I'm always trying different ways of shooting my builds but my idea for these shots, well aren't the best LOL......I still have a lot to learn. I know what I want in a picture but getting to know what the camera likes is a different story.  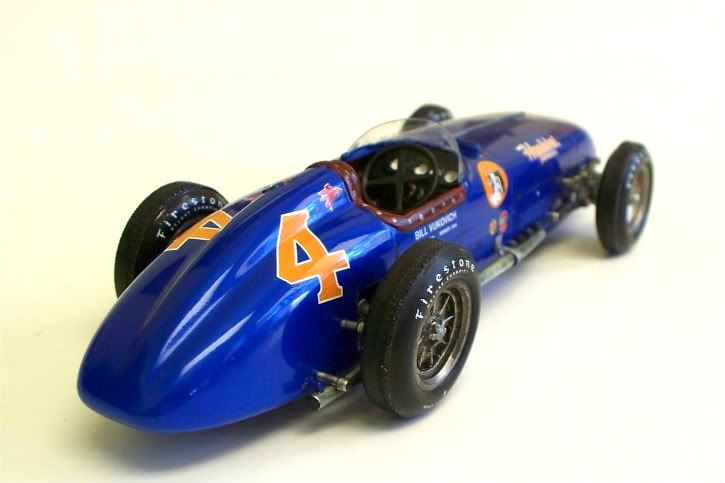  |
|
|
|
Post by racerbrown on Nov 1, 2011 22:03:22 GMT -5
great job calvin!
thanks for sharing.
duane
|
|
Deleted
Deleted Member
Posts: 0
|
Post by Deleted on Nov 1, 2011 23:56:25 GMT -5
Look great Calvin!!! Tires good too!
Best to you!
Russ
|
|
|
|
Post by Calvin on Nov 2, 2011 1:51:27 GMT -5
Oh I forgot to mention, I had to raise the rear axle, because the kit way is too damn low. Which makes the ride height too high in the rear. I dont know if anyone else found that problem building this kit?
BTW I'm going to redo my pics, just so that you guys can actually see the model easier.
|
|
|
|
Post by Calvin on Nov 2, 2011 3:08:57 GMT -5
I'm working on better pics, but I need better lighting.   |
|
|
|
Post by macsparty on Nov 2, 2011 7:26:40 GMT -5
Man, that's a thing of beauty right there. You sure know how to treat a kit!
|
|
|
|
Post by Calvin on Nov 2, 2011 12:00:16 GMT -5
FYI, I used a Kodak EasyShare z885 8.1 mega pixel.
So you be the judge if I'm getting the fullest I possibly can out of it? (I doubt it)
|
|