|
|
Post by Gary Davis on Feb 10, 2017 22:27:56 GMT -5
This is the first part of a typical West Coast Race team that did the Regional type circuit back in the late 60s and 70s. Running at West coast tracks from Washington,Oregon, Calif. Also as far east Arizona,Neveda,Utah,Colorado, Montana. This is going to be a 4 piece build... Starting with the 72 Chevy pickup, A slide-in Camper, a 60s type Dirt Sprintcar and Race Trailer. I started with the camper and truck. I drew a set of plans for the slide-in camper as I really didn't want to cut up that AMT/Moebius camper to fit. This camper is made to represent a permanent setting on this truck. In the first set of pics I have cut all the pieces out of card stock and taped them together for a rough look and see. The second set of pics are of the Evergreen Plastic and taped together again to see how everything fits. To this point all the measurements have been pretty darn close. A little sanding here and there but it's going to work. All the Trim and roof vents and windows with trim (and of course curtains) still need to be fabbed. But...this is the start.... CARD STOCK MOCK-UP... 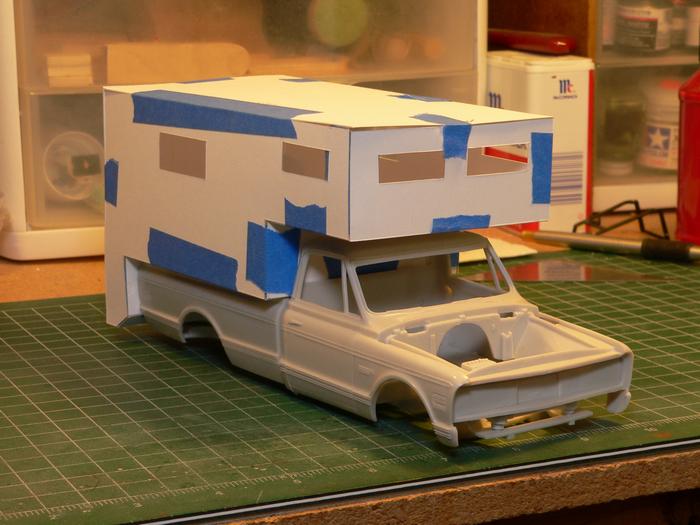 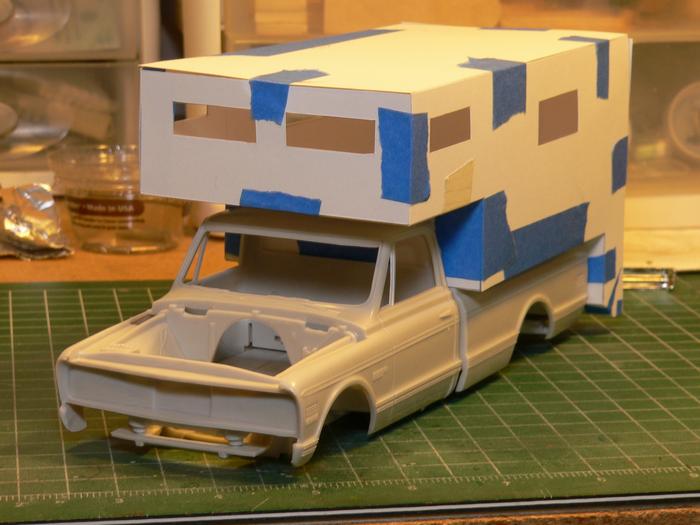 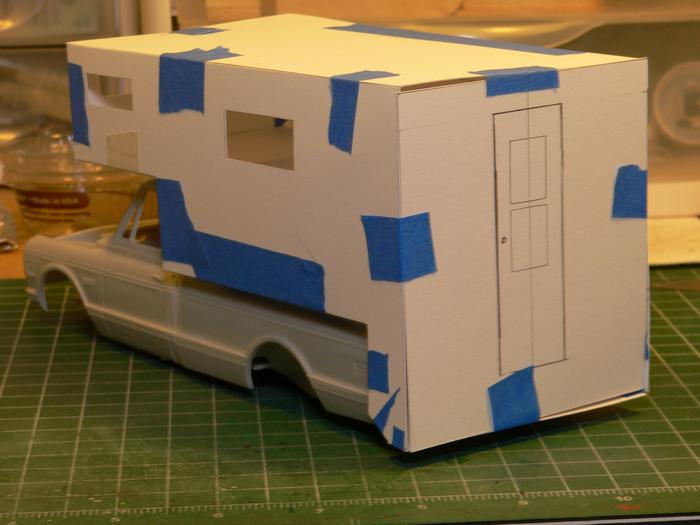 PLASTIC W/ MINOR CHANGES 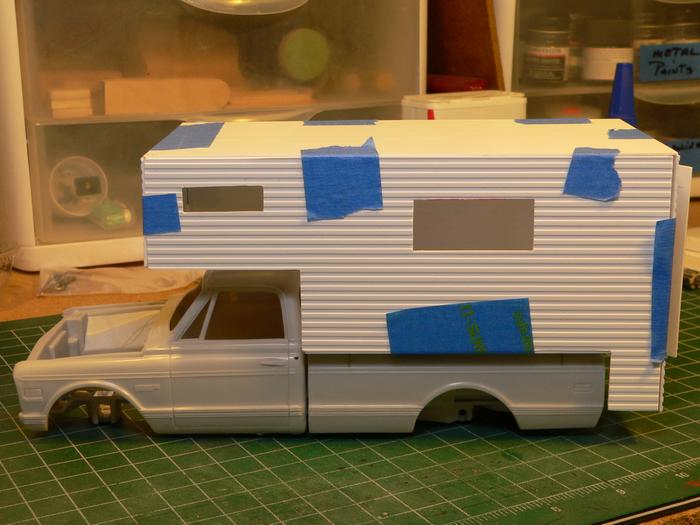 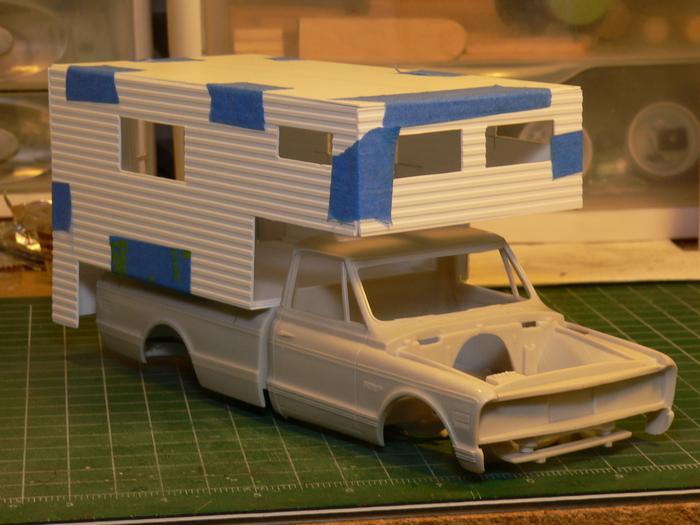 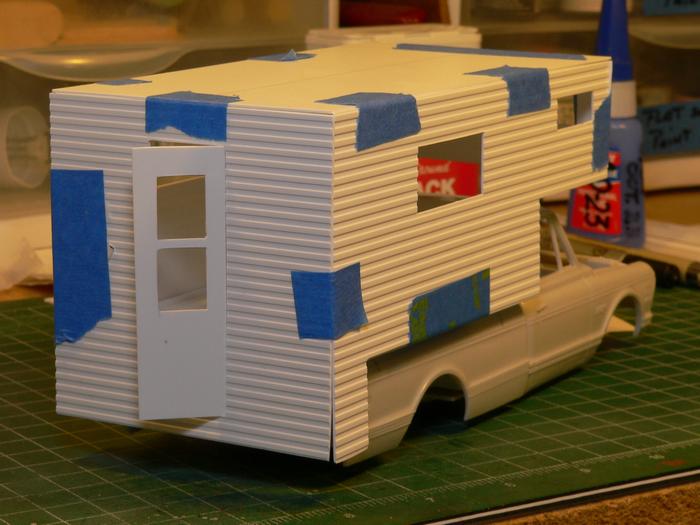 Thanks for looking in folks.... |
|
|
|
Post by clm1545 on Feb 10, 2017 22:41:37 GMT -5
This is going to be way cool, Gary.
|
|
|
|
Post by indy on Feb 10, 2017 23:16:41 GMT -5
Time to weld the plastic! It looks really good, I like the planning stages - really shows off what you do.
Jordan
|
|
|
|
Post by kip on Feb 11, 2017 16:14:55 GMT -5
You have come a long way since I first saw this. The plastic walls look just right.
kip
|
|
|
|
Post by Gary Davis on Feb 11, 2017 21:43:24 GMT -5
Thanks Guys....I've been in the shop ALL day figuring out all the glue supports where all the wall pieces connect. I think I've got them finished. Now...I've got to mock everything up again to see were things need to be adjusted. Then... All the trim on the windows (along with the windows) and all the edges need to be made. I'll post pics after ALL the out side window trim is finished....
|
|
|
|
Post by Art Laski on Feb 12, 2017 3:25:55 GMT -5
Hey Gary, this looks like it's going to be a fun one!
|
|
|
|
Post by sandysixtysfan on Feb 12, 2017 8:28:05 GMT -5
This is a VERY cool project. What a great subject. You'll need to find those little 'state' decals that people put on the back of campers and RVs every time they visit a new state!
Sandy
|
|
|
|
Post by Gary Davis on Feb 12, 2017 16:21:40 GMT -5
Thanks ART and Sandy....
Update here..... The glue/wall supports have been fabbed and the bottom ( or base) has been put together and sitting in mock up on the truck. The first picture shows ALL the walls and roof with the glue supports in place. Looking at the Camper base...I think I'm going to add a Bulk Head from floor to ceiling just in front of the big side window for side support. Here are a few pics of what's done....Thanks for looking in....
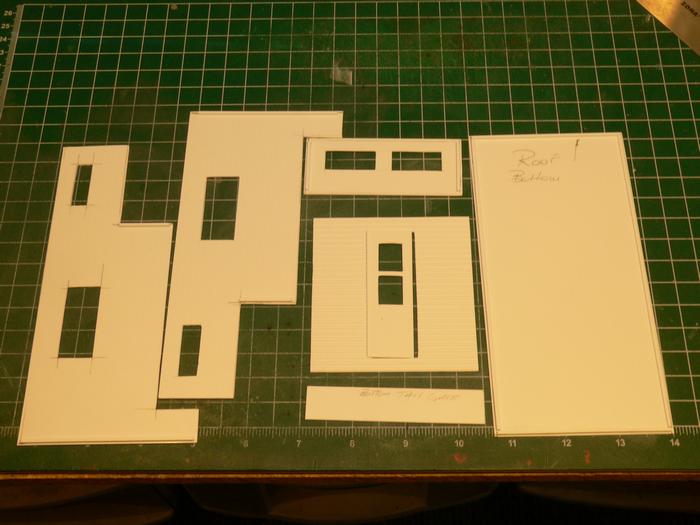
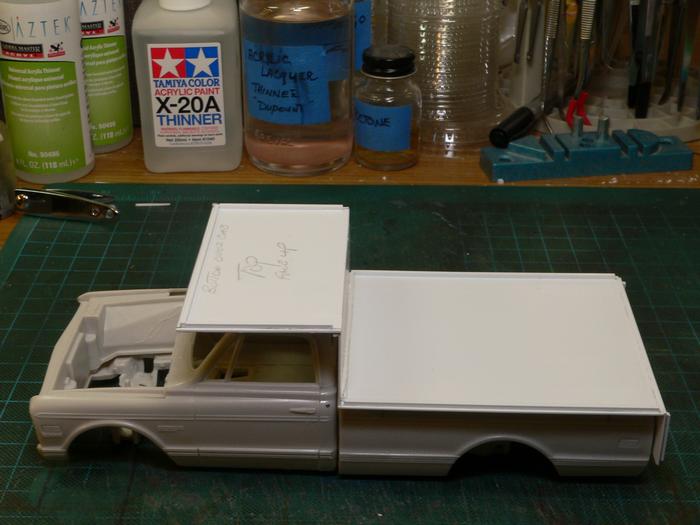
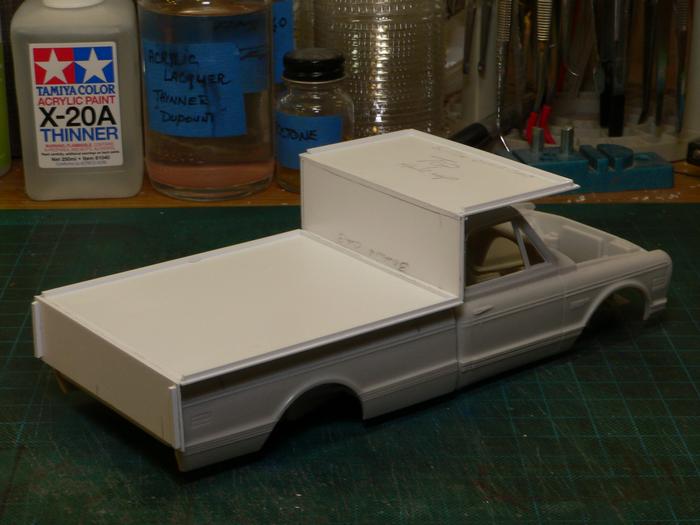
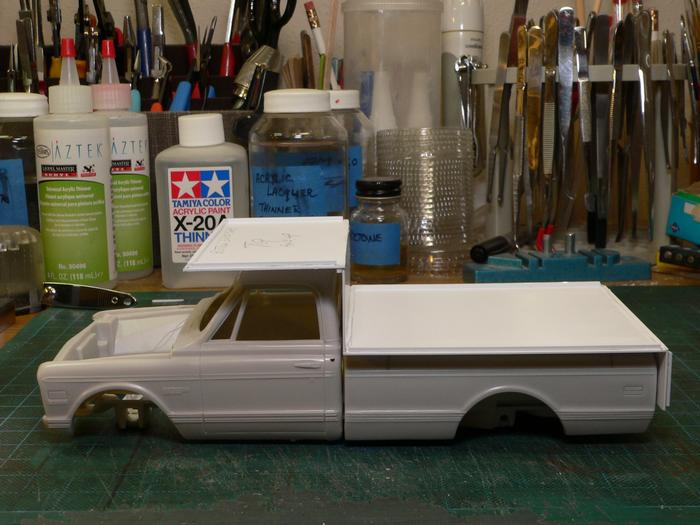
|
|
|
|
Post by racerbrown on Feb 12, 2017 18:24:53 GMT -5
man, this is just crazy cool!  duane |
|
|
|
Post by Gary Davis on Feb 13, 2017 14:46:20 GMT -5
Thanks Duane...The bulk heads are in and man...it makes it really weird...until I put the side on. The bulk heads will help support both sides and the top. Especially if this is picked-up by the camper.
|
|
|
|
Post by Gary Davis on Feb 19, 2017 15:44:43 GMT -5
Thanks for the compliments Wade and Frank.... Here's a small update on the camper...The window frames are built. The Rivets have to be attached on all the perimeters. The Back door frame and the tail light bezels have to be fabbed along with the ladder. Hopefully I can get that done today...There's still a little more that has to be done on each side of this camper like the heater box...and the power receptacle. I'm waiting for the louvers to arrive from Archers. Then I can finish that.... Here's a few mock up pics..... Supports added for the side walls..... 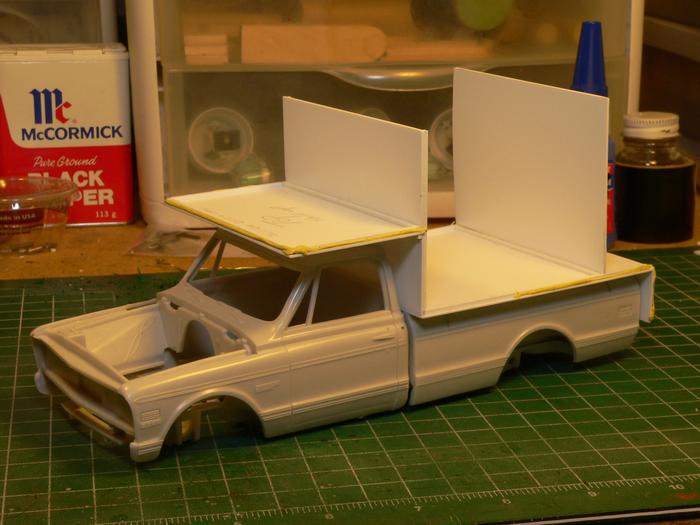 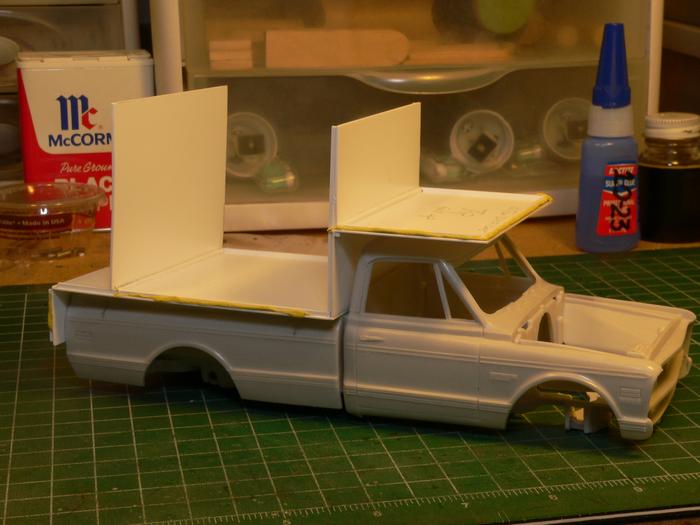 Walls and front in mockup.. 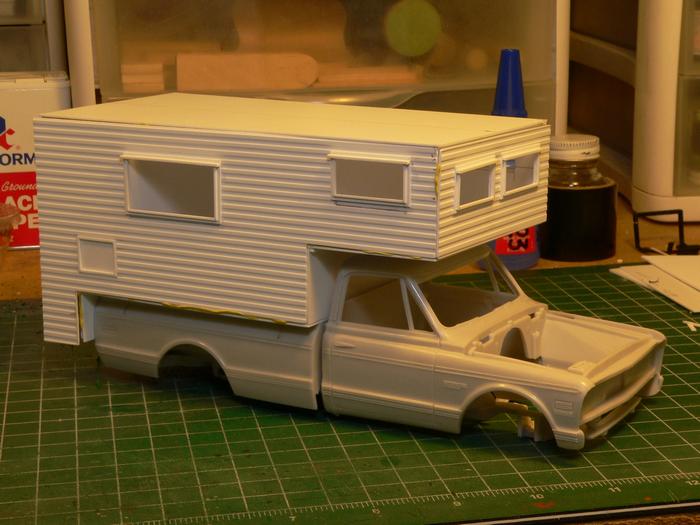 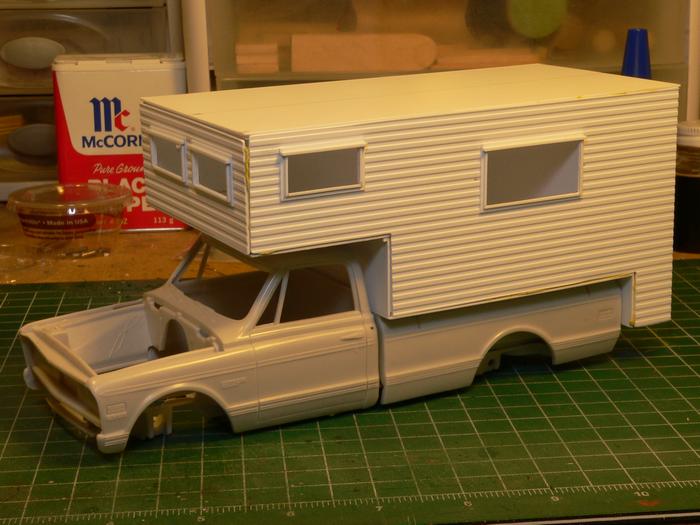 Thanks for looking in Folks.... |
|
|
|
Post by 1961redlegs on Feb 19, 2017 17:38:12 GMT -5
The progress on this kit's terrific, it's coming together really well.
|
|
|
|
Post by INDY22IAM on Feb 19, 2017 18:03:01 GMT -5
That is really cool how all of it comes to life. This will look really good. What do you use for mock up to get it to temporary stay together?
|
|
|
|
Post by kip on Feb 19, 2017 18:42:35 GMT -5
Excellent. When can I move in.
kip
|
|
|
|
Post by Gary Davis on Feb 19, 2017 19:34:08 GMT -5
Thanks Redlegs.... Hey Kip...first you have to make friends with KILLER JR....(Flip Wilson) Geraldine's Boy friends miniature KILLER Chihuahua....he's on guard 24-7 That is really cool how all of it comes to life. This will look really good. What do you use for mock up to get it to temporary stay together? I use this yellow tackie stuff that I picked up at Michael's. It's used to put Pictures and posters on the wall with out using nails. It's re-usable as I've used this same batch for at least 7 yrs. You can also get it at LOWES. It's blue ,made by LOCTITE and called FUN TAK MOUNTING PUTTY. Same stuff...different color. |
|
|
|
Post by racerbrown on Feb 19, 2017 19:42:03 GMT -5
really looking good!
i love the window detail.
duane
|
|
|
|
Post by indy on Feb 20, 2017 12:18:44 GMT -5
really looking good! i love the window detail. duane +1 I literally let out a "Wow!" when I saw how well the window detail worked. This is really going to look 1:1 when it is done. Jordan |
|
|
|
Post by Gary Davis on Feb 20, 2017 22:25:04 GMT -5
Thanks Duane and Jordan....The door is built and in...along with frosted glass. I did not get the rear tail light mounts made or the ladder. But...that's coming soon. I did get the roof fixtures ( vents, air conditioner, Heater vent and kitchenette stove vent) laid out for location. That will be up next. Still waiting on the louvers from Archer. I'll shot some update pics when there is a little more to look at.
|
|
jwrass
Rookie
  Mechcanical Engineer. 45 yr's Custom Painter- Pinstriping, Lettering, Airbrush, Exotic Finishes,
Posts: 96 
|
Post by jwrass on Feb 28, 2017 13:53:16 GMT -5
Gary,
This is so off the hook! I am so looking forward to see how this whole project comes together.... Crazy good stuff!
Jimmy "RASS"
|
|
|
|
Post by Gary Davis on Feb 28, 2017 14:26:10 GMT -5
Hey JRASS...Thanks bud....it's starting to look like those big Top Heavy land whales that we use to see in the 60s..traveling down the road with the race car in tow. I'm fab'in the roof vents and need to get the roof mounted A/C unit fabbed today too...Hopefully..Thanks for look'in in..
|
|
|
|
Post by Gary Davis on Mar 20, 2017 14:26:54 GMT -5
Here's an over due update......The window trim, door and glass( tempered),all the vents and A/C have been fabed for the roof and in mockup in the pics. All are pinned and will be removed to prime. The running lights have been figured out and the light Bezels were cut from Evergreen tubbing. The rear tail lights and running lights are in mockup. The front and side lights have to be and that should be finished today. The Heater and all the side STUFF have been fabed along with adding louvers and rivets from Archer. Then....I think it's ready for primer. Here's a look at the progress...thanks for looking in folks.... The Back door before ALL the stuff has been added... 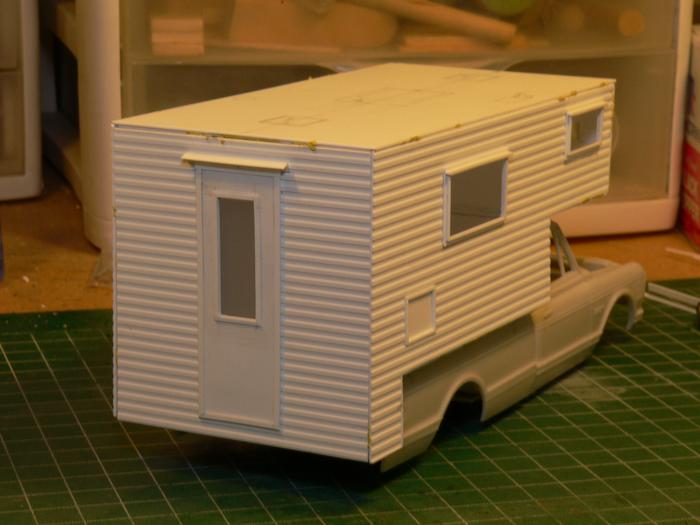 With the lights ... 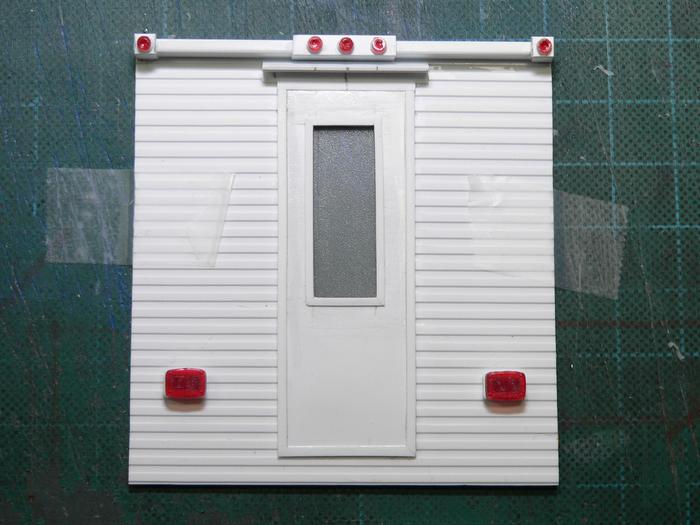 Roof lay out.... 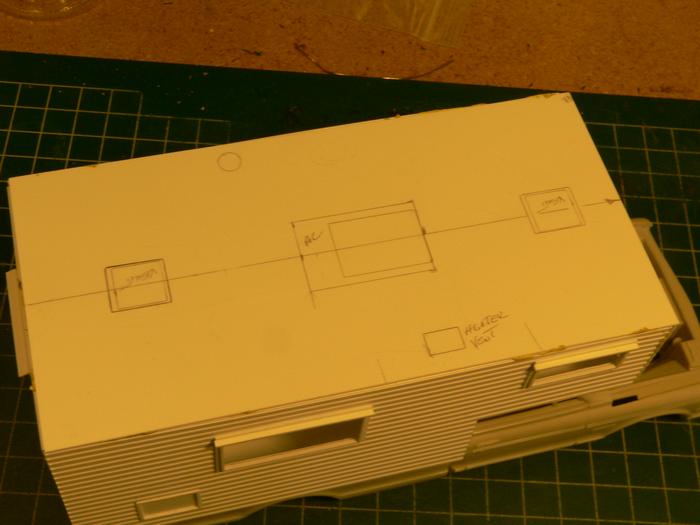 Roof with everything in mockup... 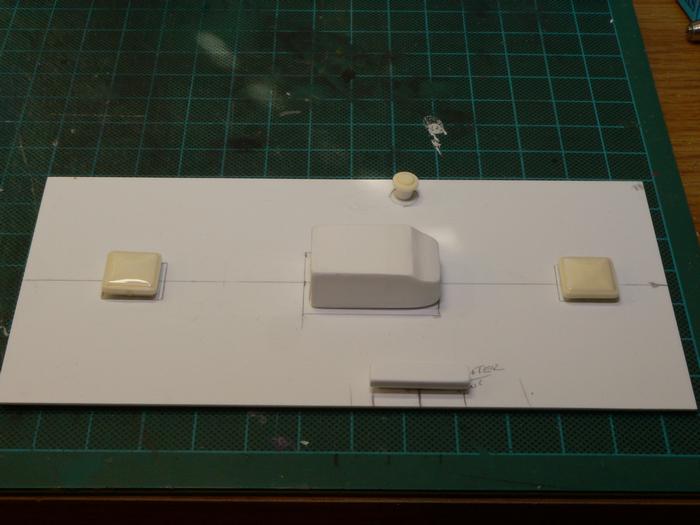 Left and right side details that were fabed... 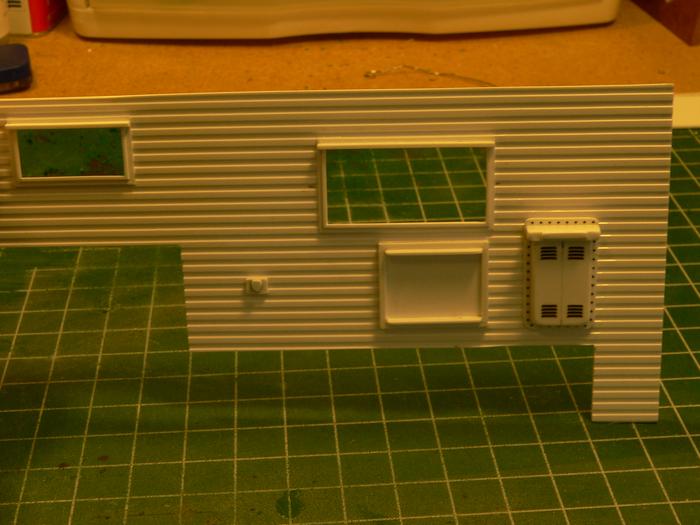 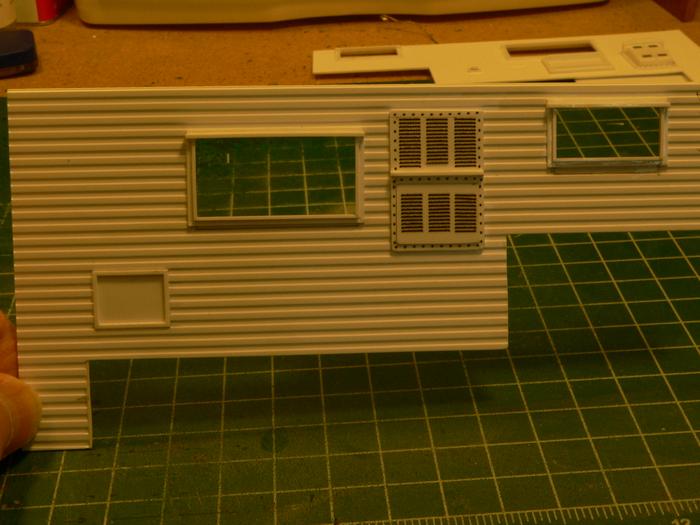 |
|
|
|
Post by clm1545 on Mar 20, 2017 15:47:34 GMT -5
Amazing work, Gary!
|
|
|
|
Post by alterrenner on Mar 20, 2017 21:01:06 GMT -5
That's some great detail! Are you working from memory, photos, a camper down the street or all of the above?
--Frank
|
|
|
|
Post by Gary Davis on Mar 20, 2017 21:47:40 GMT -5
Thanks Craig....
Frank..My brother has a slide in and I got measurements from him. But...I didn't want to have the top the same. Plus...I went on line and found a whole lot of 70s type campers to look at. I drew up a set of plans and went from there. I'll be adding things that a working road team would have to the best of my fading memory. Thanks for the look in Frank...
|
|
|
|
Post by INDY22IAM on Mar 21, 2017 5:51:27 GMT -5
This was looking cool with out all the little details but now it is beyond that. It is coming to life. Very nice detail work.
|
|
|
|
Post by INDY22IAM on Mar 21, 2017 5:55:14 GMT -5
What do you use the black pepper for? I saw that in the back ground and was curious.
|
|
|
|
Post by Art Laski on Mar 21, 2017 10:50:22 GMT -5
Looking good, my friend!
|
|
|
|
Post by Gary Davis on Mar 21, 2017 12:45:57 GMT -5
What do you use the black pepper for? I saw that in the back ground and was curious. Thanks for the comment indy22.... What I use the empty tin for is used X-acto and single edge Razor blades. Fill it up and run duct tape top to bottom to keep lid shut and then toss it in the garbage. Works good. Thanks Art for stopping by and commenting... |
|
|
|
Post by racerbrown on Mar 21, 2017 18:13:13 GMT -5
great job Gary!
keep it coming.
duane
|
|
|
|
Post by Gary Davis on Mar 22, 2017 14:09:01 GMT -5
Thanks Duane...I managed to get ALL the running lights built last night. I still need to mount the two flood lights(for loading at night) and cut the window material and then I'll get everything put together and then shoot primer.
|
|