Deleted
Deleted Member
Posts: 0
|
Post by Deleted on Apr 27, 2016 18:04:41 GMT -5
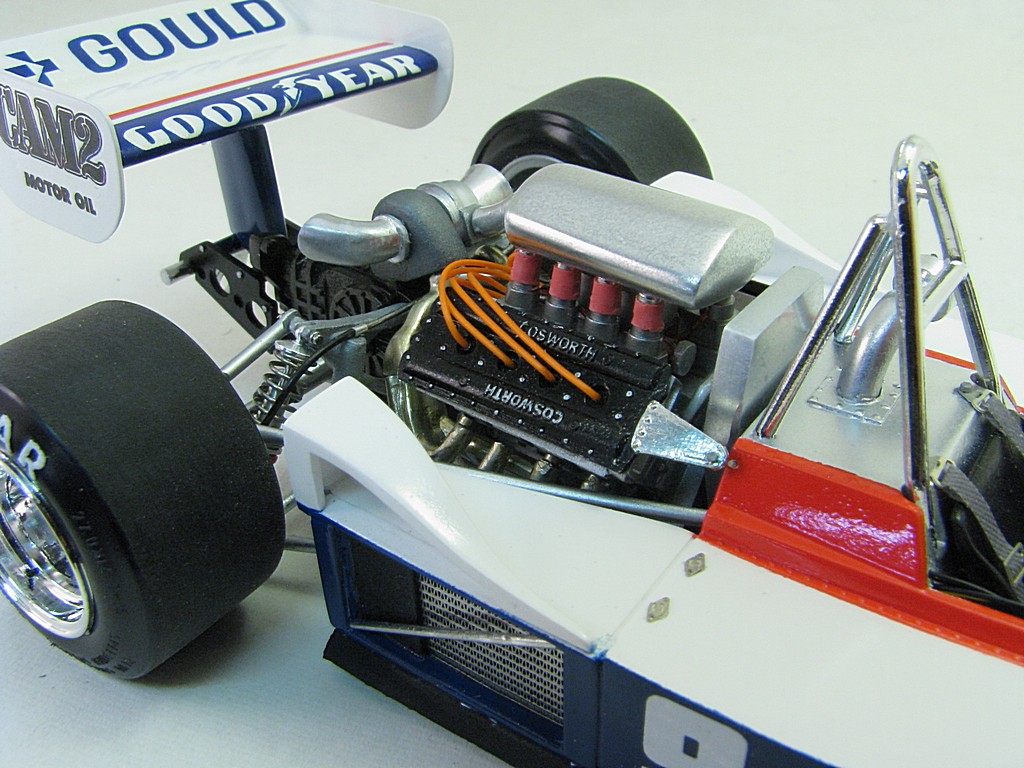
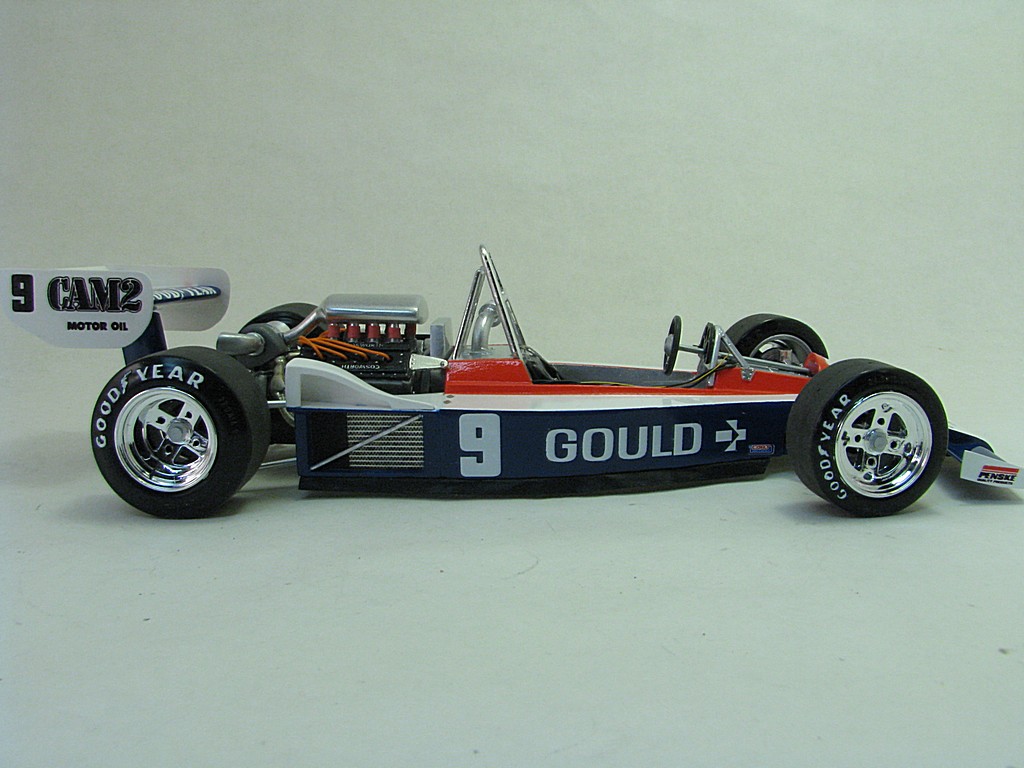
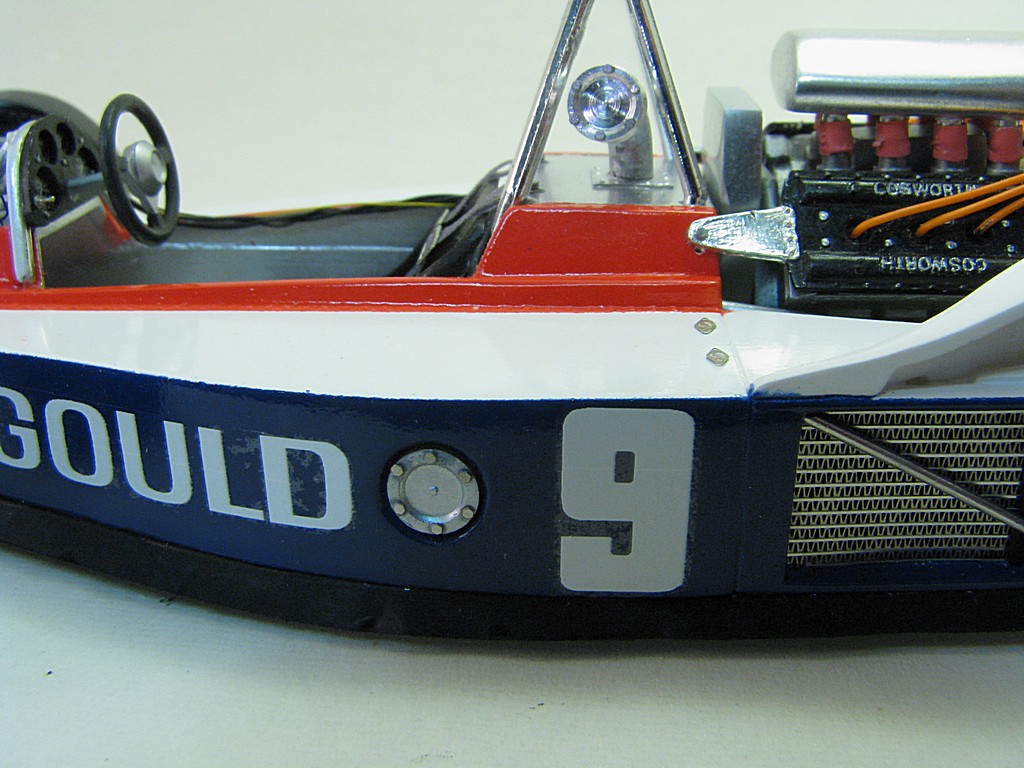
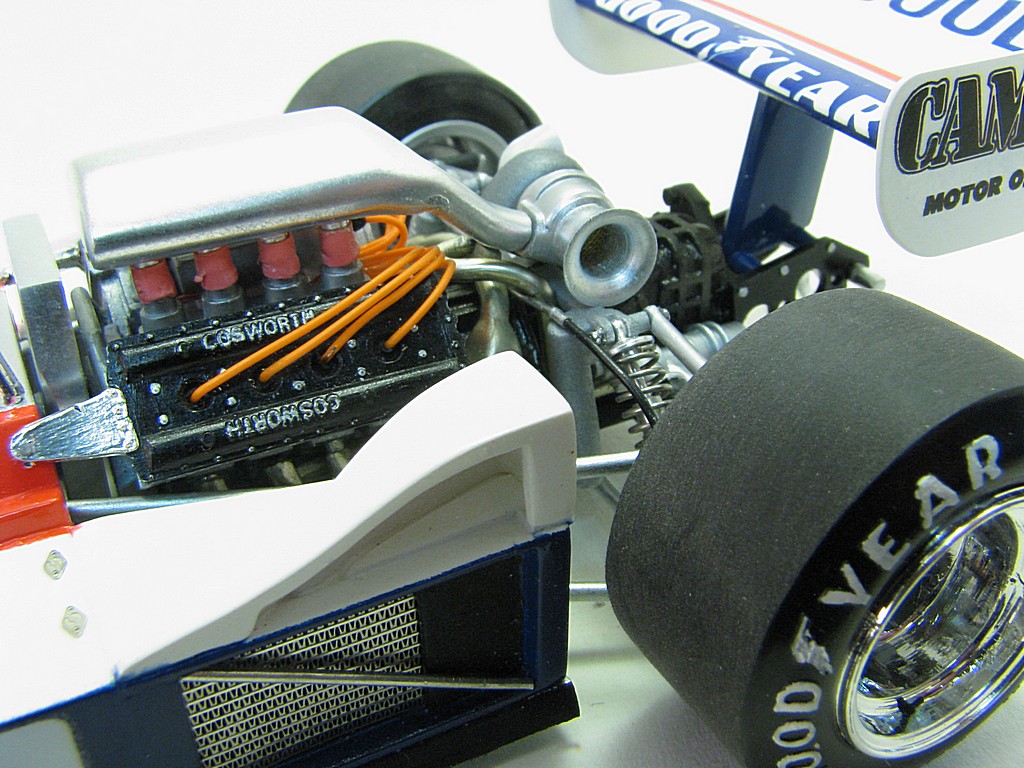
I managed to finish the model this past weekend, in time for the Kingston Modelrama show. It took first place in the Competition - road course category, which I was very pleased about. The final assembly did not go without some issues (do they ever go smoothly?) The air plenum and turbo inlet were airbrushed in Alclad Polished Aluminum, over bare plastic, with no clear coat. With all the handling to get the rubber air intakes on and test fitting the engine, a lot of the paint rubbed off. To fix this, I carefully masked around the parts and shot some more paint. From then on, it was hands off during final assembly.   Brake lines were added using 0.5 mm diameter wire, fitted into some aluminum tubing for the connectors. Here are the rear set.  Problems include: Front nose sits a little too low Front wings end plates aren't quite right (see side view) I couldn't get the engine to sit far enough forward on the bottom connection to the oil tank, so the whole car has a bit of dip in the middle The cockpit cowl doesn't fit. The fuel filler tube sticks out just enough to interfere. I did all the test fitting without the roll bar and now that it is in, the cowling won't fit. I suppose I could gently spread the cowling to get it on, but don't know if I'll be able to get it off. The Indycal decals were superb, which was a great relief during the final assembly. Although there is some silvering on the left side (my fault) that I might try to fix. I added some MENG hex bolt heads to the suspension set up and photoetch bolt heads to the fuel filler and fuel tank inspection plate on the left side.           |
|
Deleted
Deleted Member
Posts: 0
|
Post by Deleted on Apr 27, 2016 18:24:18 GMT -5
Final thoughts on the Penske PC-6
I first want to thank everyone who followed this WIP and offered information and encouragement - it really kept me motivated at times. This is a really great forum and I expect I will do other WIP's (McLaren M16, Gurney Olsonite Eagle are in my stash)
This wasn't the easiest kit to finish and there are still a number of flaws in the final result.
Things I would do differently next time:
- before the tub is built, drill out the 12 lightening holes in the floor plan. You can only get to 6 of them after the tub is built
- before the tub is built, drill out the location for the side pod fuel tank inspection port. I managed to do this after the tub was built and was always afraid I would lose the cap inside the tub.
- reinforce the very back end of the cockpit cowling with styrene as it tends to crack
- make sure to dry fit the engine (with locating pins, if possible) to make sure it is level. I used some resin bolts to attach the engine cam covers to the body, but the left side sits a mm too high
- there is a lot more wiring and plumbing that could be added (e.g. coolant piping, oil lines everywhere, fuel supply lines, more instrument wiring)
Things that worked well
- the red rubber intake tubes set the engine off nicely, although they were challenging to get on
- the side skirts made out of aluminum duct tape worked really well
- the RB Motion shocks are so much better than the kit versions.
- using clear styrene for the wing end plates really makes a difference
If you want to go all out, the suspension could be redone with RB Motion rod ends and metal tubing.
Since the engine in this kit isn't all that great a rendition of a Cosworth DFV, it would be interesting to try and source a more realistic one . . . or take a Tamiya 1:20 or 1:12 scale engine and build a mostly scratchbuilt model . . . hmm . . . the tub is pretty straightforward and you would have to find the right tires and wheels . . . no, I'm not that crazy.
And finally, no one noticed (not even me, until I was decalling) that the front wings should be painted white! I was so smug leaving the end plates off to help with the painting and then when I was putting the decals on I noticed the screw up on the paint. Let's call it a qualifying version of the car, which got a coat of white paint just before the race.
|
|
Deleted
Deleted Member
Posts: 0
|
Post by Deleted on Apr 27, 2016 19:16:05 GMT -5
Quit being so hard on yourself (I do the same thing)
That PC 6 is very nice looking!
Bravo!
|
|
|
|
Post by Calvin on Apr 27, 2016 19:45:13 GMT -5
Absolutely impressive!
|
|
|
|
Post by clm1545 on Apr 27, 2016 21:26:47 GMT -5
Sorry about your cowl problem, you did a fantastic job on a very difficult kit.
|
|
|
|
Post by elsapito on Apr 28, 2016 3:13:13 GMT -5
Fantastic, and the final report is absolutely something to keep and learn from! ... or take a Tamiya 1:20 or 1:12 scale engine and build a mostly scratchbuilt model . . . hmm . . . the tub is pretty straightforward and you would have to find the right tires and wheels . . . no, I'm not that crazy. Why not? I haven't seen a 1/12 Indycar.... yet!  |
|
|
|
Post by alterrenner on Apr 28, 2016 4:50:59 GMT -5
Of course the model took first place: Look at the thing! It's beautiful!
Nice work!
--Frank
|
|
|
|
Post by indy on May 4, 2016 9:53:06 GMT -5
The final result is stunning. Shows what can be built even out of a kit that has many flaws. I really enjoyed the WIP, it was very interesting to see all the work that went into this one.
Jordan
|
|
|
|
Post by shunter on May 7, 2016 1:18:08 GMT -5
Simply loving it..
|
|
|
|
Post by schnauzer on May 7, 2016 10:26:44 GMT -5
eajonesgue:
I would like to translate your WIP/thread. Please, look your PMs.
Regard´s
|
|
|
|
Post by aowr1911 on Nov 21, 2016 1:53:06 GMT -5
|
|
|
|
Post by 2lapsdown on Nov 21, 2016 9:29:28 GMT -5
This will obviously serve as my guide to build this car. I do have a question though and pardon me if the answer is within this post. What mesh did you use for the radiators? Thank you for sharing a very inspiring build.
John
|
|