|
|
Post by 1961redlegs on Nov 1, 2015 14:13:33 GMT -5
I've got some work done on the Gil De Ferran Reynard, not much but some bodywork to make this a more accurate reflection of the car that ran at the Mid-Ohio race. I've trimmed down the shark fin on the back of the car to approximate what the Walker car looked like. I did that by carefully measuring the front and rear of the fin and tracing a straight line that I subsequently cut. I used some putty ad sanded to clean up where I cut off part of the fin. I've also fabricated a television camera for the roll hoop. I think it may be a *little* tall but not by much. As I've said I've not done much but it looks good to start. 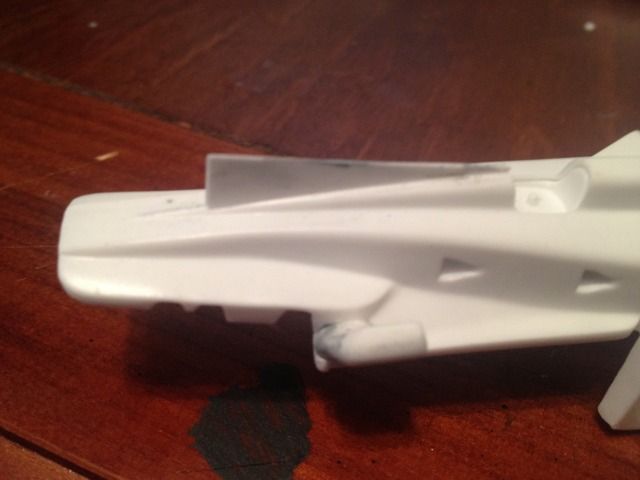 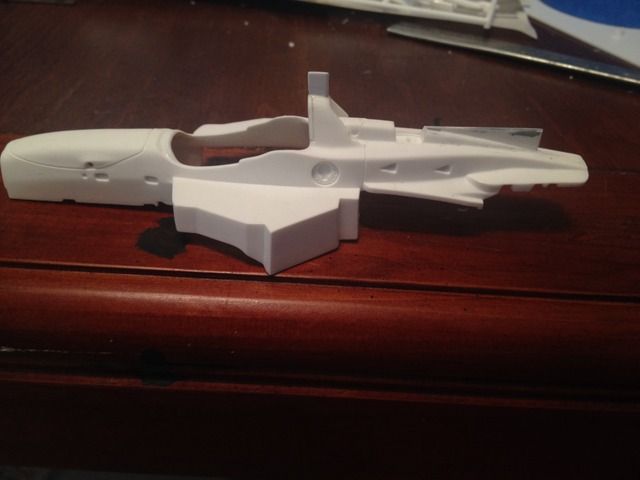 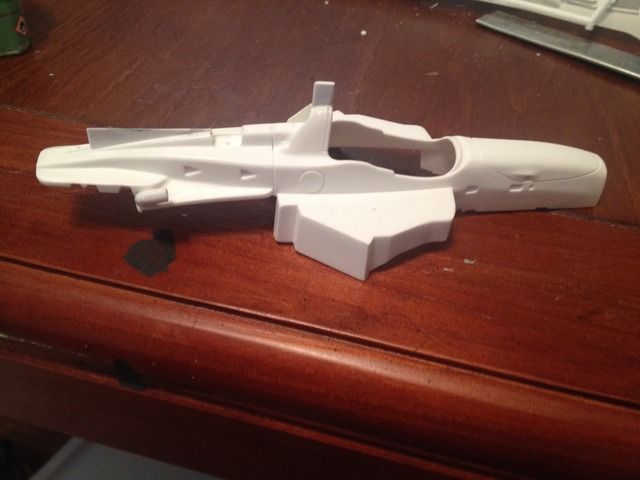 |
|
|
|
Post by IndyCarModels on Nov 1, 2015 14:20:35 GMT -5
|
|
|
|
Post by indy on Nov 1, 2015 16:25:16 GMT -5
Great start, I like what you have done so far.
Jordan
|
|
|
|
Post by 1961redlegs on Nov 28, 2015 16:54:39 GMT -5
I've managed to paint the car and am about to start some decaling before the final assembly. My question is on the Reynards where would the carbon fiber be visible without any adornment in the cockpit and on the exterior of the car itself?
Thanks for your help!
|
|
|
|
Post by Calvin on Nov 28, 2015 22:25:44 GMT -5
I've managed to paint the car and am about to start some decaling before the final assembly. My question is on the Reynards where would the carbon fiber be visible without any adornment in the cockpit and on the exterior of the car itself? Thanks for your help! JORDAN!!!! WHERE ARE YOU!!!!! I know the under tray should all be C/F Usually anything that is black is most likely going to be bare C/F |
|
|
|
Post by indy on Nov 29, 2015 0:59:52 GMT -5
I have been busy  , I just got back from a week at my in-laws and the V8 in my truck has recently developed a tapping and vibration that have preoccupied my night. But I can help with the question about where the visible C/F is on this car.... There is the insides of the small vertical fences on the front wing (just below Zerex on nose in below pic) but this would be easy to skip, the '98 front wing omits this fence above the adjustable wing portion.  The rest of the areas are marked out here in blue tape: 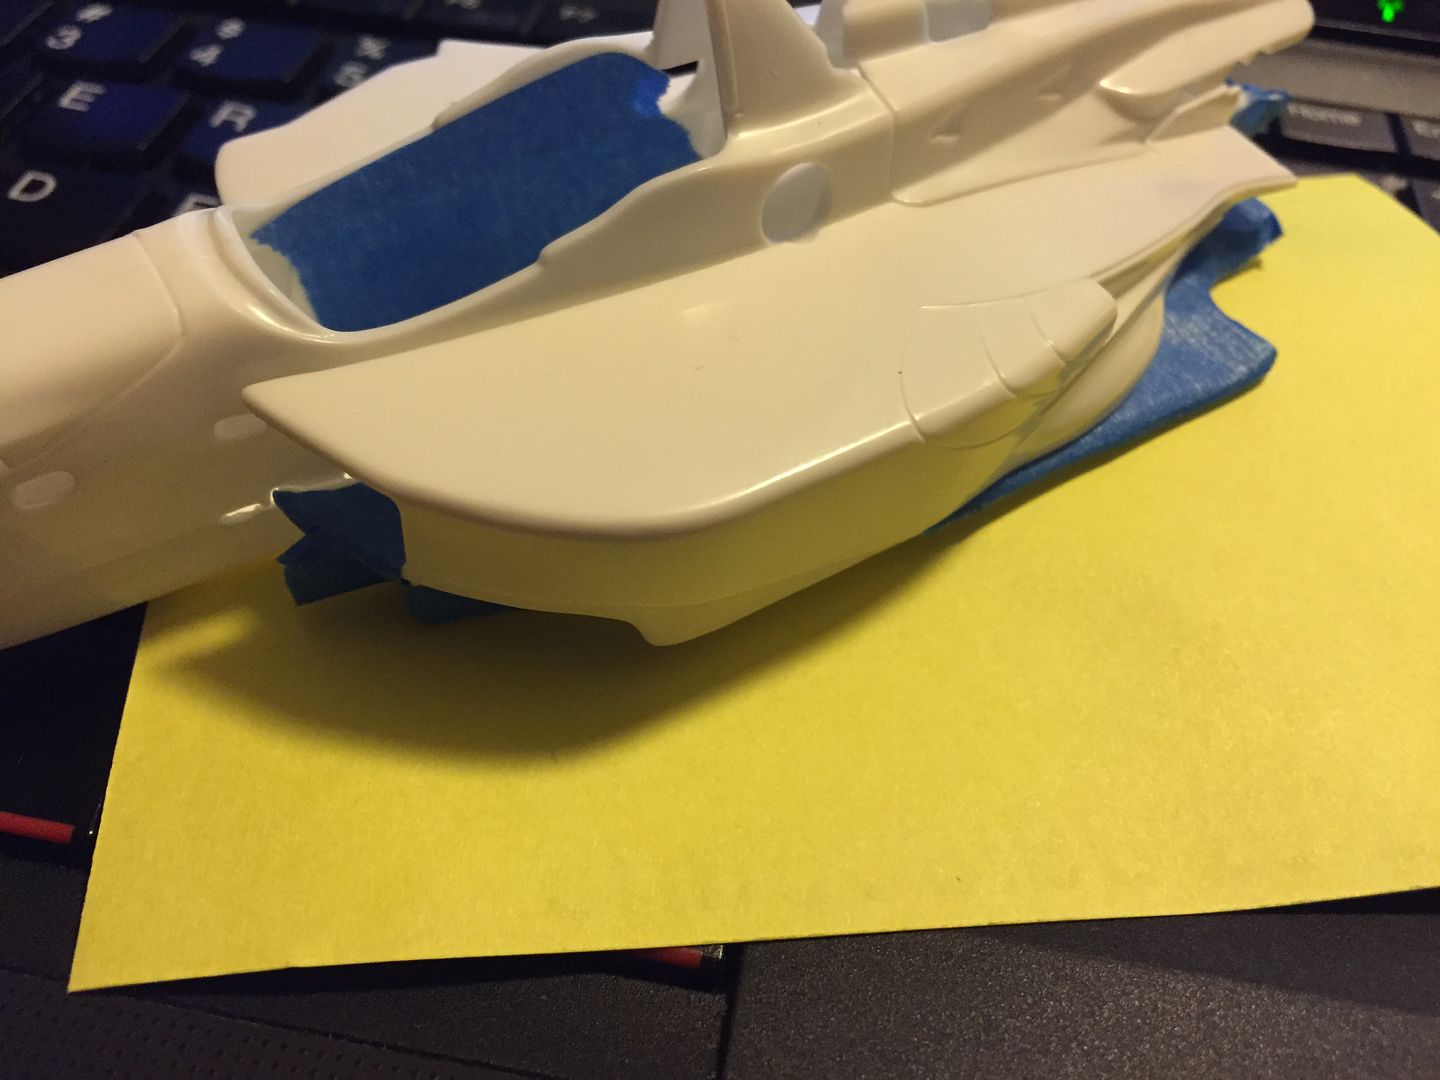 - insides of the cockpit (you may want to C/F the front lip of the cockpit like the Robby Gordon pic below) - vertical strakes leading into tunnels under chassis floor - lower portion of radiator opening (just above previous & have a reference of Gil in '98 running with this part C/F) - rear portion of chassis floor - (not pictured) front and rear brake scoops Do you want to know the C/F you can see from the bottom view of the car? It is most of it but not all of it.... Jordan Good interior C/F shots of '98 Reynards 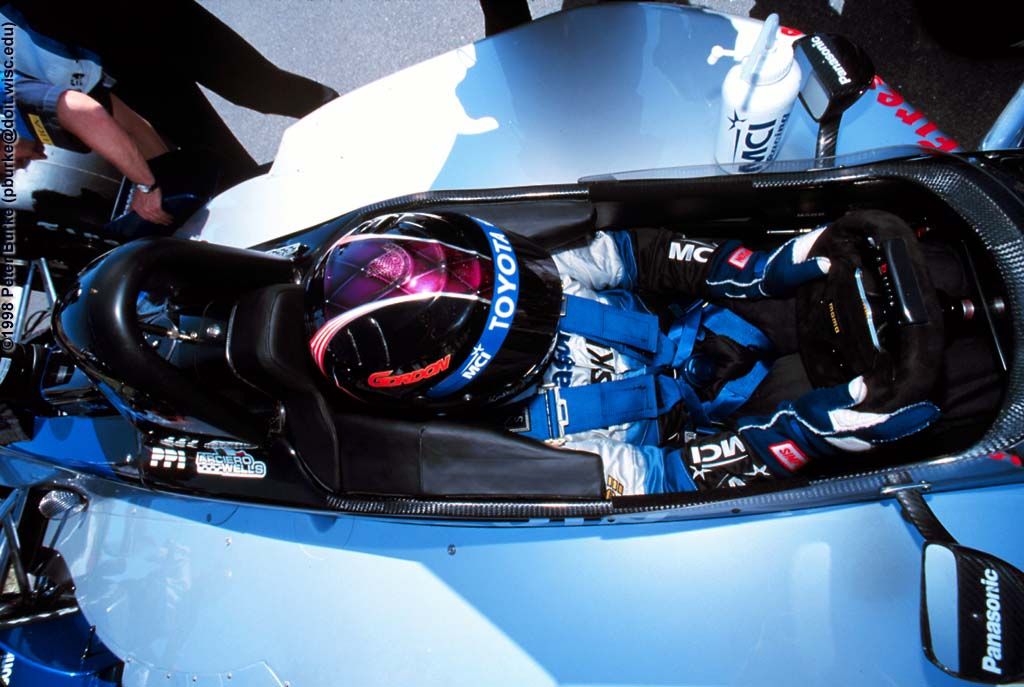 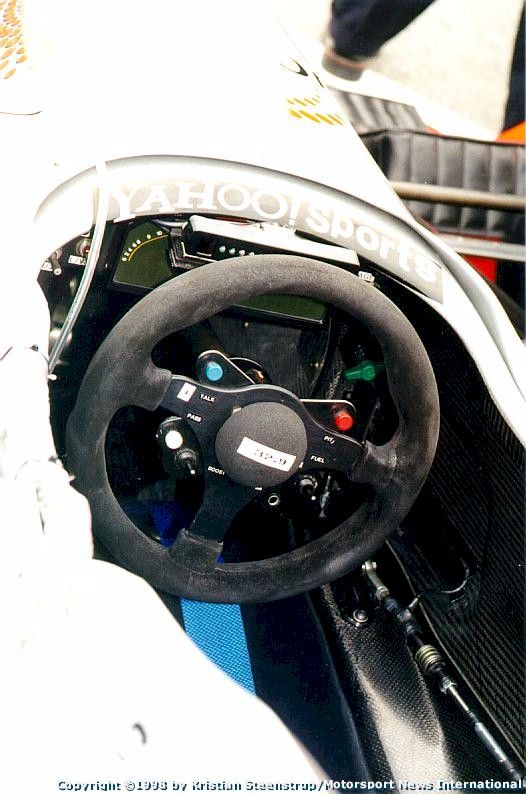 |
|
|
|
Post by Calvin on Nov 29, 2015 1:09:00 GMT -5
I have been busy  , No such thing as being too busy for Revell Reynard talk!  |
|
|
|
Post by 1961redlegs on Dec 2, 2015 21:10:06 GMT -5
|
|
|
|
Post by Calvin on Dec 2, 2015 23:02:41 GMT -5
Nice!
C/F is kind of a boring thing to do but its well worth it after its done!
|
|
|
|
Post by clm1545 on Dec 3, 2015 8:48:18 GMT -5
Looking good, Jerry.
|
|
|
|
Post by 1961redlegs on Dec 4, 2015 23:15:39 GMT -5
I've attached the rear suspension and the side pods to my car along with some decals. They're older decals but they go on well with solve-a-set and some patience. I hope to get some more on it tomorrow. 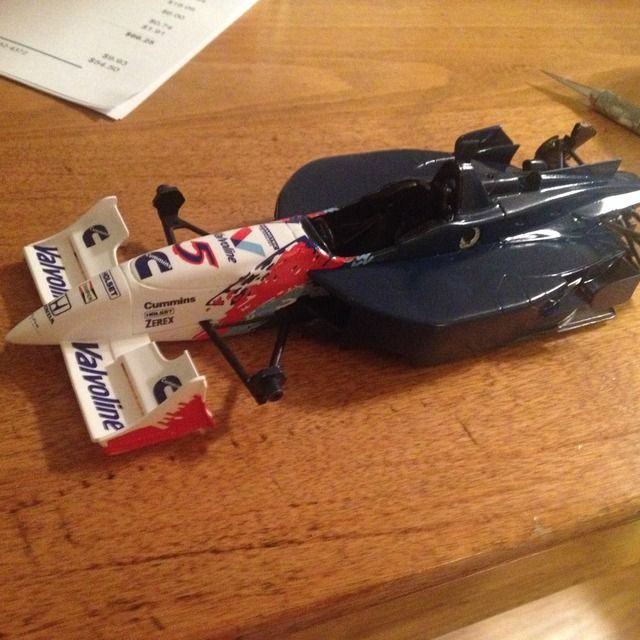 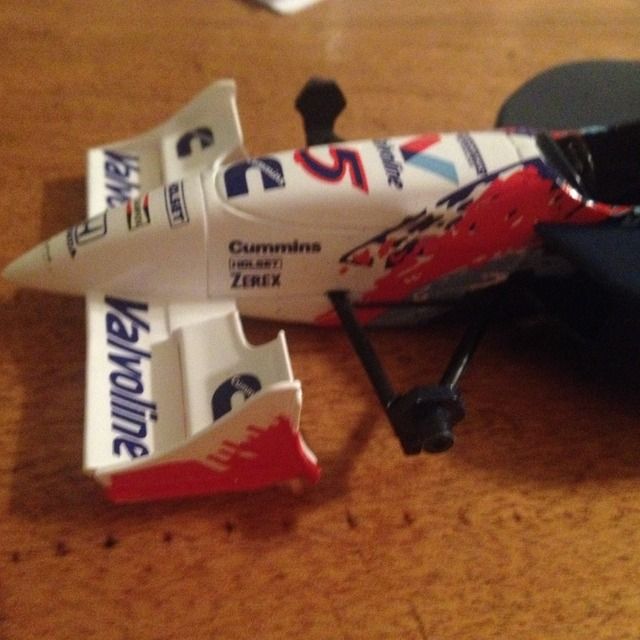 |
|
Deleted
Deleted Member
Posts: 0
|
Post by Deleted on Dec 5, 2015 0:49:24 GMT -5
Looks good.
These cars were all carbon fiber from inside the cockpit. Autocourse did a technical book (softbound) which is an excellent reference for cars of this era.
|
|
|
|
Post by 1961redlegs on Dec 5, 2015 22:51:11 GMT -5
First off, thanks for all the kind words and support so far. I'll have to see if I can find that Autocourse book Hubie. It sounds like a great help. I finished up decaling the car tonight and here are a couple photos to show the results. I'm quite pleased with the result and Speedline decals go on with no real problems, especially considering it's a 15 year old set. The fives on the wing plates are not what came on the decal sheet as what ran at Mid-Ohio had a different font. Luckily for me (and really all of us for all the work he does on our projects) Gary Sleeper made me up some fives that matched what the car had perfectly. I also added a FedEx decal where the PPG goes on the left hand side of the car to match my resource photos as well as some Craftsman decals to the front wingplate as well. The kit's really rounding out quite nicely. It was quite the productive day as I also painted the foundation of my house in addition to working on the Reynard. Who says weekends are for resting! 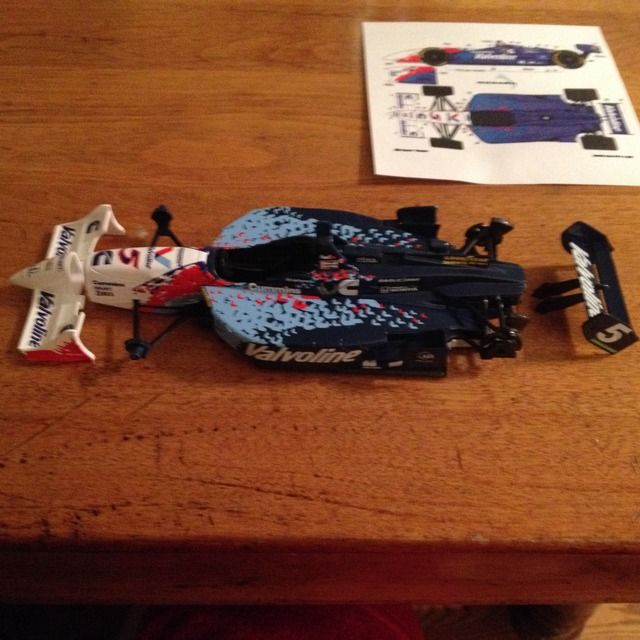 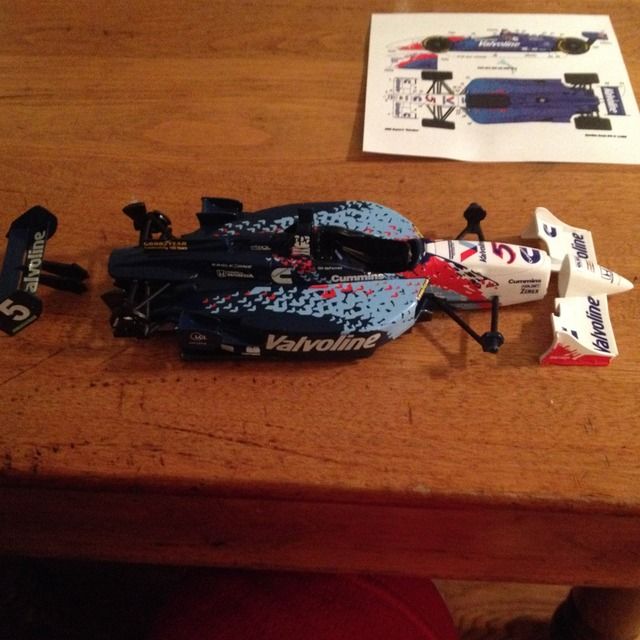 |
|
|
|
Post by indy on Dec 6, 2015 15:32:32 GMT -5
Great looking job, Jerry. Been a while since I have seen this one built. Goodyear shod Reynards are rare and nice to see every so often.
I think I have seen the book before, Hubie. Would know the name off hand?
Jordan
|
|
|
|
Post by Calvin on Dec 6, 2015 18:23:54 GMT -5
I love it!
|
|
|
|
Post by Michael Chriss on Dec 6, 2015 19:39:48 GMT -5
Fantastic!
|
|
|
|
Post by shunter on Dec 8, 2015 3:22:13 GMT -5
Beautiful stuff it looks like a winner....
I have the book mentioned but it is packed still, I will get to unpacking the books soon and will post a pic.
|
|
|
|
Post by Art Laski on Dec 8, 2015 16:33:29 GMT -5
It's looking good!
|
|
|
|
Post by shunter on Dec 30, 2015 4:49:14 GMT -5
Looks good. These cars were all carbon fiber from inside the cockpit. Autocourse did a technical book (softbound) which is an excellent reference for cars of this era. Here is the cover shot of the Autocourse book as mentioned...  |
|
Deleted
Deleted Member
Posts: 0
|
Post by Deleted on Jan 2, 2016 7:04:05 GMT -5
That is a really good book and can be found for a good price most of the time. There is a companion F1 book as well.
|
|