|
|
Post by jaw12287 on Jun 14, 2015 22:14:17 GMT -5
Hey all, i decided to test my skills and build my first speedway car. This started out as a 2012 Dollar General car but I got frustrated with trying to find the right yellow (I finally found it AFTER I started building this one) but I decided to switch to his 2013 Century 21 car. Here is the progress so far, I have a few clean up things to do and a little more paint work to make all the parts and pieces come together before my decals come in. I'll update as I go though. Enjoy! 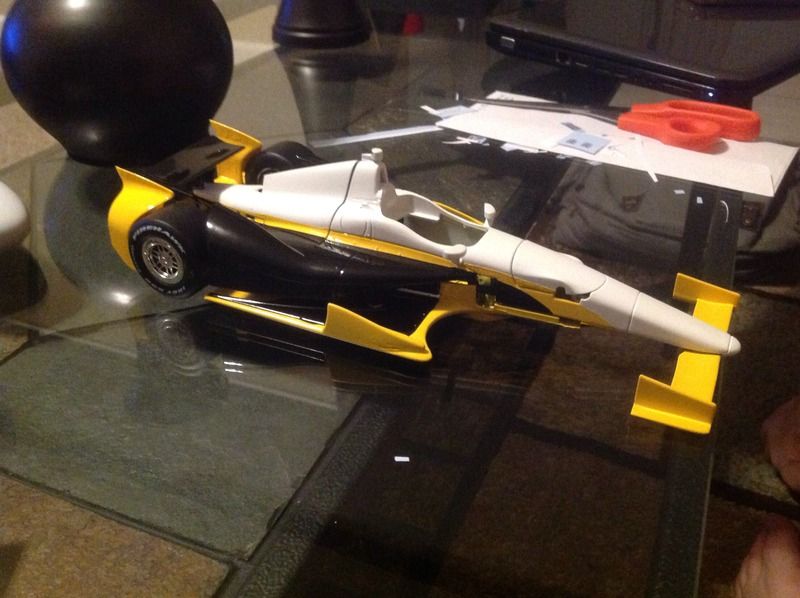  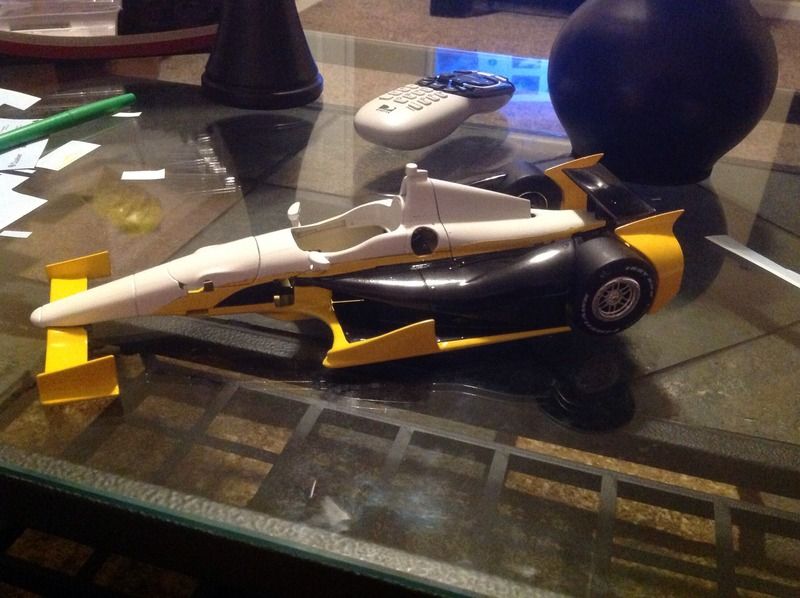 |
|
|
|
Post by chromehorn08 on Jun 14, 2015 22:33:10 GMT -5
VERY NICE! Can't wait to see it finished.
|
|
|
|
Post by Calvin on Jun 15, 2015 2:39:15 GMT -5
This is really cool!
|
|
|
|
Post by clm1545 on Jun 15, 2015 9:51:39 GMT -5
You picked a good weekend to show us a Newgarden build. Great timing, and a good looking car.
|
|
|
|
Post by indy on Jun 15, 2015 10:07:58 GMT -5
Paint looks good, you have a nice base for this one!
Jordan
|
|
|
|
Post by mrpeters on Jun 15, 2015 11:35:17 GMT -5
Looking good! My cousin is an agent for Century 21, I've wanted to build her one of these for her office.
Still cracks me up how they ripped off the Ganassi #38 paint scheme from 2012 for this. I did a pitch for Graham to get Century 21 that year and was asked to use that line scheme, and then suddenly here comes Sarah Fisher with the exact paint scheme I had done for Rahal. Guess Century 21 liked it and stuck with it hah!
|
|
|
|
Post by jaw12287 on Jun 18, 2015 21:05:18 GMT -5
Thanks for all the kind words everyone! Things were progressing along nicely until I hit a bit of a snag today. While doing some trim work, I taped off a part of the rear wing to try and keep the lines clean. When I took the tape off though, I took a healthy chunk of paint off with it. Anyone have some suggestions on how to fix this? 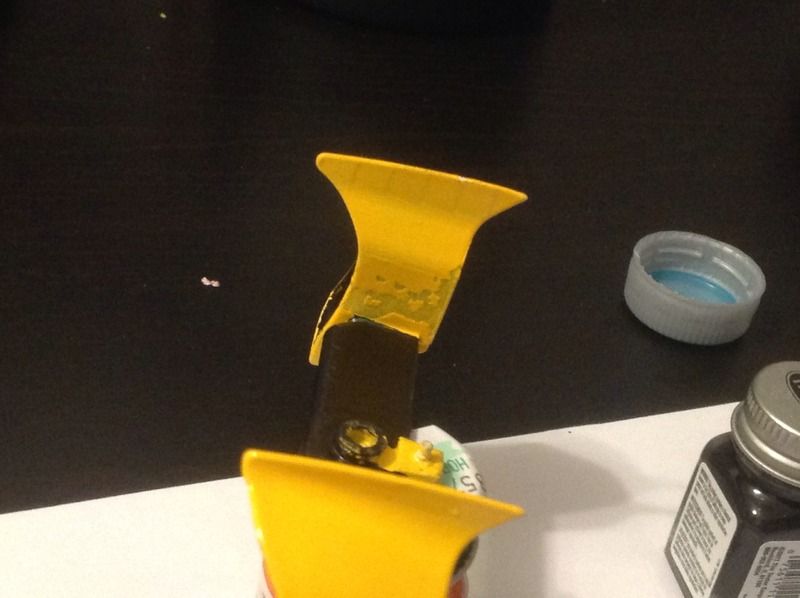 |
|
|
|
Post by alterrenner on Jun 19, 2015 5:21:15 GMT -5
I ran into the same problem after removing the masking tape from my 2010 winner! I discovered that you can paint that white decal paper sold for printers!
Cut the paper to the size you need first, revearse-loop some tape to hold the decal paper to the painting board, and apply several light coats of matching paint (I use enamel). Where decals normally slide from the backing paper in seconds, the painted paper will require almost a minute of soaking before it slides.
--Frank
|
|
|
|
Post by INDY22IAM on Jun 19, 2015 9:00:58 GMT -5
This doesn't help with your problem but I usually hand paint a flat black were I need carbon fiber look. If I get real gung ho I put carbon fiber decals over what I painted flat black. I would probably try to do a light coat of yellow and than sand lightly till it is somewhat smooth. Than repeat the process till it looks smooth again. Did you prime the plastic 3D printed part before you painted it yellow?
|
|
|
|
Post by Calvin on Jun 19, 2015 9:25:55 GMT -5
When I took the tape off though, I took a healthy chunk of paint off with it. Anyone have some suggestions on how to fix this? You're just going to have to sand that area smooth and redo it - re-paint it.....You shouldn't have to repaint the whole thing but just focus on that area. |
|
|
|
Post by jaw12287 on Jun 19, 2015 11:56:59 GMT -5
This doesn't help with your problem but I usually hand paint a flat black were I need carbon fiber look. If I get real gung ho I put carbon fiber decals over what I painted flat black. I would probably try to do a light coat of yellow and than sand lightly till it is somewhat smooth. Than repeat the process till it looks smooth again. Did you prime the plastic 3D printed part before you painted it yellow? I used a 2 in 1 paint and primer from valspar that usually bonds really well but for some reason isn't sticking as well to the 3d part. I will try to sand it down a little then respray it. Hopefully that gets it. The decals are on their way and I should have something more to show soon |
|
|
|
Post by jaw12287 on Jun 29, 2015 22:33:33 GMT -5
Still chugging along here. Decals have arrived from Gary and look great. I had a few break during the application process but I'll wait until I get everything applied before I get replacements. Here's a few sneak peaks: 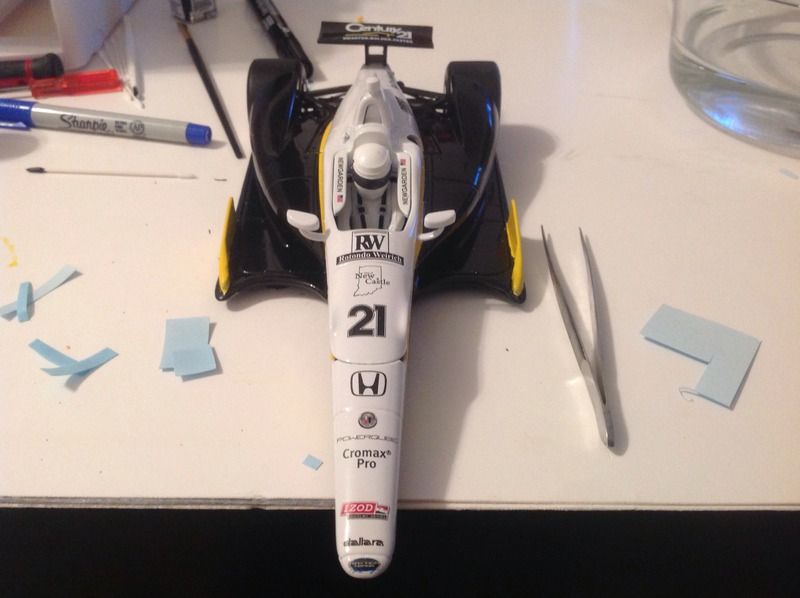 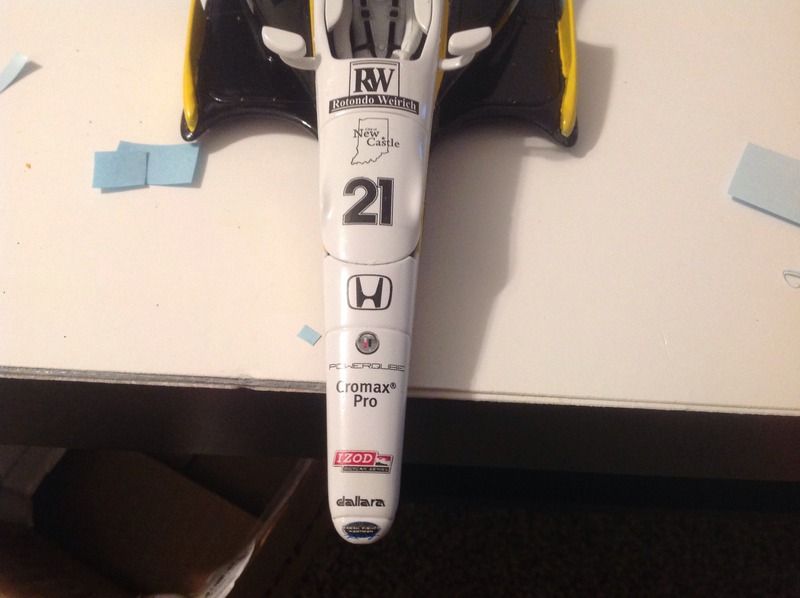 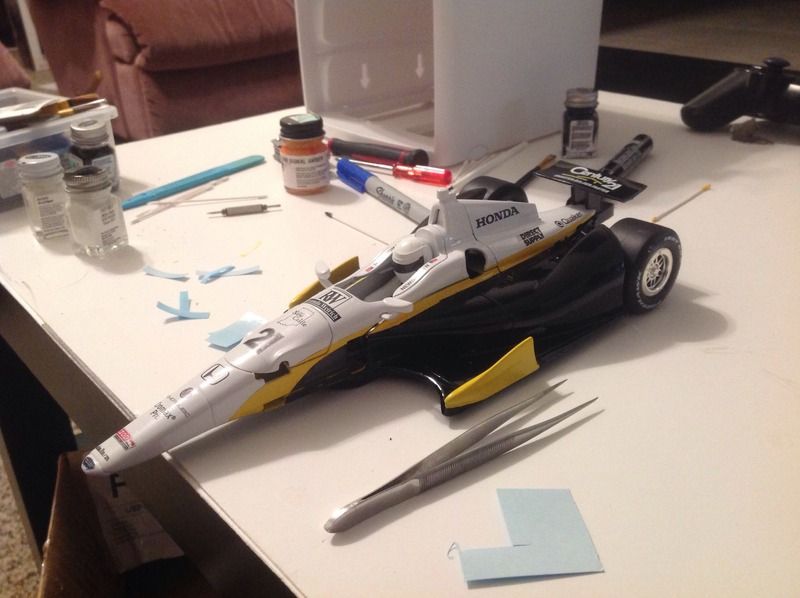 oh, and this also happened. Glad I already ordered a few extras. 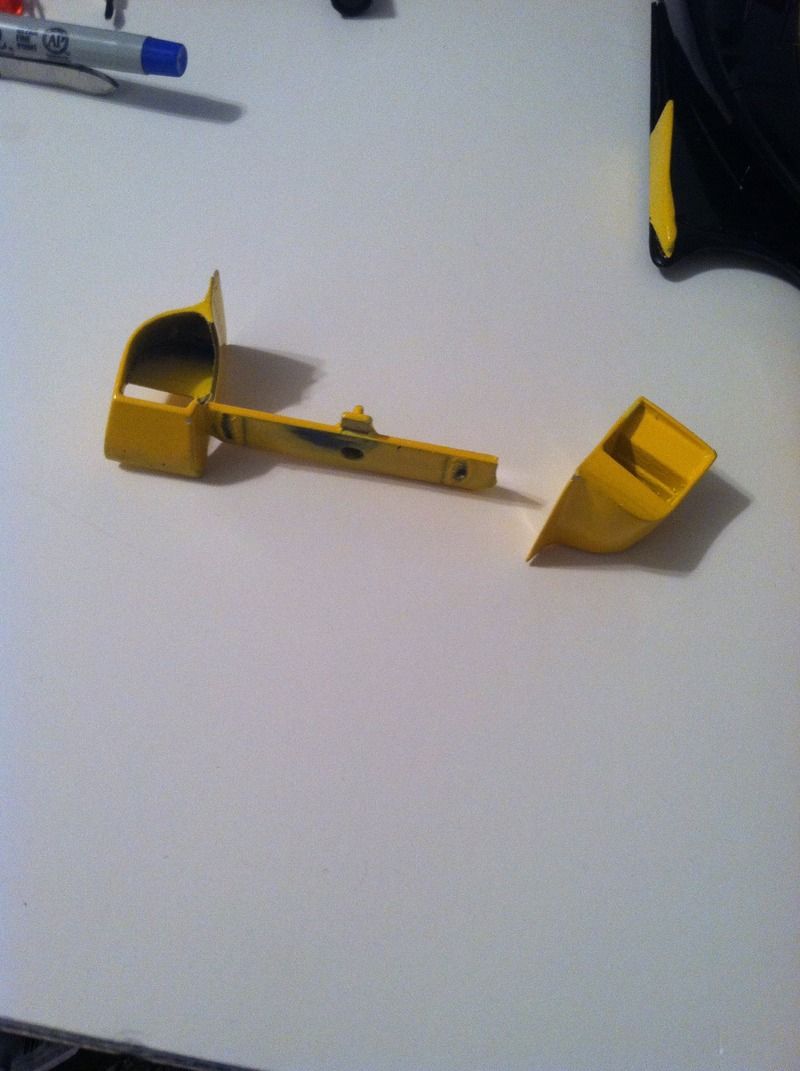 the saga continues... |
|
|
|
Post by indy on Jun 30, 2015 7:08:36 GMT -5
It looks good so far. Keep sticking with it, this is going to finish up looking great.
Jordan
|
|
|
|
Post by chromehorn08 on Jun 30, 2015 10:24:23 GMT -5
There's always that one build that something bad happens with everything. Those are usually the most rewarding once there done! Stick with it. Looks good so far.
|
|
|
|
Post by GrandPrecision on Jun 30, 2015 10:53:13 GMT -5
Just saw this thread... looking great Jaw! Not sure I've ever seen this car built before.
In regards to paint sticking on the 3D bumpers, I've typically soaked them in Simple Green beforehand to remove the "waxy" finish created by the printing material. However, this wax also provides the smoothness of the parts and you will need to sand the parts afterwards before painting.
Looking at where the break is on the bumper, you may be able to get away with gluing it back together with no visible problems! Can't wait to see it finished
|
|
|
|
Post by jaw12287 on Jun 30, 2015 11:06:21 GMT -5
Just saw this thread... looking great Jaw! Not sure I've ever seen this car built before. In regards to paint sticking on the 3D bumpers, I've typically soaked them in Simple Green beforehand to remove the "waxy" finish created by the printing material. However, this wax also provides the smoothness of the parts and you will need to sand the parts afterwards before painting. Looking at where the break is on the bumper, you may be able to get away with gluing it back together with no visible problems! Can't wait to see it finished Thanks Sadler! Unfortunately it looks like that piece is a goner. It's hard to see in the picture but the inside wall on the left is missing a substantial chunk (I have all the pieces but attempting any further surgery may be too time consuming. I just got two extra bumpers that I bought for other projects that I can use in place of the broken one. |
|
|
|
Post by jaw12287 on Jul 16, 2015 20:08:09 GMT -5
Making strides here. Almost done with the decals, just waiting on a few replacements to show up. Starting to see light at the end of the tunnel! 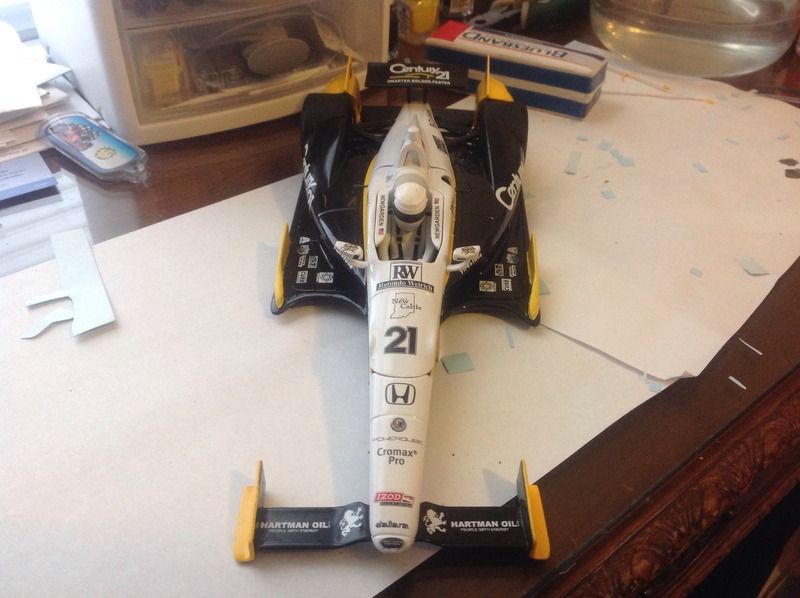 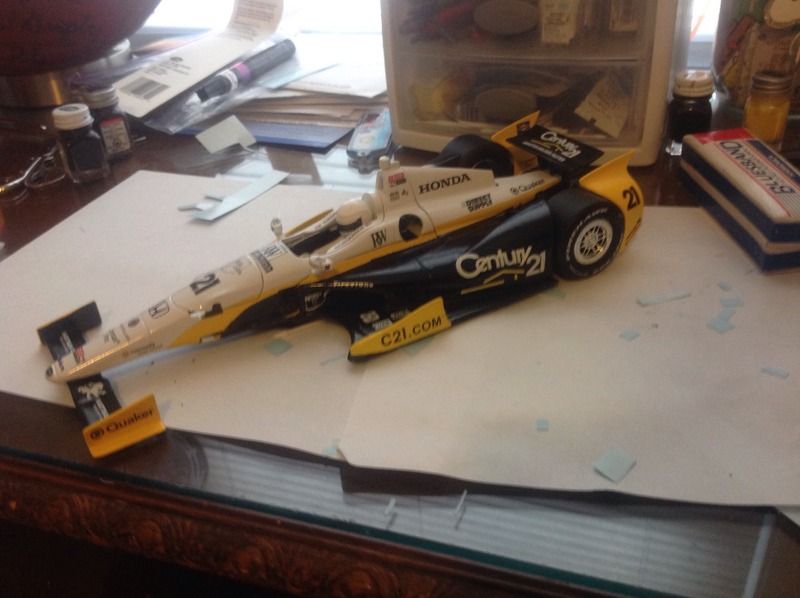 |
|
|
|
Post by chromehorn08 on Jul 16, 2015 20:27:52 GMT -5
Someone once told me "the light at the end of the tunnel is just a freight train headed your way" hopefully that's not the case here. Build is looking good!
|
|
|
|
Post by Calvin on Jul 16, 2015 22:37:41 GMT -5
Juan! no no no !  I don't think he's going have to worry about trains as it looks flawless from now on! |
|
|
|
Post by indy on Jul 17, 2015 8:46:31 GMT -5
Glad to see you overcame the issues with this one. Cannot wait to see it finished up.
Jordan
|
|
|
|
Post by jaw12287 on Aug 3, 2015 10:36:20 GMT -5
|
|
|
|
Post by indy on Aug 3, 2015 10:49:20 GMT -5
Looks great, you did good work on it and stuck with it when it almost fell apart (literally). Looks at home in the box even though it is better than anything GL put out.
Jordan
|
|
|
|
Post by gwstexas on Aug 4, 2015 8:42:27 GMT -5
Great job, Jake!
Gary
|
|
|
|
Post by jaw12287 on Aug 4, 2015 10:21:12 GMT -5
Thanks Gary! you did an awesome job on the decals, like always!
|
|