|
|
Post by indy on Jun 30, 2014 20:56:40 GMT -5
I only found out for sure why they acted like steel but looked like CF earlier this year when a member here posted about what they had learned from visiting the Dallara factory in Indy. I always find it interesting to see what I can learn from others here  Jordan |
|
|
|
Post by INDY22IAM on Jun 30, 2014 20:57:15 GMT -5
You guys are correct on the suspension. It is steel for cost and structural reasons. They than cover them with carbon fiber covers to hide the wheel tethers. They talk about this in the tour of the Dallara plant in Indy.
Looks like on the wheel nuts from the pictures of Oriol's car that they are red on the right and black on the left. Great job on the details.
|
|
|
|
Post by chromehorn08 on Jun 30, 2014 21:00:34 GMT -5
Steve Matchet mentioned this on the broadcast. Steel suspension with carbon fiber details. The newer Greenlight 2013 Briscoe 2014 Hinchcliffe etc. have the CF detailed suspensions.
|
|
|
|
Post by harveythedog2 on Jul 1, 2014 6:25:49 GMT -5
|
|
|
|
Post by harveythedog2 on Jul 8, 2014 8:53:59 GMT -5
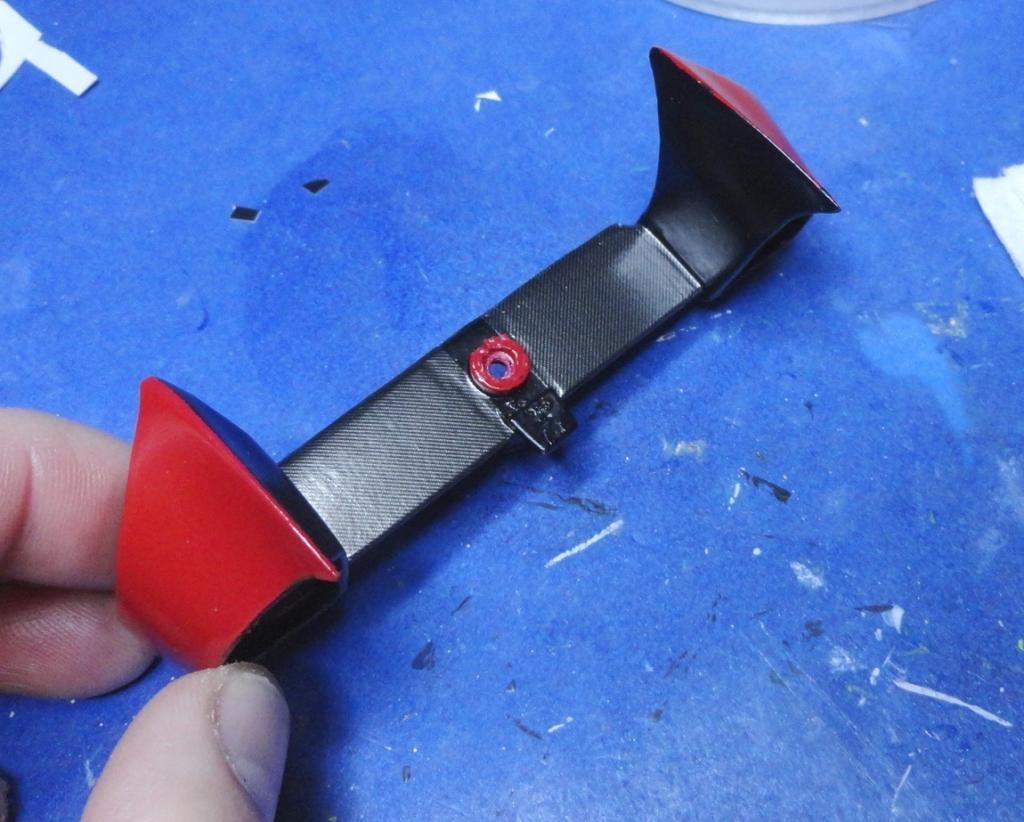
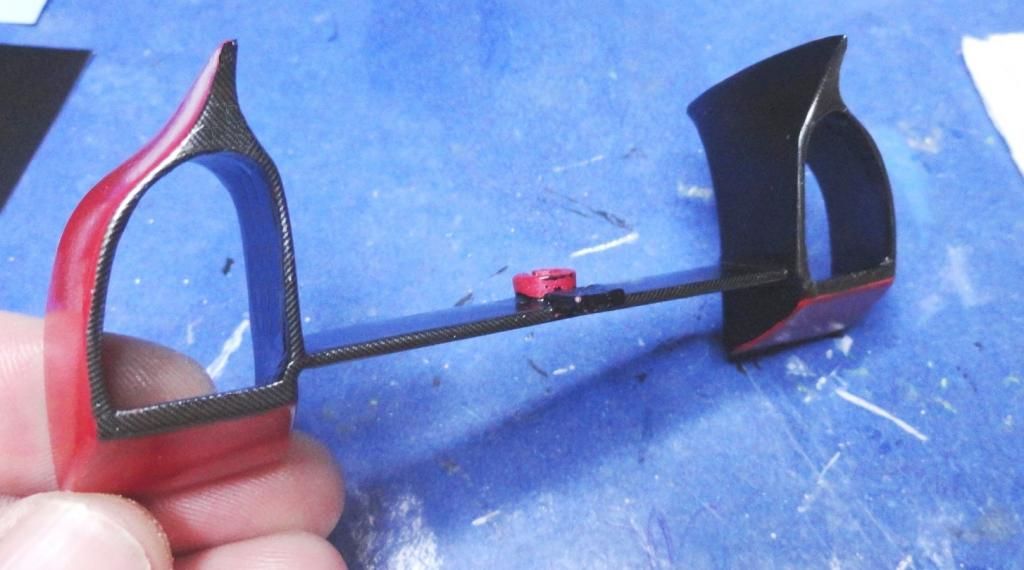
Bumper detail   |
|
|
|
Post by pje on Jul 8, 2014 10:45:48 GMT -5
Stu, looking at the bottom photo, how did you trim the CF to the outside face of the bumper? Was the CF precut or did you trim after you had placed it on the bumper?
Paul Erlendson
|
|
|
|
Post by harveythedog2 on Jul 8, 2014 11:39:20 GMT -5
Hey Paul - I cut a slightly oversized piece of CF decal (dry) and placed it over the edge. Then I used my thumb to pressed lightly all around the edges. Now I had a perfect indentation of the shape and I simply cut it out, dipped it in water and then applied. I didn't do the hole area as one piece though. I did the sides first and then the top and then the bottom. What you see on the back of the bumper is actually four pieces put together on each side.
Stu
|
|
|
|
Post by senn65 on Jul 8, 2014 11:40:35 GMT -5
Bumper looks perfect Stu but too much work for me.
|
|
|
|
Post by harveythedog2 on Jul 8, 2014 12:04:58 GMT -5
I usually go all out on one car a year. You can't make any money doing them all this way for sure.
One day I am going to keep track of all the hours I have in one just to see how much I make an hour. It's probably really sad... LOL But still tons of fun!
|
|
|
|
Post by indy on Jul 8, 2014 13:06:39 GMT -5
Impressive work, Stu. I'm liking the progress.
Jordan
|
|
|
|
Post by senn65 on Jul 9, 2014 9:25:56 GMT -5
I build some for my collection but mainly I build for the bucks & not ashamed of it either. I use flat or satin in place of CF which seems to be fine with buyers. We both know why you go to great lengths on some of your customs. Your work is masterful. There is no way I could do some of that CF work at my age.
|
|
|
|
Post by pje on Jul 10, 2014 10:16:43 GMT -5
Hey Paul - I cut a slightly oversized piece of CF decal (dry) and placed it over the edge. Then I used my thumb to pressed lightly all around the edges. Now I had a perfect indentation of the shape and I simply cut it out, dipped it in water and then applied. I didn't do the hole area as one piece though. I did the sides first and then the top and then the bottom. What you see on the back of the bumper is actually four pieces put together on each side. Stu Thanks Stu, that's an interesting technique that I'll have to try. Paul Erlendson |
|
|
|
Post by harveythedog2 on Jul 10, 2014 10:45:13 GMT -5
Thanks Guys. You make me blush Ralph because I base a lot of my work and success from stuff I learned from you. I just sometimes take it to the extreme.
The 1/12th Lotus I built has the spark plugs in the correct firing order. No would know otherwise but to me, the engine won't run right unless they are correct. And it's a model that doesn't run! That is how bad my model sickness is sometimes. Some would call it anal. LOL
|
|
|
|
Post by pje on Jul 10, 2014 11:05:59 GMT -5
Stu, I propose that we change the name of this site from "Open Wheel" to "Anal Support Group"!  Paul Erlendson |
|
|
|
Post by senn65 on Jul 10, 2014 11:25:48 GMT -5
Stu, I propose that we change the name of this site from "Open Wheel" to "Anal Support Group"!  Paul Erlendson Ha ha I think you may have something there pje. |
|
|
|
Post by senn65 on Jul 10, 2014 11:27:58 GMT -5
Thanks Guys. You make me blush Ralph because I base a lot of my work and success from stuff I learned from you. I just sometimes take it to the extreme. The 1/12th Lotus I built has the spark plugs in the correct firing order. No would know otherwise but to me, the engine won't run right unless they are correct. And it's a model that doesn't run! That is how bad my model sickness is sometimes. Some would call it anal. LOL I won't attempt some of the stuff you do Stu & I can't teach you anything, we just help each other which is a good thing. |
|
|
|
Post by harveythedog2 on Jul 10, 2014 12:57:38 GMT -5
Don't get me started Paul. You are the king of anal and I love you for it! Boy, that sounded off didn't it?
I meant the king of anal when it comes to modeling detail! LOL
|
|
|
|
Post by senn65 on Jul 10, 2014 16:50:01 GMT -5
Don't get me started Paul. You are the king of anal and I love you for it! Boy, that sounded off didn't it? I meant the king of anal when it comes to modeling detail! LOL Glad you straightened that out lol. |
|
|
|
Post by chromehorn08 on Jul 10, 2014 21:43:08 GMT -5
Thread just took a nose dive into the gutter lol. Build is coming along nicely Stu!
|
|
|
|
Post by harveythedog2 on Jul 16, 2014 11:39:10 GMT -5
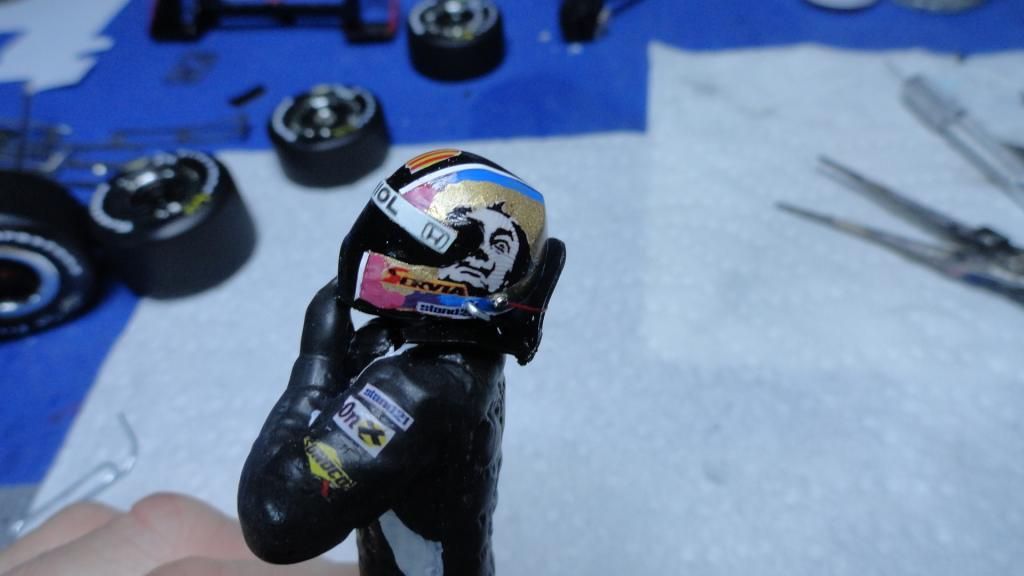
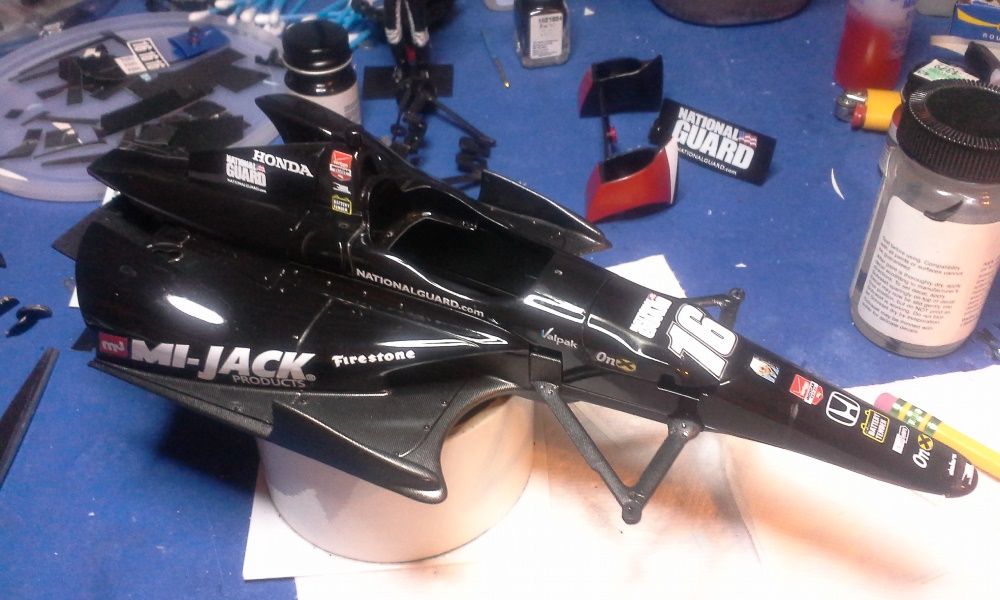
Fitted my Oriol figure with a Hans device and started the decal application on the car. Once done and decals are dry I will clear the car with a dull coat clear to get that flat black look.   |
|
|
|
Post by senn65 on Jul 16, 2014 12:11:01 GMT -5
Ooh man that's coming along nicely, paint looks really nice & slick.
|
|
|
|
Post by indy on Jul 16, 2014 12:27:51 GMT -5
Flawless black paint, almost a shame to cover it in flat.
Jordan
|
|
|
|
Post by harveythedog2 on Jul 16, 2014 12:57:05 GMT -5
Yes, one of my better paint jobs and I always have problems with gloss black. Go figure it has to go flat! LOL
|
|
|
|
Post by Calvin on Jul 16, 2014 14:25:22 GMT -5
I'm so glad you are smart because most people would just paint it flat to begin with and lay the decals over the flat black which in turn makes the decal edge bad looking!
|
|
|
|
Post by harveythedog2 on Jul 16, 2014 14:31:33 GMT -5
I struggled with this at first Calvin and thought about just flat coating the decals. I asked Michael how he would do it and he said paint it gloss black, add the decals and then dull coat it so that is what I am doing.
Michael is the smart one!
|
|
|
|
Post by Calvin on Jul 16, 2014 16:11:18 GMT -5
Um, well....I still think you're smart!
I actually learned this trick back in the day when I was about 15. (11 years ago)
|
|
|
|
Post by pje on Jul 17, 2014 0:17:06 GMT -5
Actually, we old aircraft (and armor) guys were using that technique way back in the last century in the old enamel days. Flat enamels were a lot easier to air brush than gloss, so all the color paint work was done in flats. Then we air brushed on Testors Gloss Coat. It’s a type of lacquer, but with the light air brushed coats, it wouldn’t attack the enamel. Then apply the decals finished off with a coat of Testors Flat Coat, and hopefully no silvering of the decals.  Technique worked nicely as aircraft and armor markings are fairly flat to begin with. The trouble with these new flat black car schemes is the graphics applied to the cars. Almost impossible to replicate as in Stu’s case, the flat coat needs to be applied over the decals which on the real car are fairly glossy vinyl applications. I suppose the ideal way would be to use some type of vinyl decal, but most of the ones I’ve seen tend to be rather thick and hence make things more toy like. Your solution is the best that I know of Stu, and it’s looking very great. Paul Erlendson |
|
|
|
Post by harveythedog2 on Jul 17, 2014 6:45:08 GMT -5
|
|
|
|
Post by indy on Jul 17, 2014 8:57:15 GMT -5
Nailed it! Nice detail work like the C/F camera pod.
Jordan
|
|
|
|
Post by pje on Jul 17, 2014 8:57:30 GMT -5
WOW!
Paul Erlendson
|
|