|
|
Post by drums01 on Oct 13, 2012 13:33:54 GMT -5
Everyone,
Last year I started a 1:16 Bandai Red Ball Lola. Other than what I showed at that time in pictures, nothing else has been done.
Could I use this "build-o-rama, as my excuse to get off my duff and really start then complete it?
Basically, can I "get-er-done", and use this contest as my catalyst?
Just wondering!
|
|
|
|
Post by clm1545 on Oct 13, 2012 17:20:26 GMT -5
I don't make the rules, but it is sure OK with me.
Take Care
Craig
|
|
|
|
Post by indy on Oct 13, 2012 17:31:18 GMT -5
Absolutely!! The initiative is to get guys back to building. The rules have eased up since the beginning and now it is just about building something open wheel.
Jordan
|
|
|
|
Post by drums01 on Nov 12, 2012 13:46:44 GMT -5
FINALLY, As promised... I want to apologize up front for the poor pictures. I do my best, but between the camera type and poor lighting, it is very difficult. I am not a master photographer anyway so I start with a disadvantage. It has been quite some time since I worked on the 1/16 Bandai Lola. This started out as an idea, but I got carried away with it. The model was molded many years ago (early 1970's). The body is generally a good starting point, but the engine, suspension, and other things I'll mention later have very little or completely incorrect toy like details. The kits front suspension is a total of 6 very basic parts, the picture below shows after I cut out the twin "AA" battery box and then created the entire front suspension, including bulkheads, fluid reservoirs, radiator and suspension mounts, complete radiator, and assorted other items from actual photos. The top suspension arms had to be made thicker while the bottom ones were made from scratch (brass and wire). The working rack & pinion steering was from brass rod, stainless, sheet plastic, pieces of jewelry, and tie-rod ends from spares. The fluid reservoirs were made from extruded styrene, and the radiator was from a combination of sheet plastic solder, and photo-etch screen. The kit also does not come with any brakes or holes for the fuel cells. The brakes were sourced from my spares, scaled against various pictures, and modified. The fuel cell holes were drilled then shaped, and then filled from below with plastic sheet. The fuel block was made from a very small lock washer pounded flat, sheet plastic, and brass tubing. 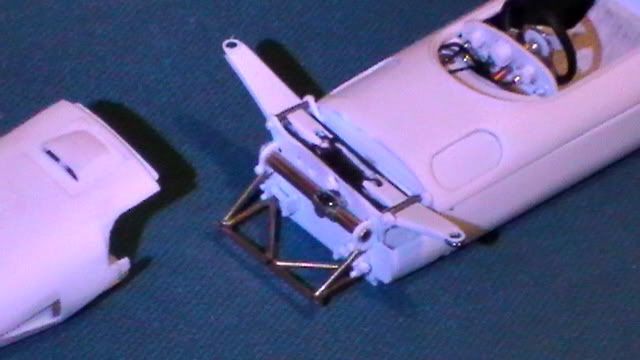  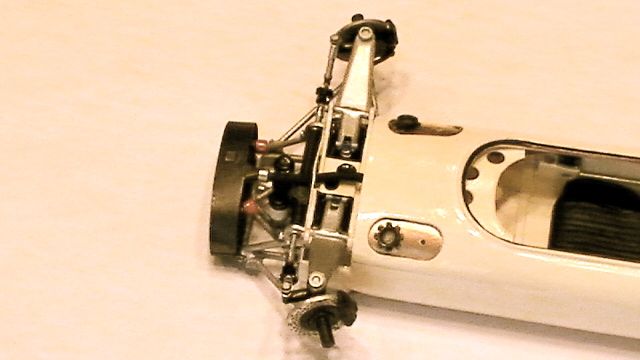 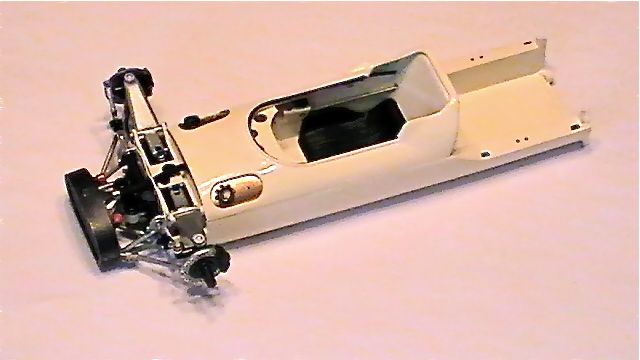 |
|
|
|
Post by harveythedog2 on Nov 12, 2012 14:42:28 GMT -5
Great stuff!
Stu
|
|
|
|
Post by drums01 on Nov 12, 2012 14:43:41 GMT -5
|
|
|
|
Post by drums01 on Nov 12, 2012 14:58:18 GMT -5
Now, the engine was a very crude 5 pieces in kit form consisting of the two engine/trans axle half's; a very basic front without any detail, two heads, and that is it, (less the four cam covers). I really cannot tell you the number of pieces I added, but it is easily over 50. Below is the highly modified block, heads, etc., to include new bolt heads, a fuel pump, distributor/magneto, throttle linkage, etc. The trans axle has been highly modified as well to include bolt heads, casting reinforcement lines, drain plugs, etc. One thing weird about the kit is that it does not have the closure for the bottom of the engine or transmission, so I made them as well. I use various pictures for the engine detail so I cannot honestly say that is how the Red Ball Lola's engine was accurately appearing the day of the race. The engine was fully plumbed and wired (before adding it to the chassis for other hoses and lines).  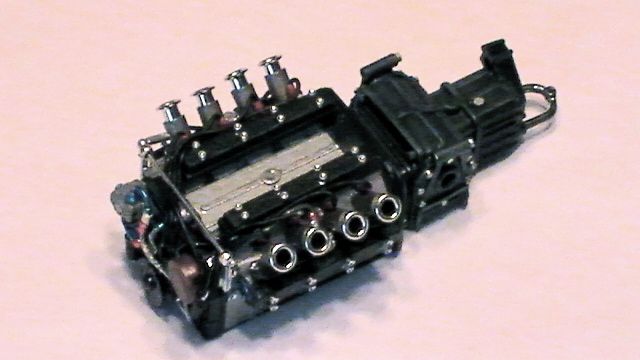   Something neat to add about the injectors; they are from Hobby Lobby in the necklace and jewelry section. They are metal and come in chrome, copper, and gun metal. I had a set of photo-etch but these actually look more accurate in scale. The jewelry pack came with enough to make at least three engines in 1/16 or 1/18, three in 1/20, and three in 1/43. The cost, was only $4.00. Depending on if you want long or short stacks is a matter of adding them to some cut brass rod or plastic, or not. I still plan on putting throttle bodies in the injectors (they are not glued). The last pictures show the scratch built rear suspension bulkhead bar. It will relocate the rear shocks in the correct positions, the rear suspension ties to the control arms, and the torsion bar (not provided in the kit). It was made from aluminum tubing and sheet plastic, the kit part was cut off after the lower portion was fixed to the body as it was terrible. |
|
|
|
Post by drums01 on Nov 12, 2012 15:24:45 GMT -5
The kits rear suspension was very simple and not accurate to the original car either. After some research, here is what I came up with for his car on race day. There were modifications to the real Lola's suspension over time, but this is what I could identify.   The brakes did not come with the rear either, so I sourced a pair and detailed them to include a complete caliper. The modifications included bolt heads, solder cross bracing, lower torsion bar mounts, control arm ends from my spares box, brake caliper mounts, various bolt heads, etc. I also repositioned the shock mounts to their proper locations.  The rear springs in the kit were terrible. Replacements were spare parts that were modified to scale and length: 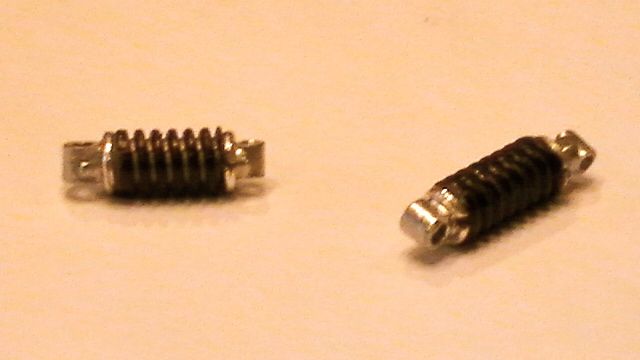 |
|
|
|
Post by drums01 on Nov 12, 2012 15:36:43 GMT -5
|
|
|
|
Post by drums01 on Nov 12, 2012 15:48:58 GMT -5
Here some other picture of the complete body panels together.  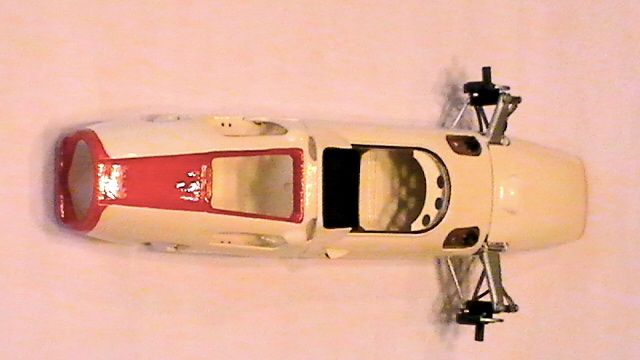 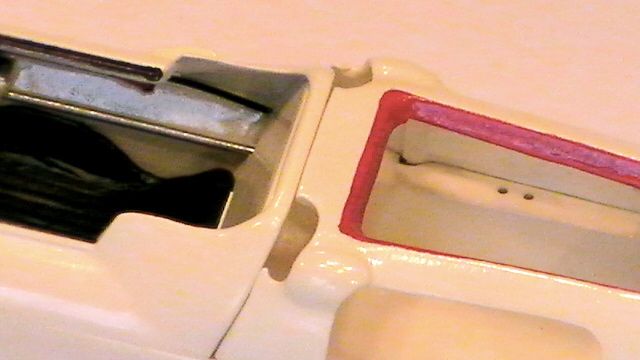  My next step is to replicate the look of the long and short half shafts with U-joint connections. Soon after that I hope to begin the final assembly of the rear suspension. After that I am finishing minor detail painting and then applying those wonderful decals from Indycals which Michael made based off of some time consuming investigation to the accurate vintage markings, placement, and colors... (Thanks Michael!) I'm not sure the direction I'm going with the exhaust. Not sure if the kit parts are scale correct, or if I can use aluminum, brass, or solder to bend them to shape. Does anyone have a tried and true recommendation for accurate simulated exhaust tubing? Also, if you see something I might have forgot about, please let me know.... To me, part of the fun is sharing ideas and techniques. Thanks in advance for your input... |
|
|
|
Post by Chris on Nov 24, 2012 13:49:41 GMT -5
Drums, I am using a set of U-Joints from www.shapeways.com to scratchbuild the rear suspension on the 1/16 Ford GT40 also from Bandai/AHM  all you need to add are some CV joints and the ones in the kit may work!! Shapeways is a 3d Printing co. that is really getting into making model parts in all scales. Cost $14.10 plus $6. shipping, time spent scratchbuilding 1 u-joint = 4 days and it went into the trash!!!! The product is very nice , no flash although a bit of smoothing will make it a little more attractive. Oh and I am adding metal caps on the u-joints to tighten them up and look real . I will be doing the Jimmy Clark Lotus 38 in 1/16 also from Bandai/AHM with a scratchbuilt D.O.H.C. Ford engine based om a Ford small block and a set of drawings.. but it wont be for a while due to the GT40 thats about 3/4 done!!! check my Fotki for pics on that at public.fotki.com/pmodwrks/ in the 1/16 Ford gt40 Alan Mann AMTGT40 01/02 album... Chris |
|
|
|
Post by drums01 on Nov 24, 2012 16:25:11 GMT -5
Chris,
Thank you very much for the information on Shapeways. Prior to your message I never heard of them. Unfortunately for me I've managed to make all four already for my Red Ball Lola. Because of the headache and time, I will look into using these in the future. Thank again for the tip.
I looked at your GT40 WIP, I love it. Can't wait to see how your Bandai Lotus comes out. I really love both of those cars. This is my favorite era.
|
|
|
|
Post by drums01 on Feb 27, 2013 19:25:05 GMT -5
Well everyone, I've gotten all of the rear suspension complete parts built including the half shafts. The cockpit is done except the decals and belts; the engine has been installed and all rear suspension painted and assembled; and finally the rear body cowling mounted. I like it that much of the detail spent on the engine can be seen through the various openings, but thats the problem...
I want to take accurate and clear pictures to show it to everyone, but my photo skills and camera are crap. I will try my best to get some decent pictures of the work-up. It is currently at the stage just before applying the decals, water hose and cap on the roll bar, rear suspension control arms, wind screen and mirrors, and wheels with knock-offs. Almost done, but I can't get past the picture hump....
Hope to post them real soon!
|
|
|
|
Post by 2lapsdown on Feb 27, 2013 22:07:38 GMT -5
This type of craftsmanship just blows me away. Just a wonderful job, thanks for sharing.
John
|
|
Deleted
Deleted Member
Posts: 0
|
Post by Deleted on Mar 3, 2013 22:34:12 GMT -5
There it is!
I'v e been watching for this one.......great to see it here!!
|
|
|
|
Post by drums01 on Mar 5, 2013 15:07:30 GMT -5
FINALLY!, more pictures.... I've been waiting to go any further with this until I got some of these done. It is now to the point that the only things remaining from the box unmodified is the wheels. Actually, the ONLY parts from the box are the body panels wheels, tires, engine halves and heads, and rear suspension uprights. Everything else is either scratch built or sourced from some spared and then modified. First is the area I was most concerned about, the rear suspension. Notice the Hewland transmission decal (an Indycals item). Just a post note; each half shaft is comprised of 19 pieces.  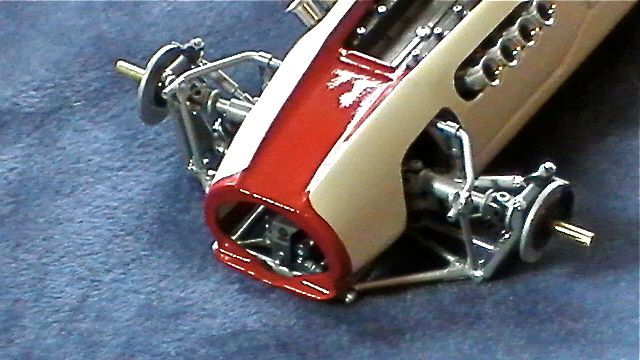 Everything was done by brass, aluminum, solder, or plastistruct materials. Next is the cockpit which also has the small Lola decal I got with Michael's decals (neat). This assembly has 24 parts. 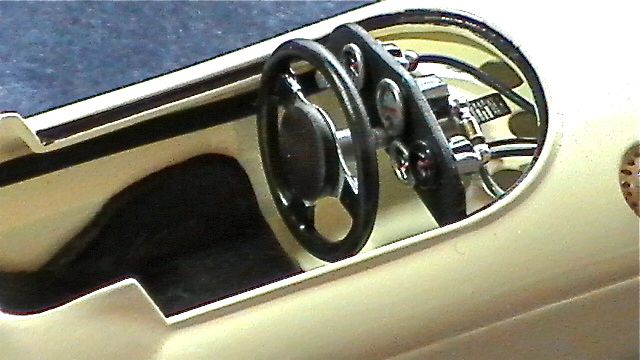 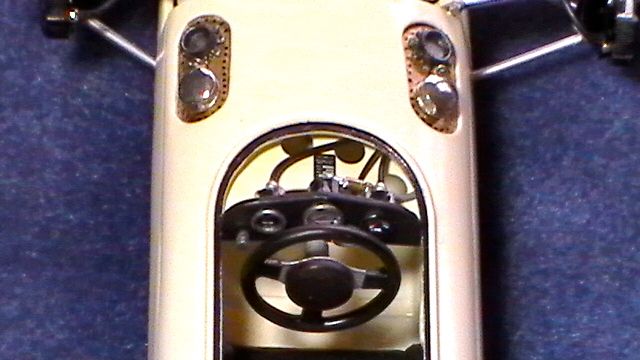 Here is a detail shot of the engine detail and roll bar with ignition module: 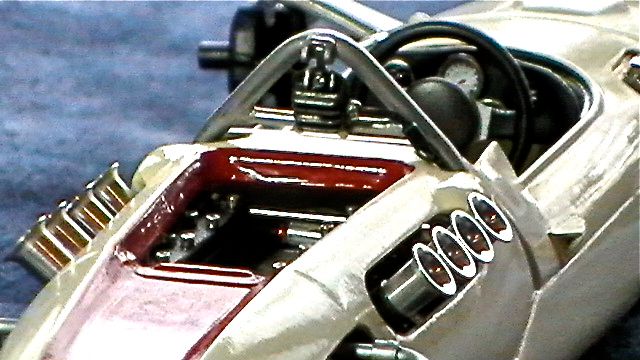 Here is another detail shot of the left rear showing the engine detail to include another Ford engine decal provided by Indycals. Each of the bolt heads were added. It also has complete fuel injection fittings and hoses as well as spark plug wires and boots. 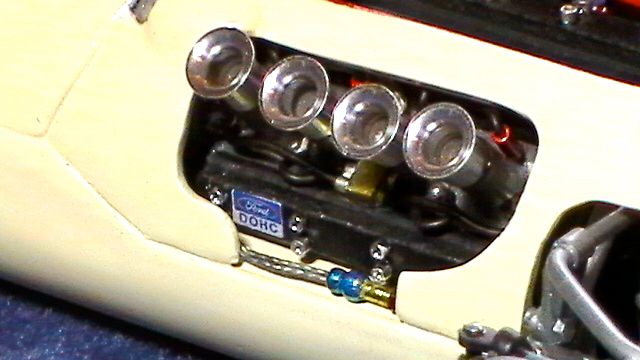 Last are some body shots:     What cannot be seen are the numerous hoses and wires from up font all the way back throughout the engine. They are there and can be seen, but not by my camera shots. I now have to add the decals of the Red Ball Indy car, create and attached the rear suspension control arms, create and add the radiator port behind the left of the roll bar, assemble and instal the seat harness. I'll also add decals to the tires. I am finding that it is very difficult polishing the windshield as it is very grainy. Then the finale will be to add the snaked exhaust (kit or something else to be determined)..... Almost There!!! |
|
|
|
Post by indy on Mar 6, 2013 11:26:16 GMT -5
It looks great. The detail work and scratch building is very impressive.
Jordan
|
|
|
|
Post by drums01 on Mar 14, 2013 16:01:47 GMT -5
Thanks Jordan... I think it is taking some of the enjoyment out of the build with the amount of research and scratch building, but I hope in the end it is worth the effort.  I think my next will be mostly straight out of the box.... mostly. I hope to have it fully stenciled this weekend, then clear coat and finally the last details... Michael (Indycals) made me some great decals. I just hope I do not booger them up putting them on the car. I guess we will see soon! ;D |
|
|
|
Post by drums01 on Mar 24, 2013 11:34:12 GMT -5
Finally got the Red Ball decals on the Lola. Frankly, I am impressed with the colors and quality of the Indycals product. ;D, Good job Michael!  I still have to decal the soft rubber tires with the firestone stripes, add the rear stabilizer bars from scratch, create and add the water fill tube by the roll bar, polish out and mount the windshield with mirrors, build up the photo-etch seat belts to add them to the cockpit, then add panel lines with access fasteners, add the rivet detail to the body, and then finally mount the completed tires with spare parts knock-offs. I'll be adding pictures real soon..... Does anyone have a good source for a wood base acrylic display case? |
|
|
|
Post by drums01 on Apr 14, 2013 9:46:40 GMT -5
Sorry about the delay. It is baseball season, springtime in the yard, race season (Indy, NASCAR, ALMS, Moto GP, & F1). Then there is exercising (running and weights) and building other models, playing drums, shooting, etc. There is motorcycling with my son in his side car, and cruising in the Camaro. Top that off with a MH special needs son requiring 24/7 care, and time becomes premium. Can't forget work, which supports all this either.
I have the decals applied and much of the other parts created but bending a proper soft copper snaked exhaust is very time consuming. I did find that the tire striping and Firestone decals DO NOT like the soft vintage Bandai rubber. I did my best at hand painting the tire stripes, I'll post them in my photos. Really, photos are on the way... I promise.
|
|
|
|
Post by Gary Davis on Apr 28, 2013 14:32:21 GMT -5
Man Drums...you've done a lot of GREAT work here.I also have this kit and seeing your work has given me a little incentive. Looking forward to the next set of pics from you.
|
|
|
|
Post by drums01 on May 2, 2013 6:02:24 GMT -5
Since the build period was over for this winter blog, I added new pictures in the Indy board area. They show the car with the main decals on. I just recently added the decal rivets and duz fasteners from Indycals.
Next is the clear coat and then finishing the seat harness, windscreen with mirrors, snake exhaust, rear suspension links, water filler by roll bar, then finally the wheels with knock-offs. I hope to be done with this soon...
Check out the indy board for the time period and you will see my latest photos. My apologies to everyone for taking this long on my build.
Thanks for the feedback, and happy modeling!
|
|
Deleted
Deleted Member
Posts: 0
|
Post by Deleted on Dec 31, 2014 20:24:33 GMT -5
Drums,
Killer job on the Lola. 
I have a glue bomb of the same kit, and mine is a mess. I would love to do to mine what you did to yours.
I just got done taking mine apart, and I have a lot of work to do, especially on the suspension components.
Did the real Lola have that frame that runs the length of the chassis that is in the Bandai kit? I don't see it in yours..
Its a cool ride and I would love to restore it.....
I saved your pics for reference... 
Cheers, Ian |
|
|
|
Post by drums01 on Jun 27, 2015 14:04:06 GMT -5
No it did not have a pan under the engine like on the kit. The rear tube suspension is not like the others of the era either, same technology, but different . Of course, the battery compartment must be removed from the cockpit area and the fuel tanks, bracing, pedals, etc. added. There are several web site out there with the details. I will try to look them up again and provide them for everyone.
|
|