|
|
Post by Patrick on Mar 27, 2012 19:36:05 GMT -5
Way back when Tokyo Mauri came out with their 312T I built one (I also built their McLaren and Tyrrell...wish I had them both now!). It has fallen on hard times and has needed a full restoration... 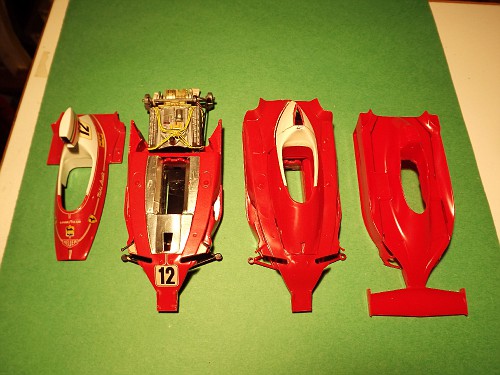 ...there is another 312T car that is going to be converted into an early 312T2 and a 1/28 Nitto 312T3 that I am going to cut and enlarge it to 1/24 to complement the other two... 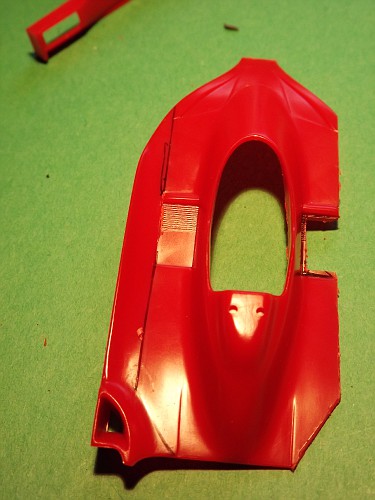 ...the goal of this project is is to continue the 312 flat-12 history that I started with my rare Trinity Models 312B3/1974 and my recent Polistil 312B3/73. I will then have a '73, '74, '75, '76, and '77 F1 Ferraris. I may be able to make a 312B of '72, but a T4 and T5 seems to be not within reach of my project... Patrick |
|
Deleted
Deleted Member
Posts: 0
|
Post by Deleted on Mar 28, 2012 4:26:49 GMT -5
Interesting subject Patrick, I have several Nitto 1/28th scale kits. love the subjects but hate the scale!, I'll be watching and learning how you tackle the scale increase to 1/24th scale.
Ian
|
|
|
|
Post by Calvin on Mar 28, 2012 11:22:47 GMT -5
It will be interesting to see how you go about doing this!
|
|
|
|
Post by mjjracer on Mar 28, 2012 14:49:55 GMT -5
Great projects Patrick. I have a glue bomb 1/28 312 you are welcome to if you could use it. Also a Lotus 79 & Brabham-Alfa if you want yet MORE projects!  MJ |
|
|
|
Post by Patrick on Mar 28, 2012 18:06:33 GMT -5
Slice and dice time... 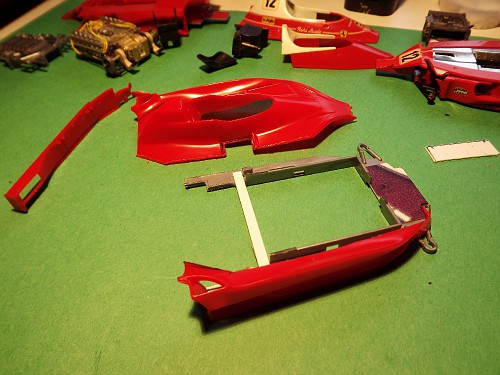 the chassis had to be widened... 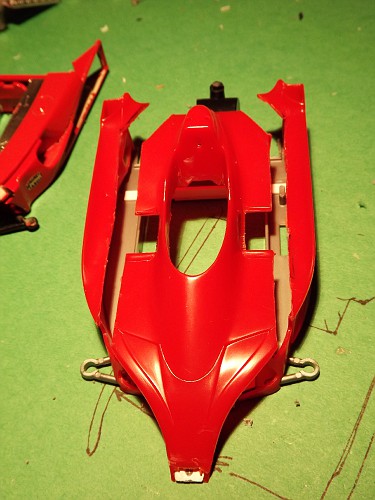 a test fit showed I was on the right path... 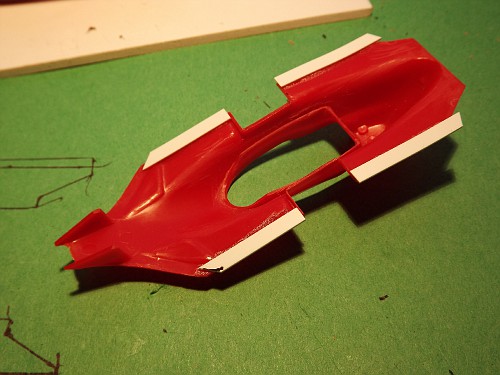 ...tabs were glued for the widening... 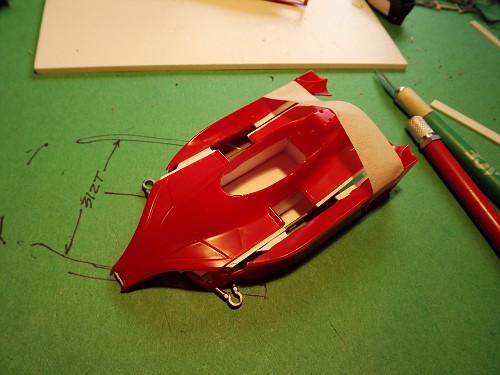 I need a new saw blade cuz my cuts are a bit ragged sometimes... 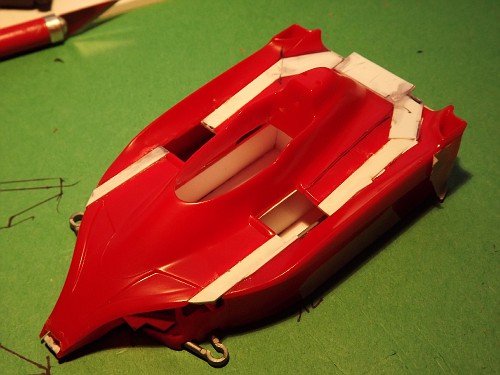 ...well it looks good so far...rough, but a bit of putty and sandpaper will work miracles! The width is good now, but the length was close enough. My research showed that there were two different WB cars, a long and a short (the short chassis works well for this project). The T2 car is very similar to a T car with minor rule changes. The major changes are going to be on the engine cover and the cockpit cowl. The duct and cowl was changed because of a rule change that banned the tall scoop that carried air to the engine. 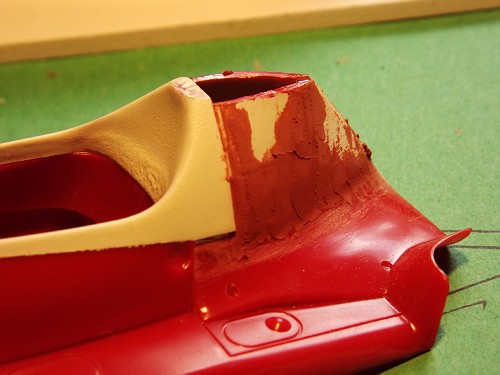 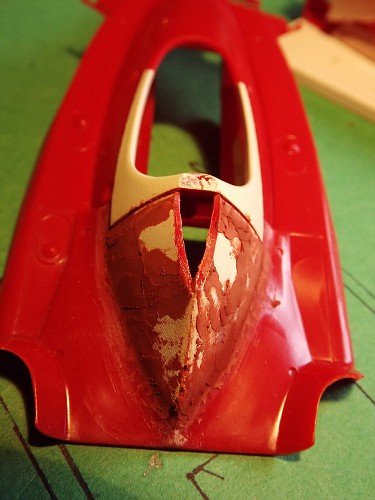 A modified NACA duct will be in the front of the cowl which would then take the air to the engine... Patrick |
|
|
|
Post by Patrick on Mar 29, 2012 23:32:25 GMT -5
Back to the T3...Ah, putty! 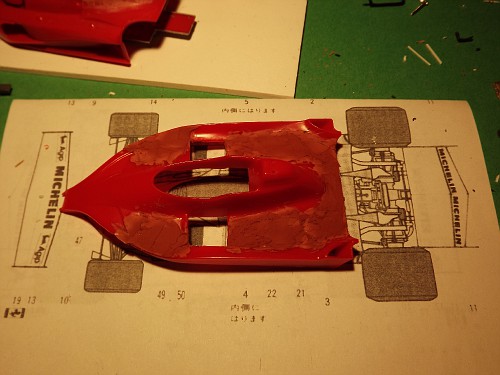 top front suspension... 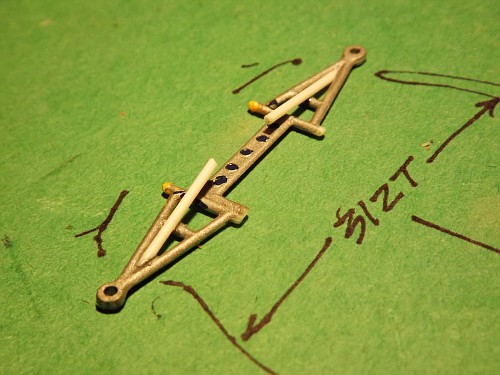 locating the side radiators... 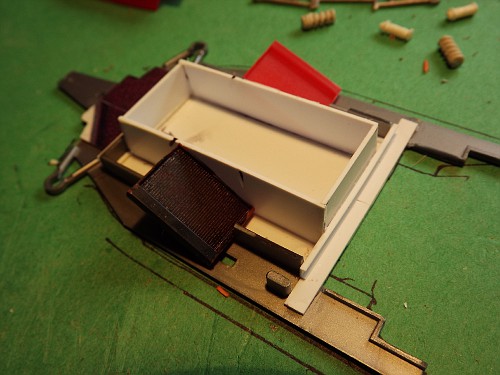 the seat and dash are from another Polistil toy... 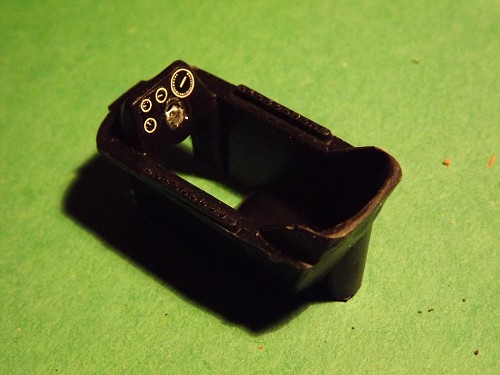 The T2 project continues with the front "nostrils"...  I vac-formed the stock part so I could use the vac-part as the inside of the air duct... 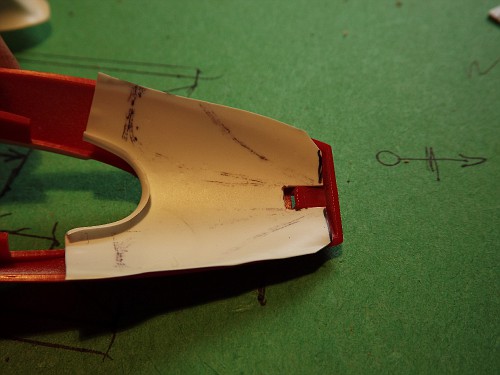 as I was trimming the opened space...A-A-A-H-H-H!*#&!*%$#!*... 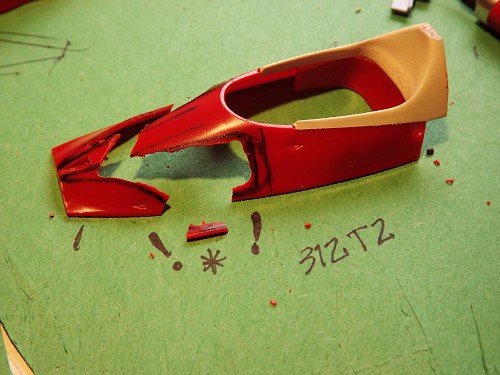 Well, enough work for today! Be calm and breathe slowly in and out. |
|
|
|
Post by 2lapsdown on Mar 30, 2012 6:41:51 GMT -5
Patrick, the work you do is very special.
John
|
|
|
|
Post by Calvin on Mar 30, 2012 9:55:03 GMT -5
LOL! What can I say? .........Patrick, you are one of a kind! Its great to watch.
|
|
Deleted
Deleted Member
Posts: 0
|
Post by Deleted on Mar 30, 2012 16:02:39 GMT -5
Model gremlins can bite! we've all been there. Very much enjoying following this Patrick, and learning from a master.
|
|
|
|
Post by Patrick on Mar 31, 2012 12:38:15 GMT -5
Grumble grumble...the 312 T Mauri kit was a fine kit for its day. It has nice thin walled plastic, but at over 20 years old the plastic is very brittle. I've snapped two more parts of the body, but repairs are being done...slowly.
Patrick
|
|
|
|
Post by SWT500 on Mar 31, 2012 15:28:04 GMT -5
You have neglected to tell us if you are a decendant of Michaelangelo and/or Da Vinci...
|
|
|
|
Post by Patrick on Mar 31, 2012 16:33:37 GMT -5
Ha! More like Hambone Stywickie. I HATE brittle plastic.
Patrick
|
|
|
|
Post by Patrick on Apr 1, 2012 22:25:09 GMT -5
Well, challenges are opportunities to learn to overcome adversity. Patience to let the glue cure was a good idea. I was able to strengthen the breaks by gluing the edges as supports for the shroud ducting... 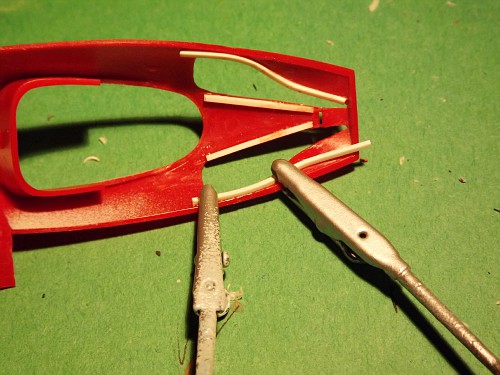 Sometimes when parts sit around for a long time some will get lost. Yes, I lost one side of the flat-12 engine for the T2! I'll need to get another Monogram Testa Rossa kit for another engine to modify. I already modified a new transverse transmission for the T3 car. Patrick |
|
Deleted
Deleted Member
Posts: 0
|
Post by Deleted on Apr 2, 2012 15:13:51 GMT -5
Clever solution Patrick, as you say oppertunity to learn.
|
|
|
|
Post by Patrick on Apr 8, 2012 12:34:28 GMT -5
T3 check-in...putty...sand... 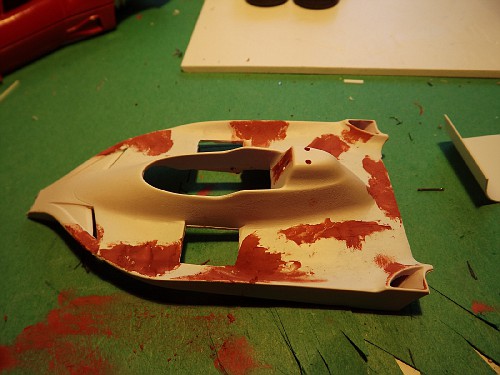 opened up the nose vents... 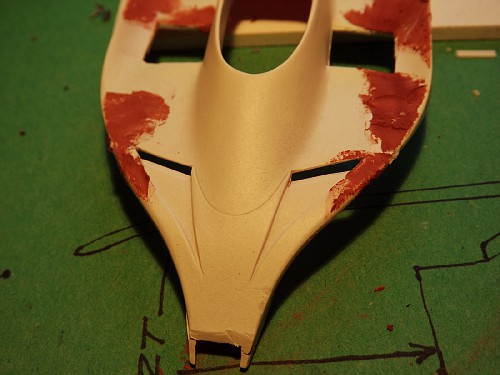 sanding nearly complete... 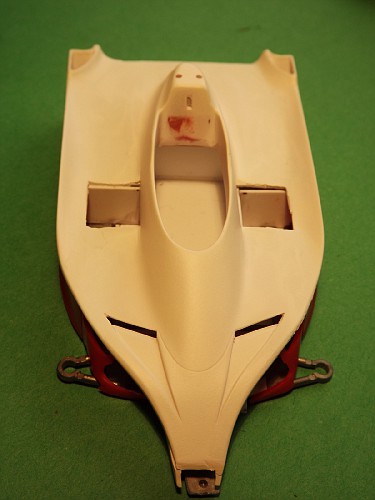 this has been tedious...I wish I was doing a "kit" LOL! Patrick |
|
|
|
Post by Chris on Apr 8, 2012 17:27:43 GMT -5
Patrick, No Doubt You are one of the 7 Wonders of the Modeling World!!! Chris  |
|
|
|
Post by Patrick on Apr 8, 2012 18:47:39 GMT -5
Rather than waiting for another Testa Rossa kit engine I decided to make up somethig that would look "ok". Photos later...oh, I also cleaned up the 312 T car so soon I can paint all 3 cars at one time.
Patrick
|
|
|
|
Post by Patrick on Apr 14, 2012 13:01:08 GMT -5
The kit engine is on the left and my modified one on the right... 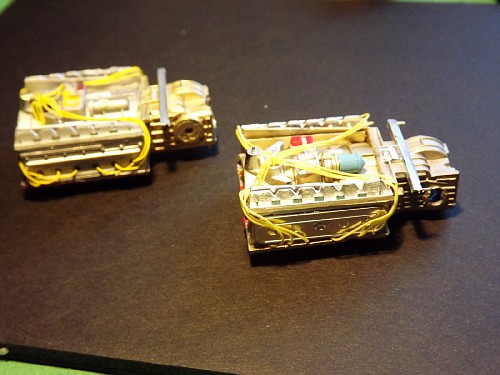 Here's the bashed trans for the 312 T3 car... 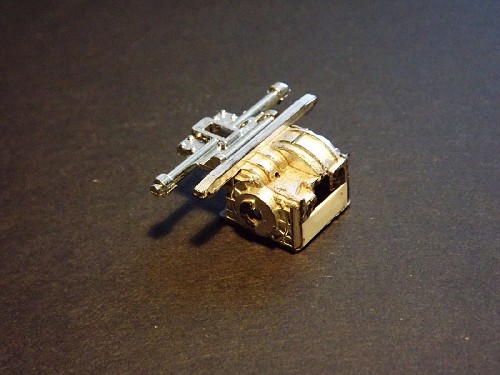 everything is ready for the paint shop... 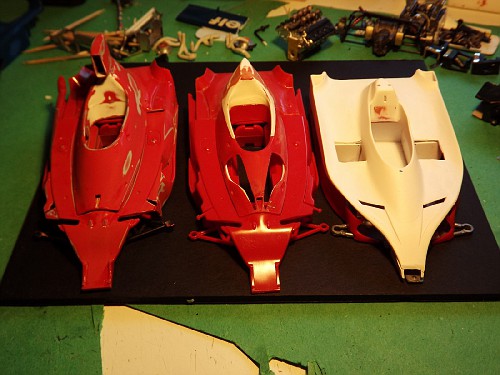 Patrick |
|
Deleted
Deleted Member
Posts: 0
|
Post by Deleted on Apr 24, 2012 8:45:33 GMT -5
Crackin' Patrick, just crackin.
Ian
|
|
|
|
Post by Patrick on Oct 5, 2013 11:02:18 GMT -5
Santa Vaca! It has been over a year and a half since I last worked on these "T" cars! But with time the approach to the finish is sometimes easier. I was close before I ran out of petrol! Maybe a good warm weekend to re-pair and re-paint.
Patrick
|
|
|
|
Post by Patrick on Oct 7, 2013 11:35:32 GMT -5
A good paint day yesterday. I got most body parts painted, but one "T" car tub still had some decal residue I needed to take off, ugh! 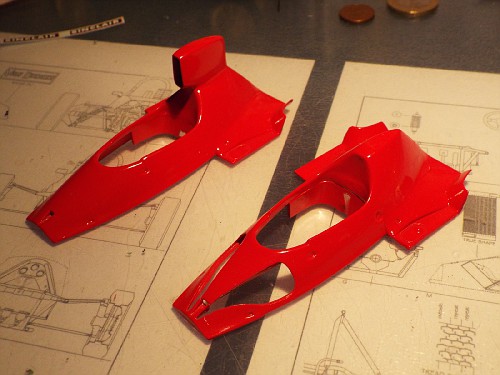 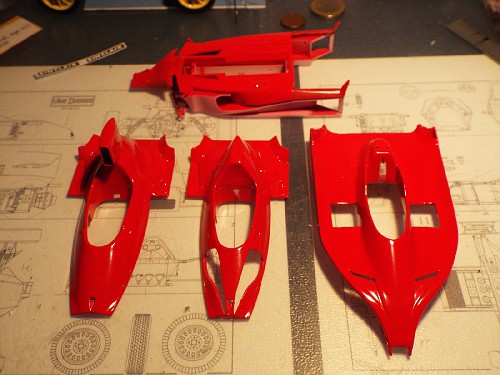 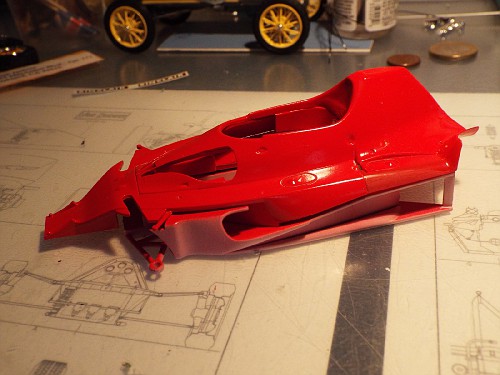 Looks like a miniature Rush! Patrick |
|
|
|
Post by Patrick on Oct 7, 2013 20:15:47 GMT -5
Grrrrrrrr! Why are things difficult sometimes? The new paint doesn't match the wonderful red of the first paint job. Calvin warned me of matching paint and here it bit me in the butt! I might have to start all over again by stripping all the paint and do it all at one time. Not what I'd like to do to be sure. Oh well. Back to the drawing, i.e. painting, board.
Patrick
|
|
|
|
Post by Calvin on Oct 8, 2013 10:44:51 GMT -5
I'd love to take credit but I can't because I warned you about Tamiya Flo red not every type of paint......Maybe what you just sprayed will dry the same shade? Becuase sometime paint will take on a different shade once it's 100% dry....
|
|
|
|
Post by Patrick on Oct 12, 2013 11:14:10 GMT -5
Calvin, Well, I hoped the Tamiya Italian red would be the same, but alas and alak, it was not to be. They are just noticeably different. I'll just wait 'till a good warm day and spray ALL the body pieces at once (and for all I might add). I did cut up a Mauri flat 12 engine to show how to make one a bit more accurate in appearance (they were designed to hold the Mabuchi motors like the McLaren and Tyrrell models)...first glue the engine together and then cut along the inside of the intake and next to the motor hump... 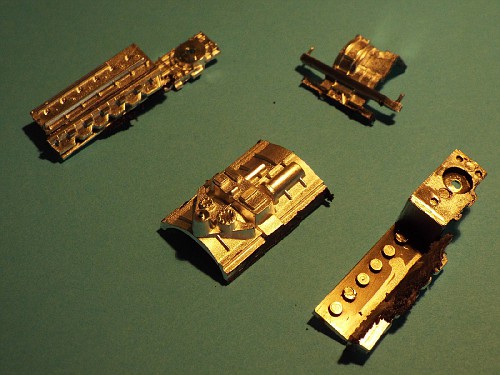 after that cut off the transversal transaxel... 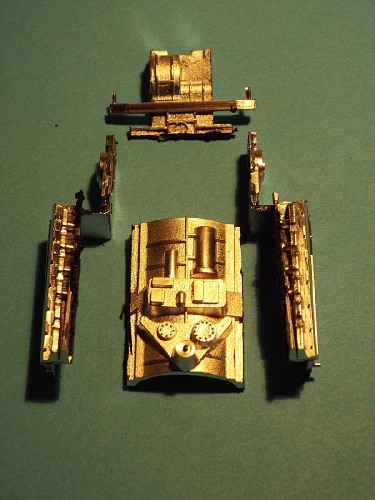 next add a strip of Evergreen to the underside of the engine sides and fit the motor hump lower into the mid-space... 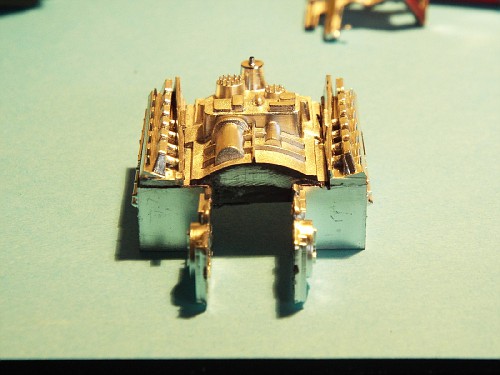 This allows the engine to have a more realistic look and offer more room for detailing. Finally the top of the transaxel has to be trimmed down a bit as the cuts to the engine narrows it down a bit, but the engine does look better. Now where's that warm weather...please. Patrick |
|
|
|
Post by indy on Oct 12, 2013 19:33:04 GMT -5
Nice work, Patrick!!
Jordan
|
|
|
|
Post by Calvin on Oct 15, 2013 22:21:33 GMT -5
If I knew 1/16th of your modeling tricks Patrick, I'd be considered a legendary modeler!  |
|