|
|
Post by Patrick on Feb 28, 2012 18:08:13 GMT -5
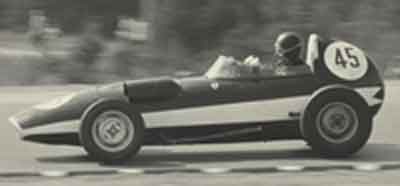
I've been working on a few projects off and on for some time (as I work out the other project problems) and thought you'd like to see the other cars from SEF or Will's Finecast. This was a smashed Sharknose that I could afford off of Evilbay. It was like a gluebomb par excellance! The poor beggar that started this project did some work before me by adding 1/8" sheet as a sandwich piece because so much damage had been done... 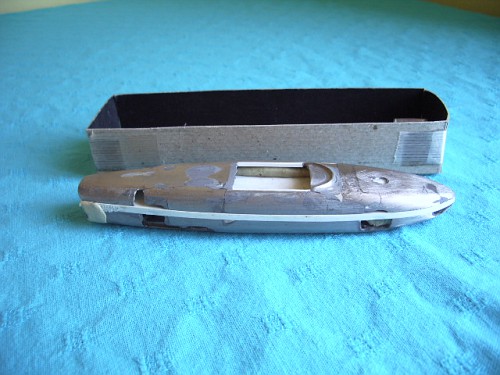  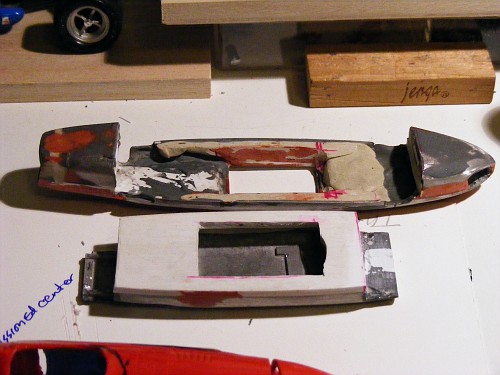 I ground and filed and got the body pretty good, but lost all the vents and carb covers... 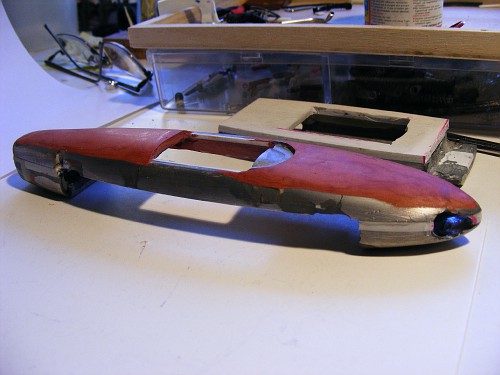  The goal is to make my favorite Sharknose, the ENB entered yellow #8 car of Olivier Gendebien at the 1961 Belgium GP... 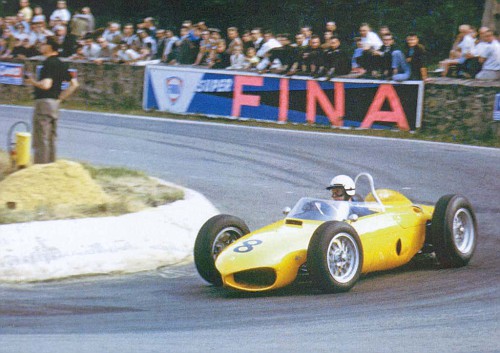 ...it was a 60* V6 engined car so it had a single perspex cover. I sanded a block buck and vac-formed it...  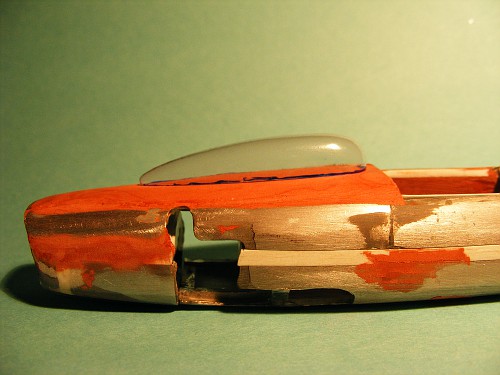 the F/R suspensions of the kit come as pieces that glue together as units (something I'm trying to do in my scratch-bashes as I think it saves a bit of time) and they're ready to pop in. The next photos will show where I am now and the problem I must decide on. Patrick |
|
|
|
Post by kurzheck on Feb 28, 2012 18:24:07 GMT -5
|
|
|
|
Post by Patrick on Feb 28, 2012 18:55:31 GMT -5
Well, that's the major decision I have to make! The cover is a bazillion small holes drilled in the solid cover!! I'm not up to that so there are 3 possible ways a lazy Ferraristi can go...
one...damn it all and tint it yellow...
two...use a mesh substitute (already tried without good results)...
three...use a plastic mesh cover...
there is, of course a fourth possibility and that is do a red '62 Ricardo Rodriguez car that had a large clear cover (I like the yellow car!).
This is a tough decision to make...suggestions anyone?
Patrick
|
|
|
|
Post by pje on Feb 29, 2012 0:34:40 GMT -5
The Gendebien Belgium GP cover had a mesh cover. On the replica you can see they used a hex mesh. You have a nice wood form that I think you can get good results with. www.sharknose.net/Also, here are the Hiro instructions for their kit and you can see how they have you form the mesh cover. www.1999.co.jp/eng/10038864Paul Erlendson Attachments:
|
|
|
|
Post by harveythedog2 on Feb 29, 2012 9:42:07 GMT -5
Looks great Patrick!
This is a bit of work but you can make your mesh cover that matches your vacuum form one exactly using your wooden buck master.
Find a small box and place the wooden piece flat side down.
Spray PAM cooking spray all over the buck and the inside of the box. Mix up some resin and pour it over the buck and inside the box. You don't really have to worry about any small air holes that may be in the resin before you pour. Just make sure the large ones are popped.
Once it's dry, remove the resin block from the box and release your wooden buck. The PAM spray should make it easy to remove. You will now have a matching female buck.
Place a piece of soft metal mesh or metal window screen over top of the female buck. Make sure you have plenty of mesh hanging over the sides. Now take your male buck press it down over the screen and into the female buck. Press hard and around all the edges and Wa La! You will now have the mesh in the shape of your original male buck. Just carefully trim the excess off and paint it yellow.
Stu
|
|
|
|
Post by harveythedog2 on Feb 29, 2012 9:47:36 GMT -5
Rethinking my tip a bit.
It may be wise to elevate the male buck slightly on some sort of platform. That way you will be sure to get the entire depth of the wooden buck and it will also make it easier to trim.
You asked for suggestions! ;D
Stu
|
|
|
|
Post by Patrick on Feb 29, 2012 11:09:08 GMT -5
Both suggestions are why I belong to this group. Thanks my friends.
Patrick
|
|
|
|
Post by formula14kdc on Mar 2, 2012 2:42:12 GMT -5
What is the best substitute for the kit tires and wheels and where can you get them?
|
|
Deleted
Deleted Member
Posts: 0
|
Post by Deleted on Mar 26, 2012 18:07:38 GMT -5
Great work as ever Patrick, reclaiming such a model is not easy at all. Love the Shark nose so I'll be wathcing this build with great interest.
btw I quite like the SEF range of kits. Still providing a good base to work from many years after their initial release! some of us simple can't afford the Model Factory Hiro kits.
|
|
|
|
Post by Patrick on Mar 26, 2012 21:46:20 GMT -5
Ian,
From what I have heard from the folks that have laid down the cash for an MFH kit, their fit leaves a lot to be desired. That's a lot of money for a kit that fits like a SEF kit. Their detail work far surpasses a SEF kit however.
Patrick
|
|
Deleted
Deleted Member
Posts: 0
|
Post by Deleted on Mar 27, 2012 16:27:50 GMT -5
Patrick,
MFH kits look fantastic in the box, fabulous mix of media all crisp and clean, p.e., wire, the whole kit and caboodle. Although I haven't had the pleasure of building one myself I'm told that they do challenge even top modellers. I'm also told I'd love them!
As you say detail far exceeds SEF, but the sctarchbuilding of the new parts and details is the pleasure of it all for me.
No disrespect to any one but it's the difference between being a modeller and a kit builder.I probably couldn't build an MFH kit with out adding something to give it my own stamp if you know what I mean.
Getting back on thread I have an Autohobbies grp slot car body of this car to work with. I've been collecting little odds and ends to go with the build for years now. Must get on and build it!?!
|
|
|
|
Post by Patrick on Mar 27, 2012 19:40:53 GMT -5
Ian,
We do understand...
Patrick
|
|