|
|
Post by Calvin on Sept 13, 2011 23:36:43 GMT -5
Slowly but surely the Rubber goes into the mold box.  Wish it luck! ;D 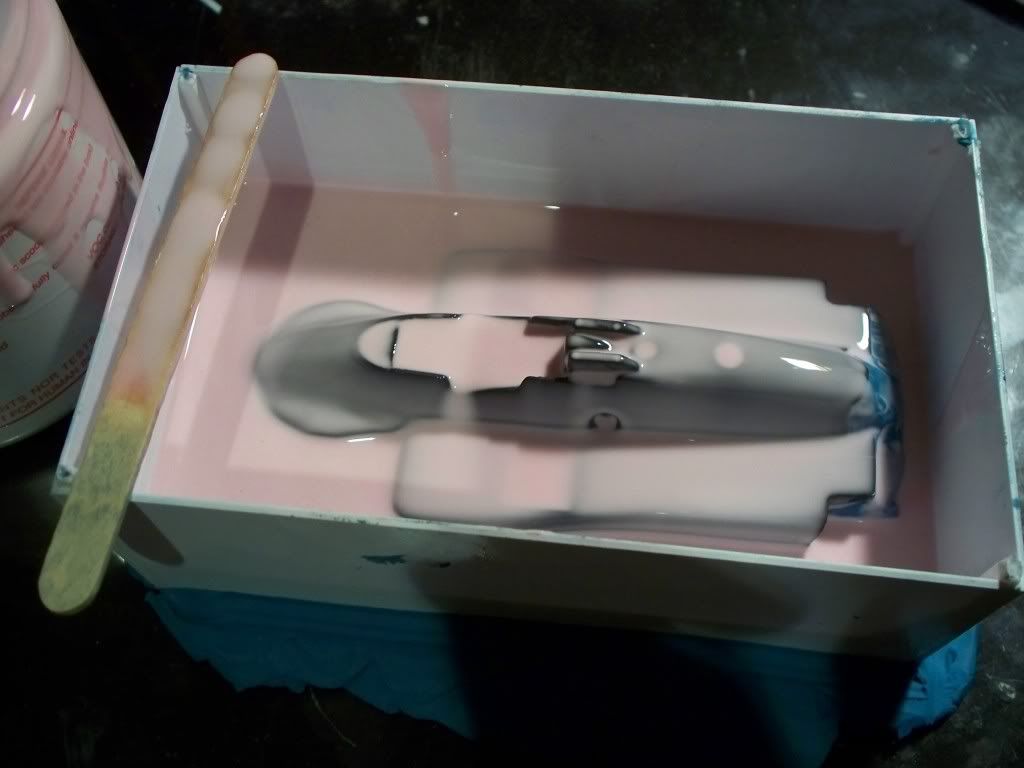
|
|
|
|
Post by illeagle10 on Sept 14, 2011 16:00:05 GMT -5
OK Calvin I'm ready. This is going to be great!
Jim
|
|
|
|
Post by Calvin on Sept 16, 2011 1:20:08 GMT -5
Why I scrapped my first version of the 83 March Things better about about my new version of the 83 March is: -Longer body length -Windscreen area corrected with larger radius!!!!!! -Larger Engine cover -Better looking nose (larger and bolder) -Ride height corrected -Larger Roll bar fins -Side pods are more in line -Larger side pods in the rear -Larger Radiator exits -New easy "plug n play" for attaching engine to body. -Cheaper and easier to build "trans kit" -Overall looks way better 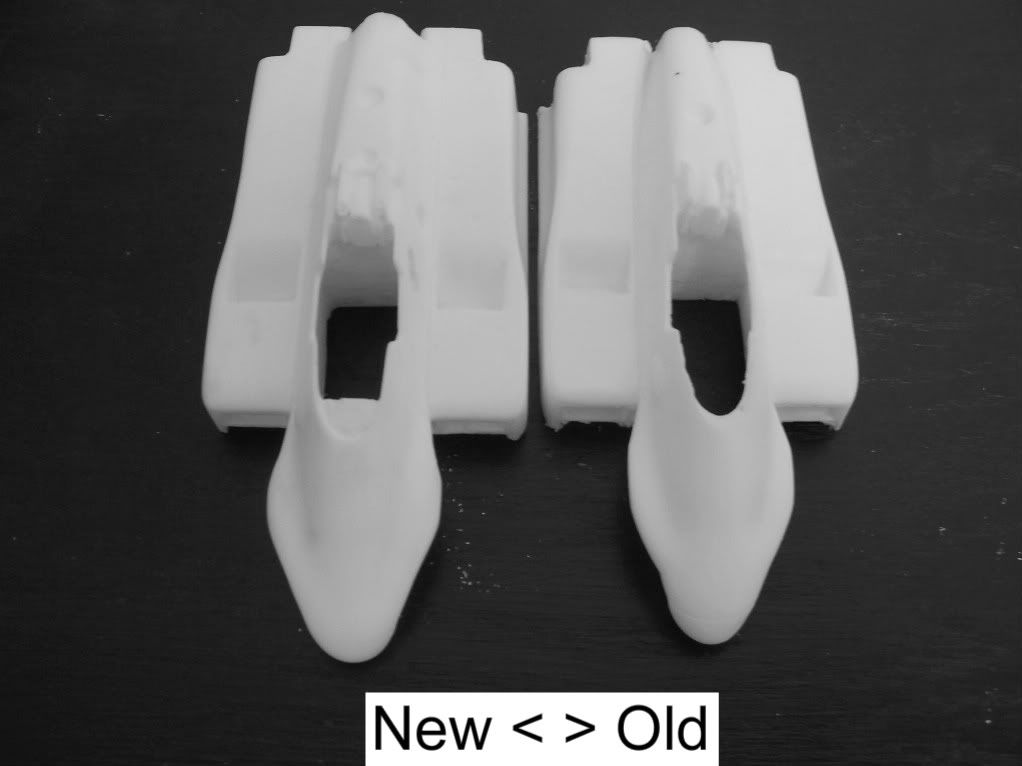 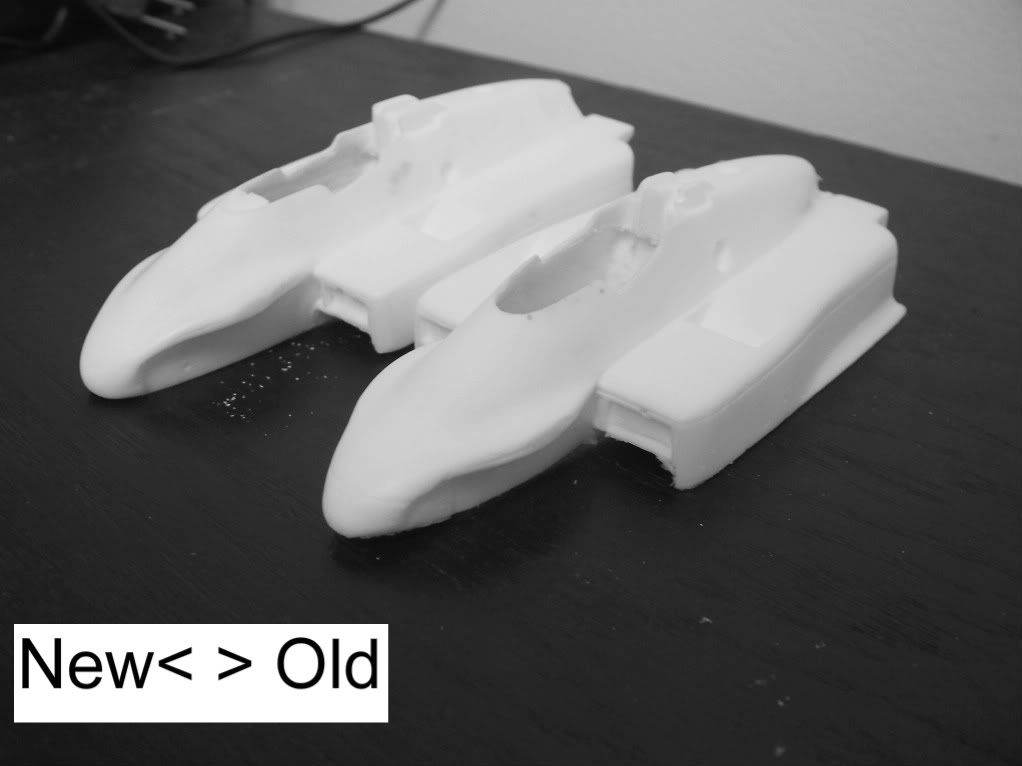
|
|
|
|
Post by Calvin on Sept 16, 2011 1:35:34 GMT -5
and I've started to cast them too! Here is the first one! 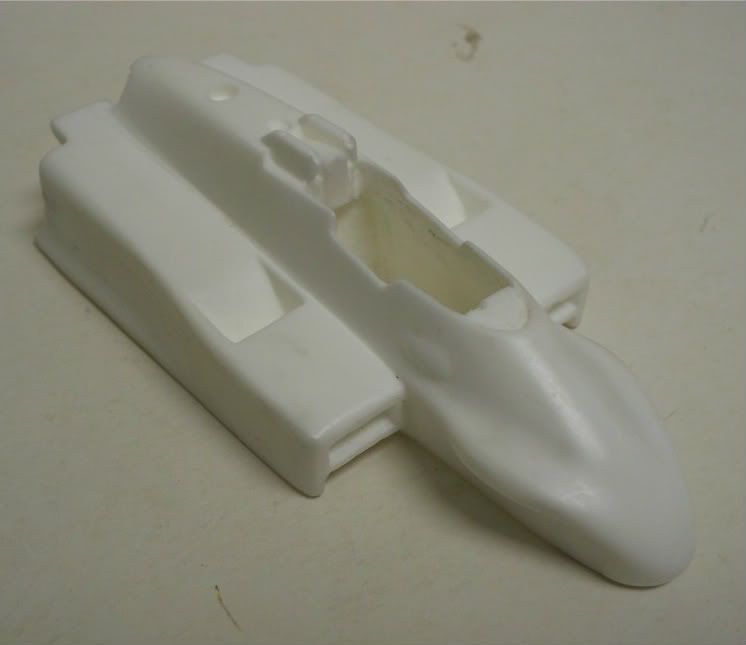 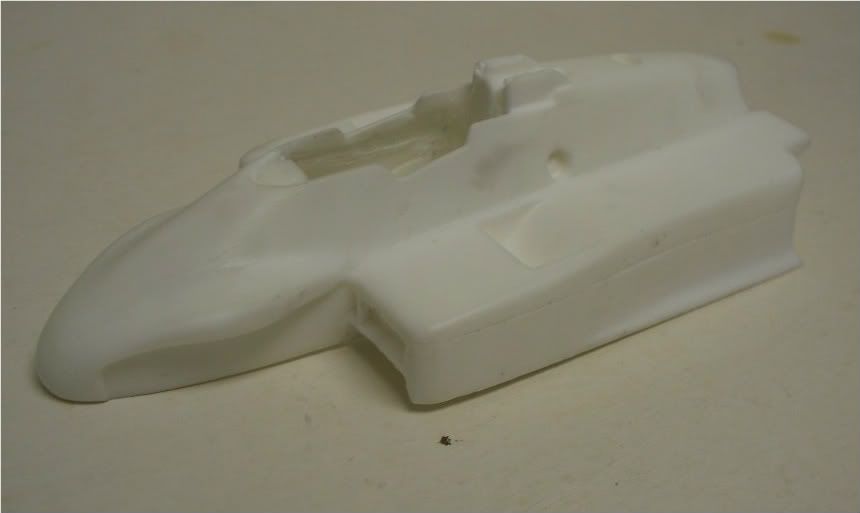 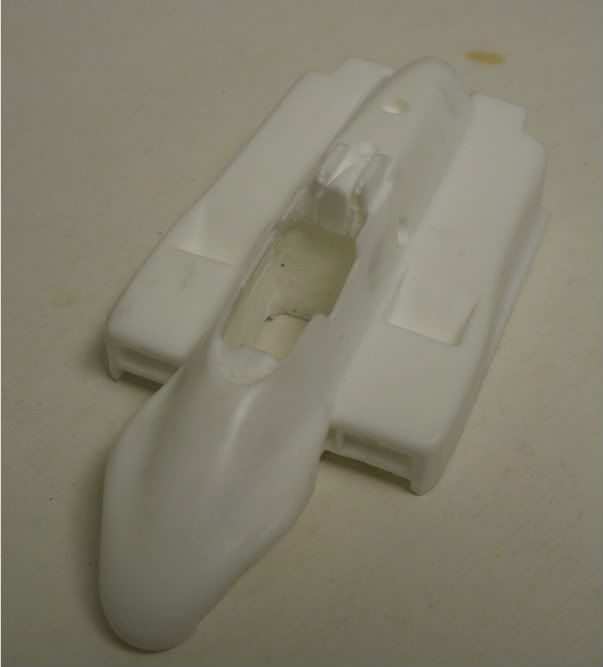 Another thing I fixed believe it or not is the nose angle. I was blown away when I figured out the nose has slight bend almost half way up the center. |
|
|
|
Post by Calvin on Sept 16, 2011 1:41:09 GMT -5
I plan on starting the traditional WIP tomorrow, which will be my Rough draft for my Directions that I will set up on a google doc that anyone can see and print off.
So when I do this WIP/Rough draft......ask questions because it will help me build some good instructions for this kit.
|
|
rick
Hot Shoe
 
Posts: 142
|
Post by rick on Sept 16, 2011 22:14:39 GMT -5
Hi Calvin.
Body looks great. I have a suggestion when photographing for your WIP/directions. Given that your resin is a blanched white. Try photographing with a contrasting background. Something like royal blue poster board or construction paper. It will bring out the defintion of the body. Keep up the good work.
-Rick
|
|
Deleted
Deleted Member
Posts: 0
|
Post by Deleted on Sept 16, 2011 22:36:40 GMT -5
Hey Calvin, Impressed with your talent! Just a thought but could you grind up those rejects and use the powder as filler ? I would think the powder should blend in with the fresh resin. Maybe save you a little on overhead. Tim
|
|
|
|
Post by Patrick on Sept 16, 2011 23:37:30 GMT -5
Great stuff Calvin. I applaud your attention to detail. I'm very pleased with what you've done. I'm happy  Looking forward to your WIP. Patrick |
|
|
|
Post by Calvin on Sept 18, 2011 1:17:10 GMT -5
Parts List.1. Body 2. Large Rear Wing 3. Small Rear Wing (aka: "Sneva Wing")  4. Belly Pan 5. Rear Wing Support 6. Vac Form Windscreen 7. Right Front Wing 8. Left Front Wing 9. Top Front A-arms 10. Exhaust 11. Turbo Inlet 12. Turbine 13. Compressor and all the rest of the parts used will be from any AMT Lola kit - preferably a Cosworth Lola kit. (Provimi or Amway Speedway.) 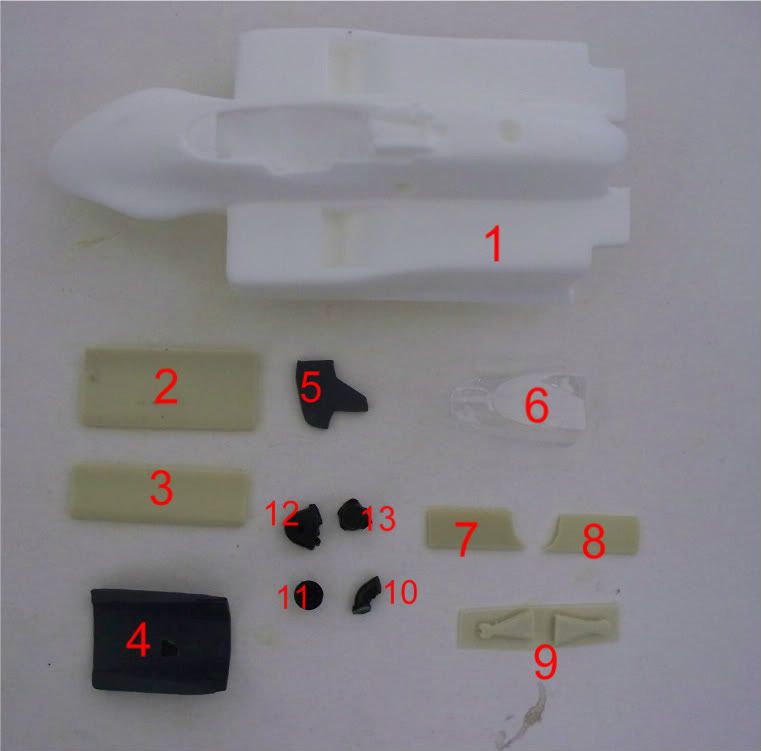
|
|
|
|
Post by Calvin on Sept 18, 2011 1:44:37 GMT -5
Supply List (as of now.....)-Any complete AMT Lola kit - preferably a Cosworth Lola kit. (Provimi or Amway Speedway.) ----------------------------------------------------------------- - Milliput Putty - Pin hole body filler - Dremel with any reasonable size end mills - high and low grit sanding files - Steel Wool (fine) - Loctite Super glue (for resin parts or resin onto plastic parts.) - Plastic glue (for the AMT donor  ) - High grit sand Paper or Micro mesh (2,000 - 4,000 ) - Windscreen glue -------------------------------------------------------------------- Drilling- #70 (0.028") Drill bit - #55 (0.053") Drill bit - 0.020" Brass Rod - 3/64" Brass Rod --------------------------------------------------------------------- Body Paint- A good Lacquer Primer - Preferably Tamiya White Primer with Tamiya TS Sprays. Detail paint- Aluminum/silver - Flat Black - Semi Gloss Black - Red - White - Gunmetal - Model Masters Acryl #4636/Flat Clear Acryl
|
|
|
|
Post by Calvin on Sept 18, 2011 1:59:07 GMT -5
Step 1Clean flashing, cut off pour rods, and clean out any pin hole/ air bubbles. Clean body with Oven cleaner and or with dish washing soap repeatedly until you think its clean. 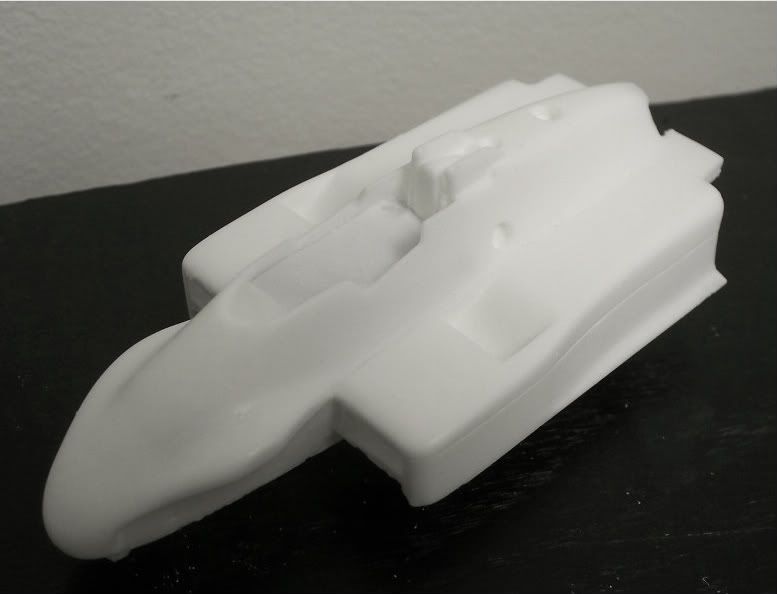 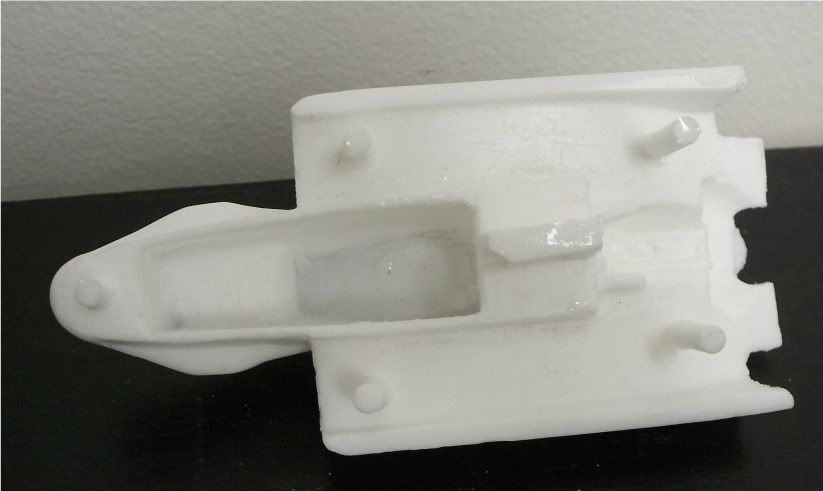 Sand down the extended sides of the cockpit just enough to test fit the cockpit under and up in to the cockpit area of the body. Test fit the cockpit for alignment repeatedly until correctly snug under the head rest. 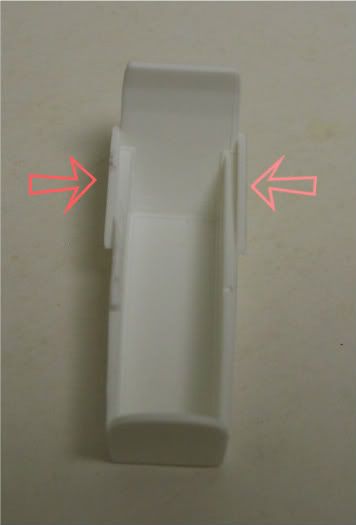 Paint the cockpit Aluminum color and the seat flat black. The inside of the body's cockpit will need to be painted semi gloss black. 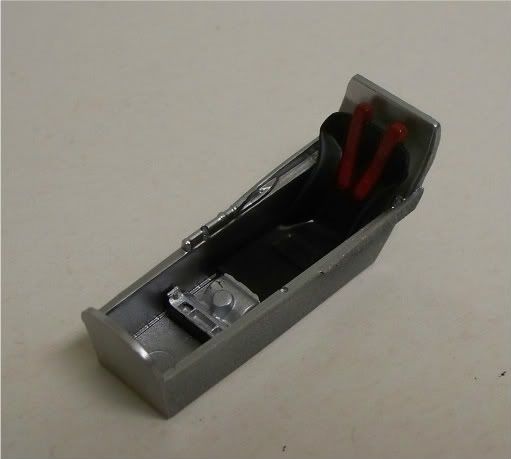 Super Glue in the cockpit into the body. Detailing the cockpit will happen later on after the body work....... 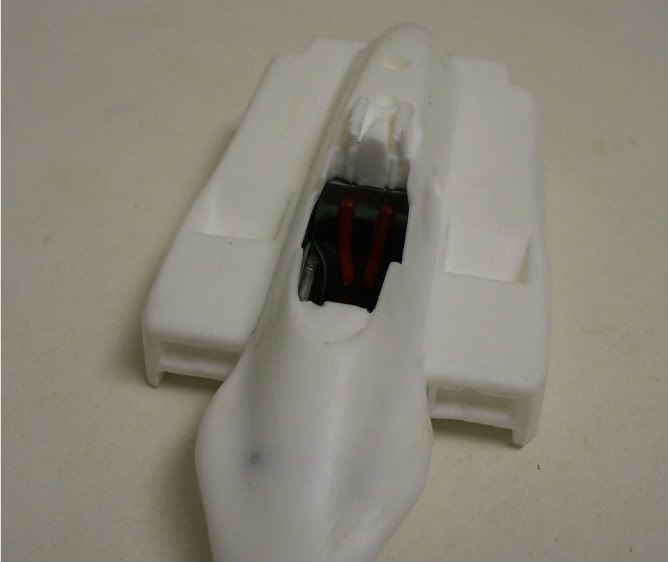
|
|
|
|
Post by Calvin on Sept 18, 2011 2:23:50 GMT -5
after the super glue has dried under the cockpit. Start to add some Milliput under the cockpit to form out the under tray of the car. Milliput takes about 24 hrs to dry and then it can be sanded down smooth. 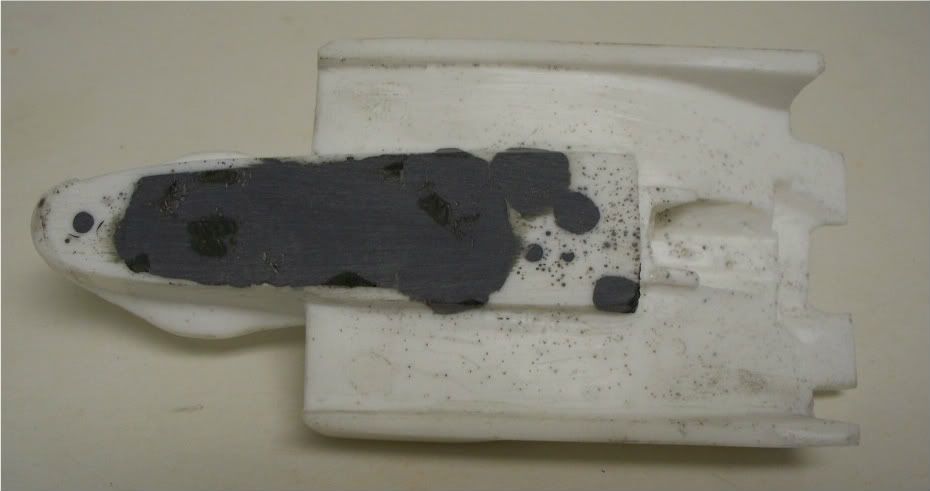 |
|
|
|
Post by Calvin on Sept 18, 2011 2:38:49 GMT -5
While you let your Milliput sit. Now is a good time to start gluing the AMT Drive train together. Now this is important I used a Cosworth to shape out my area for attachment under the body just because the Cosworth is smaller. I recommend using a Cosworth if you dont feel like modifying a Chevy engine slightly to fit under the body correctly - its really not to hard if you have Chevy engine. Go ahead and glue your Cosworth or Chevy ( Chevy pictured) together as you normally do with the AMT kit. Also add the turbo assembly, as this will be used more of support for the resin turbo assembly later on.... 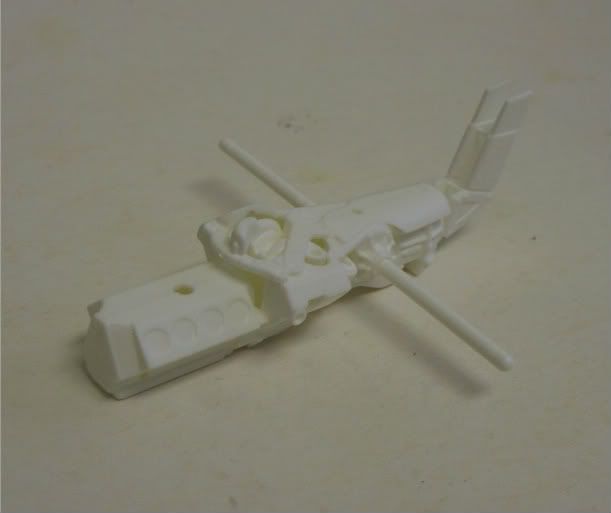 ( Chevy pictured) 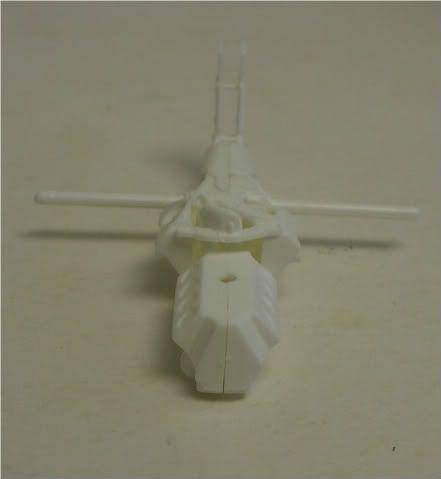 ( Chevy pictured) If you have a Cosworth you will need to cut off the front part of the turbo assembly and also sand it smooth to fit properly and thats it. But if you have a Chevy you will need to look at this picture a few times to see all the areas that need to be grinned down and test fitted. It doesn't have to look pretty, since its going to get covered anyway.  You also need to cut off the AMT rear win support. 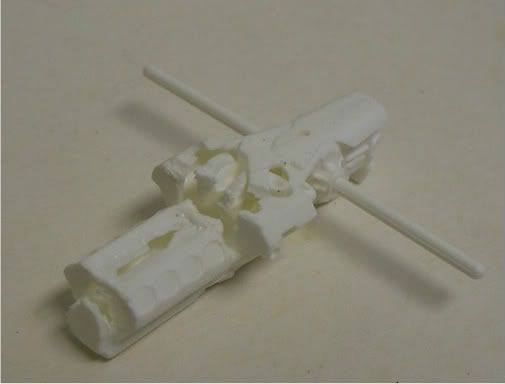 ( Chevy pictured) |
|
|
|
Post by Calvin on Sept 18, 2011 23:16:55 GMT -5
Cut off the lower front suspension on the AMT Lola with a very sharp Razor blade. Keep them in the same spot until you read the next step. Dont move them around after you cut them off. 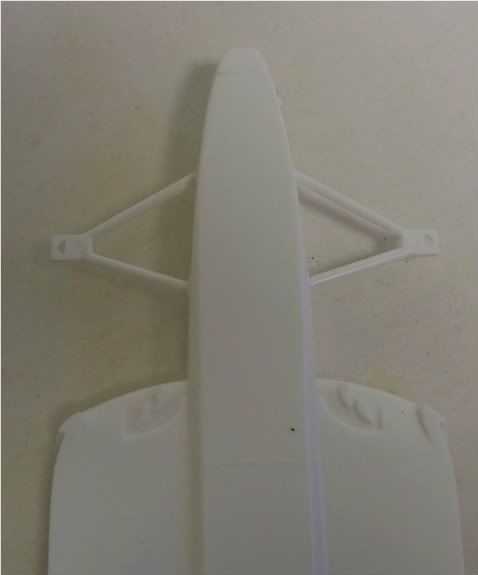 Then flip the flip the lower A-arms over upside-down. Then flip the flip the lower A-arms over upside-down. You will be gluing these upside down on your 83 March. These A-arms normally point down hill, but we want then to point up hill. and then cut off the amount in the picture bellow. 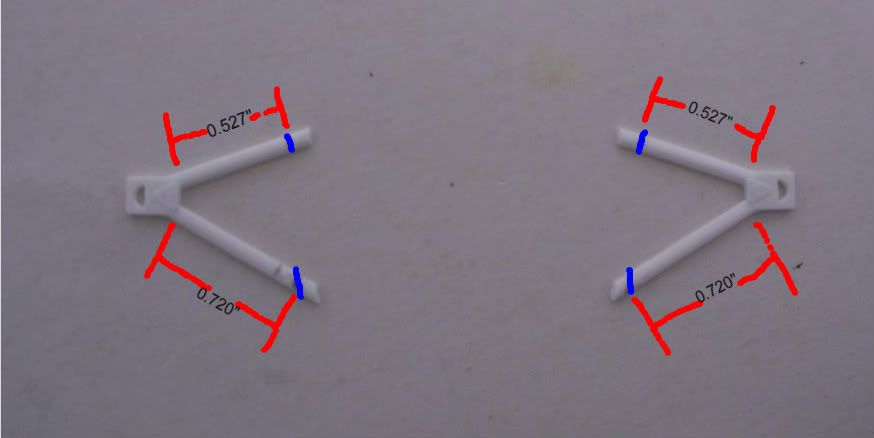 After that hold them up to the dimples on the side of the tub to see if the A-arms are perpendicular to the rest of the car. |
|
|
|
Post by stonecold44 on Sept 18, 2011 23:16:57 GMT -5
Awesome Calvin! I might have to get a couple, depending on what Michael does in the way of decals. I have plenty of Lola donors so that isnt a problem. Good luck with this version of it.
|
|
|
|
Post by Calvin on Sept 18, 2011 23:39:14 GMT -5
After cutting down the A-arms using a #70 0.028" Drill bit, Drill out holes at the end of the rods. 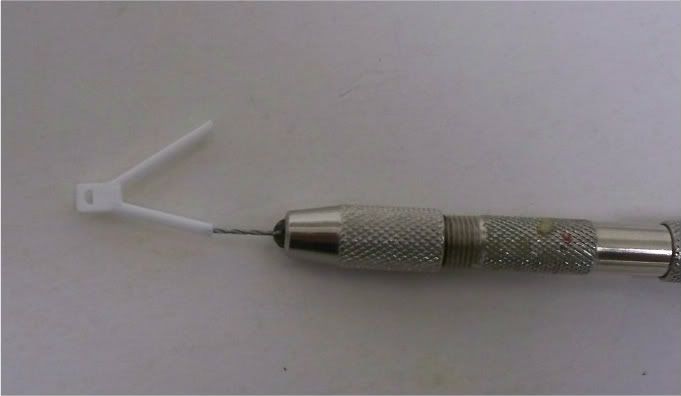 Then cut up some 0.020 Brass rod and super glue into place. 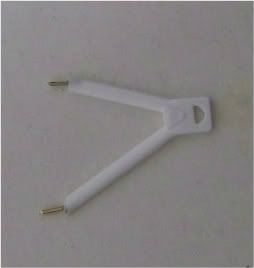 Next drill out those dimples that are on the side of the tub using a #70 0.028 Drill bit. Drill in as far as needed. 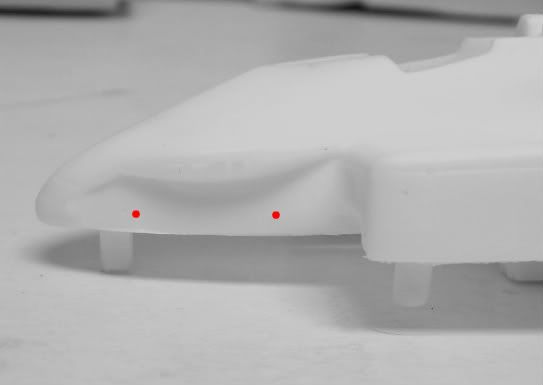 |
|
|
|
Post by Patrick on Sept 19, 2011 0:28:03 GMT -5
Excellent work Calvin. Just great!
Patrick
|
|
Deleted
Deleted Member
Posts: 0
|
Post by Deleted on Sept 19, 2011 9:09:09 GMT -5
Hi Calvin,
Cant wait to get one of these to. If anyone didn't already know, the silicone mold material can be recycled. I have been working on reproducing the old Strombecker 1/32 midget racer slot cars and my first attempt was only ok. When I perfected the body and needed to make a new mold, I found out that you can add chunks of the cured silicone to the fresh silicone and they will bond to make a strong mold as well. I have used small and big chunks of it and it really saves me a lot of new material which usually costs the most. Also, I have learned that using a light coat of baby powder in the mold before I cast eliminates a lot of the small air bubbles and conditions the mold a bit better. I use Alumilite but I think it should work for what your using.
Keep up the great work.
Many Thanks,
Mike
|
|
|
|
Post by Michael Chriss on Sept 19, 2011 9:39:53 GMT -5
Calvin, this looks great! I am trying to finish my Wildcat before you offer this so that I will not have yet another unfinished kit.
There were 18 March chassis in the 1983 500. Michael, what are your thoughts? Come on, you have been thinking about this; let us know what you may offer.
There were 33 entrants which did not qualify for the ’83 500. Those were the days!
|
|
|
|
Post by indycals on Sept 19, 2011 14:16:44 GMT -5
Calvin, this looks great! I am trying to finish my Wildcat before you offer this so that I will not have yet another unfinished kit. There were 18 March chassis in the 1983 500. Michael, what are your thoughts? Come on, you have been thinking about this; let us know what you may offer. There were 33 entrants which did not qualify for the ’83 500. Those were the days! Right now it's going to be Fabi, Sneva and Foyt and maybe Howdy Holmes. |
|
|
|
Post by scalecentral on Sept 19, 2011 16:47:49 GMT -5
Calvin, this looks great! I am trying to finish my Wildcat before you offer this so that I will not have yet another unfinished kit. There were 18 March chassis in the 1983 500. Michael, what are your thoughts? Come on, you have been thinking about this; let us know what you may offer. There were 33 entrants which did not qualify for the ’83 500. Those were the days! Right now it's going to be Fabi, Sneva and [glow=red,2,300]Foyt[/glow] and maybe Howdy Holmes. Yeah! Definitely getting that one! Christmas is coming early between this and Lance's kit. Nic |
|
Deleted
Deleted Member
Posts: 0
|
Post by Deleted on Sept 23, 2011 9:21:58 GMT -5
Calvin, I would definitely like (at least) one! Is it possible to "pre-pay"? In other words, can I send you a PayPal payment now, and you send the kit when it's ready? I never did get the '84, or the Wildcat. I would also be interested in a pre-pay for those, once you get closer to actually issuing them again. Please let me know, here or thru a PM. Thanx!
Tom
|
|
|
|
Post by Calvin on Sept 23, 2011 10:23:02 GMT -5
Sorry I dont do any pre orders - I dont like to sell anything that I dont have or have not completed. I should have the all the info of when my first release is here in the next few days....its getting very close. I'm going to have to not have "the buy from me directly" option for my fist run because my message box will blow up if I do. The 83 March will be on ebay. But when things calm down I'lll have the Buy from me direct option.
After I get the 83 car done and calmed down then I'll pull out the 84 March, then after that I'll work with the 81&82 Wildcat and start selling everything all at once at more organized and more buyer optional manner.
My goal is to have 81 & 82 Wildcats, 83 Marches, and 84 Marches available at anytime.....But developing new cars its hard to do that.
|
|
|
|
Post by Calvin on Sept 24, 2011 23:15:02 GMT -5
This is just a test car so dont follow the decal layout these are actually decals for my scrapped March. Michael is reworking the decals to fit the new March body. 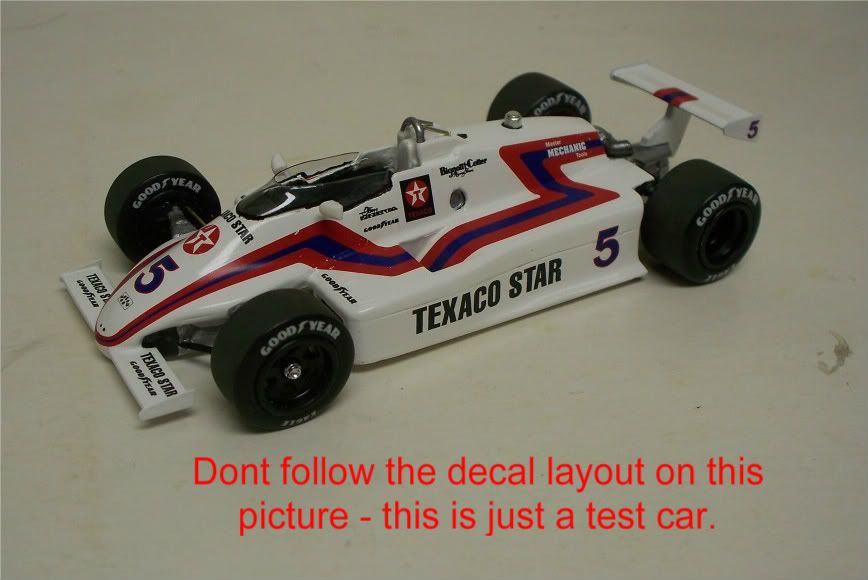
|
|
|
|
Post by Patrick on Sept 25, 2011 0:43:31 GMT -5
Calvin,
You amaze me with your abilities and talents. The test car looks great. I think you're going about the selling process best. It should be to fit your needs. Otherwise you are going to be overwhelmed. Be smart and take care of yourself. You're cool buddy.
Patrick
|
|
|
|
Post by Calvin on Sept 25, 2011 1:02:17 GMT -5
Thanks Patrick, its been a long road and its getting close to the finale, I pretty much have all 30 kits done as of now. I hope by the end of next week we can have this show on the road.
Im very pleased with how things look on this car, the ride height IMO is very good, the LOLA chassis works great with this car and most importantly its a cheaper kit for everyone to buy. My goal is to make my resin kits some of the easier ones to build and available at any time with more buying options. But like I've said before the first 30 will be listed on ebay, just because the demand is so high for the first run that I couldn't possibly be able to work out the Personal message "first come first serve" thing if I were to do it direct.
|
|
|
|
Post by 2lapsdown on Sept 25, 2011 7:26:04 GMT -5
I'm with Patrick on this. Make sure you take care of yourself on these projects. If it stops being fun for you, we all loose. The car looks fantastic!!
John
|
|
|
|
Post by Calvin on Sept 25, 2011 15:08:08 GMT -5
Okay back to the serious stuff. The instructions. Go ahead an glue the front wings in place along with the Roll hoop. Which you need to use a 1/16" Brass rod and then bend it with a #6 0.204" Drill bit. Use it as a jig to get the correct radius on your Roll bar. After you get the front wings solidly on use the wing endplates template to cut the endplates out of sheets of brass or styrene for the front wings and rear wing. (templates coming soon) Get the rear wing all glued up ready to go for paint. 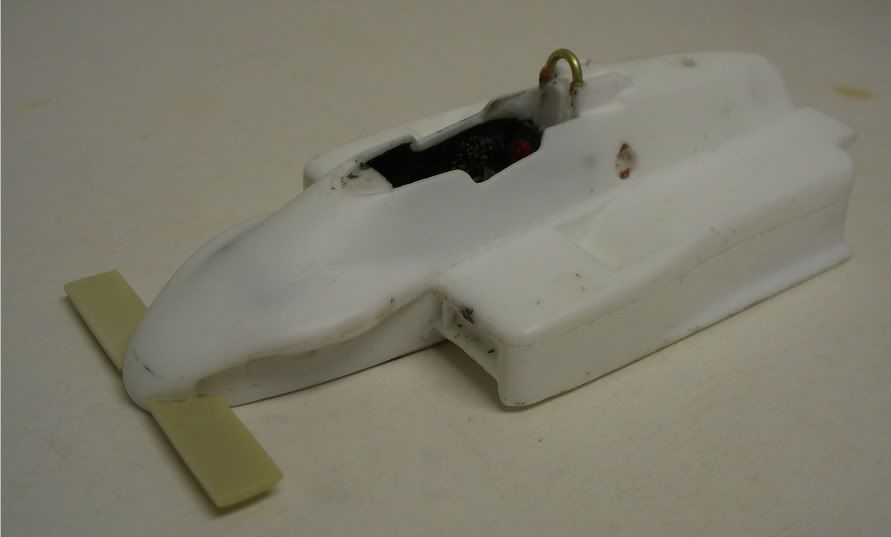 |
|
|
|
Post by Calvin on Sept 25, 2011 15:11:15 GMT -5
After doing the last step go ahead and start prepping your body for paint. You will need to sand-fill-sand-fill-Prime-fill-prime-sand-and then clean- then maybe you'll be ready to shoot your color on. ;D Also get you drive train already to go.... 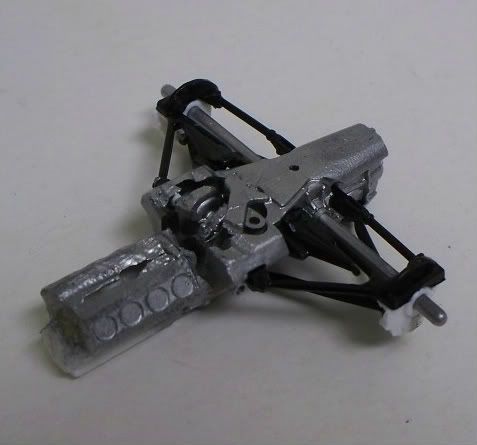 After you the drive-train already to go, glue it on the back of the body, make sure you line it up as close as you can. It should be already to go after the glue drys. Before you add your rear wheels you will need to.... 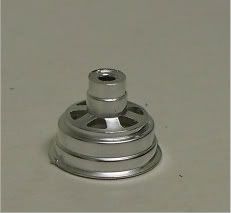 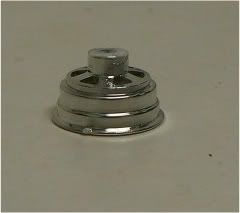 sand down the boss of the wheel down to the first line to get a proper rear track for you car. But before you add your Tires onto your wheels you need to get rid of the raised Goodyear logos. Sand those off. 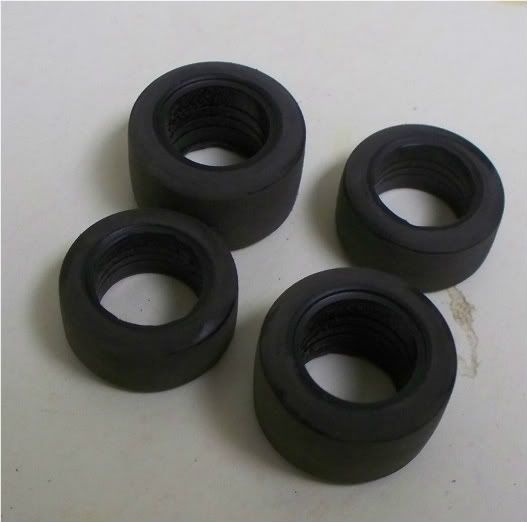 The add some flat clear over your sanded side walls. 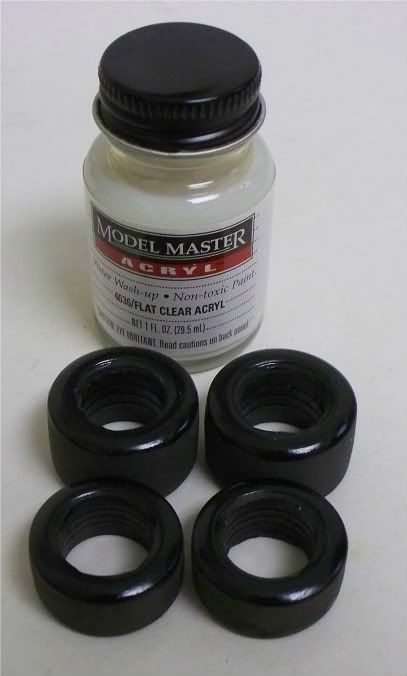 Then head on over to Indycals and get some Goodyear tire decals. 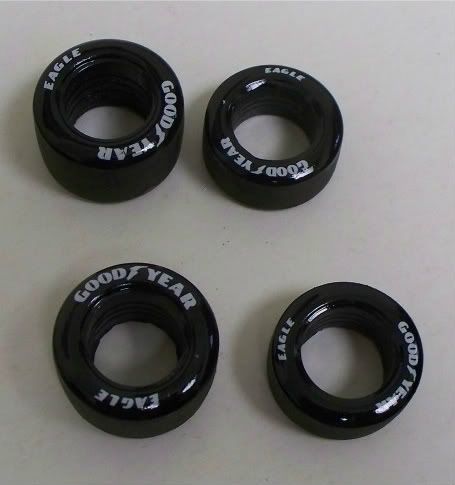 Then after the decal dry add some more of that Flat clear. When the flat clear drys us some soft steel wool and take the shine off of the sidewalls. If you do all of the properly, the tires should look pretty real.   Then mount your rear wheels. 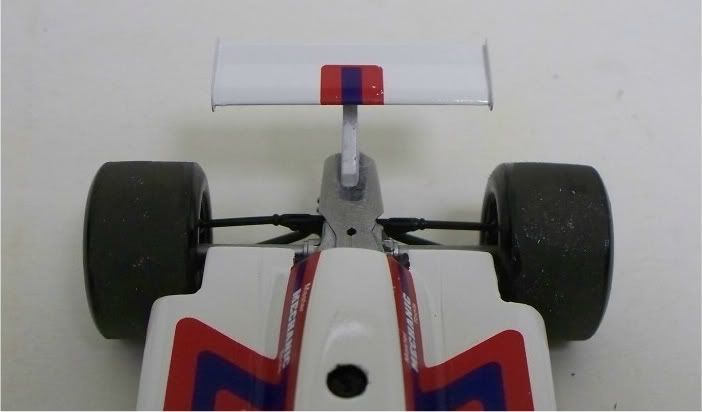 |
|
|
|
Post by Calvin on Sept 25, 2011 15:26:41 GMT -5
IMPORTANT! Follow Closely After you get all your paint job do on your body you will need to add the front suspension. Make sure your test fit your parts before gluing for good. Clean out your holes once more and then find the correct height of your lower A-arms. From the bottom of the car to the top of the lower A-arm NEEDS to be 0.261" 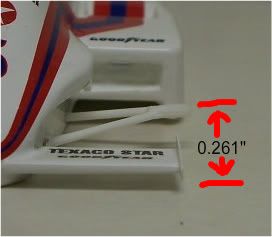 If you got it them go ahead and glue it in, making sure you keep that number even after the glue drys. Next you will need to do some sanding to make the top A-arm fit properly. This A-arm needs to be sanded down thinner and remember this will be angled up using your Lola "hub" as a guide 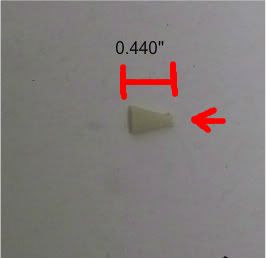 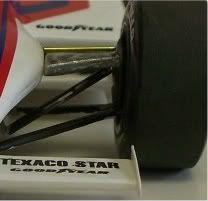 You will need to add your what was Lola Pushrods into March Pullrods. As seen in the picture. Then take 0.032" brass rod and add your Tie-rods.
|
|