Deleted
Deleted Member
Posts: 0
|
Post by Deleted on Mar 11, 2008 10:27:22 GMT -5
|
|
|
|
Post by macsparty on Mar 11, 2008 10:30:55 GMT -5
Looking good so far. I did the same one a while back. That was a nice looking car. Simple scheme, yet nice.
|
|
Deleted
Deleted Member
Posts: 0
|
Post by Deleted on Mar 11, 2008 19:05:14 GMT -5
Make sure the body fits, that was the big challenge on these kits. Where are you getting the decals from? I got the decals from Indycals. They are about identical to the '88 decals except they are shades of imitation gold. |
|
Deleted
Deleted Member
Posts: 0
|
Post by Deleted on Mar 11, 2008 23:30:19 GMT -5
Make sure the body fits, that was the big challenge on these kits. I second that. It was a real pain on the '88 K Mart Lola I built a couple of years ago and the panel gap is really noticeable. It also caused some decal problems (see photo). G |
|
Deleted
Deleted Member
Posts: 0
|
Post by Deleted on Mar 11, 2008 23:45:02 GMT -5
Thanks, guys, for the heads up. I am going to treat this one like we did 1/72 scale airplanes 35 years ago! LOL!! Glue it all together and mask off the *holes* to touch it up with the airbrush. Hopefully that will take care of the nose and sides. The rear cover........  unless I glue it down, which I might. |
|
|
|
Post by herk56 on May 23, 2008 16:23:07 GMT -5
Hey Bill, any progress on this one?
|
|
|
|
Post by geralds on May 23, 2008 20:00:52 GMT -5
Super Glue!! Maybe!!!
|
|
|
|
Post by stonecold44 on May 27, 2008 10:33:36 GMT -5
Make sure the body fits, that was the big challenge on these kits. I second that. It was a real pain on the '88 K Mart Lola I built a couple of years ago and the panel gap is really noticeable. It also caused some decal problems (see photo). G I'm new to this board so excuse my ignorance for a few weeks. Just wondering where you got the Amoco Ultimate decals since the original kit didn't come with them? |
|
|
|
Post by indy on May 27, 2008 14:44:06 GMT -5
|
|
|
|
Post by stonecold44 on May 30, 2008 15:32:13 GMT -5
This is the 1987 Pole Winner that I am working on. AMT kit and Indycals. Getting ready to glue up the body. All suggestions are welcome! How did this one turn out for you? I just started to work on the same car. |
|
Deleted
Deleted Member
Posts: 0
|
Post by Deleted on May 30, 2008 18:01:22 GMT -5
This is the 1987 Pole Winner that I am working on. AMT kit and Indycals. Getting ready to glue up the body. All suggestions are welcome! How did this one turn out for you? I just started to work on the same car. I guess I need to get some batteries and take some more pictures! LOL!! Like everyone says, fit the body real good. And it does seem (like someone said) that each one is different. You cannot just paint and glue together if you want a really good looking model. But, then I have worked with a lot worse over the years!  Paint wise, it is Duplicolor Bright Red and Testors semi gloss black (1/2 and 1/2 Gloss Black/Flat Black). I plan on using Duplicolor Paint Shop clear through my airbrush for a cover coat. The heat insulation material over the exhaust pipes I painted with Tamiya Titanium Gold, and then various shades of aluminum and steel.... I like to add flat black (and sometimes flat clear) to silver and aluminum to get different shades, and I really like to use the Alclad metal colors. Bill <>< |
|
|
|
Post by stonecold44 on Jun 16, 2008 7:21:14 GMT -5
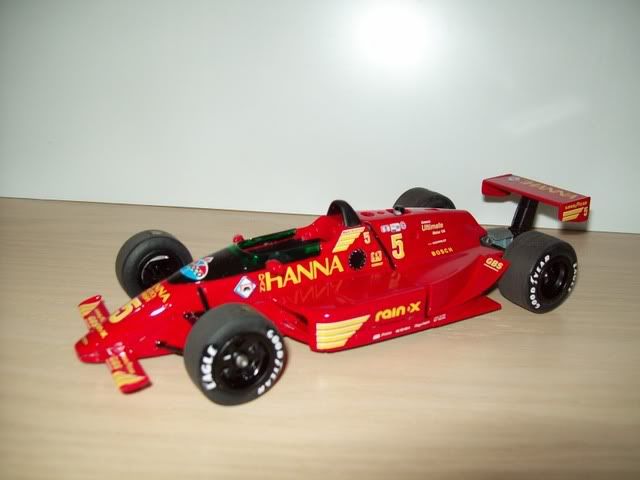
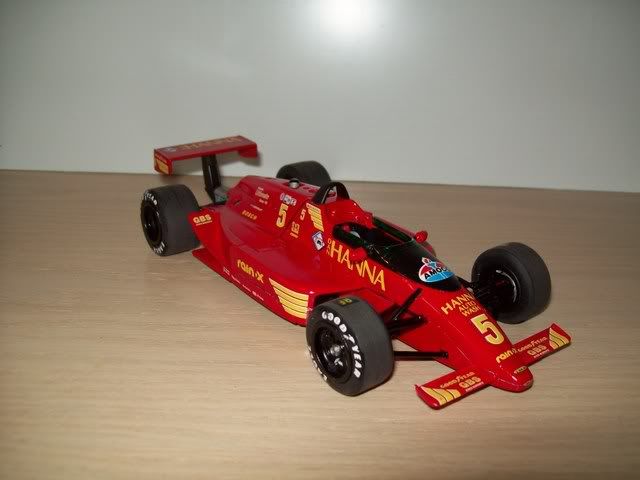
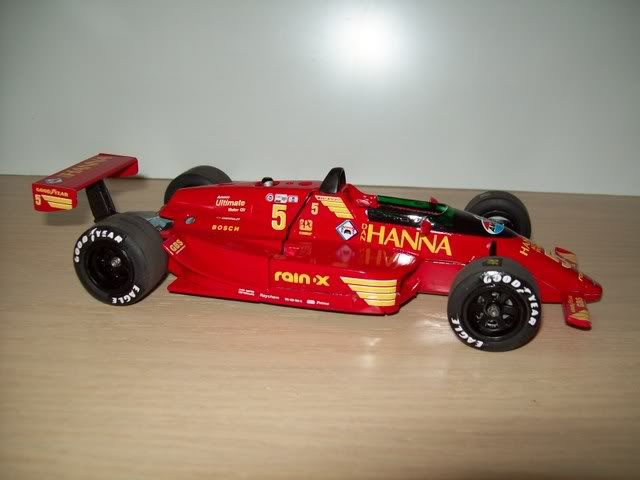
OK, I just got a better camera so here are my latest pics. You'll find that I'm an Andretti fan, but it also helps that their cars looked nice.     This is my favorite Indy car and I waited almost 20 years to find someone that did the decals for it. My thanks to Michael Portaro for doing a great job on the decals and for suggesting the paint color (Tamiya Italian Red). For the tire lettering, I tried one set with the Shabos and another with slide decals. As easy and good-looking as the Shabos are, I like the look of the decals better. The lettering looks more like the real thing. Decals: On the right side, the pics on the Indycals website has the little car wash logo closer to the front wheel, but after watching my tape of that race, I saw that it was at the other end of the Dan Hanna graphic. I should have slid the stripes on the sidepods all the way over to the radiator opening. |
|
|
|
Post by professor on Dec 20, 2008 0:13:01 GMT -5
Why doesn't anyone fill in the seam between the body tpo and bottom? Doing this makes the model much more realisitic.
|
|
|
|
Post by indycals on Dec 20, 2008 1:38:28 GMT -5
Yeah, those kits are a pain regarding that seam. When I did mine... and the Penske PC17... I did the tub, glued it into place, then glued the body together, filled up the seams, carefully masked and painted... oh yeah, I also removed the suspension arms and reattached them after painting.
|
|
|
|
Post by shunter on Dec 20, 2008 2:11:27 GMT -5
Excellent work, did you have to patch up the gap or did it basically go away when you joined the halves? I am also a fan of Mario's & Newmann Haas so nice to see this build.
|
|
|
|
Post by stonecold44 on Dec 21, 2008 21:07:55 GMT -5
Why doesn't anyone fill in the seam between the body tpo and bottom? Doing this makes the model much more realisitic. In my case, I'm just not that advanced. If I had to take off the suspension and re-attach it, it might not work well. I've tried using putty on a glue bomb and it was a disaster. Some other guys here have done great work on that kit by filling in the seams and with good decals and paint, the cars look like the real thing. |
|
Deleted
Deleted Member
Posts: 0
|
Post by Deleted on Feb 11, 2009 1:01:29 GMT -5
Why doesn't anyone fill in the seam between the body tpo and bottom? Doing this makes the model much more realisitic. On Mine, the seams will be filled before it is actually assembled. This is just a WIP on my part (Work In Progress) and I have basically left it in that condition for about 6 months. I just ran out of steam on the project. I hope to get back to it before too long. I have decanted paint to use in the airbrush t touch up with, so that is not a problem. Some of the members here are less experienced than others and it takes a little while to catch on to all that can be done, and more importantly, how to actually do it. Removing the front suspension as someone else said, is the easiest way, but to someone who has never done it before, it may seem to be a challenge. I can do that with this model at this stage, and it will hardly be (PROBABLY WILL NOT BE) noticeable when finished. When (and if!) I get it finished, and posted, I will welcome any critiques since I am always wanting to get better! ;D Mongo |
|