Joel
Hot Shoe
  Old & Slow
Posts: 162 
|
Post by Joel on Sept 23, 2018 11:12:41 GMT -5
Well, I thought that it was time to start a thread on my current build: The Ebbro 1/20 scale Lotus 72E. Since this build is almost completely OOB stock, I'm not going to be making many update posts, just a few larger updates would be more interesting. I started the build by assemblying the cockpit tube, then air brushing the interior Alcad Flat Aluminum. The seat cushion as well as the IP were painted Tamiya XF69 Nato Black, as it just looks better in scale. 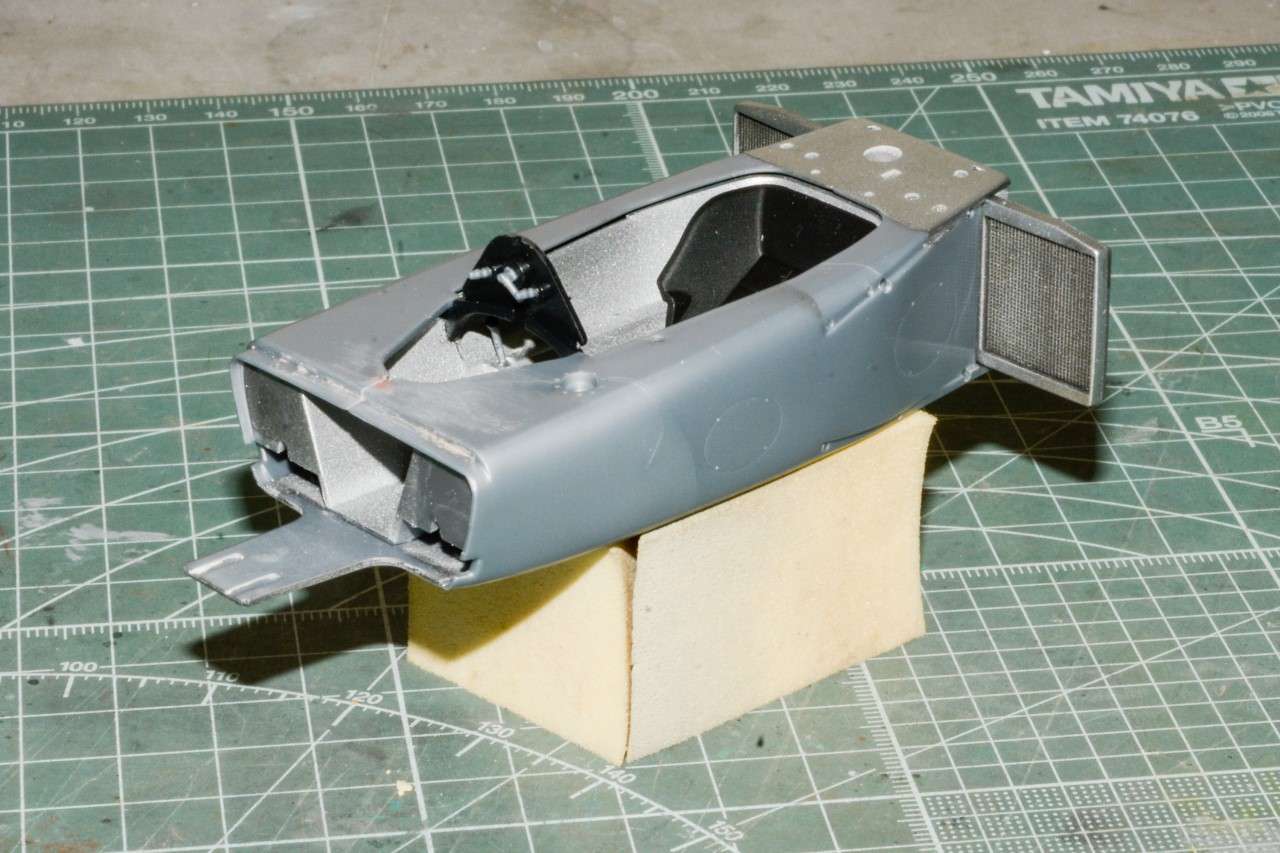 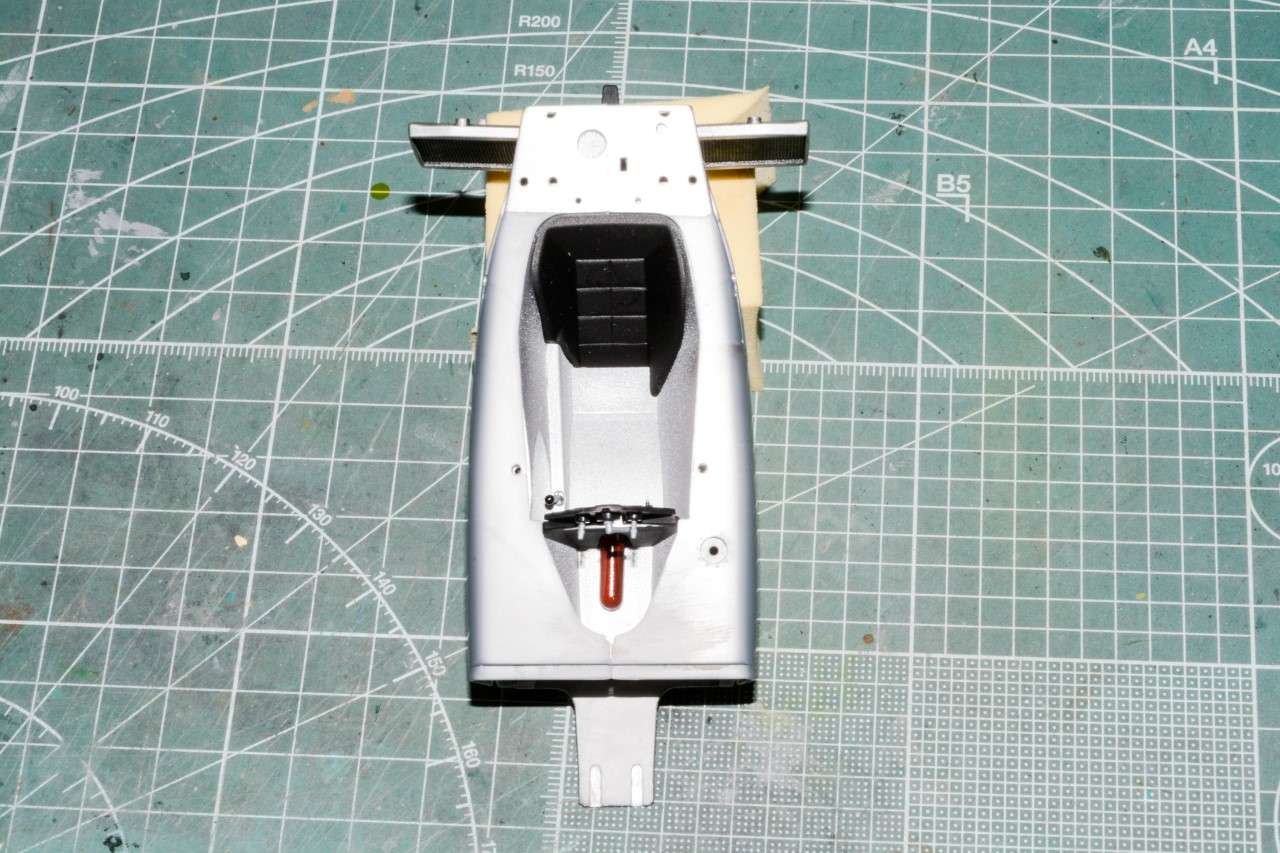 I carefully dry brushed the instrument Bezels with enamel Silver paint, the used the kit decals, and lenses from a few coats of Pledge Floor Finish. 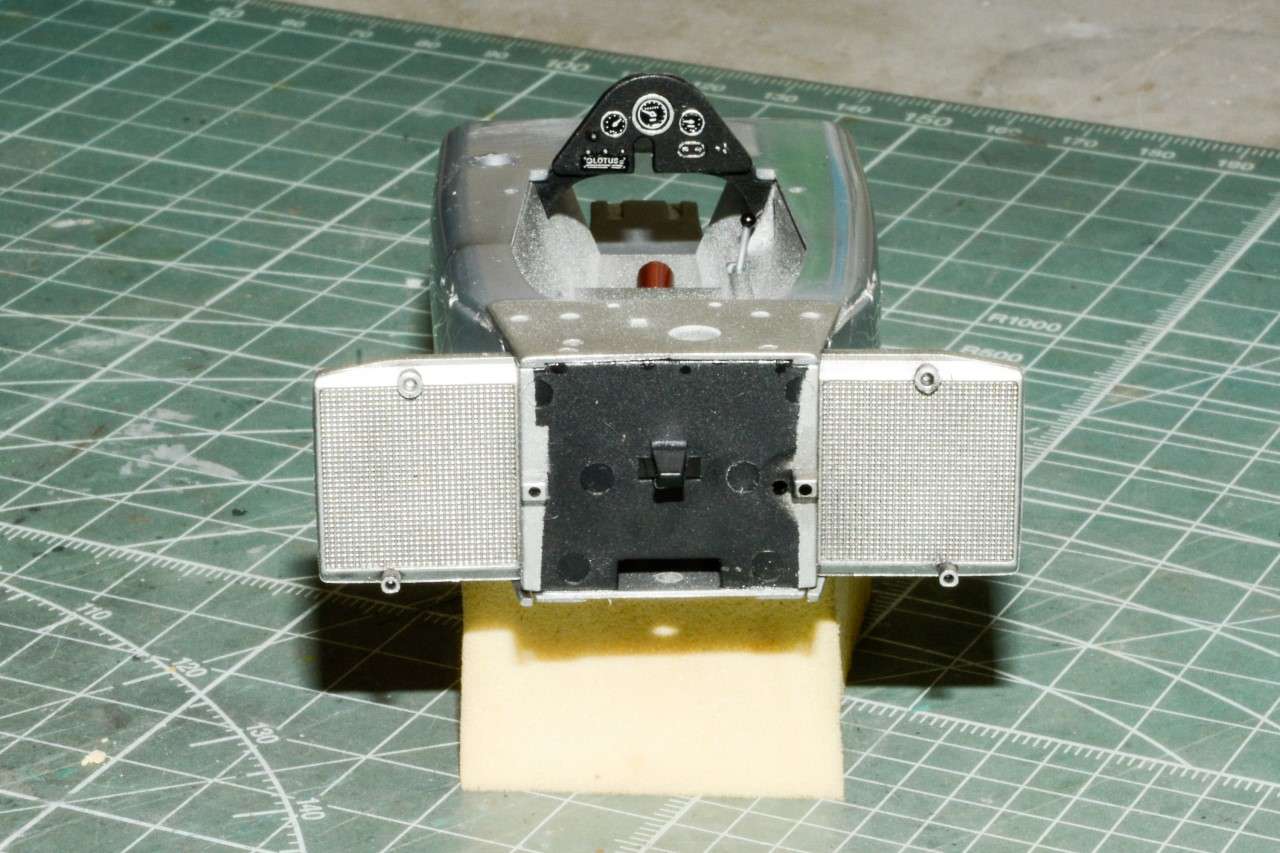 Up next was the front suspension sub assembly. A really complex piece of engineering, where I had major concerns how the inboard disc brakes & wheel shafts would correctly align, since the mounting surface was at a angle. I had worked out a method to add some adjustments, but Ebbro had already thought of that, and the final fit was just perfect. 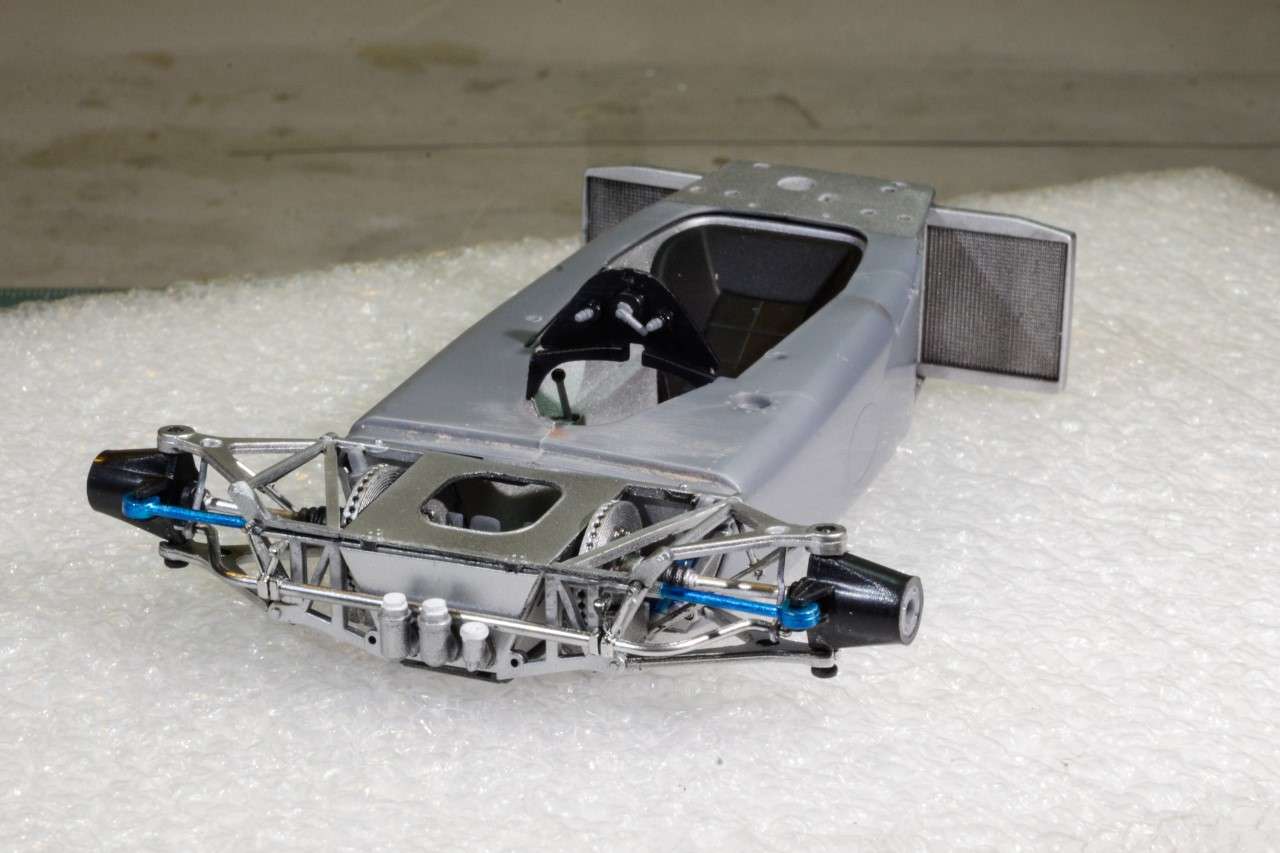 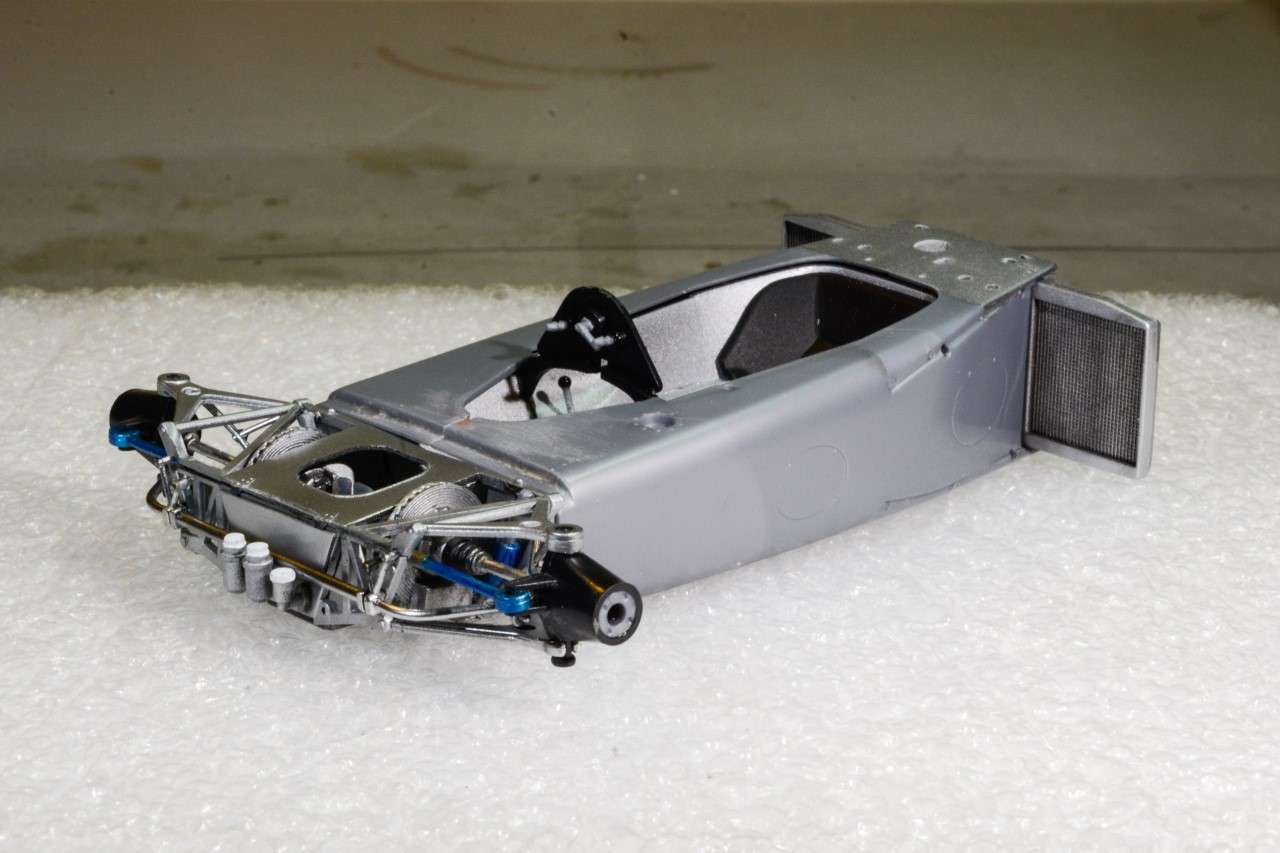 I built up both side pods, the front wing, rear wing, and cockpit cowling. Then primed them with Mr. Hobby Mr. Mr Primer 1,000 thinned 1:1 with Tamiya Yellow cap Lacquer based thinner. When dry, i gave each assemby a rub down with a wet piece of Tamiya 2,000 sponge. the end result was nice and smooth. 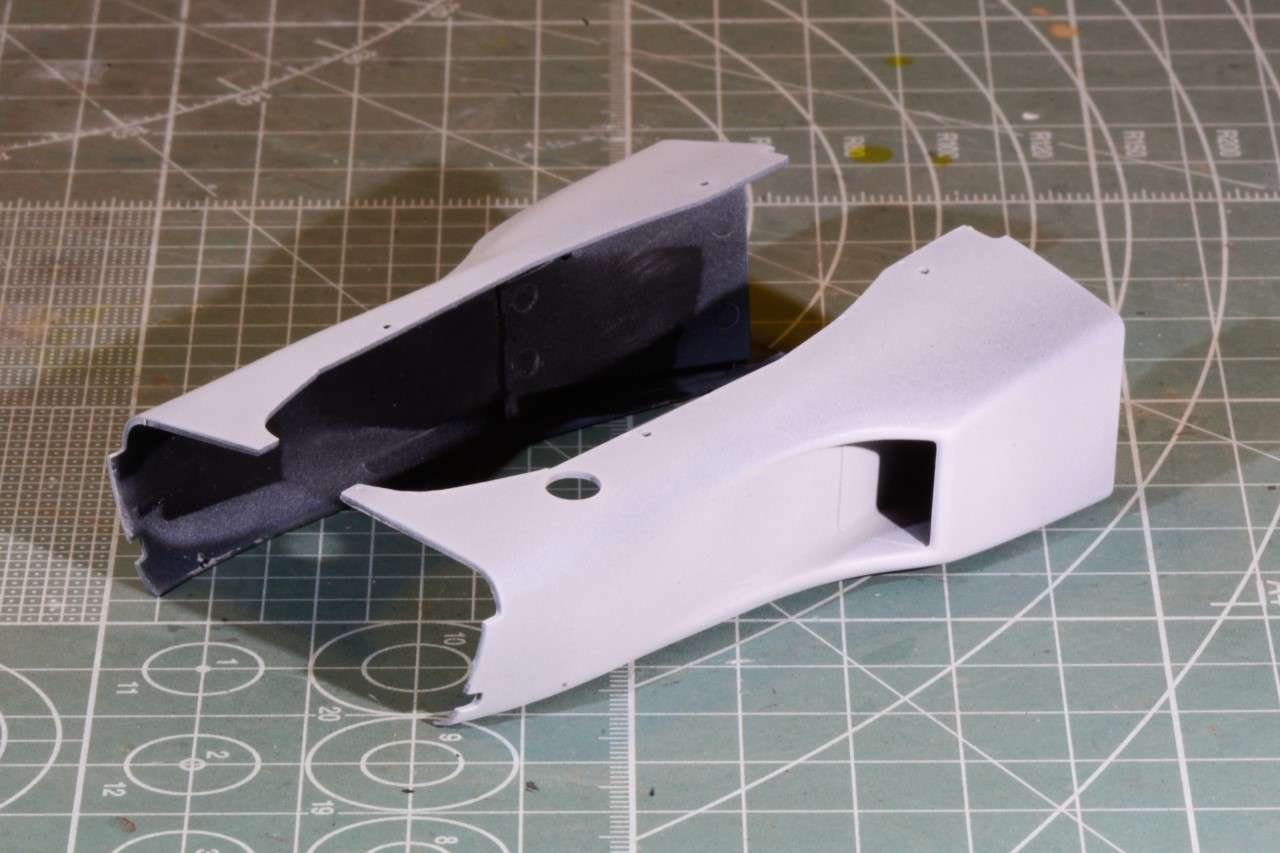 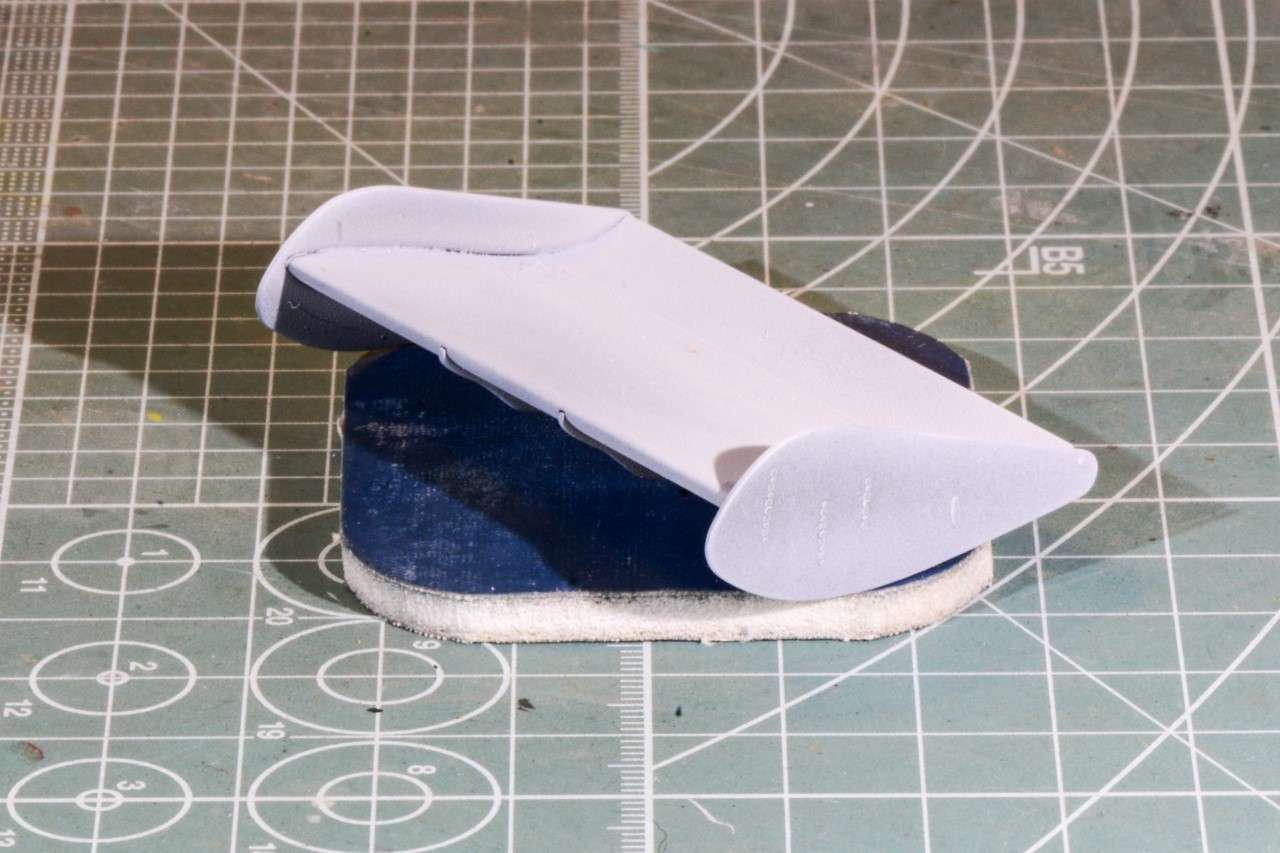 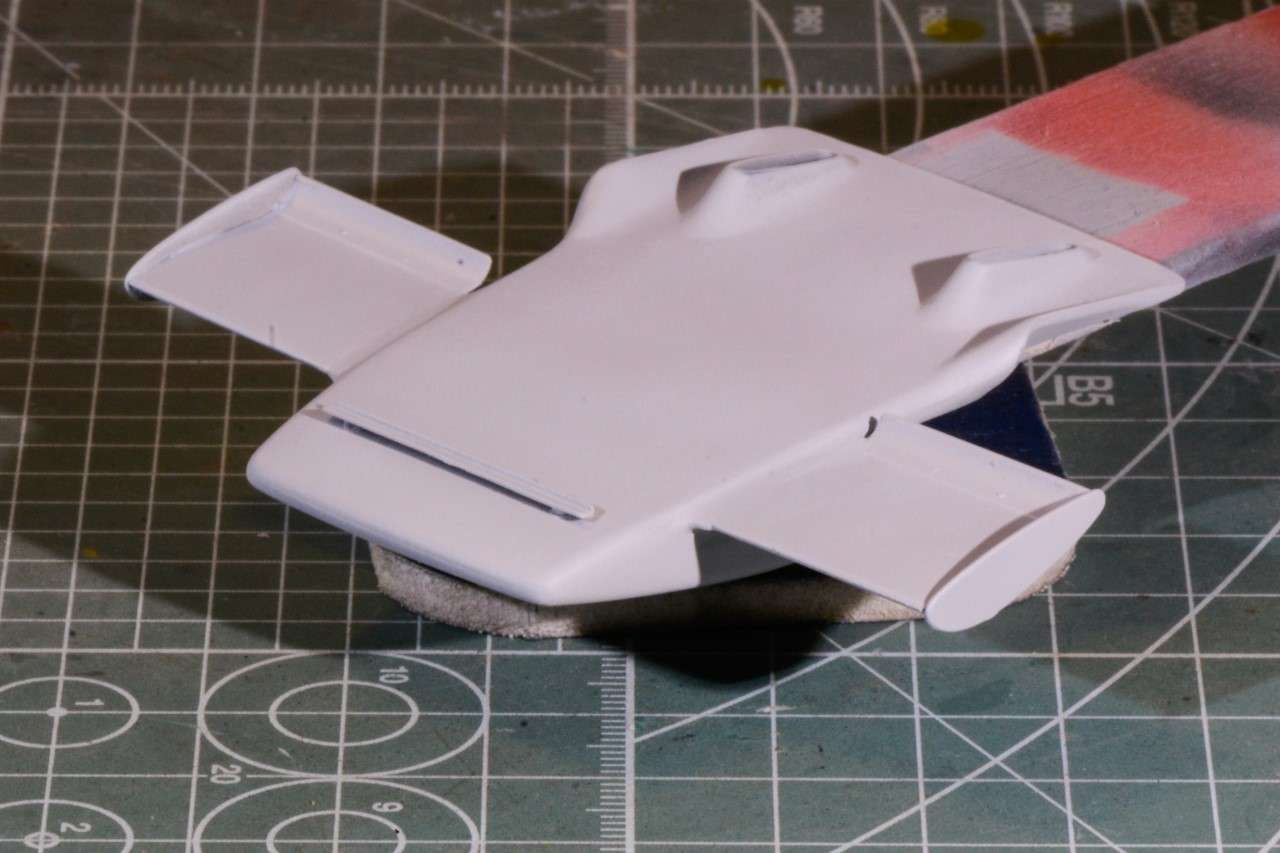 I had switched "gears" as a break, and assembled the Ford Coswoth V8 engine. I used the thinnest wire I had for ignition wires, and decided not to temp fate, and used their through the distributor cap method of wiring, as well as the led wire to the coil box. For the fuel injection wires, I decided to drill out each injector to accept the small diameter clear fly fishing tubing I could find. Again, I decided not to temp fate by painting them with Tamiya Clear Yellow, and accepted the look as just brand new tubing. I also had assembled the proper intake trumpet for Emmo's car, primed, and painted it with Zero Black. 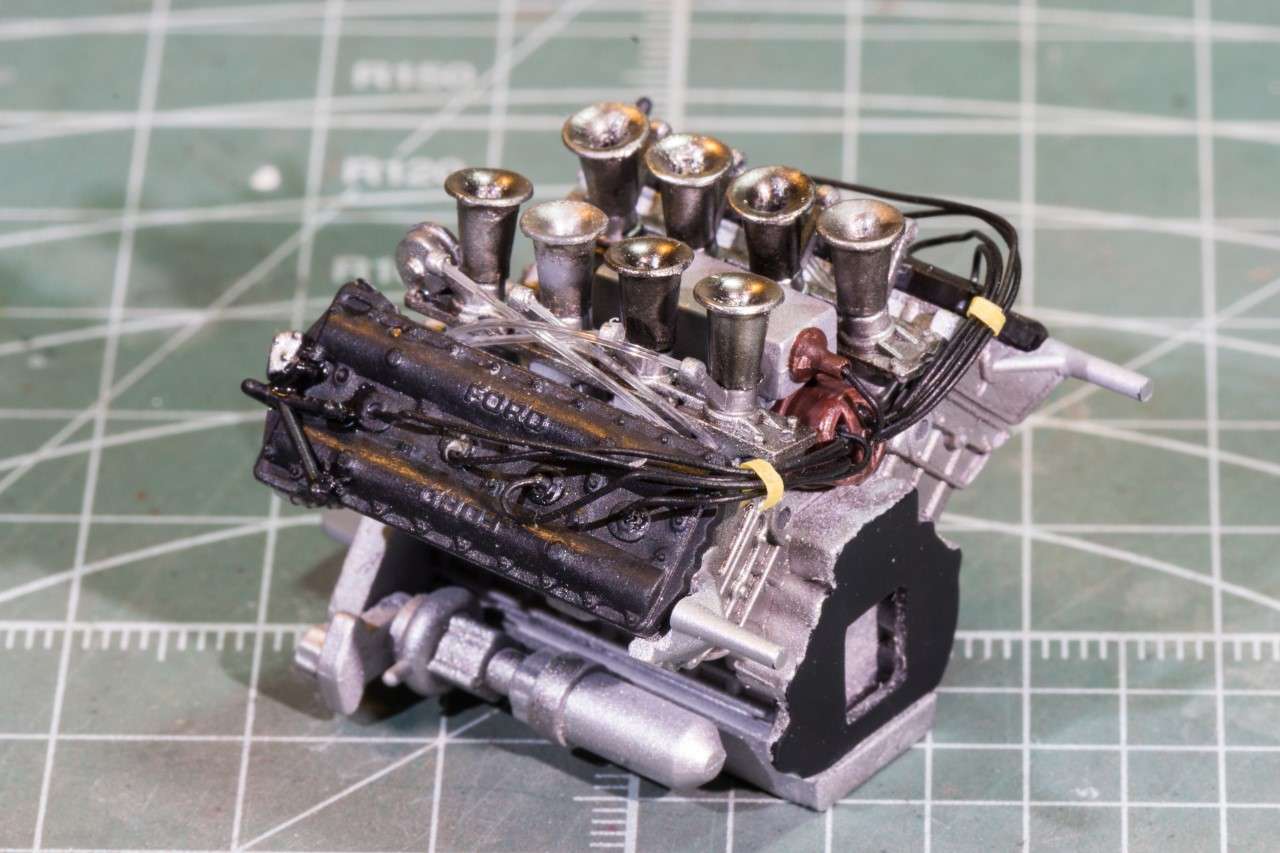 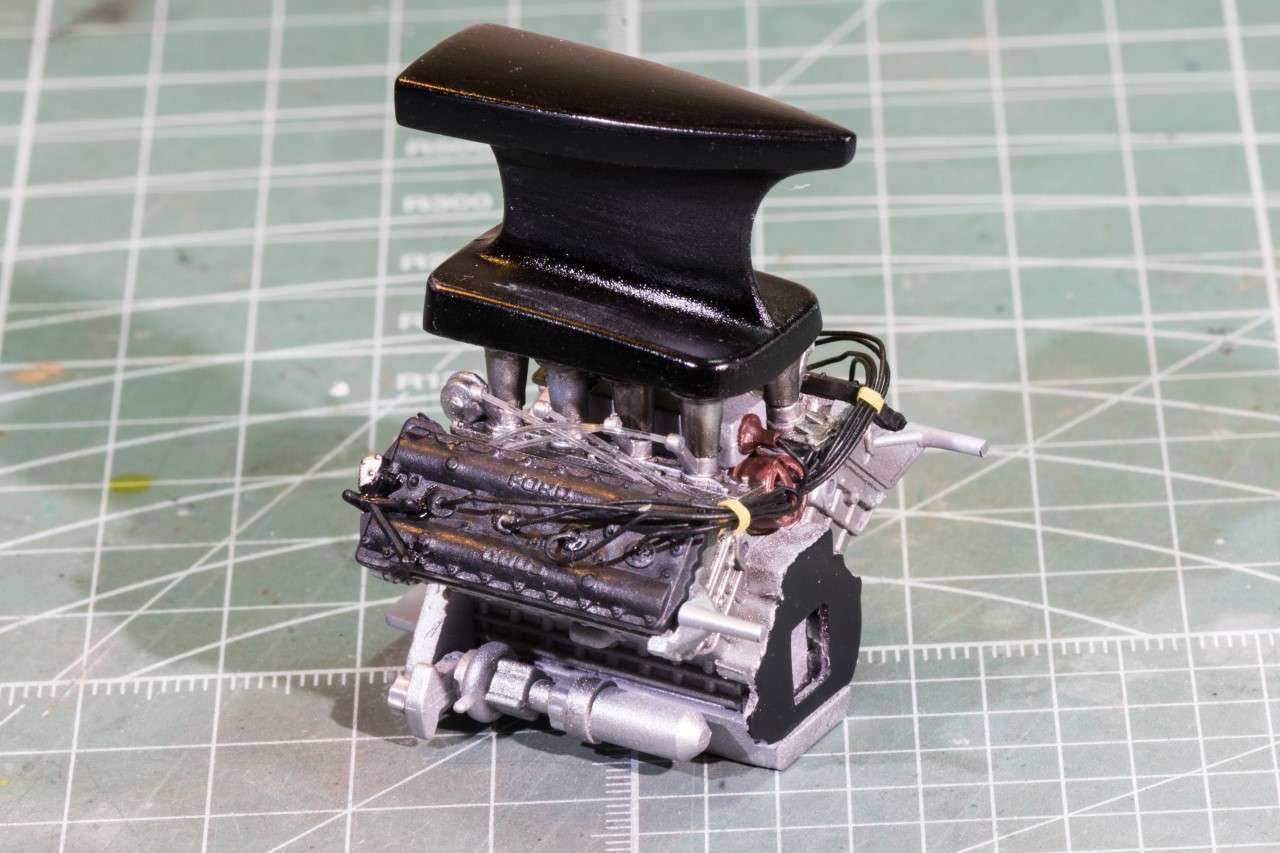 Thanks for stopping by and checking out my build. It's much appreciated. Joel |
|
robh
Race Winner
  
Posts: 526
|
Post by robh on Sept 23, 2018 14:56:32 GMT -5
You're off to a good start. Really nice work on the front suspension.
|
|
Joel
Hot Shoe
  Old & Slow
Posts: 162 
|
Post by Joel on Sept 23, 2018 15:03:59 GMT -5
rob,
Thanks so much for stopping by and checking out my build to date. I just put it together. the designers/engineers at Ebbro really should get all the credit. The parts fit has been outstanding.
Joel
|
|
|
|
Post by racerbrown on Sept 23, 2018 15:53:13 GMT -5
looks great so far joel!
the engine detail really stands out!
duane
|
|
Joel
Hot Shoe
  Old & Slow
Posts: 162 
|
Post by Joel on Sept 23, 2018 19:21:46 GMT -5
looks great so far joel! the engine detail really stands out! duane Duane, Thanks for stopping by and checking out my build to date, as it's much appreciated. Joel |
|
|
|
Post by 2lapsdown on Sept 23, 2018 20:42:38 GMT -5
Lots to be learned here, thanks for sharing
John
|
|
|
|
Post by Art Laski on Sept 24, 2018 1:58:51 GMT -5
Looking good, Joel! Look forward to more.
|
|
Joel
Hot Shoe
  Old & Slow
Posts: 162 
|
Post by Joel on Sept 24, 2018 9:09:13 GMT -5
Lots to be learned here, thanks for sharing John John, Thanks so much for stopping by. As for lots to learn, I'm not so sure about that. But I hope that one or two things I do is of interest to you. Joel |
|
Joel
Hot Shoe
  Old & Slow
Posts: 162 
|
Post by Joel on Sept 24, 2018 9:12:11 GMT -5
Looking good, Joel! Look forward to more. Art, thanks for taking the time to check out my build to date. It's much appreciated. I've finished the color coats, and decaling the other day, so another update in a few days will bring you up to date. Joel |
|
|
|
Post by indy on Sept 24, 2018 13:58:51 GMT -5
Very nice work and looking forward to the updates!
Jordan
|
|
Joel
Hot Shoe
  Old & Slow
Posts: 162 
|
Post by Joel on Sept 25, 2018 8:42:27 GMT -5
Very nice work and looking forward to the updates! Jordan Jordan, Thanks so much for stopping by and checking out a Newbie's work. It's greatly appreciated. I'm trying to keep the updates condensed as I'm not doing anything special, but trying to actually get the build across the finish line. So far my biggest surprise is how the paint job just came out. That and decaling is my next update for the up coming weekend. Joel |
|
Joel
Hot Shoe
  Old & Slow
Posts: 162 
|
Post by Joel on Sept 28, 2018 7:30:03 GMT -5
Since my last update, I've finished the rather complex decaling required on the type 72E, and I must say while not perfect, looks pretty darn good to me. Ebbro had Cartgraph print their decals, but there were no JPS cigarette logos provided. I went to order a set from Indy Cals as the Type 72E is listed on the IndyCal site, but Mike no longer can print Gold decals. So now what do I do? I checked ebay and found a small decal/parts company located in Hong Kong that silk screens decals. And for some strange reason they had just the JPS sponsor decals for the type 72E. So I ordered a sheet for $11.50 with shipping. Took 3 weeks, but they got here. In the mean time I started on those Gold stripes. I cut the cowl strips into 4 sections on each side, so that a total of 11 decal pcs needed to match up. Came out pretty good. 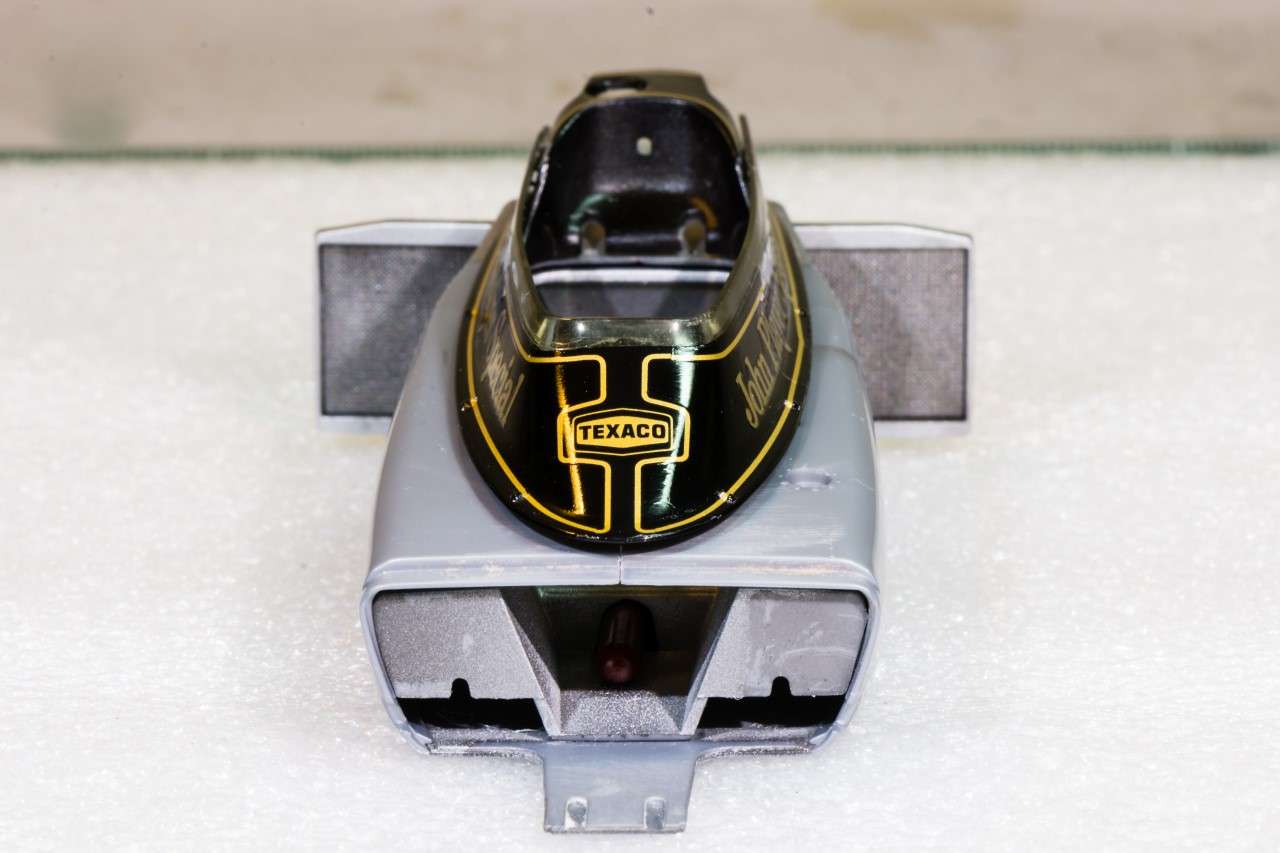 Then I did the side pods and cut the stripes in workable sections, as well as the nose clip, intake box, and the rear wing. All the body panels dried perfectly much to my amazement. Up next was the big #1s in with their Gold backing, also by Cartgraph. By this time the decals still haven't arrived, so i worked on the rear suspension and drive train. Finally, the decals arrived. they looked great, but a little thicker then what I had expected. More in tune with what you would expect with Asian decals. They went down perfectly, and look great. I gave them a day to dry, then I air brushed on 3 coats of Mr. Color Lacquer Clear gloss, waited 2 days, and rubbed that out with Tamiya's #3,000 sponge. Now the decals look almost like they were painted on. No flash, and no silvering, which was in the back of my head through the entire process. Now comes the fun part. I also ordered from Gravity their polishing set and wax. The final results were simply amazing. 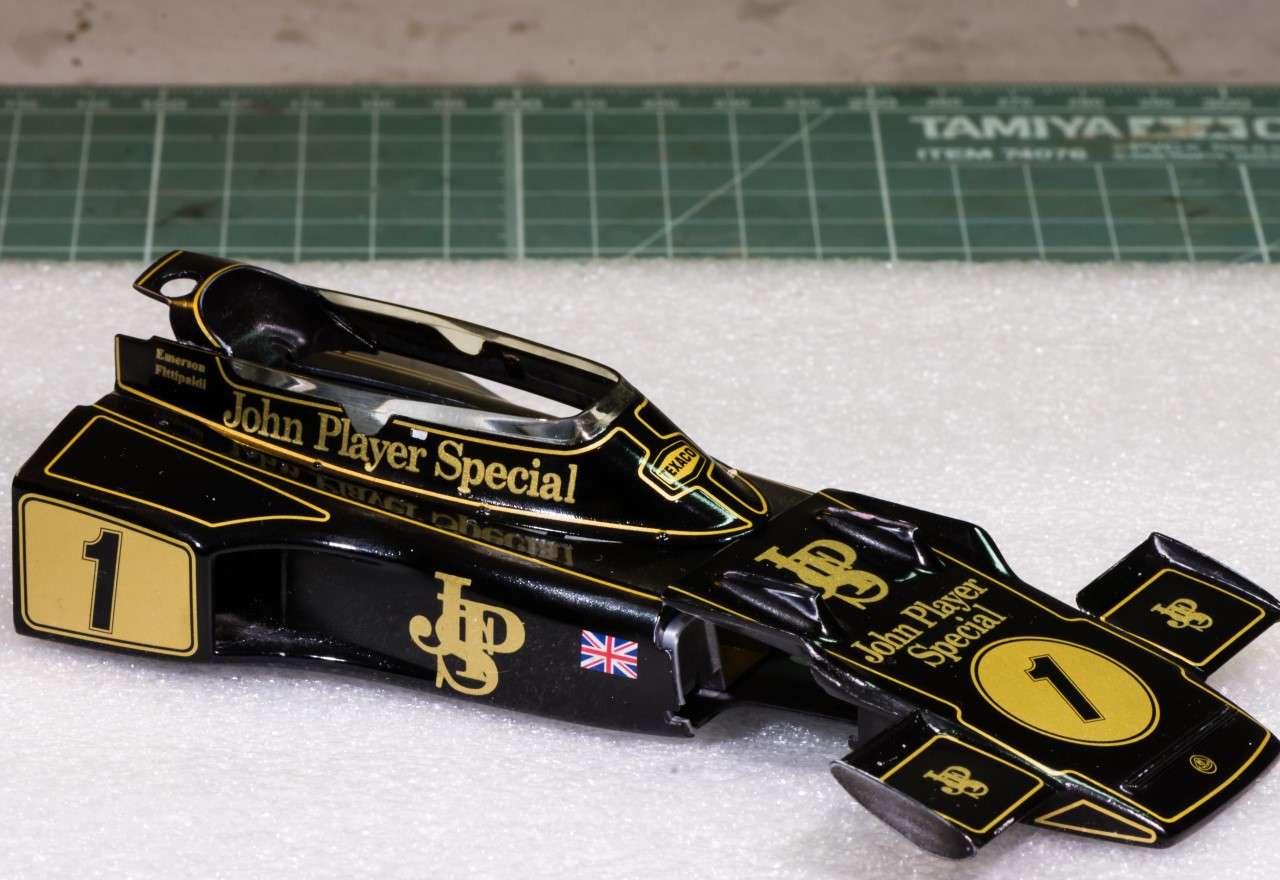 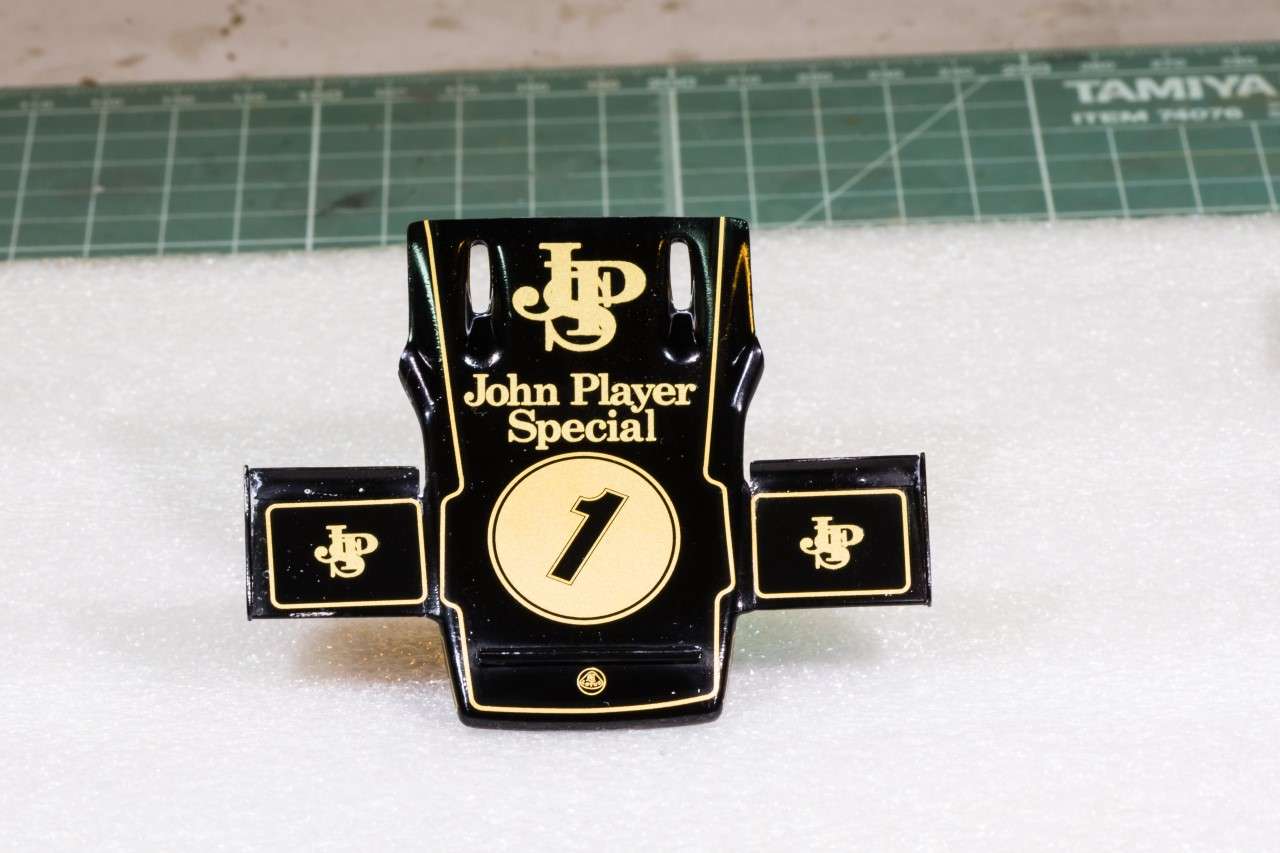 And here's the Ford Cosworth with the intake box dry fitted just for effect. 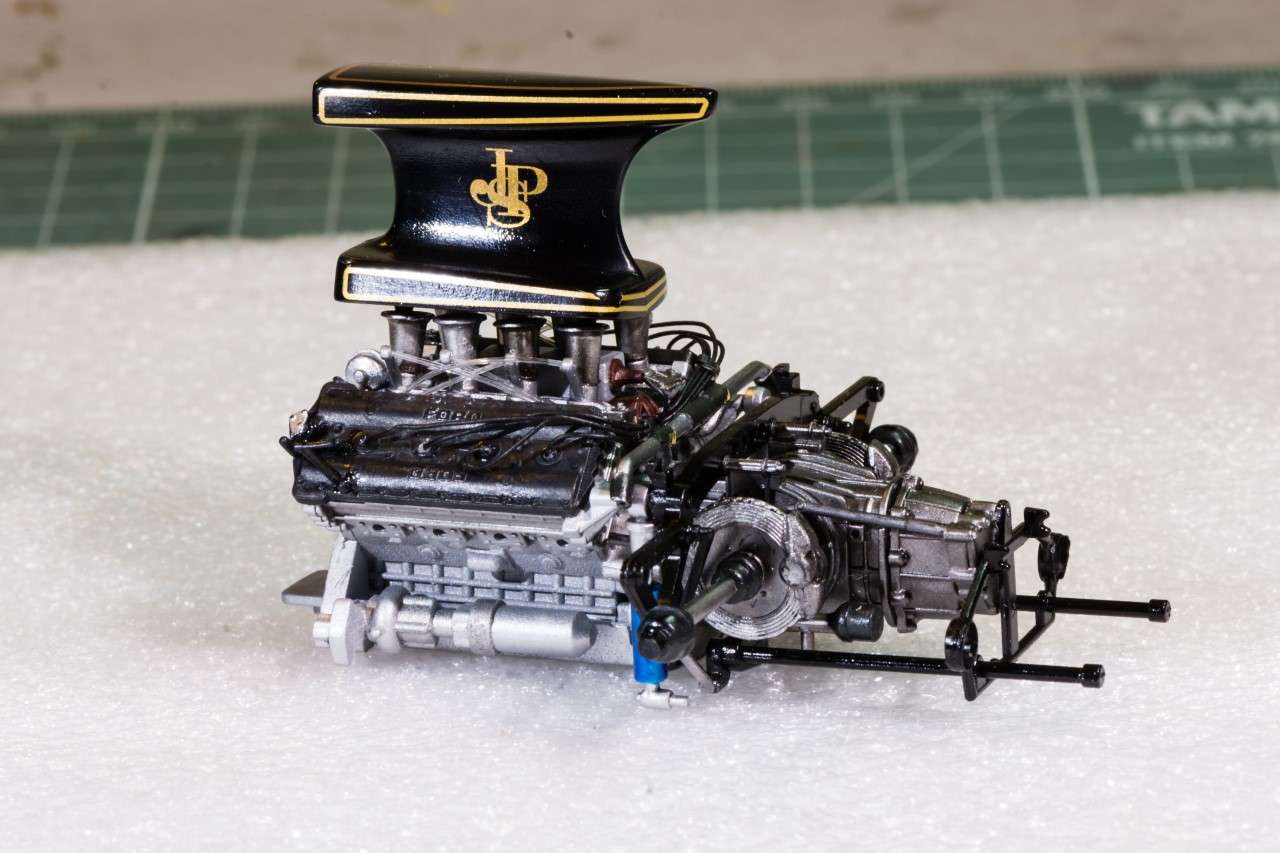 the pictures being greater then 1:1 do show off any and all imperfections in the paint due strictly to my limited ability to apply a gloss paint job correctly. but I'm getting better. In person the panels do look a lot better. Joel ![]() |
|
|
|
Post by harveythedog2 on Oct 1, 2018 6:21:30 GMT -5
Joel, black is the hardest paint to spray because it shows everything. Still, I think it looks great! The added detail makes it look that much better. Look forward to your next installment!
|
|
robh
Race Winner
  
Posts: 526
|
Post by robh on Oct 1, 2018 7:24:21 GMT -5
Very nice work on a challenging paint and decal job.
|
|
Joel
Hot Shoe
  Old & Slow
Posts: 162 
|
Post by Joel on Oct 1, 2018 7:57:52 GMT -5
Joel, black is the hardest paint to spray because it shows everything. Still, I think it looks great! The added detail makes it look that much better. Look forward to your next installment! thanks so much for the thumbs up. it's much appreciated. The next update hopefully will be the finished model. Right now I'm struggling with the Tamiya harness assembly. And I thought that painting the wheels was the hardest job left on the build Joel |
|
Joel
Hot Shoe
  Old & Slow
Posts: 162 
|
Post by Joel on Oct 1, 2018 7:58:42 GMT -5
Very nice work on a challenging paint and decal job. Thanks so much for stopping by and checking out my progress to day. it's much appreciated. Joel |
|
|
|
Post by Gary Davis on Oct 1, 2018 13:01:07 GMT -5
Man Joel...you've done a GREAT job on this 72E. Looking forward to the next set of Pics...
|
|
Joel
Hot Shoe
  Old & Slow
Posts: 162 
|
Post by Joel on Oct 1, 2018 14:04:45 GMT -5
Gary,
Thanks so much for stopping by, as well as the thumbs up. being the new guy on the block, everyone is really making me feel right at home.
Joel
|
|
|
|
Post by racerbrown on Oct 2, 2018 6:29:24 GMT -5
you're making a really tough job look easy!  duane |
|
Joel
Hot Shoe
  Old & Slow
Posts: 162 
|
Post by Joel on Oct 2, 2018 6:37:33 GMT -5
you're making a really tough job look easy!  duane Duane, Thanks so very much for those most kind words. Believe me, the decaling wasn't all that difficult. You just need a plan, and then follow it. There were long stripes that I simply cut in half as I had absolutely no confidence in my ability to work with stripes that long. Or the cowling that I just cut up into what was workable sections for me. Joel |
|
jj66
Podium Finisher
  
Posts: 363
|
Post by jj66 on Oct 3, 2018 13:42:21 GMT -5
Great work! Black paint is hard to work. I love JPS livery in Lotus cars.
|
|
Joel
Hot Shoe
  Old & Slow
Posts: 162 
|
Post by Joel on Oct 3, 2018 15:00:38 GMT -5
Great work! Black paint is hard to work. I love JPS livery in Lotus cars. the paint work for my 2nd ever gloss paint job wasn't as hard as I thought using the "Full Monty" of rubbing out the color coats, then rubbing out the gloss coat over the decals, which were the hardest decaling job I've ever done in more then 8 years of military modeling. Then using the full Gravity polishing system including their wax. It's not cheap by any means, but for a novice it's the way to go. Joel |
|
Deleted
Deleted Member
Posts: 0
|
Post by Deleted on Oct 3, 2018 19:29:40 GMT -5
Joel
Nice work on your Ebbro Lotus 72E. The JPS livery is very cool and not easy to do.
BTW- Many years ago I lived on North Bicycle Path in your town, but now I'm located 20 miles east of you. Are you planning on going to the LIARS model car show in Freeport next Month?
Jimmy B.
|
|
Joel
Hot Shoe
  Old & Slow
Posts: 162 
|
Post by Joel on Oct 4, 2018 16:20:43 GMT -5
Well, the Lotus Type 72E finally crossed the finish line. Less days to completion then previous builds, but the hours are most likely about the same. Being retired and still not even looking for a part time job, does give me a lot of free time once I finish my daily "Honey To Do List" choirs. It was time to "bolt" the engine/gearbox/suspension to the chassis tub. Ebbro has a screw and tongue to really keep it locked into place. Then the body panels were fitted and the slightest amount of Extra Thin was used to keep it where it belongs. Then the cowling, and it was a real bear to get into position. Time to step back and admire my progress Now comes one of the dreaded parts of the build, the Tamiya 6 way harness that's generic by era, so you need to have some photographs, and then do a Rube Goldberg install. Took two days, but I got it done. looks ok but certainly not perfect. The kit comes with Chromed wheels, fronts one piece, but the massive rears are two pieces. What's more they're flat black, then Gold front surfaces, and polished Aluminum rims. I stripped the chrome of with Ammonia which works faster then Bleach. Then airbrushed the flat black. The gold was a real bear to do as I opted for Enamel paint slightly thinned so it would flow and hopefully not leave brush marks, and it didn't. The polished steel rims are done with a artist's very fine felt tip marker. I was hoping for just ok, but I'm a step or two above it, but there's certainly room for improvement. Then to my horror as I pressed the wheels on, one of the pins in the rear wheel broke. I tried to glue it but it just kept on breaking off. Then I used 5 min epoxy, and it didn't hold the pin in place. I then went with my last resort of a clay type two part epoxy. Set the wheel in place and braced everything aligned the best I could. Then left it a lone for a good two. Hours. SUCCESS. I had previously painted the two Talbot Mirrors, and now they were finally installed. And with the Talbot's installed, the Type 72E of Emmo is in the books. Here's some pictures of the finished Lotus. Joel 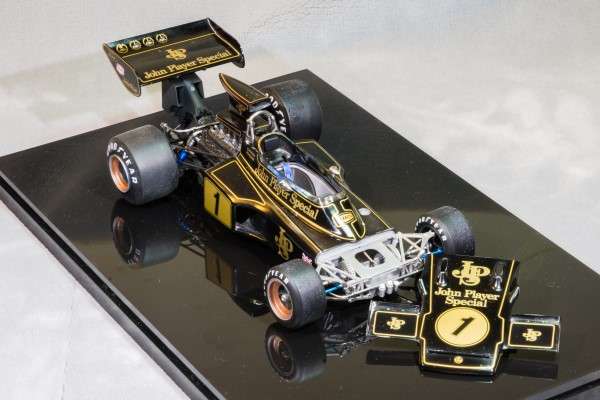 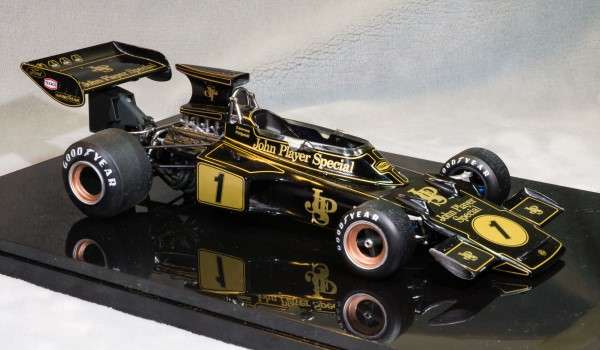 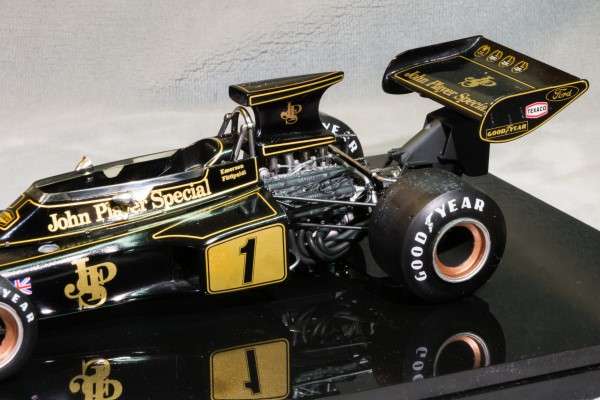 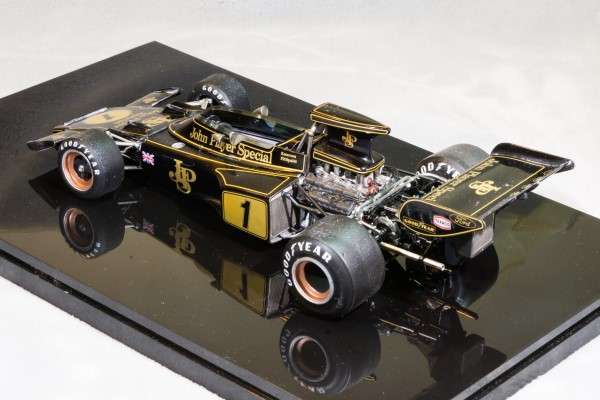 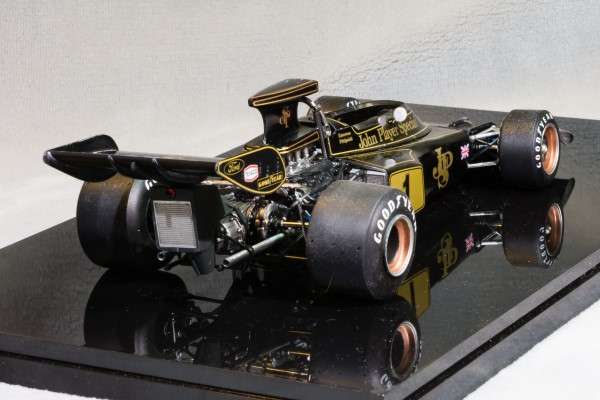 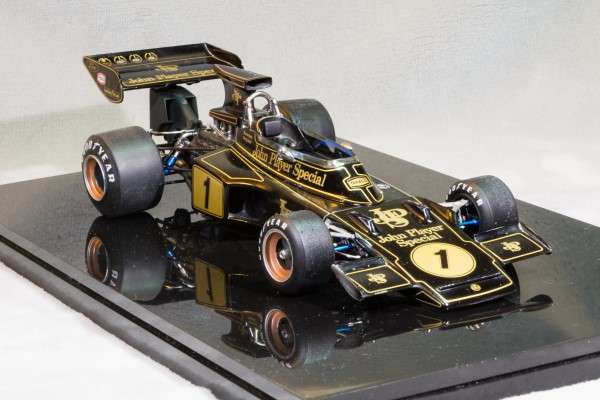 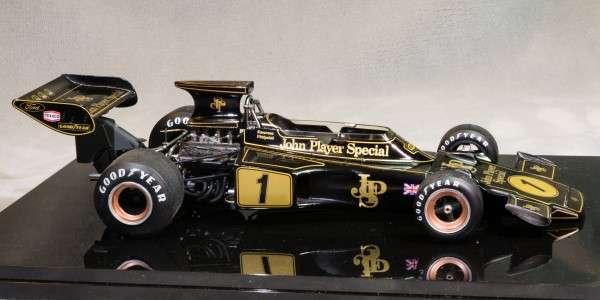 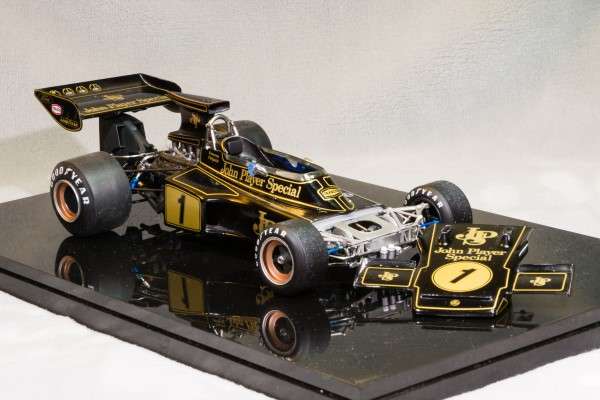 |
|
robh
Race Winner
  
Posts: 526
|
Post by robh on Oct 4, 2018 16:32:10 GMT -5
It turned out great! Nice fix on the rear wheel.
|
|
|
|
Post by indy on Oct 4, 2018 16:33:03 GMT -5
Well done on a icon F1 car. Was before my time but it still has always been a striking car. That Brazilian really was something to see drive!
Jordan
|
|
|
|
Post by Gary Davis on Oct 4, 2018 21:52:50 GMT -5
GREAT job Joel...I sure enjoyed watching your work on this build.
|
|
|
|
Post by racerbrown on Oct 5, 2018 5:16:54 GMT -5
definitely a winner!
thanks for sharing the build.
duane
|
|
Joel
Hot Shoe
  Old & Slow
Posts: 162 
|
Post by Joel on Oct 5, 2018 9:38:15 GMT -5
It turned out great! Nice fix on the rear wheel. Rob, thanks so much for those most kind words. As for the fix, I got lucky, and my final attempt worked. checked out the fix this morning and it's rock solid. Joel |
|
Joel
Hot Shoe
  Old & Slow
Posts: 162 
|
Post by Joel on Oct 5, 2018 9:42:45 GMT -5
Well done on a icon F1 car. Was before my time but it still has always been a striking car. That Brazilian really was something to see drive! Jordan Jordan, So glad that you liked my 1st open wheel build. the front and rear suspensions were really quite a challenge to a neophyte like myself. Unfortunately, at my age, I was in my early 20s when Emmo ran the Type 72E. Honestly, while I liked him in F1, I loved him driving Indy Cart cars for Mr. Penske. Joel |
|


 Pro Tech | MAD | Scale Motorsport


