|
|
Post by Patrick on Feb 4, 2015 3:05:20 GMT -5
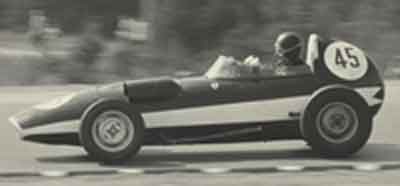
Well, until I get the suspension for the M-B W159 I started this little beastie... 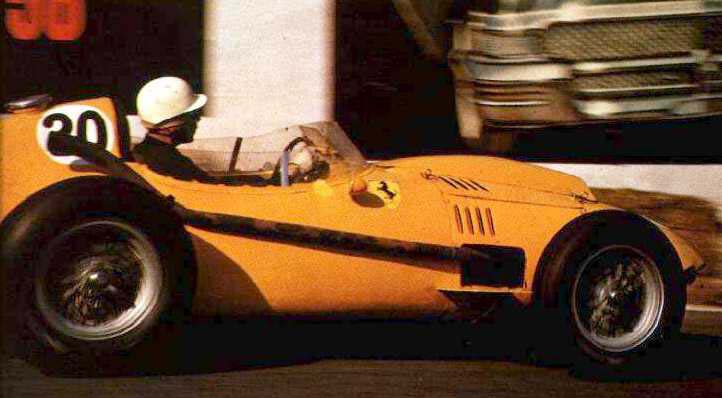 So, remember I did the Typo801 from a Merit or MPC body? As I was working on it I remember thinking that it had some similarities to the Dino. And, I like the yellow Ferraris driven by Olivier Gendebien for the Belgian team.  I started with a Roxy friction toy...well I didn't take a pre-picture of it... 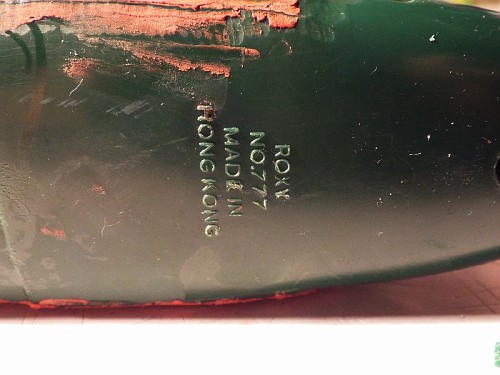 so I sliced the pontoons off... 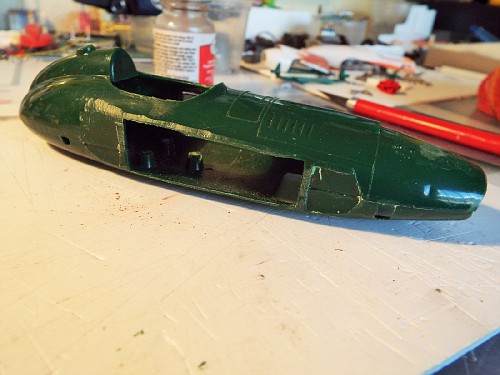 I cut some Evergreen sheet to fill the spaces... 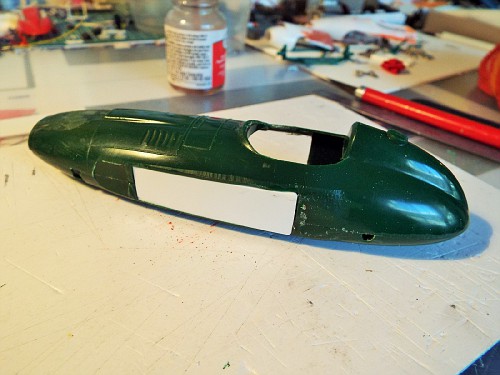 the Dino's wheelbase was shorter than the Lancia so I cut out 1/8" of the body's length... 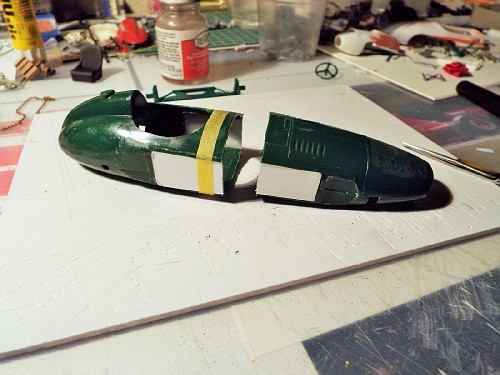 Next I reglued the two body halves together and puttied it up... 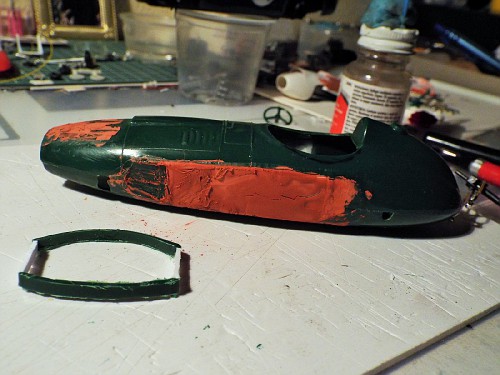 Then I cut out the engine cover... 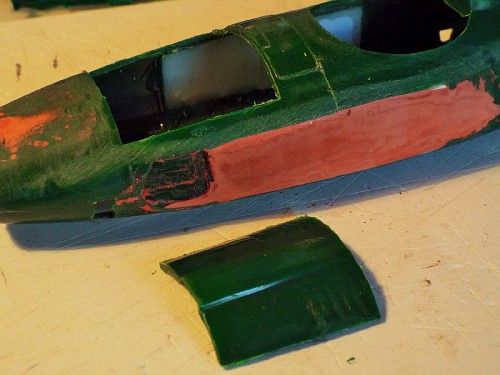 I scrounged my spares boxes for rear chassis coverings on the rear tank/body... 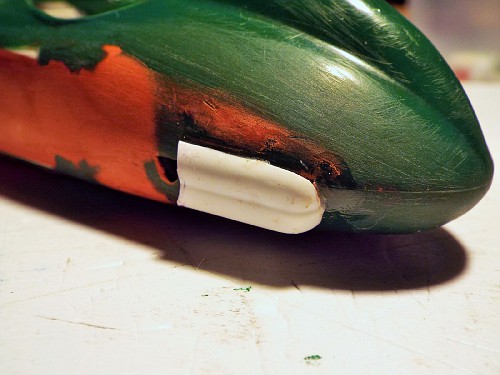 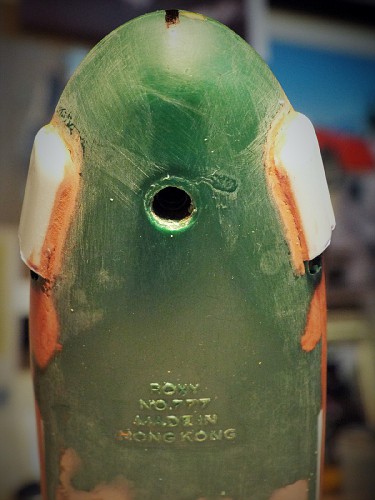 I then bashed together shock/springs and A-arms from the spares box and Lotus 56 kit... 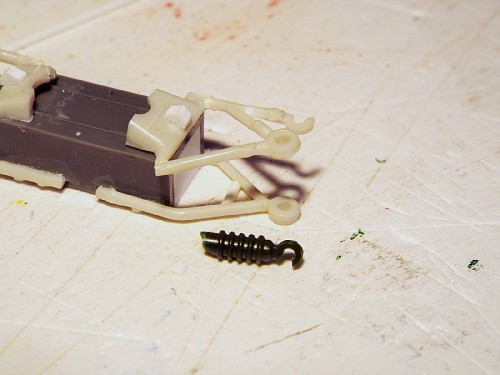 Next will be a simple frame of tubes to hold the front suspension in place and give the interior something to look at! Till next time...Oh, I'm looking for some finned brake covers...where can I find such a thing?? Patrick |
|
|
|
Post by indy on Feb 4, 2015 10:10:19 GMT -5
Happy days are here again, Patrick is working his wonders with another Hong Kong toy!
Jordan
|
|
|
|
Post by harveythedog2 on Feb 4, 2015 10:17:09 GMT -5
LOVE IT!!!
|
|
|
|
Post by Patrick on Feb 4, 2015 16:37:35 GMT -5
Thanks guys. I seem to thrive on this kind of work, but I long to build a kit straight from the box. A Heller Brabham BT33 comes to my mind.
|
|
|
|
Post by raceparke on Feb 4, 2015 16:43:31 GMT -5
Yeah,those Heller cars are a lot less challenging  |
|
|
|
Post by Patrick on Feb 4, 2015 21:34:18 GMT -5
LOL!!!
|
|
|
|
Post by alterrenner on Feb 5, 2015 6:07:28 GMT -5
I was unaware that you knew about kits!
--Frank
|
|
|
|
Post by Patrick on Feb 5, 2015 13:39:56 GMT -5
Even a bigger LOL!
|
|
|
|
Post by racerbrown on Feb 6, 2015 7:41:20 GMT -5
i can't imagine patrick getting a kit and building it box stock.
as always, i'm enjoying the WIP.
duane
|
|
|
|
Post by Patrick on Feb 6, 2015 23:54:45 GMT -5
Well, so far things are going nicely so I decided to add a simple ladder frame. So then I decided to add the side frame and add the side tanks, and a seat platform...what?? This was to be a simple build...but wait! This gets better! 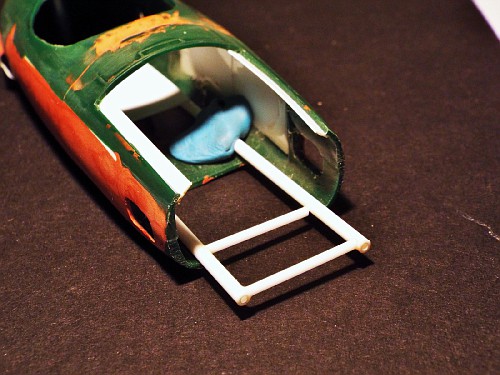 the front suspension unit fits nicely on the frame... 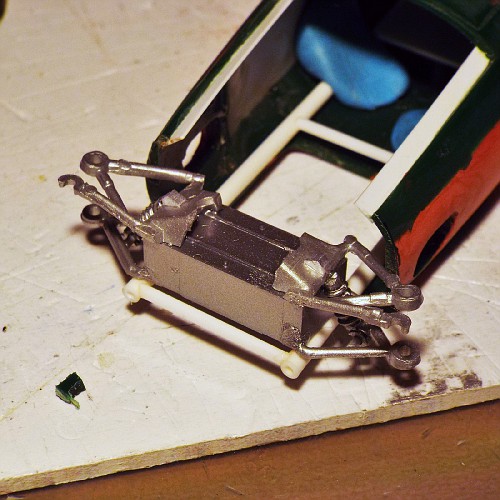 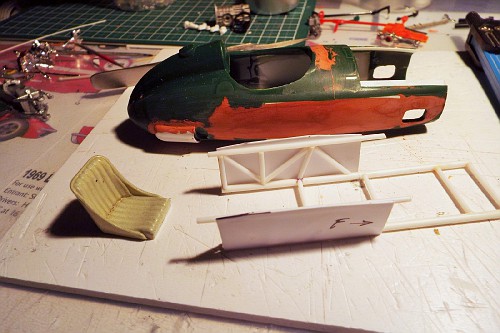 everything fits ok... 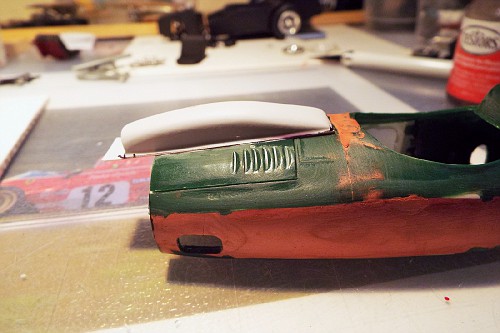 I had to cut and sand a piece of basswood for the hood scoop and vac-formed it. Well it was too tall and I had to re-sand it down and re-vac but I think it's still a bit too tall... 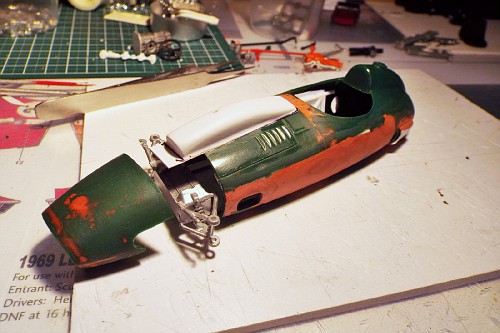 More to come...like I had the bright idea to vac-form some nose sections and change the shape of the nose... Patrick |
|
|
|
Post by Calvin on Feb 7, 2015 3:32:06 GMT -5
I just can't help myself but laugh.......Laughing from entertainment of what you do with these toys.
Its great fun.
|
|
|
|
Post by alterrenner on Feb 7, 2015 6:06:51 GMT -5
Somewhere there's a toy engineer who's shouting to the others in the retirement center "that's what I wanted to do! That's what I wanted to do!"
--Frank
|
|
|
|
Post by Patrick on Feb 11, 2015 5:01:33 GMT -5
I worked on the nose by vac-forming the upper piece of the nose with my trusty Mattel Vac-U-Form machine... 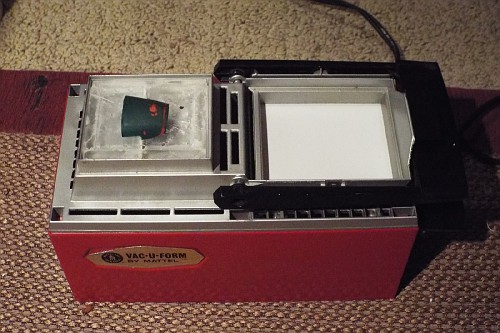 because of its height I had a bit of trouble getting two good pulls, but decided to use the pieces I made to lengthen the nose by about 1/8"... 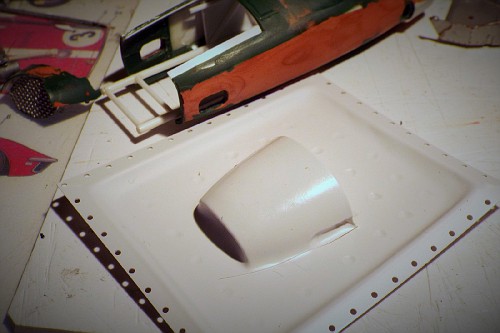 I then feather-sanded the edges and applied some putty to smooth the transition... 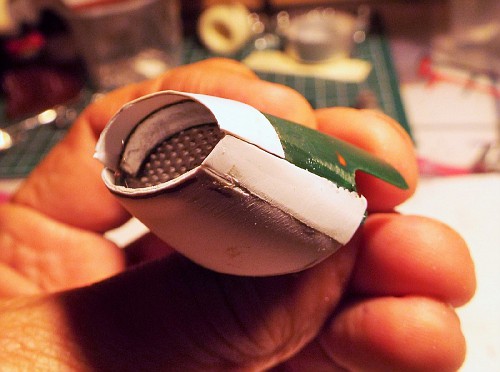 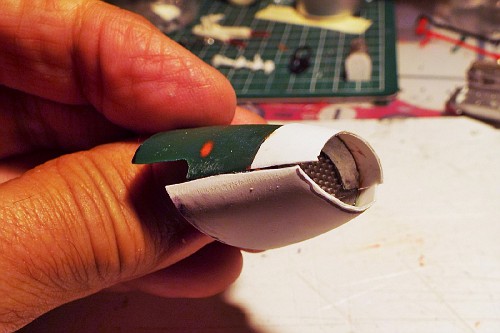 It doesn't look it but it did come out ok! I also replaced the scoop(this is the third one now), but it does look better. Warm weather ahead so painting is on the schedule for a few projects! Patrick |
|
|
|
Post by racerbrown on Feb 11, 2015 7:00:32 GMT -5
major surgery is always fun to watch when someone else is doing it.
thanks for sharing sir!
duane
|
|
|
|
Post by Patrick on Feb 11, 2015 22:37:05 GMT -5
Here's the putty stage...   It's starting to look like the correct nose. 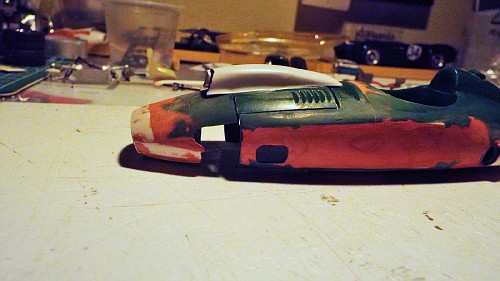 Patrick |
|
|
|
Post by clm1545 on Feb 11, 2015 22:50:04 GMT -5
We need to start calling you St Nick, Patrick. You are indeed "the toy man" not only for your builds, but also for your tools.
|
|
|
|
Post by Calvin on Feb 12, 2015 1:37:10 GMT -5
Patrick in NOT a model builder but a Model Engineer!
|
|
|
|
Post by Patrick on Feb 12, 2015 2:44:35 GMT -5
Stop it. I'm blushing! But, there is something to what Frank said, however. I fulfill the possibility of the toy. LOL!
Patrick
|
|
|
|
Post by Patrick on Feb 19, 2015 11:32:28 GMT -5
I got the paint on...now don't touch it for awhile!
|
|
|
|
Post by Patrick on Feb 22, 2015 22:45:25 GMT -5
Well, the paint is on so let the assembly begin again... 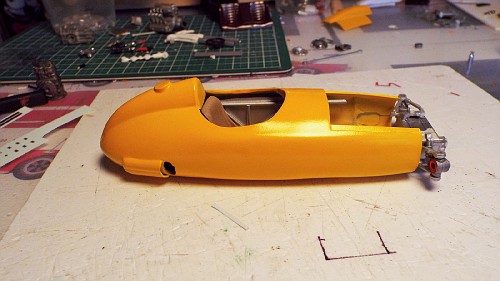 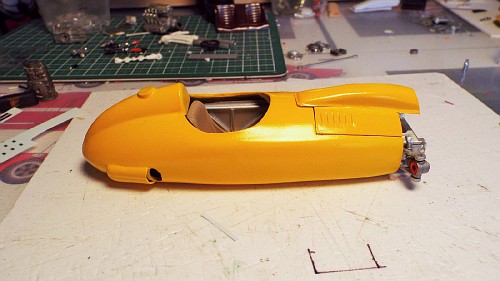 the chassis slid back in as planned, the de Dion trans glued in place, front suspension glued in place and the driver's seat glued...check! More to add... Patrick |
|
|
|
Post by Patrick on Feb 25, 2015 11:06:53 GMT -5
progress... 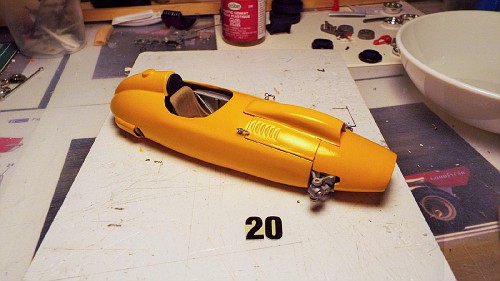 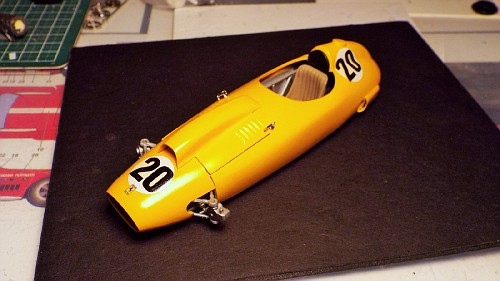 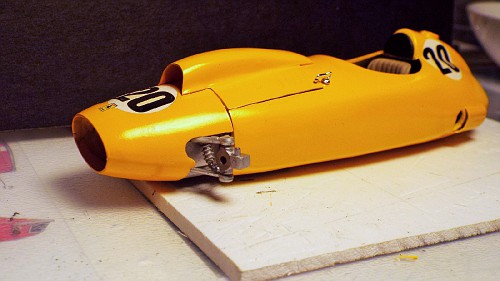 next the rear suspension assembly... Patrick |
|
|
|
Post by kurzheck on Feb 25, 2015 17:04:14 GMT -5
This is really starting to come together. Creative and excellent building as usual.
|
|
Deleted
Deleted Member
Posts: 0
|
Post by Deleted on Mar 8, 2015 9:28:57 GMT -5
WOW! It really looks great!!
|
|
|
|
Post by Patrick on Mar 9, 2015 12:19:21 GMT -5
Thanks guys. Hey, Bepe, what are you working on?
Patrick
|
|
Deleted
Deleted Member
Posts: 0
|
Post by Deleted on Mar 10, 2015 9:28:44 GMT -5
Ciao Patrick, beside some Targa Florio projects, my open wheel project at this moment is the BRM P57 1962 World Champion with G.Hill... the base is another old SEF white metal kit... there is a big wheels issue, as no one has still correctly reproduced the Dunlop rims of this car... even Fernando Pinto in his recent resin kit has totally failed the rims, using the classic Dunlop pattern as seen on D-type Jaguars and '58-'61 F1 BRMs... but the '62 rims are completely different...
|
|
|
|
Post by Patrick on Mar 11, 2015 1:38:35 GMT -5
I used the SEF rims for lack of anything better at the time...maybe the rims from one of Fisher's D-Jags?
Patrick
|
|
Deleted
Deleted Member
Posts: 0
|
Post by Deleted on Mar 11, 2015 16:30:43 GMT -5
No, the D-Jag Dunlop rims are classic 15 round holes rims, with the typical little holes between...  The P57 rims are 10 square holes rims...  There insn't any 1/24 scale reproduction of these rims... I'm trying to get something like this starting from what I have in my spare parts box... |
|
|
|
Post by Patrick on Mar 25, 2015 0:29:04 GMT -5
Well, I had some problems with the suspension both front and rear, but I did use these for finned brakes... 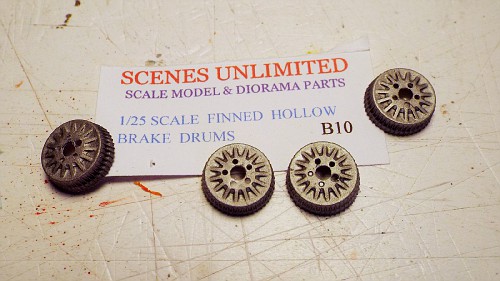 after I attached them to the wire wheels and assembled the rear suspension and glued it in place, I then assembled the front suspension and glued it in place... 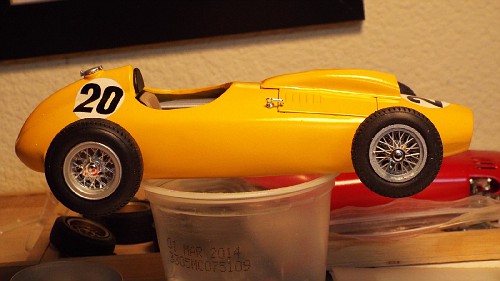 The front suspension was built too wide, but glued level! The rear was cockeyed and had to be pried apart and re-glued level. 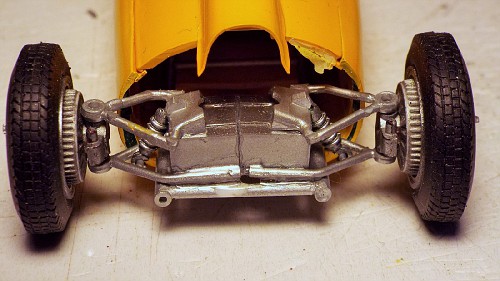 Then the front had to be taken apart again and sliced in two, narrowed, and re-glued in place (still level!)...sometimes these projects don't go so well! 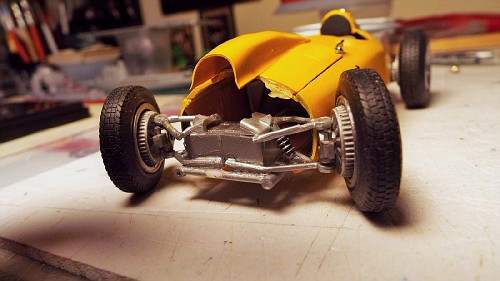 So, now I only have to cut the exhaust holes in the body (which I should have cut out before I painted the body!) and fabricate the windscreen...simple! |
|
Deleted
Deleted Member
Posts: 0
|
Post by Deleted on Mar 29, 2015 8:42:06 GMT -5
Go ahead, it's wonderful!
|
|
|
|
Post by pje on Mar 29, 2015 10:42:17 GMT -5
Looking great Airman!
Paul Erlendson
|
|