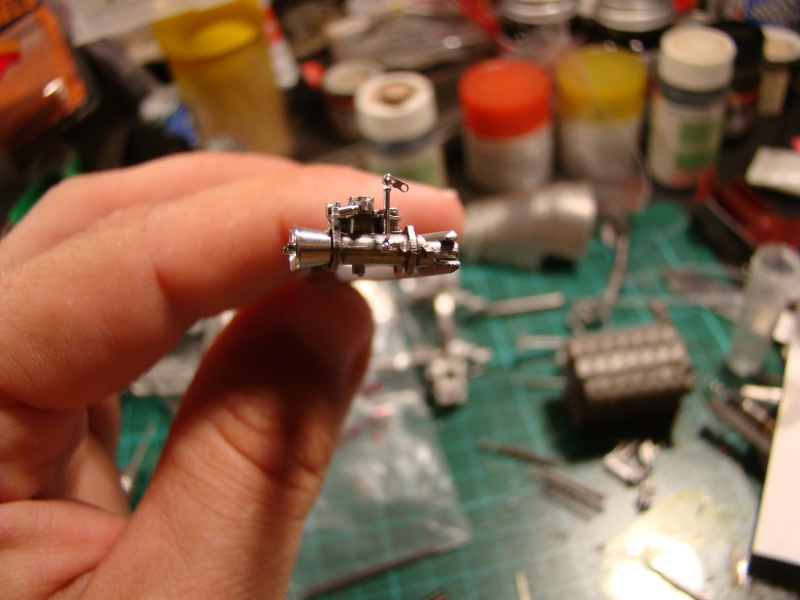
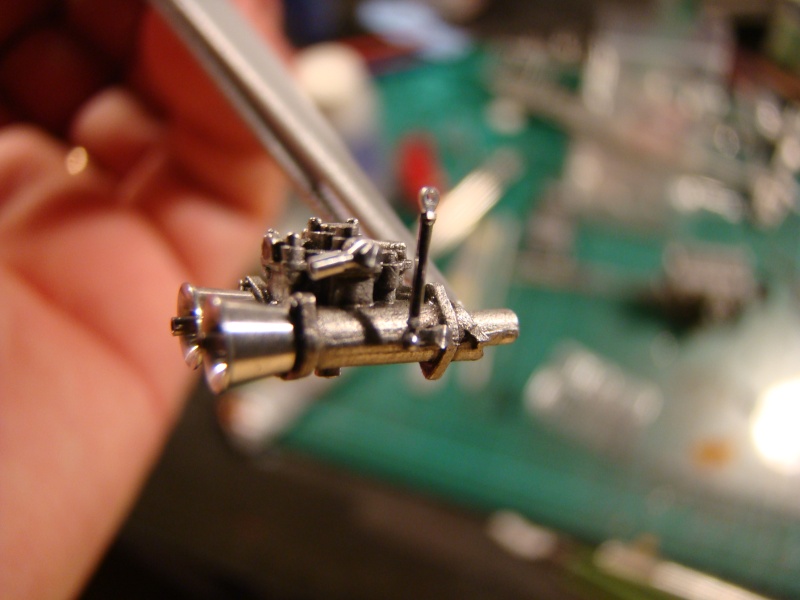
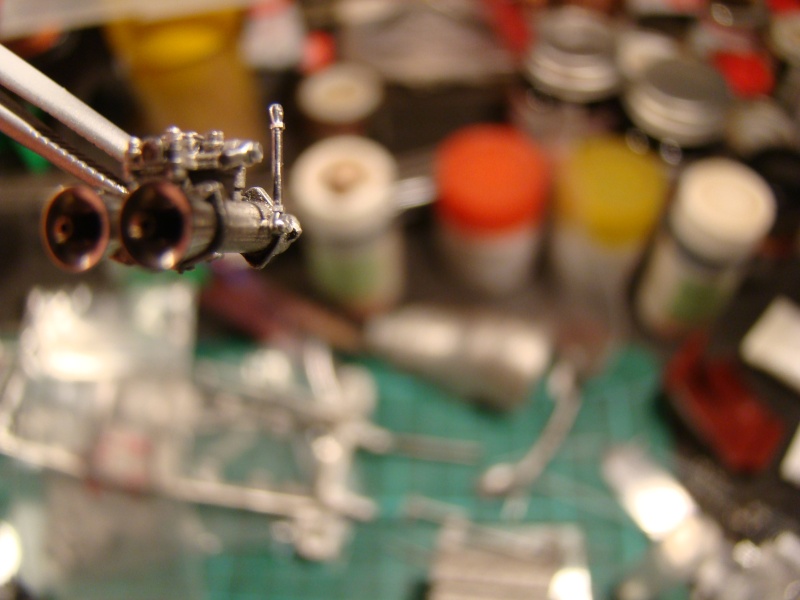
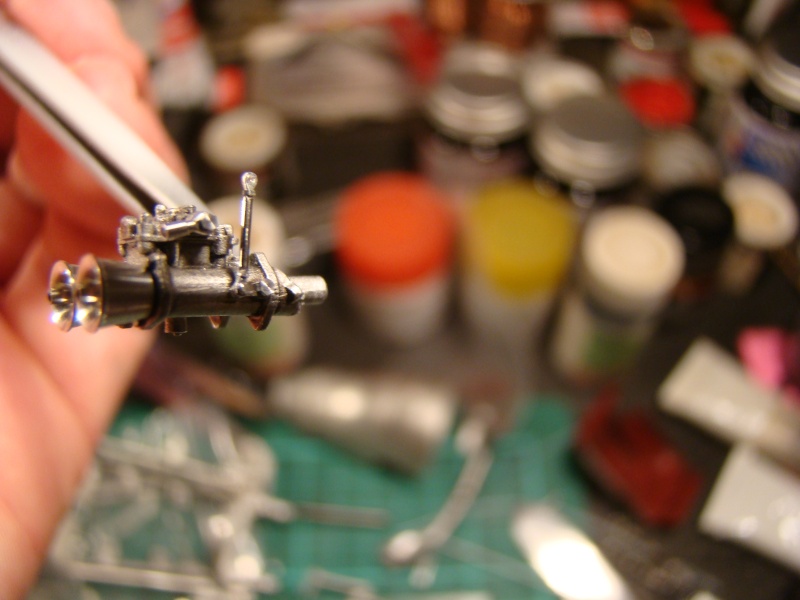
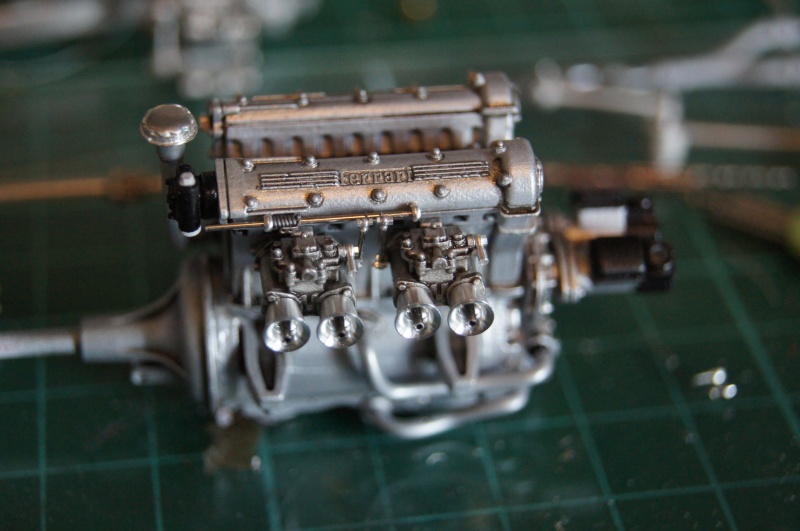
pg265
Front Runner

Posts: 221 
|
Post by pg265 on Dec 18, 2014 12:23:11 GMT -5
|
|
|
|
Post by clm1545 on Dec 18, 2014 13:04:13 GMT -5
Well, this is pretty much over the top.
|
|
|
|
Post by indy on Dec 18, 2014 13:30:22 GMT -5
Jewel-like. Very impressive first day here!
Jordan
|
|
Deleted
Deleted Member
Posts: 0
|
Post by Deleted on Dec 18, 2014 16:56:55 GMT -5
WOW.
Those MFH kits certainly give you your money's worth detail wise.
Very impressive work there Pascal.
Mark
|
|
|
|
Post by racerbrown on Dec 18, 2014 19:12:52 GMT -5
stunning!
thanks for sharing.
duane
|
|
|
|
Post by Calvin on Dec 19, 2014 0:08:24 GMT -5
eye candy!
|
|
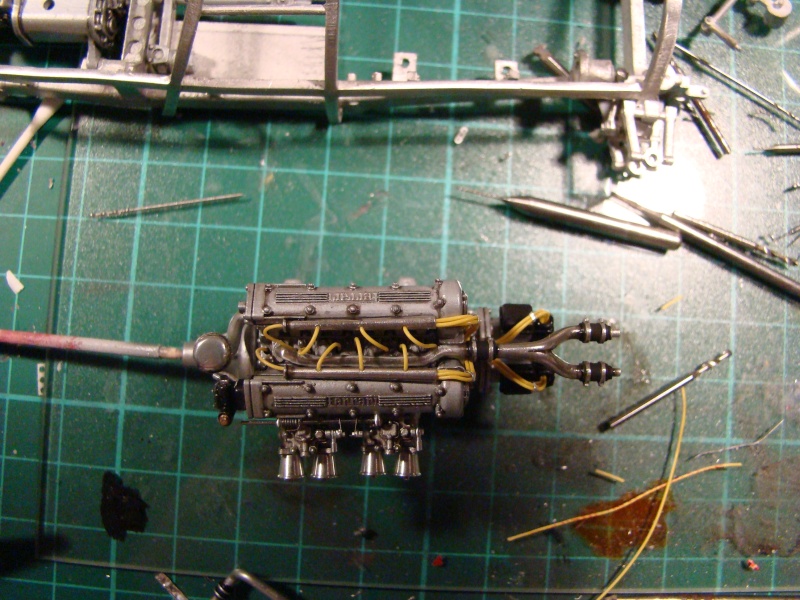
pg265
Front Runner
Posts: 221
|
Post by pg265 on Dec 19, 2014 4:46:48 GMT -5
|
|
|
|
Post by alterrenner on Dec 19, 2014 6:07:03 GMT -5
Incredible! That's the kind of detail you see on large-scale models! Great work, and great eyesight!
|
|
|
|
Post by racerbrown on Dec 19, 2014 7:15:34 GMT -5
wow!
making a great model even greater.
where did you get the castle nuts and pins?
duane
|
|
Deleted
Deleted Member
Posts: 0
|
Post by Deleted on Dec 19, 2014 8:33:09 GMT -5
These MFH kits are astonishing, but they have to be built well, and this isn't an easy matter...
Your bulding is perfect and clean, very well done!
|
|
|
|
Post by alwaysindy on Dec 19, 2014 11:05:04 GMT -5
Paschal:
Welcome aboard! I can't remember anyone doing a MFH kit on this forum, so yours is a very welcome eye opener...like you, I really enjoy 50's GP cars...however, unlike you, My eyesight isn't what it used to be...the detail is amazing, so keep up the good work!...Also, you will find that most Americans don't speak English very well; since we hail from different parts of the country and use "local words" and phrases...modelers speak a universal language such as Wow, Amazing, and How'd you do it?
Timp
|
|
|
|
Post by kip on Dec 19, 2014 17:37:19 GMT -5
Wow, Amazing, and How'd you do it. alwaysindy said it all.
kip
|
|
|
|
Post by 2lapsdown on Dec 19, 2014 18:19:30 GMT -5
Wow, Amazing, and How'd you do it. alwaysindy said it all. kip I'm glad he said it, I had no words for it!! John |
|
|
|
Post by clm1545 on Dec 19, 2014 18:42:45 GMT -5
This is just unreal.
|
|
Deleted
Deleted Member
Posts: 0
|
Post by Deleted on Dec 20, 2014 9:46:46 GMT -5
|
|
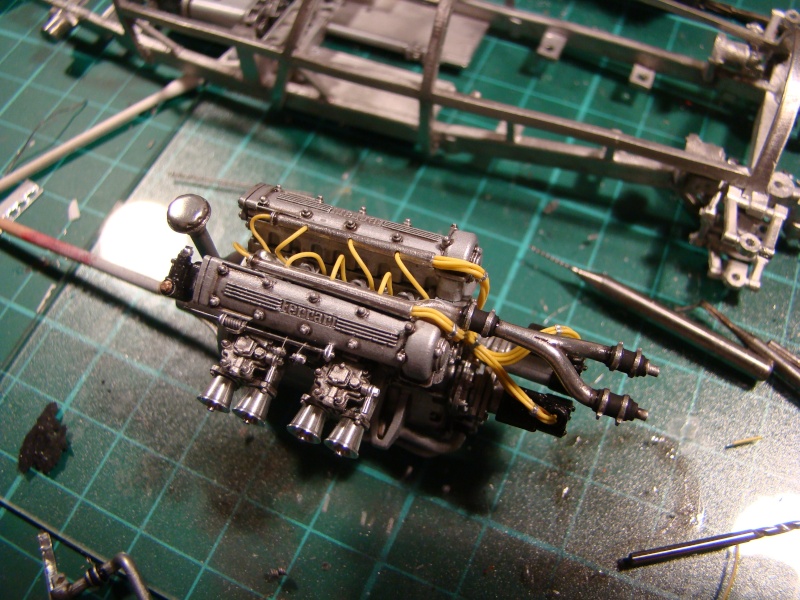
pg265
Front Runner
Posts: 221
|
Post by pg265 on Dec 20, 2014 14:14:28 GMT -5
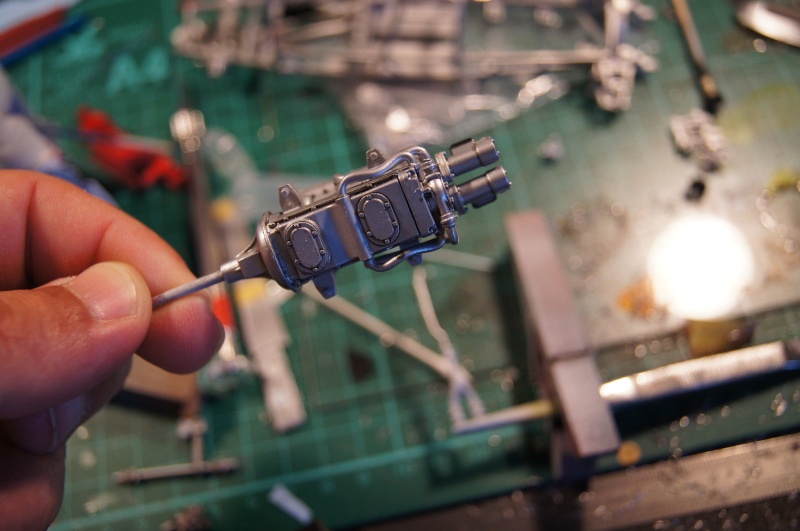
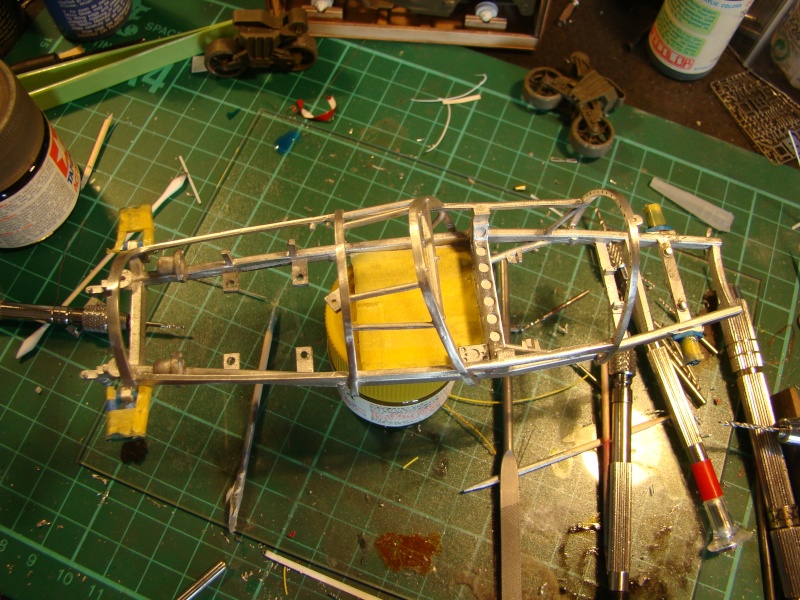
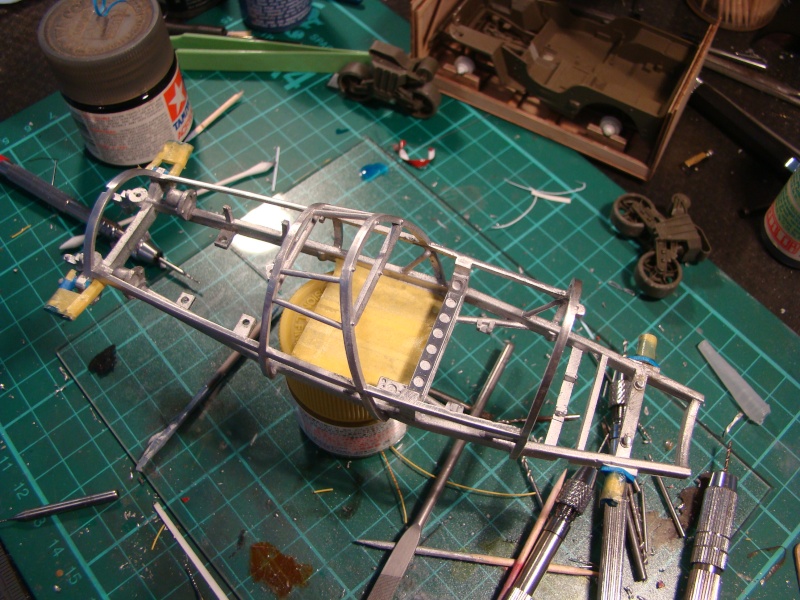
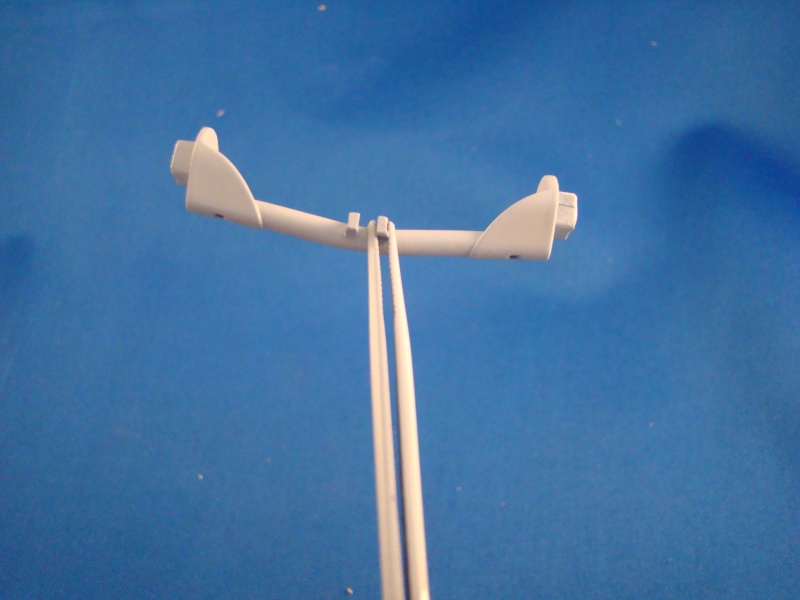
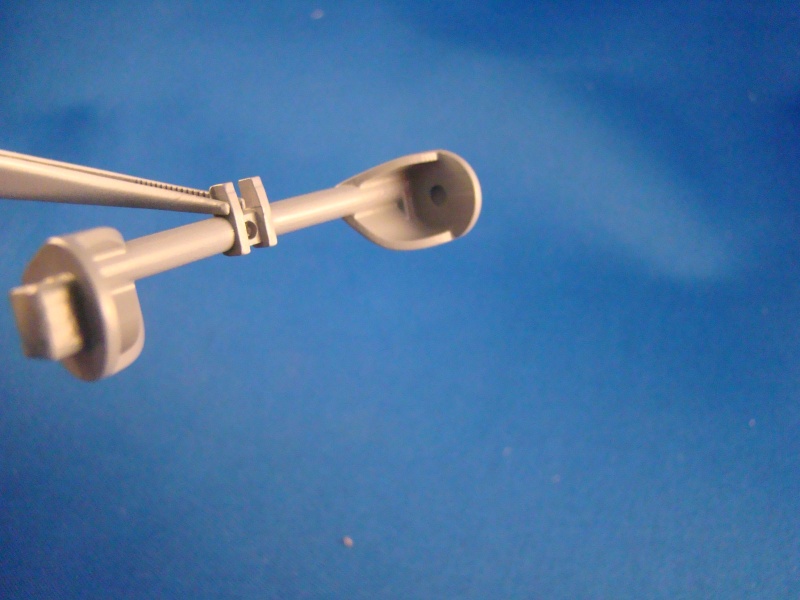
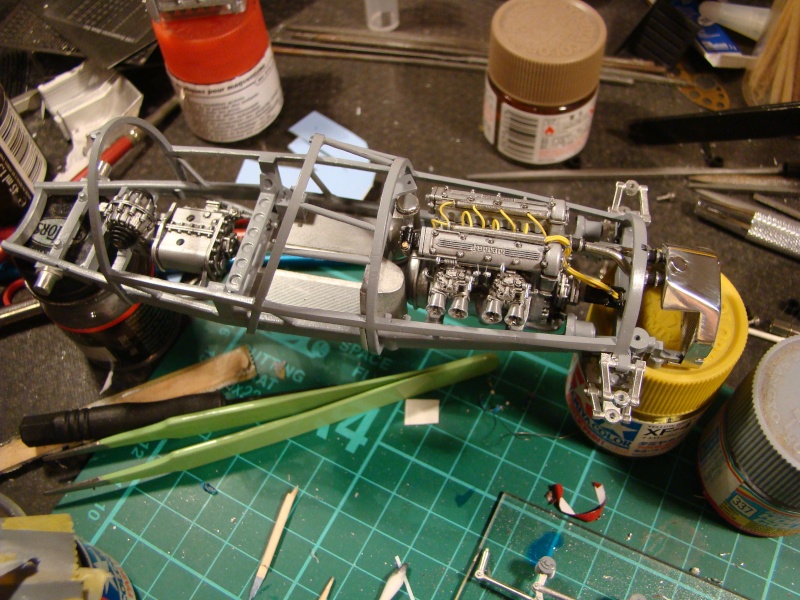
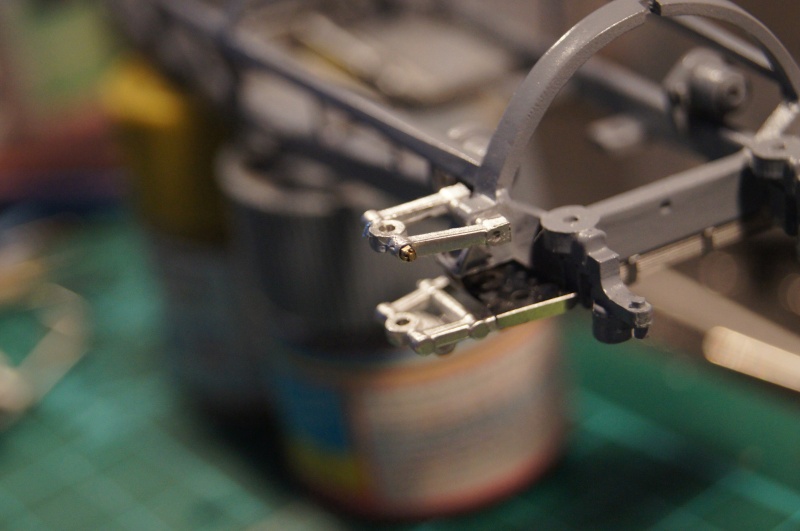
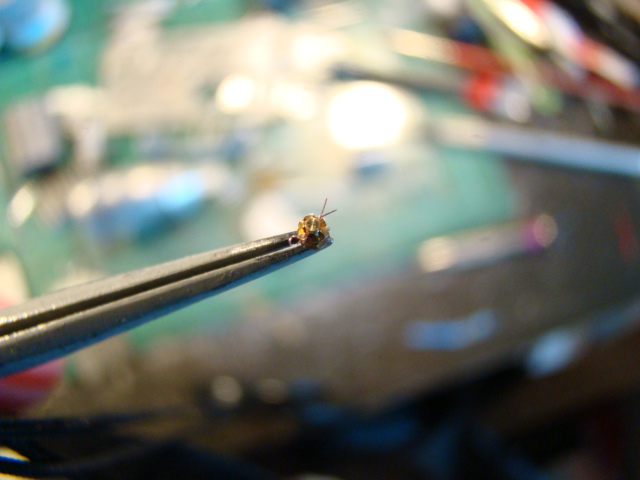
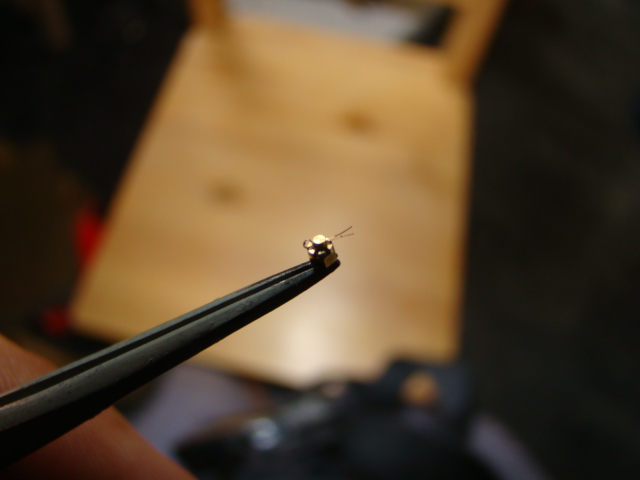
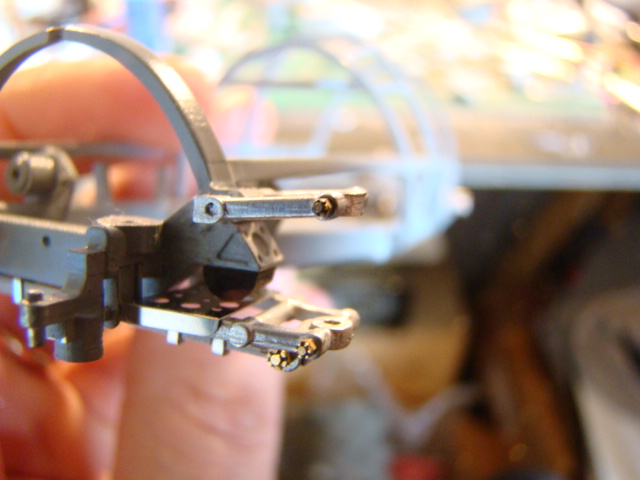
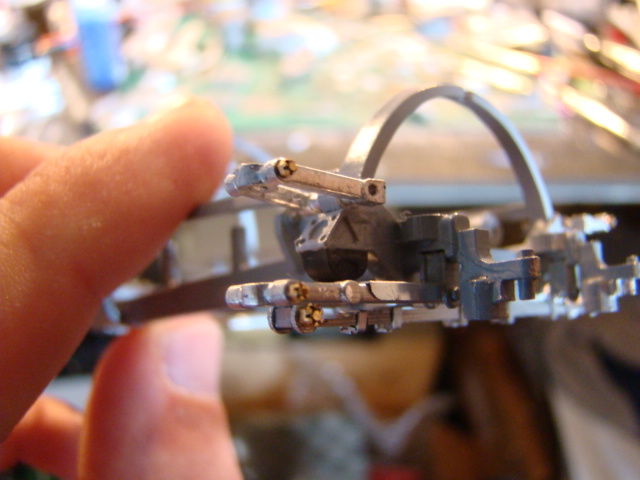
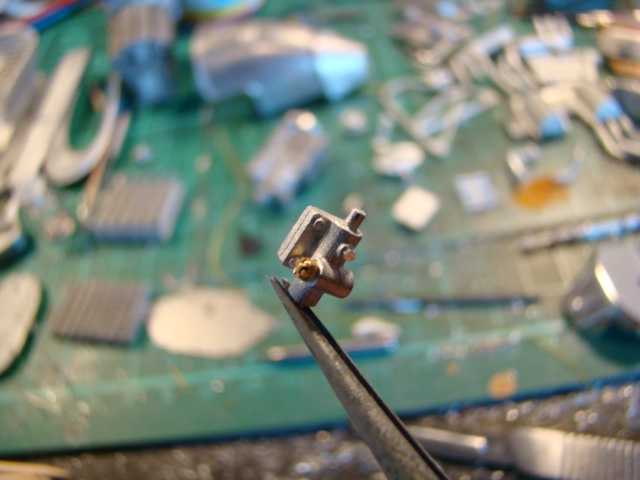
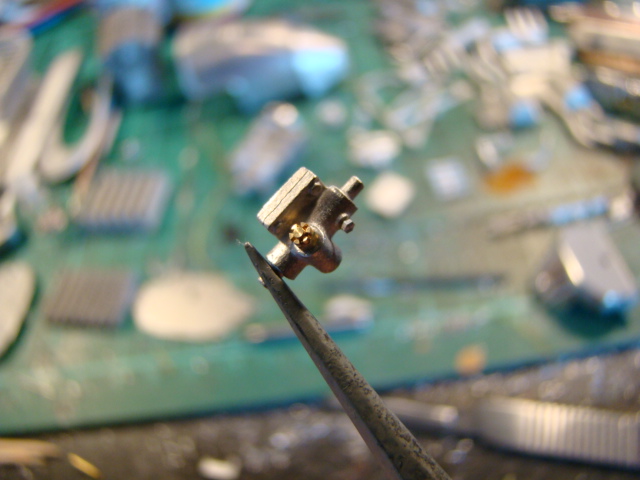
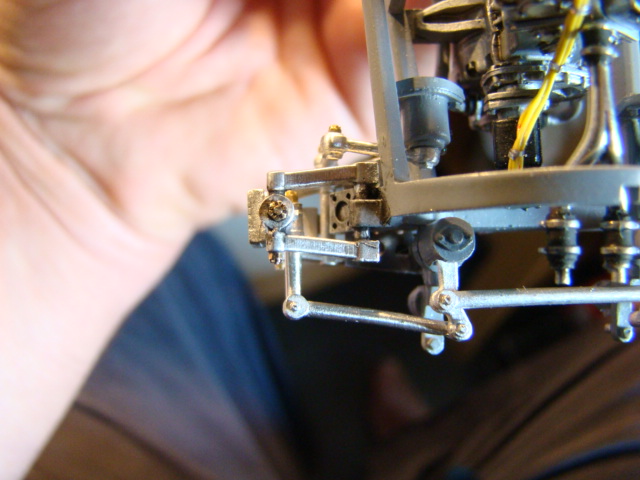
Hi, Thanks a lot  The "castle nuts" are from Adlers Nest and pins from me. Pins are easy to "build" and just need you to be patient and not too nervous to insert them into the small hole. Test fitting global view : 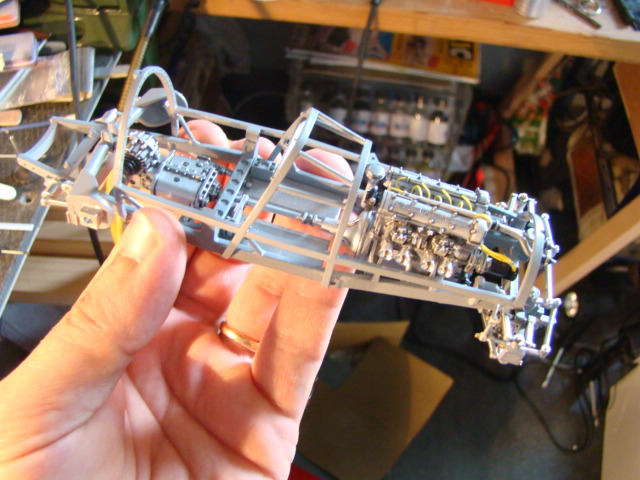 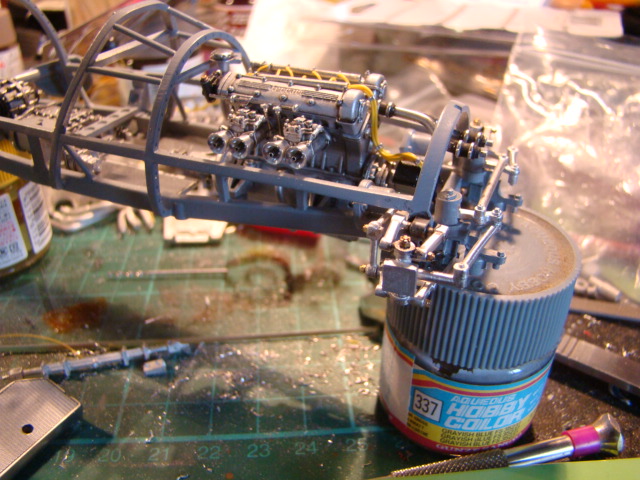 Front and rear axles with hubs are now in place. Wheels just need the valves and have their "Bibendum socks".  Few pics:  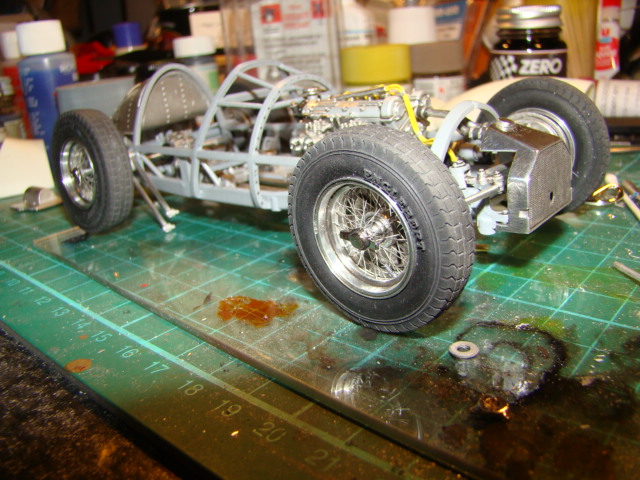 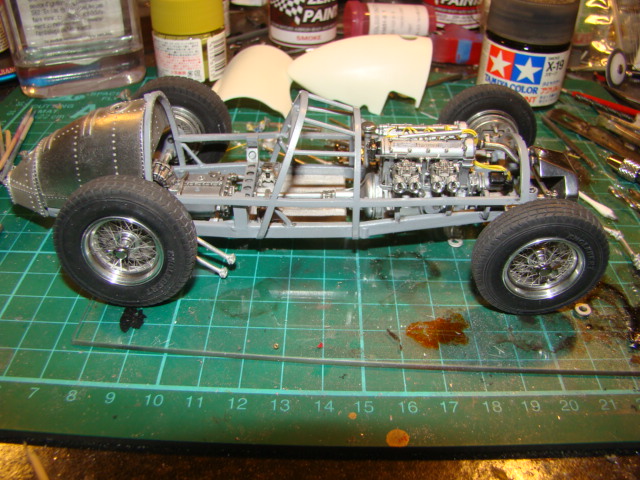 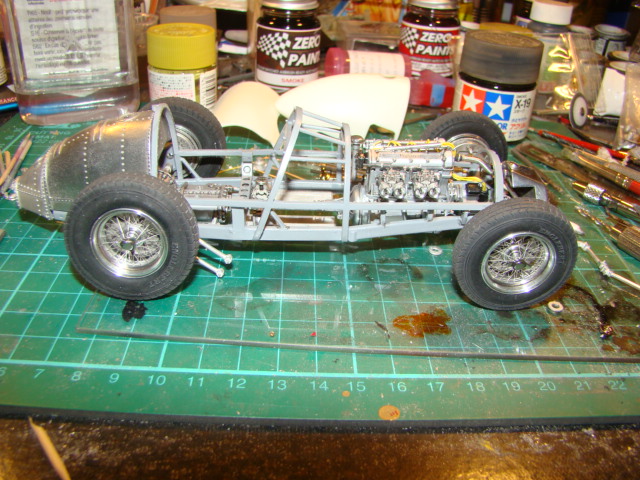 Balance weights and valves added on the wheels... 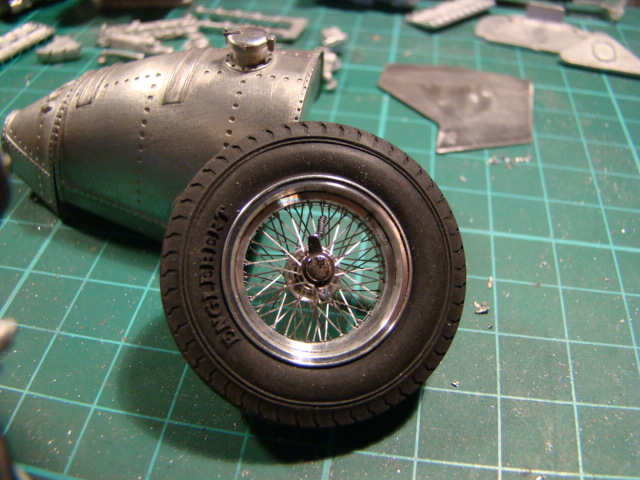 Fuel tank ready for riveting work around the filler... 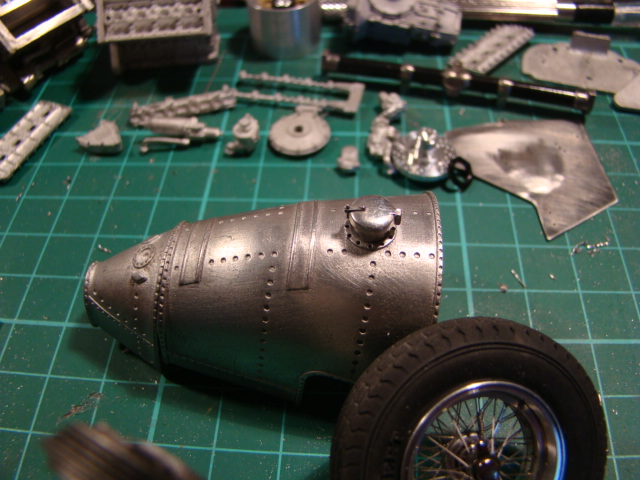 More soon Don't hesitate if you have any question. Pascal |
|
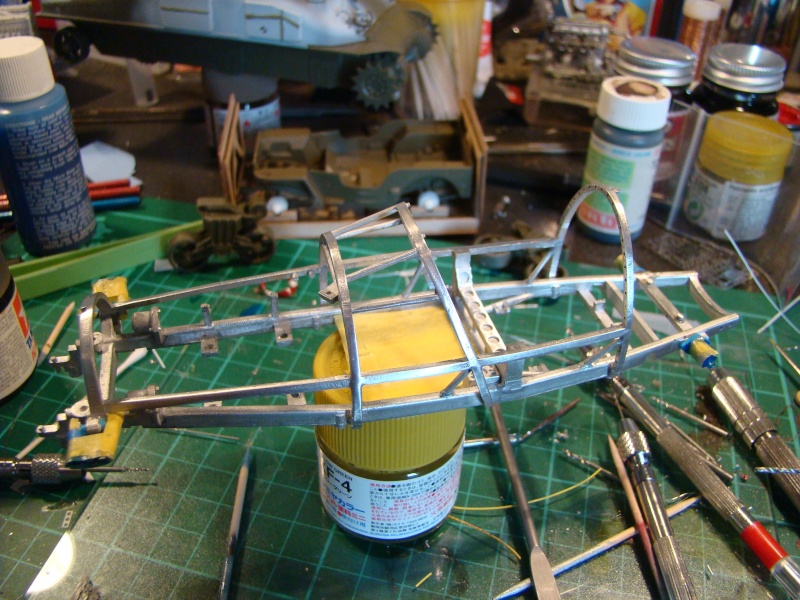
pg265
Front Runner
Posts: 221
|
Post by pg265 on Dec 22, 2014 10:58:20 GMT -5
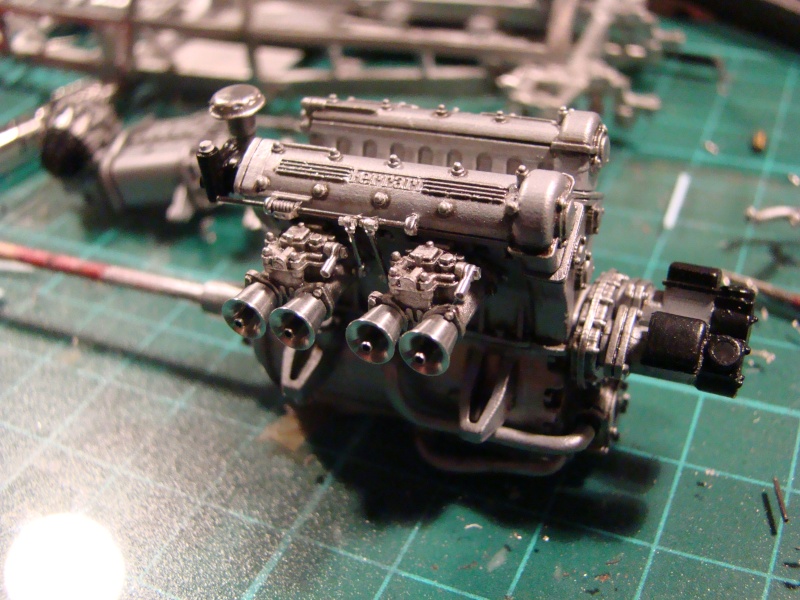
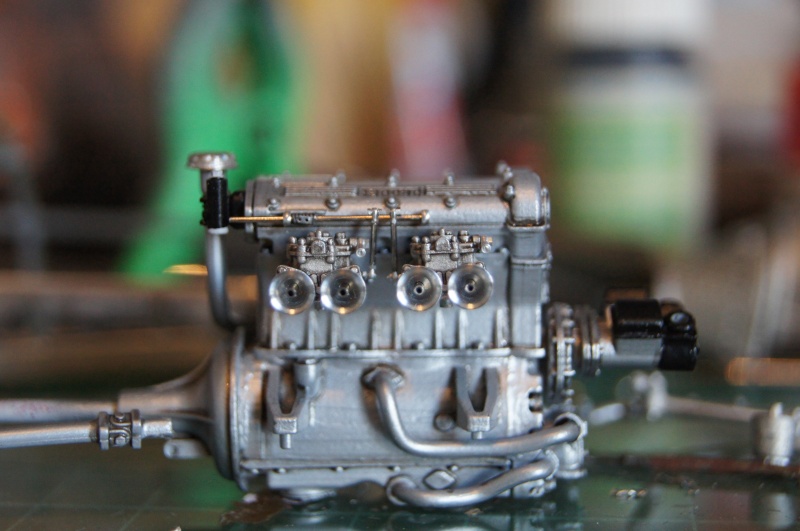
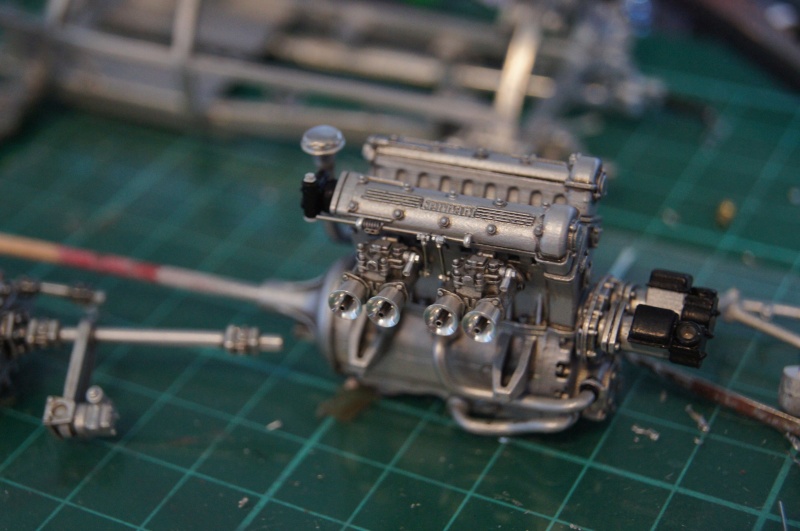
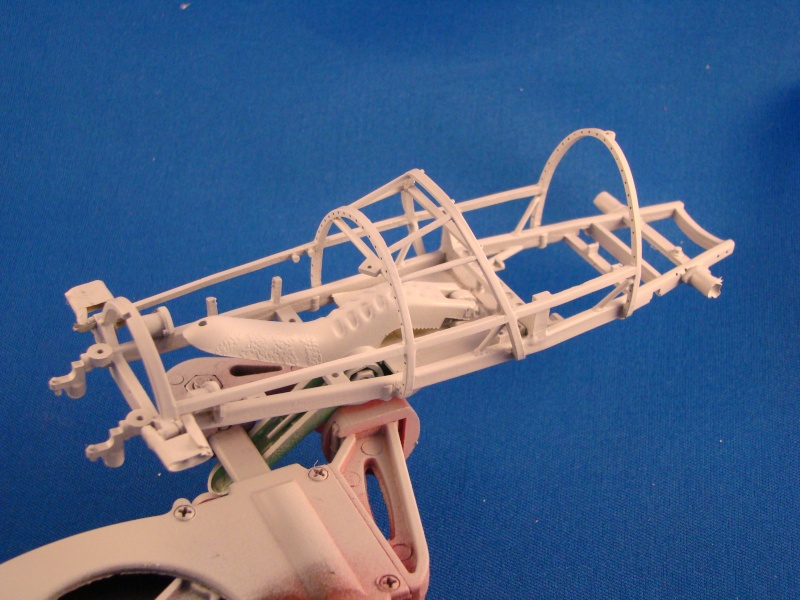
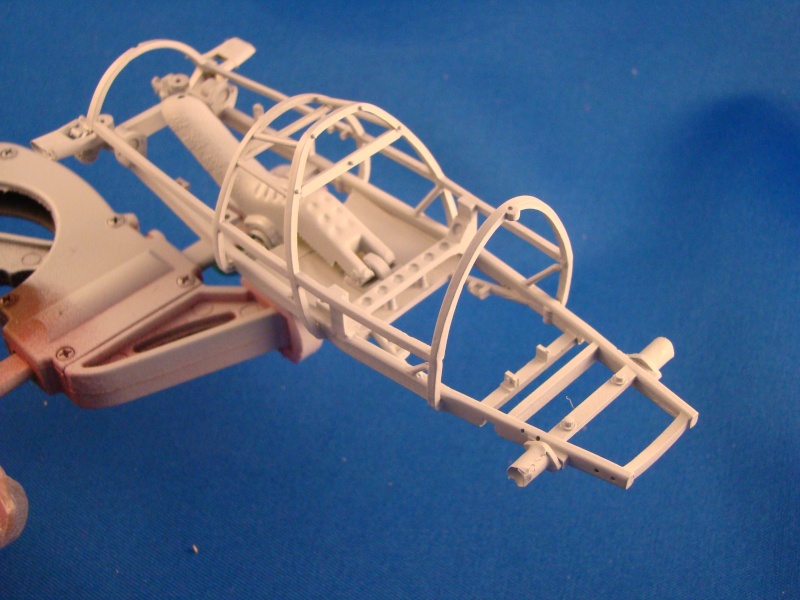
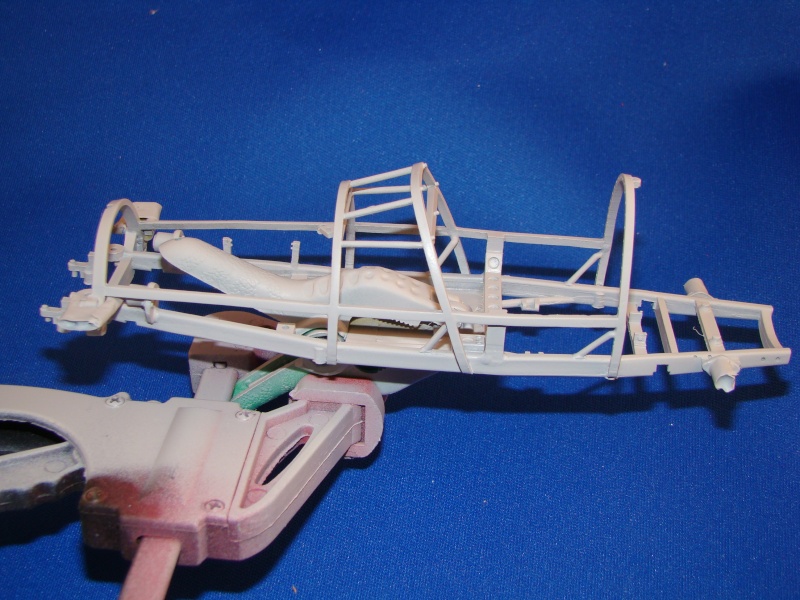
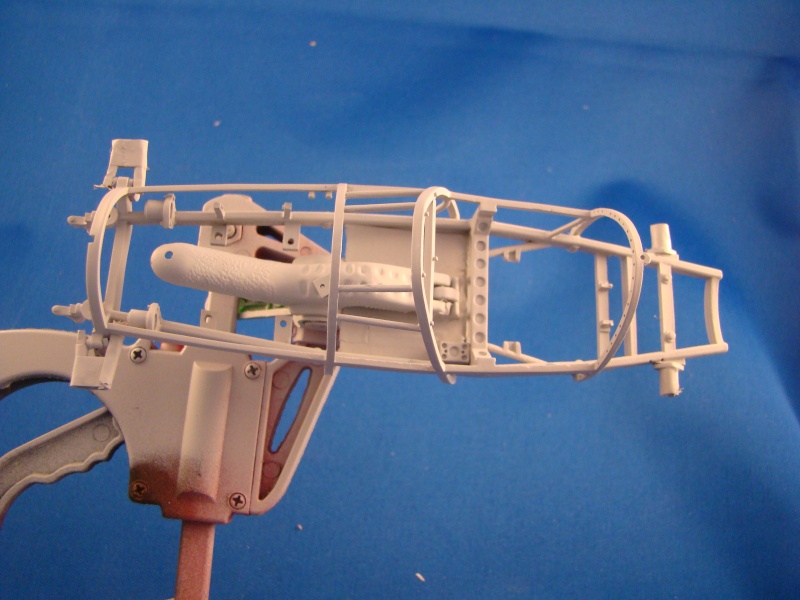
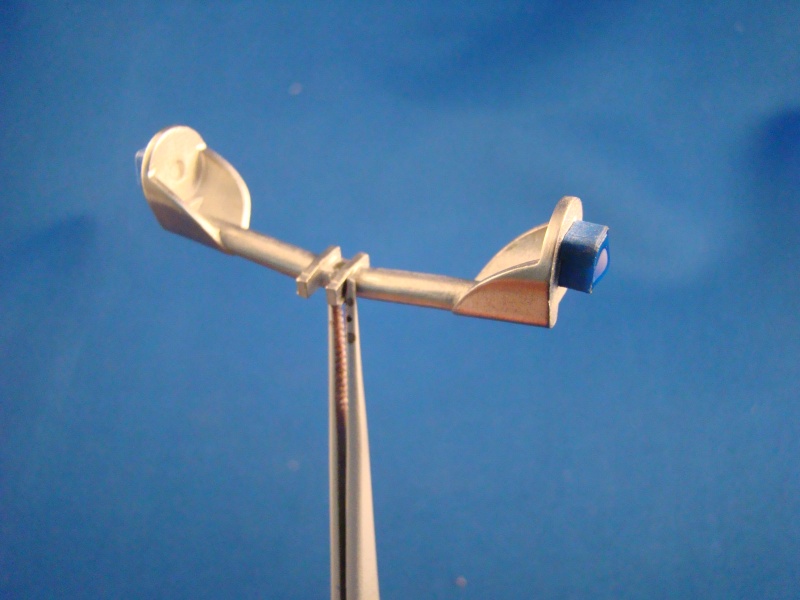
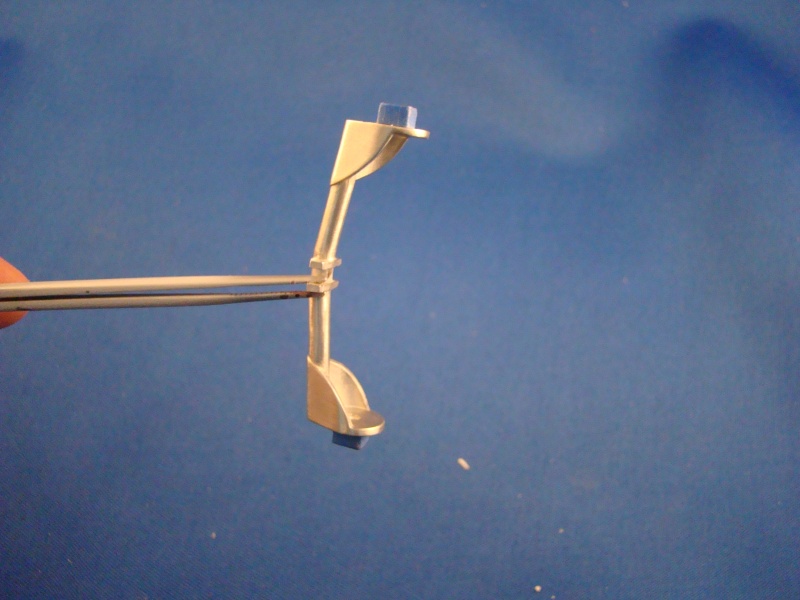
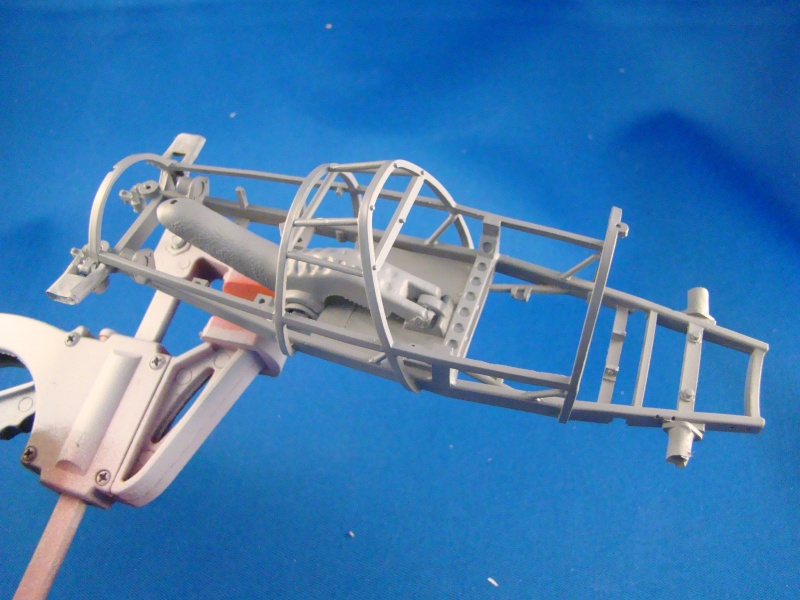
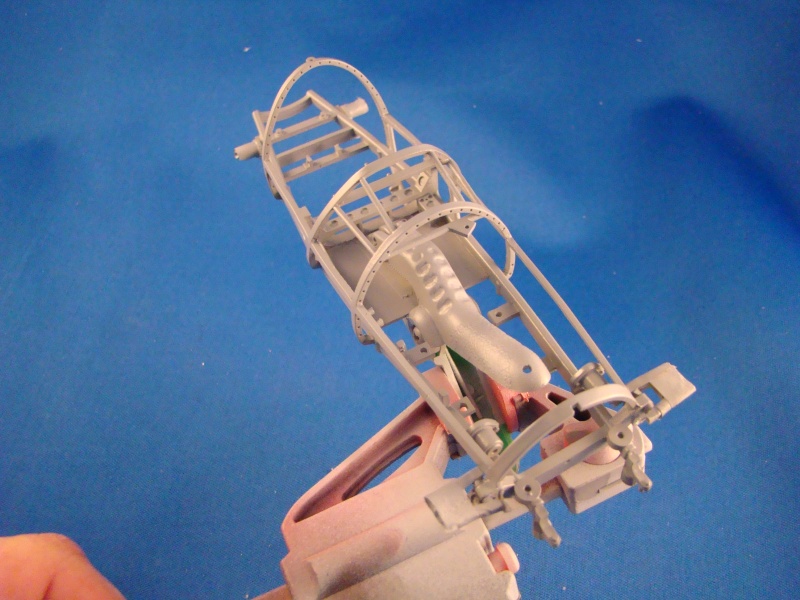
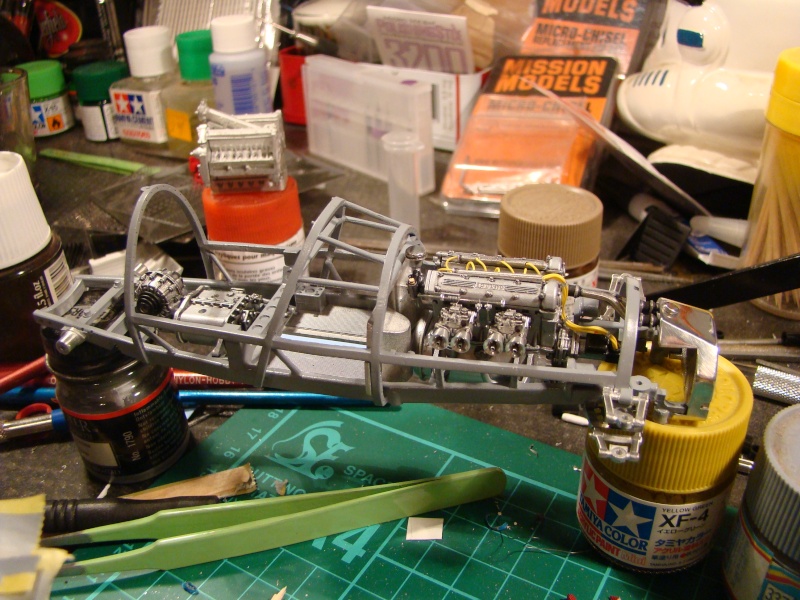
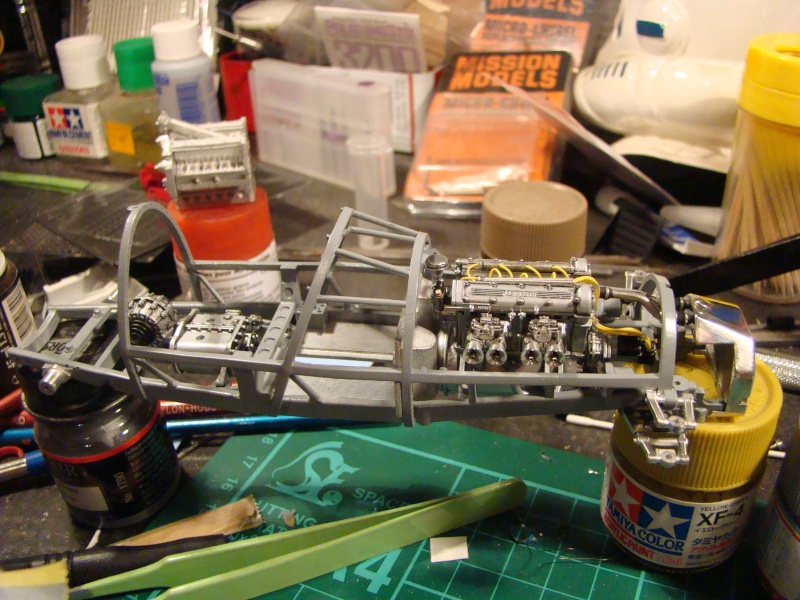
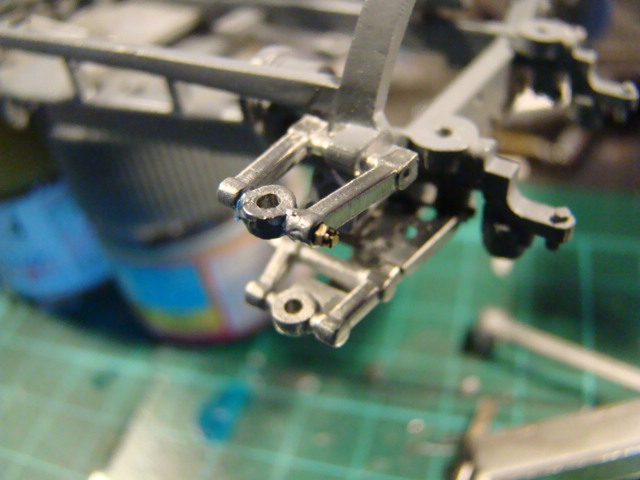
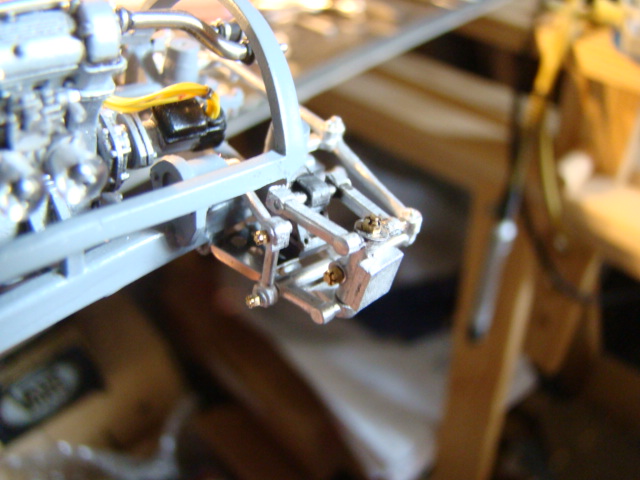
Hi, Gear box without the tanks this time... 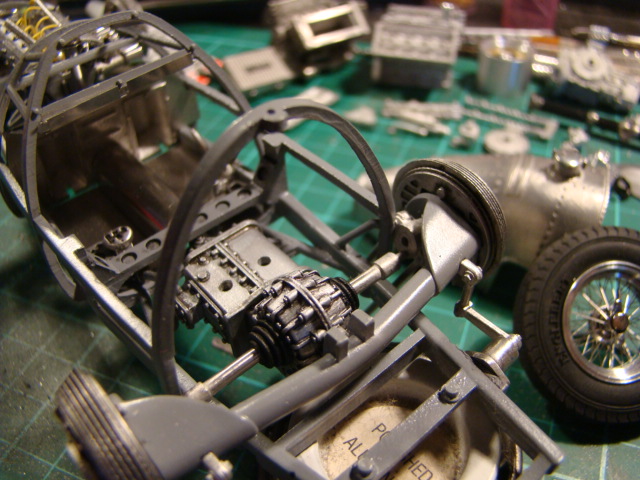 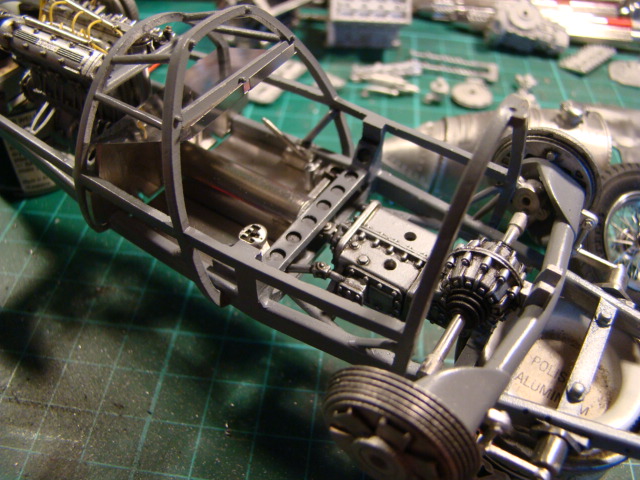 A wide view... 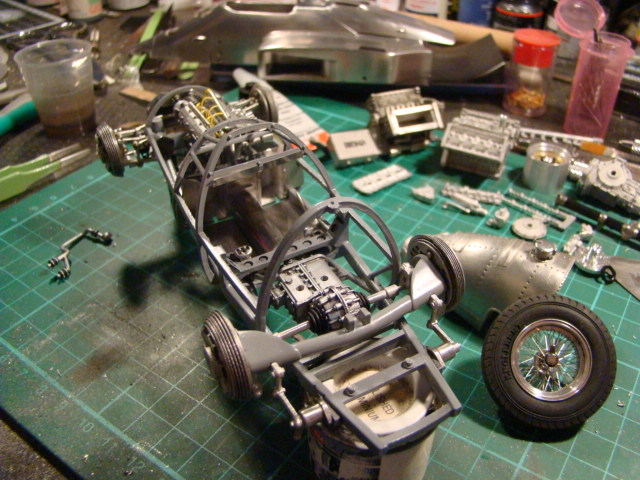 Still working into the cockpit. Test fitting of the dash board and the bulkhead or firewall(?) ... Pedals have been quickly textured, even if they are pretty well hidden... Just need to paint them with aluminum. 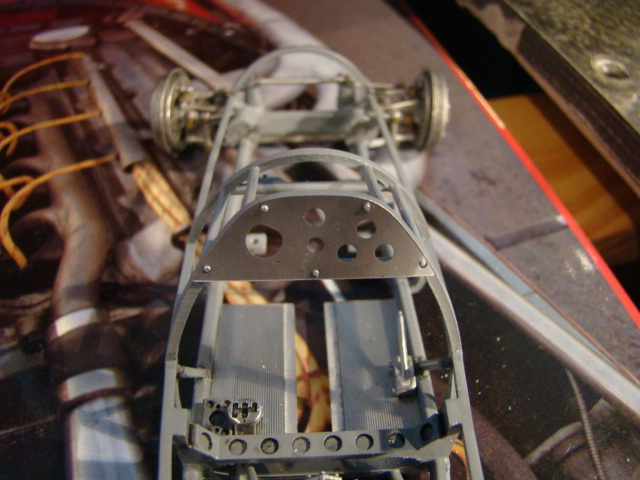 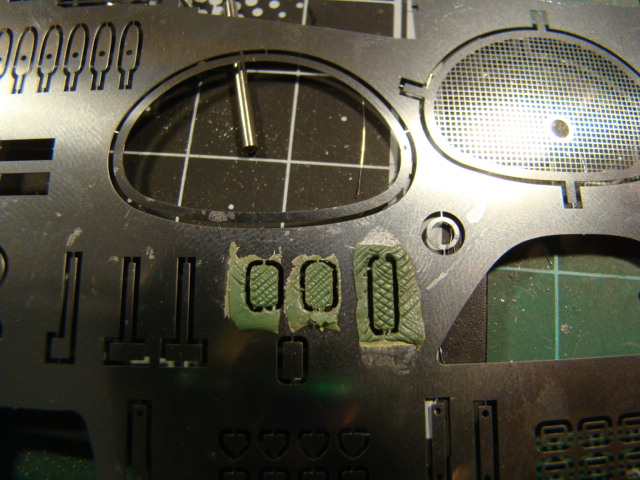 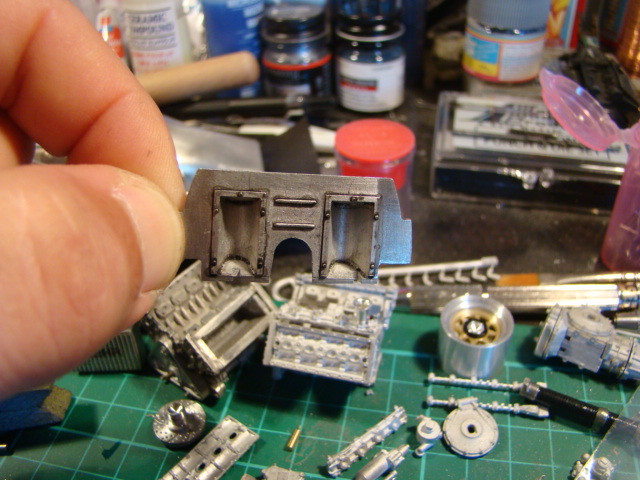 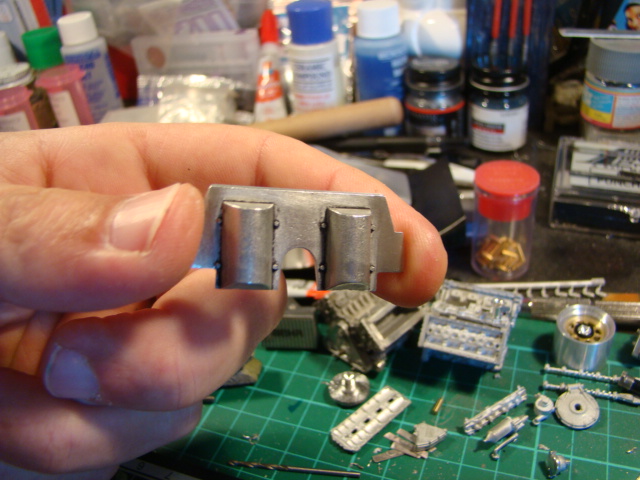 "Arrival" and "departure" have been added on the mid fuel pump to reach the backward fuel tank. 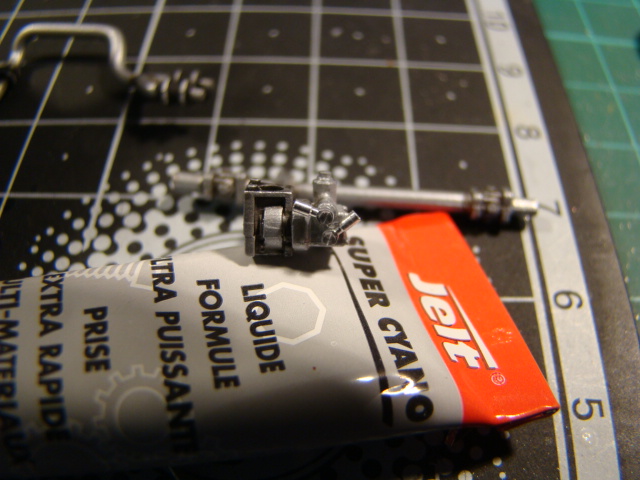 Same thing was done on the engine and I will "just" :roll: have to join the engine fuel pump to the mid fuel pump (the one near the seat, driven by the drive shaft)... and then the fuel circuit will be OK :wink: 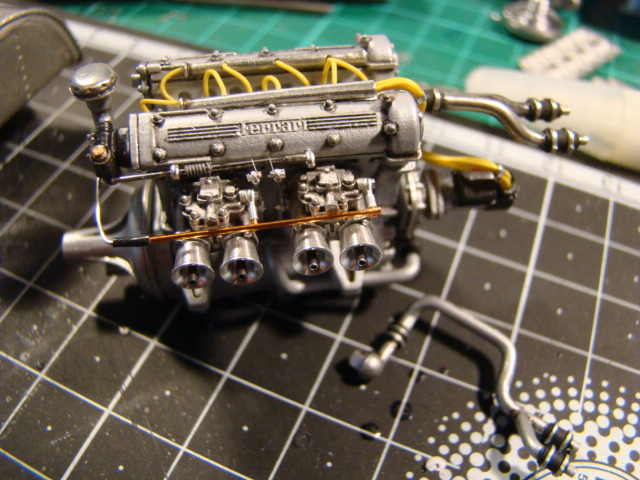 The parts who depict the link between the carbs linkage and the accelerator pedal will be added later... when the engine will be kindly installed in the chassis! I just "painted" the pedals buy dry brushing them with Humbrol Metal Cote Mat Alu and still have to give them a sheen. I also realized that the brakes and the throttle pedals were inverted... So I made a new slot of 1.5mm width using my Tiger saw on the left side of the right foot location... Then I put the part of WM which was cut off and put it in the former slot and weld it in place. The throttle pedal then found the right place on the right. The two following pics will surely be a better explanation than what I wrote above... Wide view with a test fit of the meters on the dash board. I now have to "chrome" the bezels. 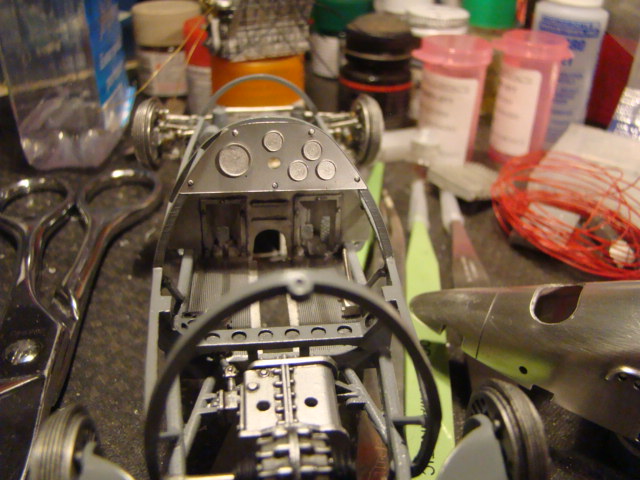 "Inside" the cockpit: 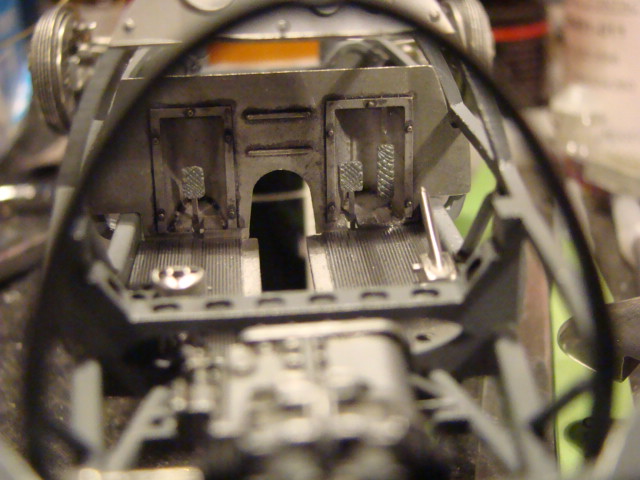 I've “chromed” the external part of the instruments and then put the dials decals inside. I still have to make the glass and wonder if I will use epoxy or punched acetate/rhodoïd… 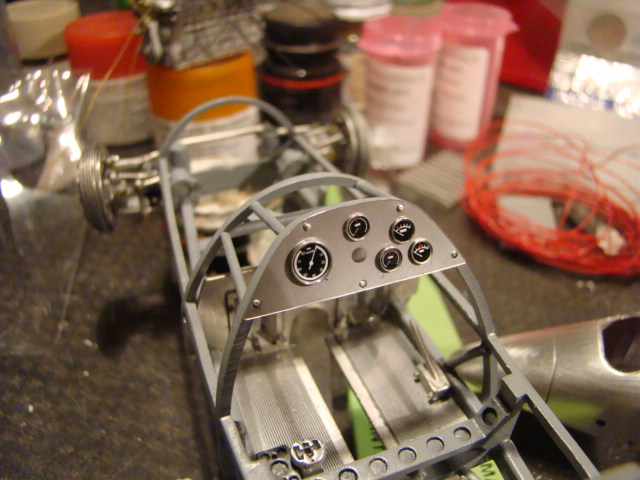 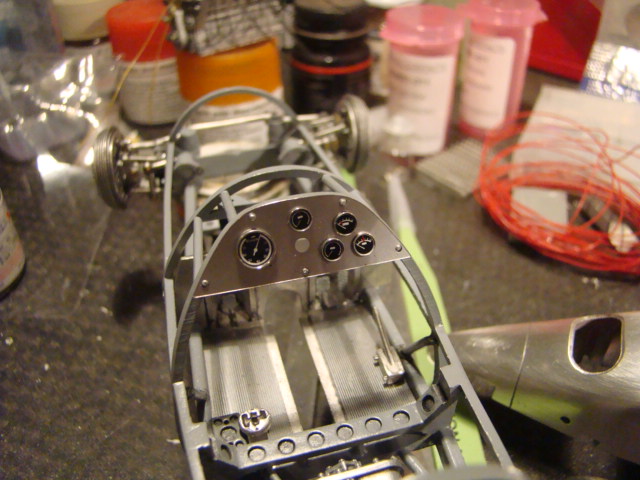 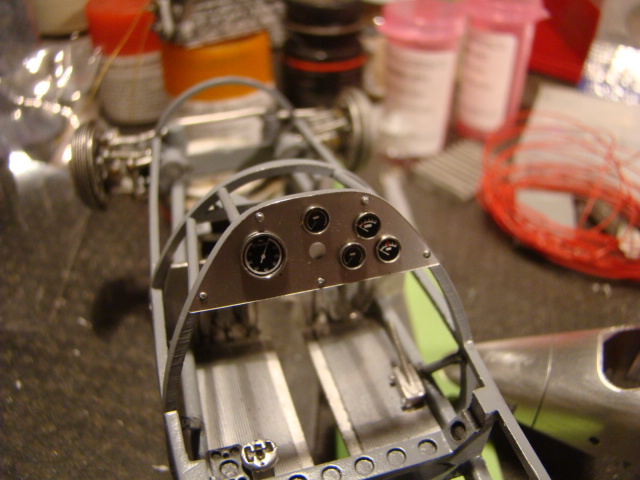 I've also worked on the seat, trying to make it more real: with a metal seat covered with fabric. A pretty important part of resin has to be removed to materialize the metallic part of the seat and a demarcation with fabric. I also still have some work to do on the way the seat is fastened on the chassis…  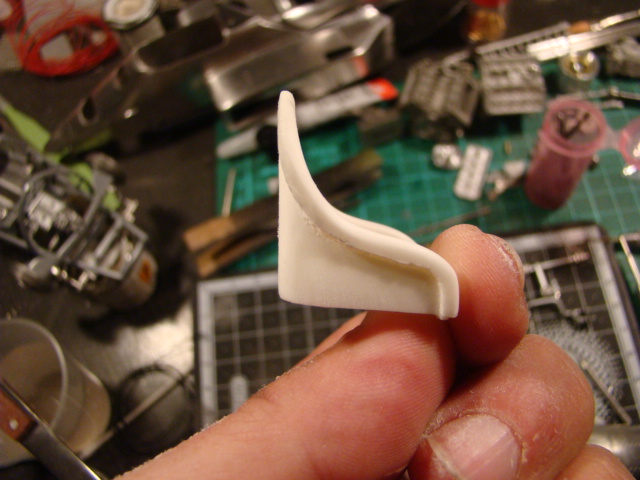 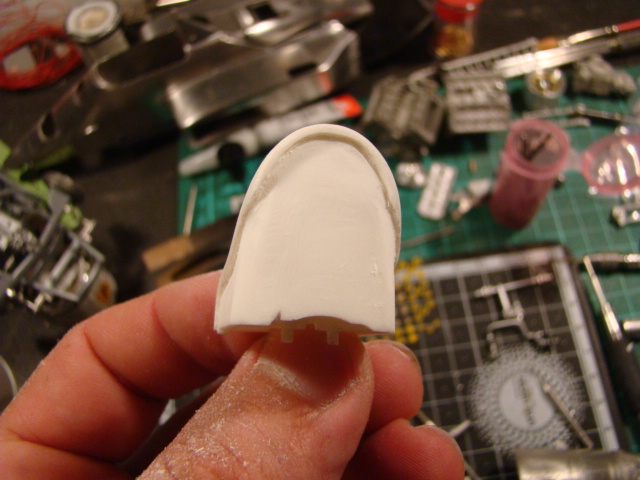 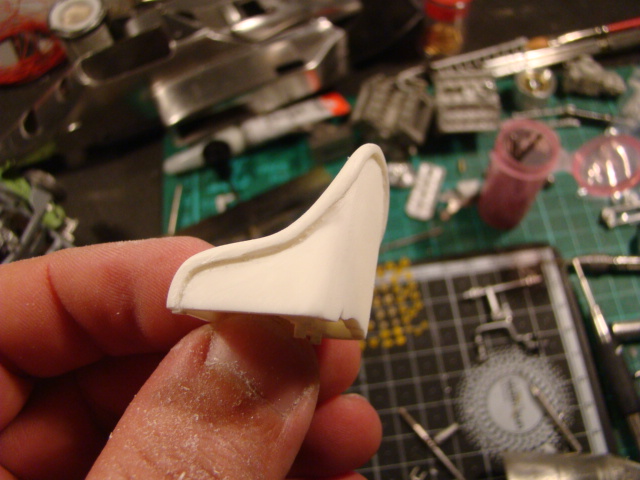 The last progress of the day was some work done on the wheel. All the parts were assembled. A small thick MFH Caballino was installed on the hub which was just lightly polished. The rim was first painted with acrylic flat earth, then received Burnt Sienna and then Raw Umber, both from W&N. 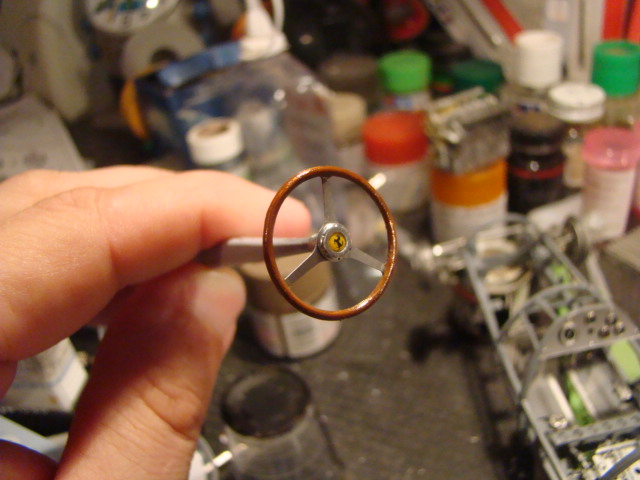 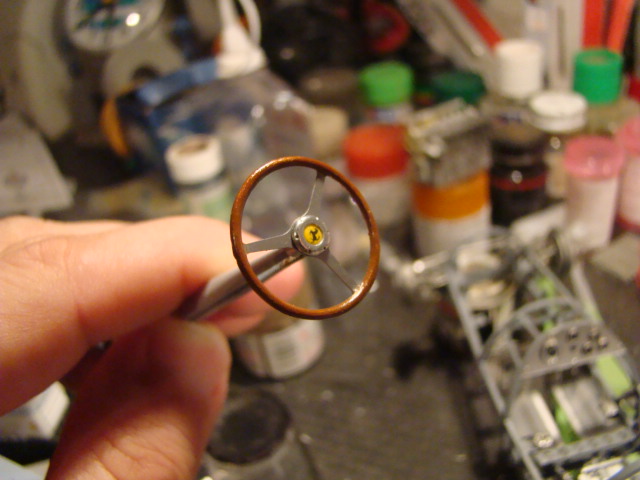 Once again, there is still work to be done on the wheel… Riveting started on visible areas of the fuel tank: Around the fuel filler cap and behind the driver seat. 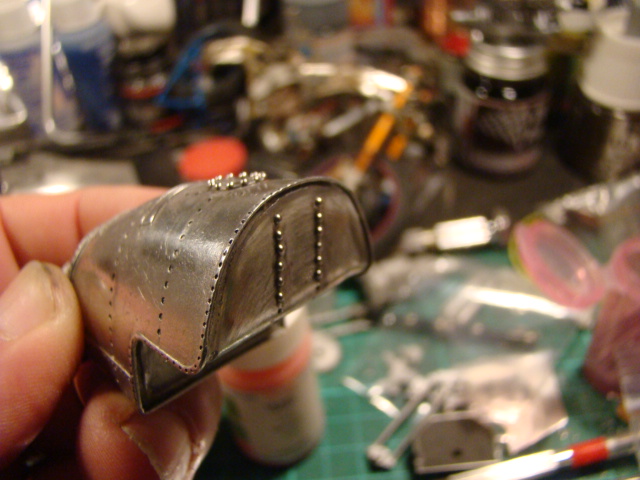 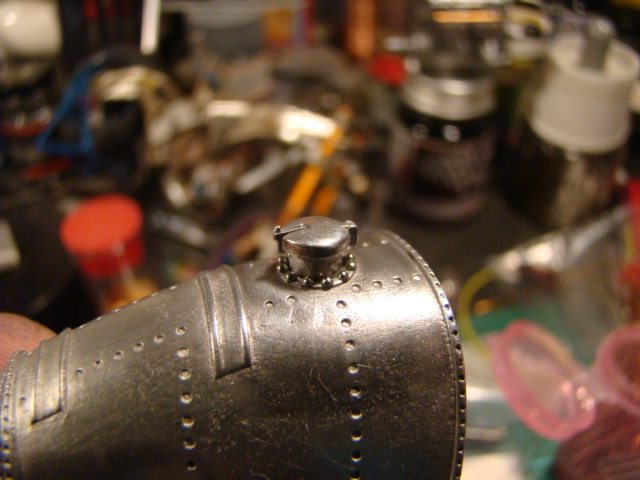 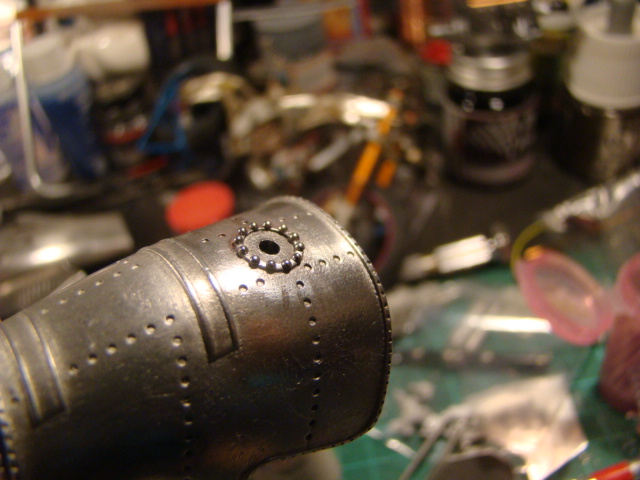 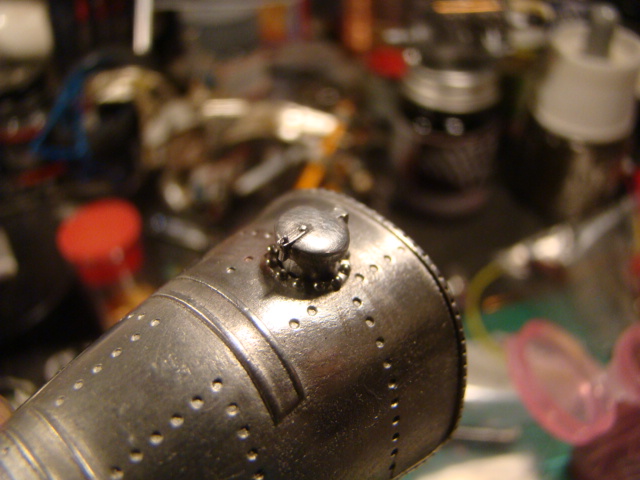 A test to depict a discreet fuel leak... 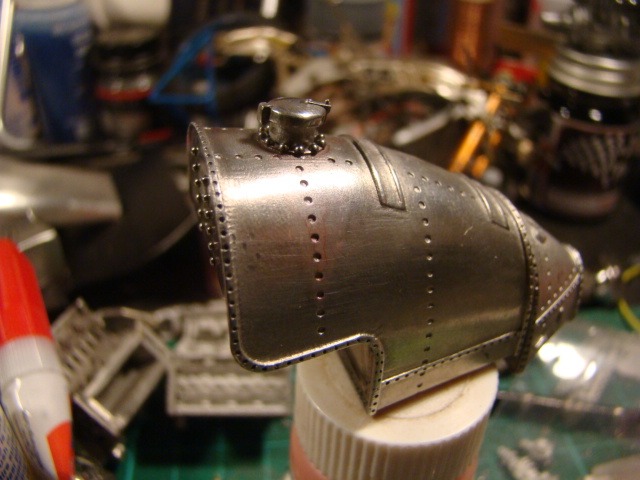 Pascal |
|
|
|
Post by alterrenner on Dec 23, 2014 6:18:57 GMT -5
This looks like a model you're going to have to display with the body panels removed. Too many details to cover up!
|
|
|
|
Post by harveythedog2 on Dec 23, 2014 11:26:30 GMT -5
Don't know how I missed this! Looks like a restoration shop of the real thing. MFH kits are amazing.
Great stuff and awesome work!
Stu
|
|
pg265
Front Runner
Posts: 221
|
Post by pg265 on Apr 12, 2020 18:08:33 GMT -5
Good evening, The Ferrari 312F1 67 drawing to the end, I thought it would not be silly to take advantage of the momentum to launch a new project / challenge ... In the mood for Rosso Corsa, I decided to reopen the box containing an assembly started a long time ago and finished at 95% (there were only all the rivets / Dzus, the decals and some small details ..), the result did not satisfy me. So I decided to deconstruct as much as possible and ... to rebuild to finish the model. I offer you some pictures of the whole recovery. Big job of modifying the resin parts of the bodywork 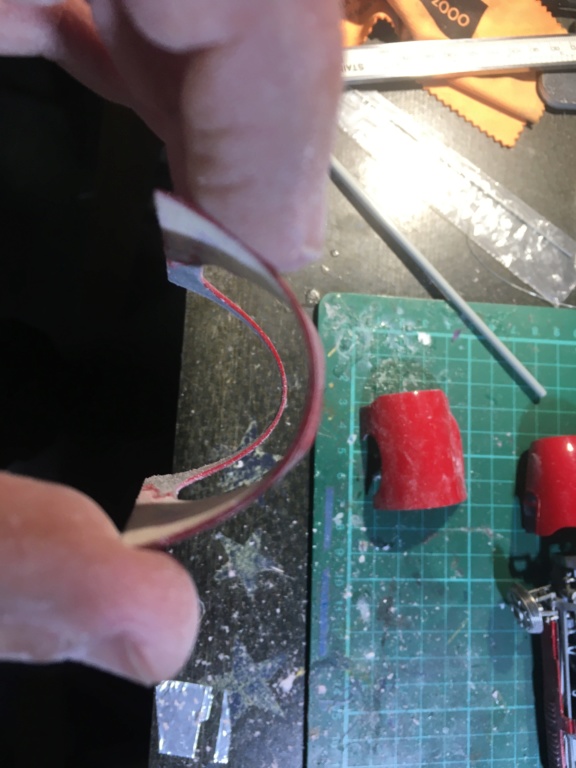 Before passing the internal layer of Grayish Blue FS 35237 from GS (Navy when you hold us ...) without excessive masking: 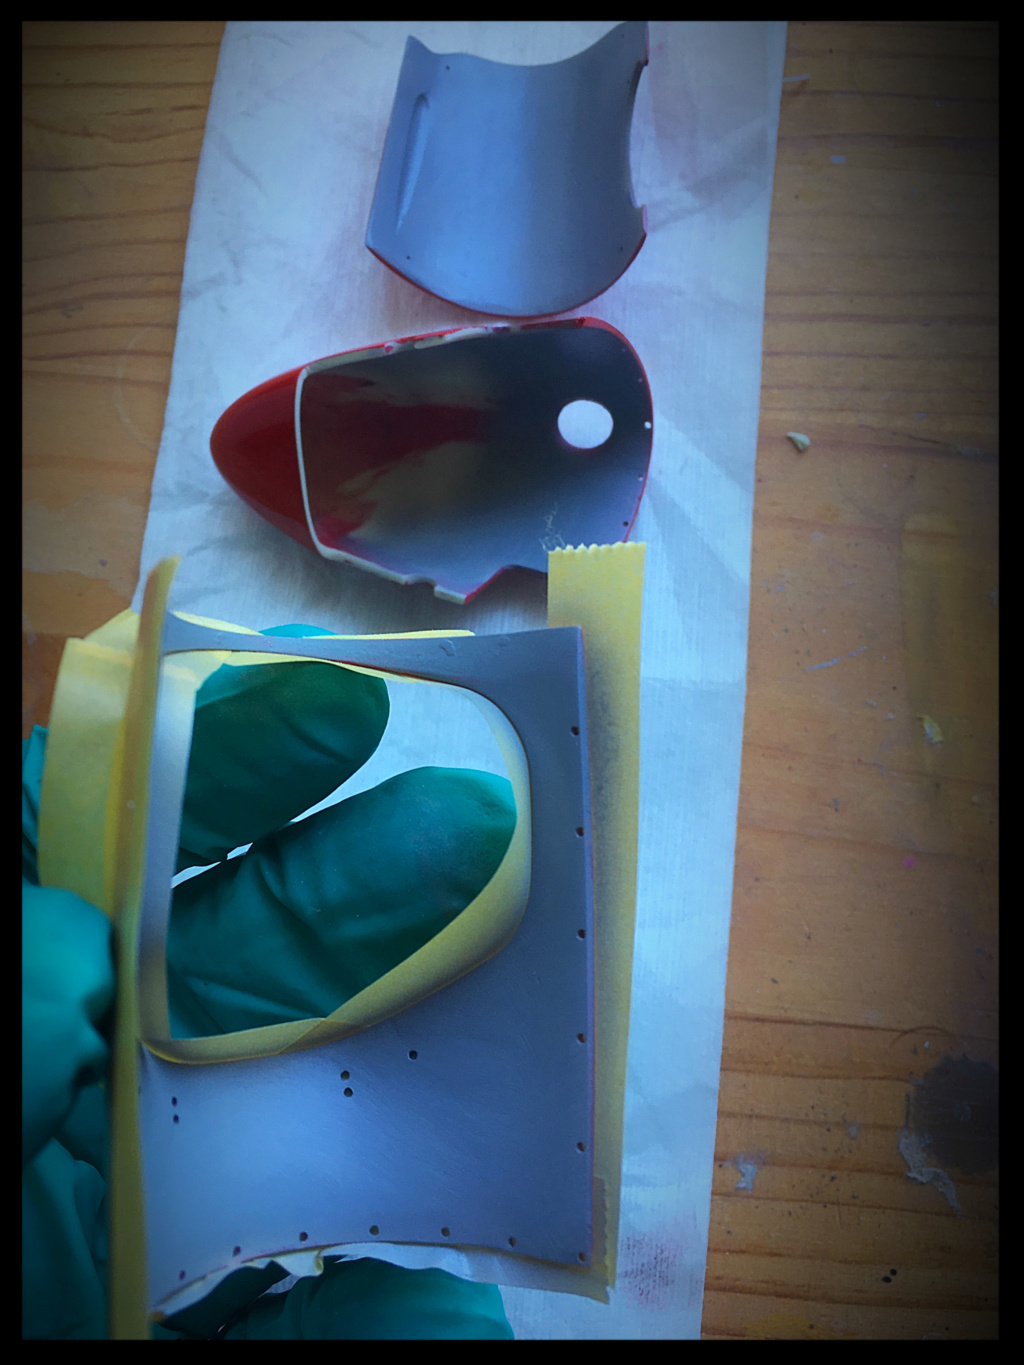 Resumption of the seat on which I pass a layer of beige which will serve as a sanding guide and background for the steering wheel: 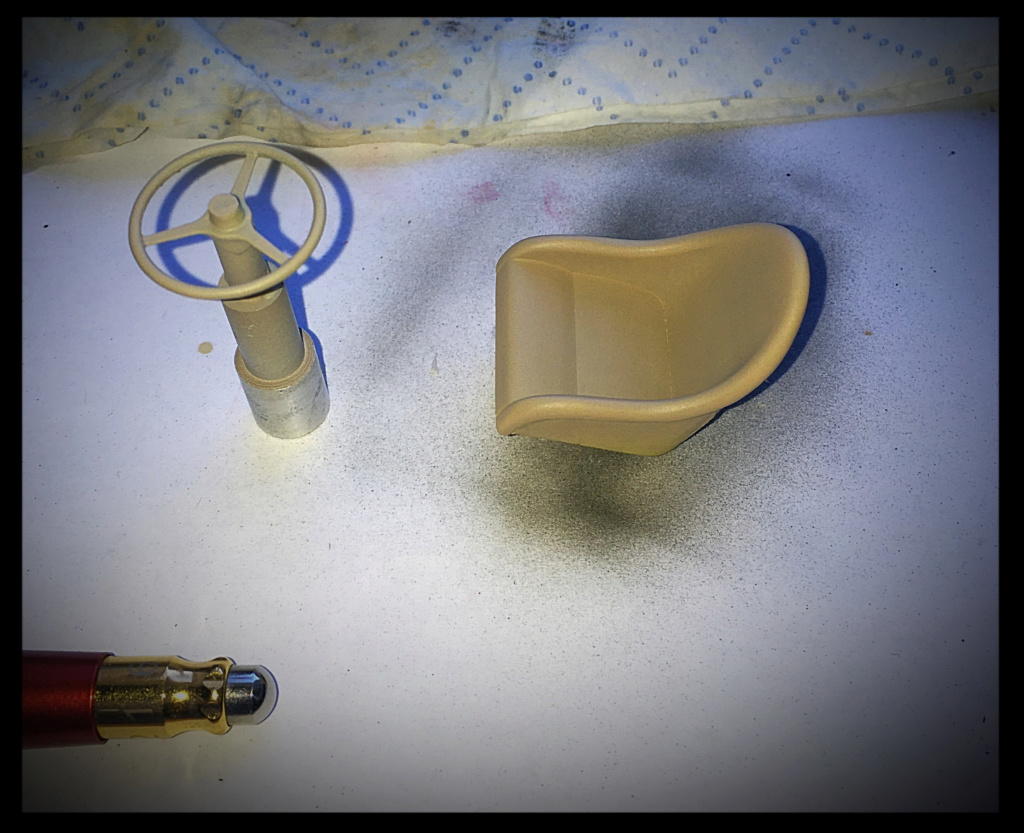 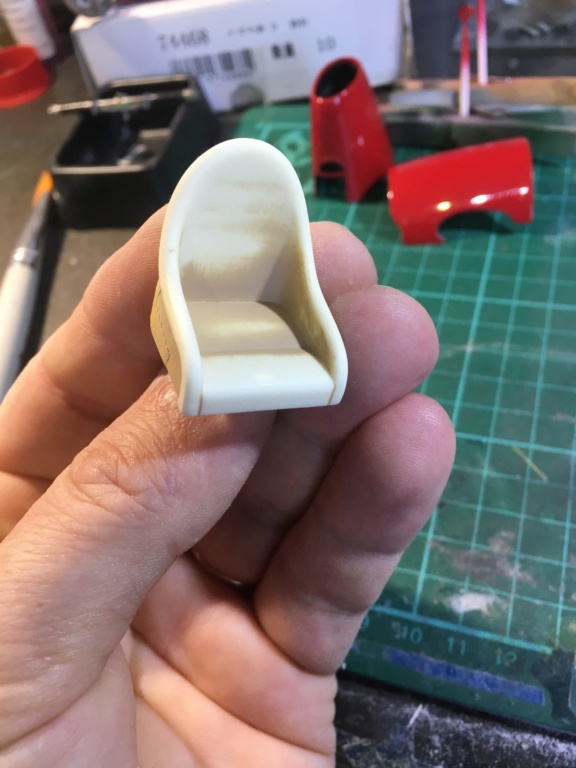 The exhaust is also modified with the addition of some welds in metal and Tamiya epoxy putty (sorry for the image ... blurred!) 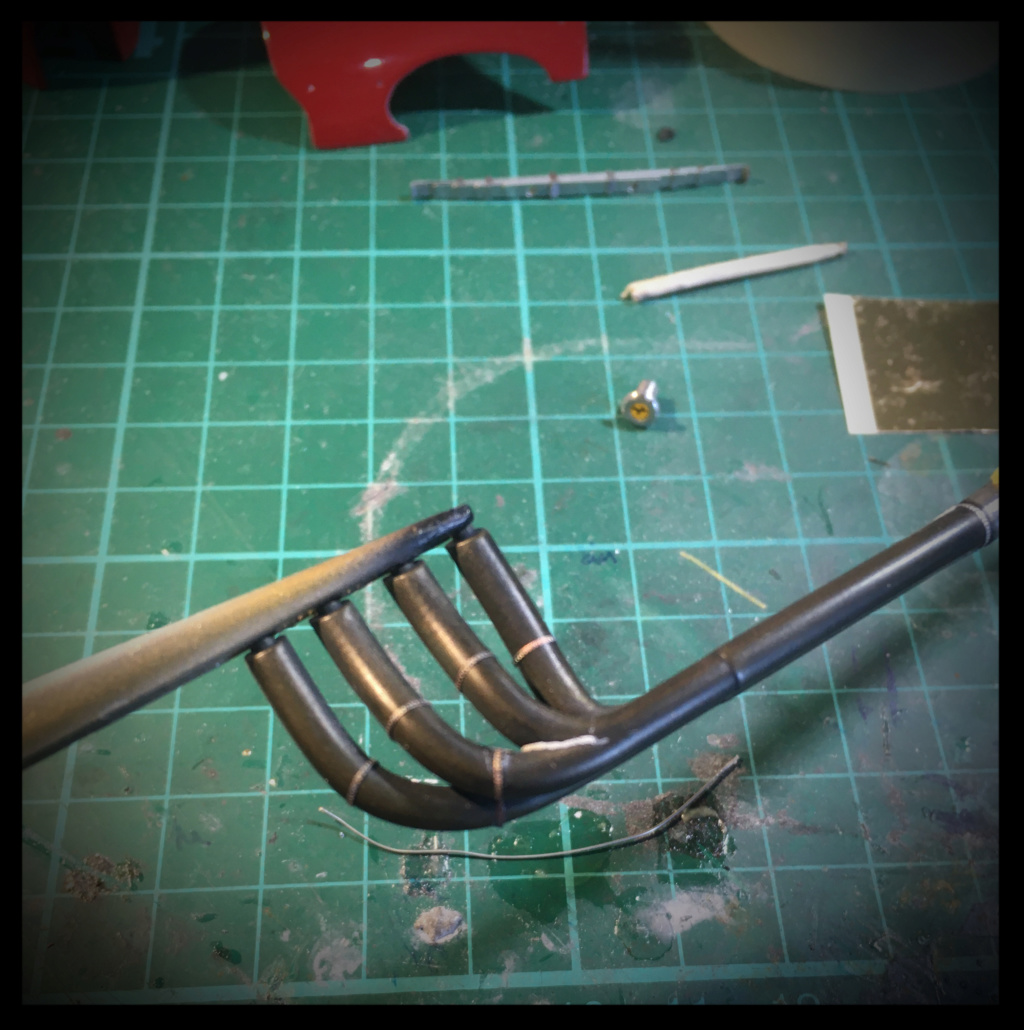 The whole is masked to pass a veil of diluted Gunze tire Black. This keeps the heated metal appearance at the outlet of the cylinders. The part before the 2 in 1 is buffered with liquid rubber to simulate the burnt paint which is crumbling, the whole is then passed to oils and pastels. 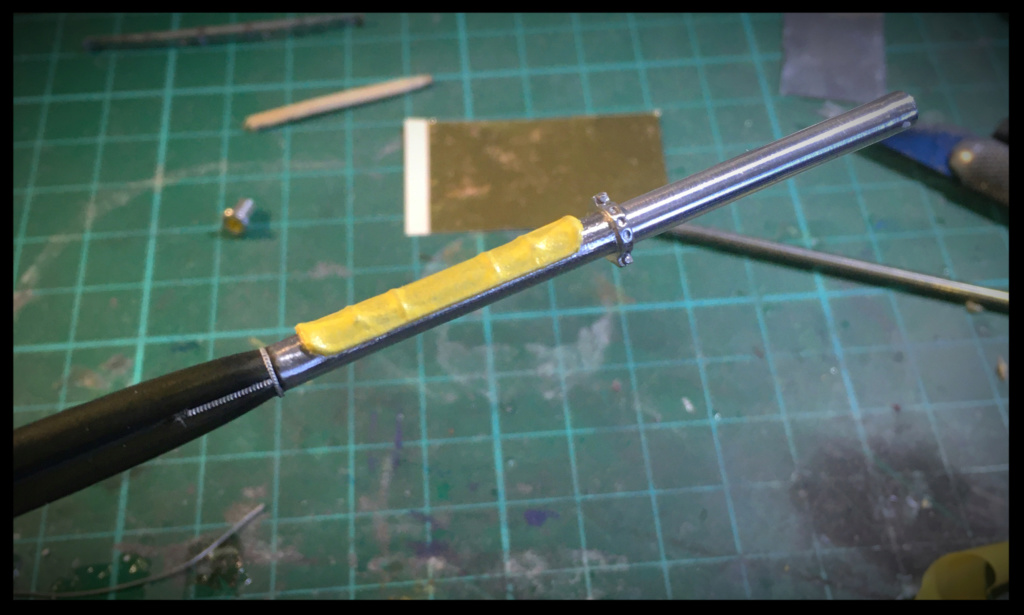 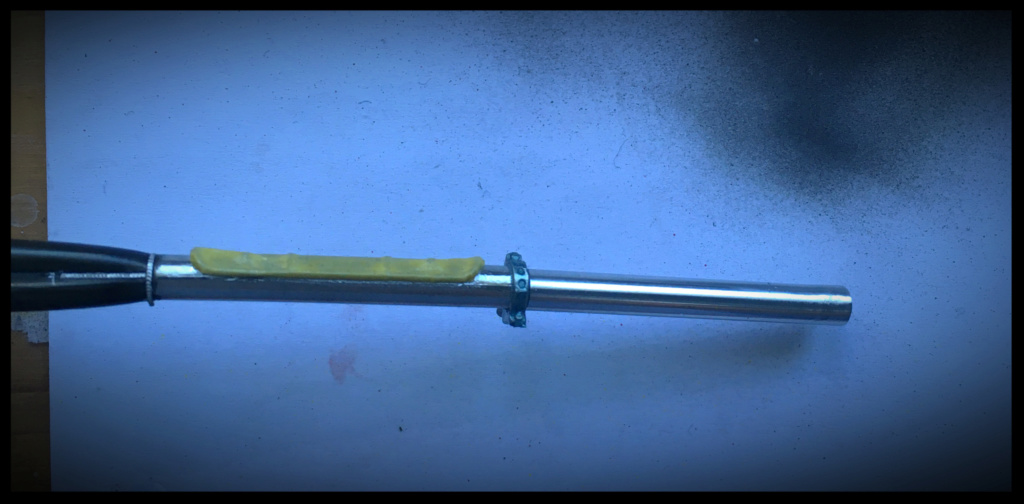  All of the front and rear axles are dismantled, rebuilt, modified and reinstalled. The clamps of the leaf springs are redone in strips of lead sheet of 1 mm: it is thinner, it facilitates the assembly and ... I like it more than before!  The rear axle wired, the tanks connected before a new pass of "traces of lives" ![]() i.servimg.com/u/f12/12/38/43/52/90411910.jpg[/img i.servimg.com/u/f12/12/38/43/52/90411910.jpg[/img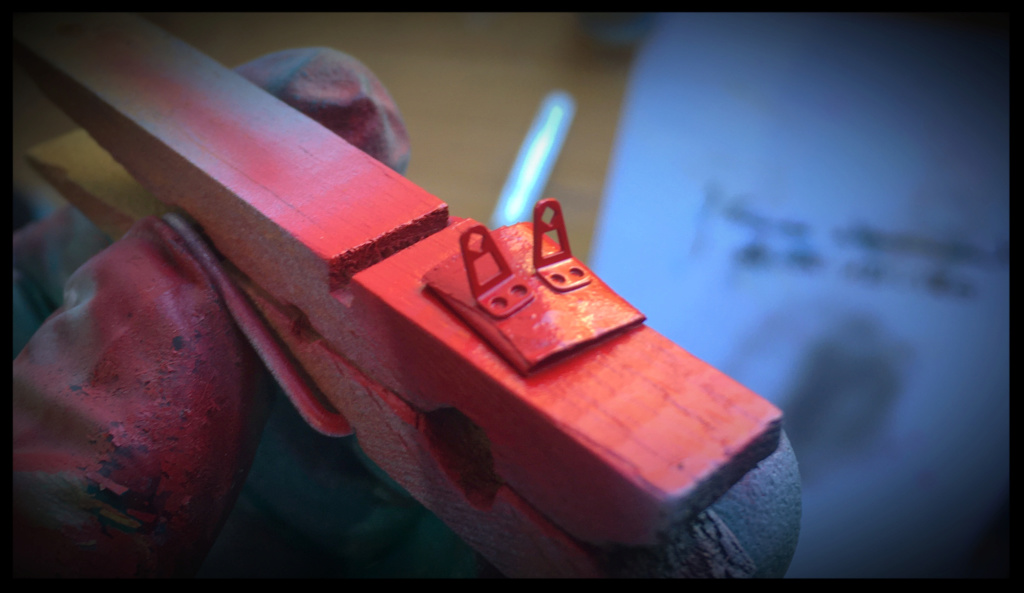 We don't really see the pretty castellated nuts anymore ...   And finally the final assembly with the installation of all the screws, the windshield, the mirrors, the installation of the decals ... The wheels are only provisionally installed so that I can more easily prepare its storage / transport box. I will definitely do more pictures later.   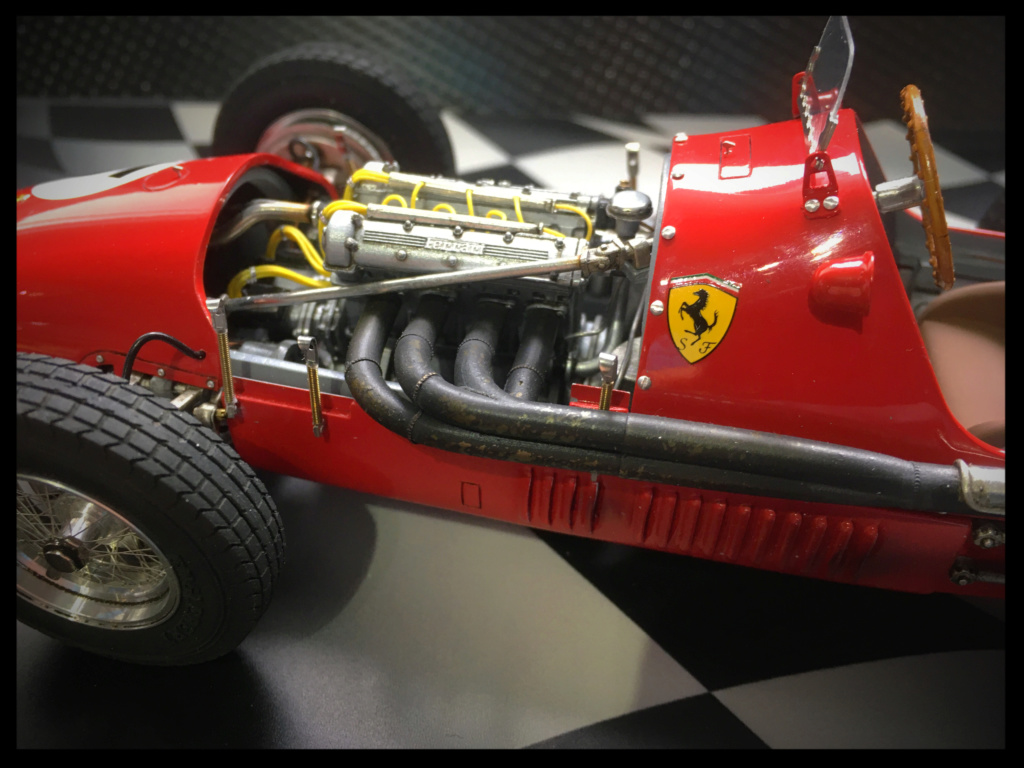 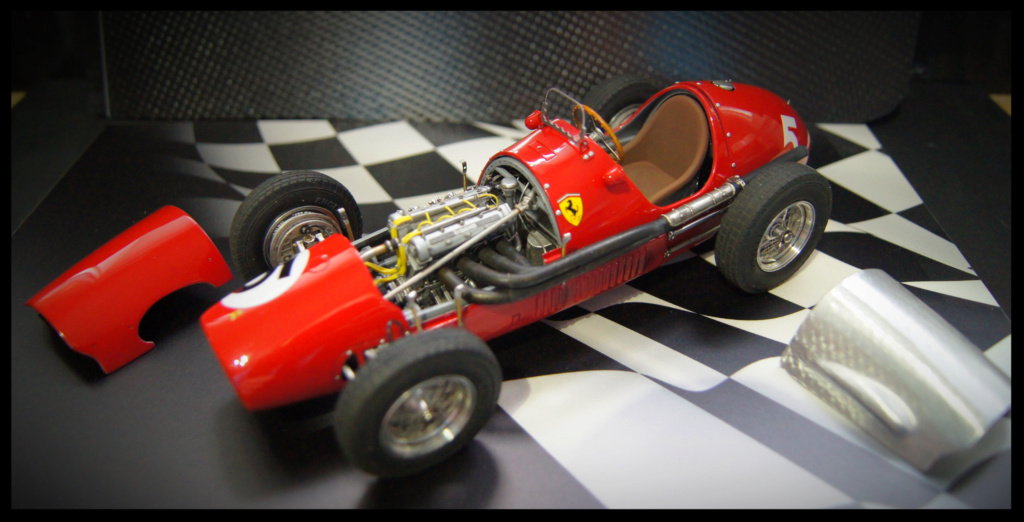  Voilà. Pascal |
|
|
|
Post by hurtubise56 on Apr 12, 2020 18:27:05 GMT -5
Wow, truly a work of art! Excellent job.
Brian
|
|
|
|
Post by jimhamill on Apr 13, 2020 11:20:49 GMT -5
Really well done - and a lot of courage (plus skill & patience) to take apart everything you'd done & redo it better
Bravo!!
Jim
|
|
|
|
Post by harveythedog2 on Apr 13, 2020 17:12:36 GMT -5
So fantastic! SUPER SWEET!
|
|
jj66
Podium Finisher
Posts: 344
|
Post by jj66 on Apr 14, 2020 11:46:32 GMT -5
Nice car and outstanding job!
|
|
|
|
Post by Gary Davis on May 17, 2020 14:24:38 GMT -5
Man...what a very cool car and outstanding job on the whole build. Very enjoyable to watch and read through from beginning to end.
|
|
|
|
Post by racerbrown on May 17, 2020 17:43:04 GMT -5
So good to see you finish this one!
There's just so much to learn from these posts!
Thanks for sharing.
Duane
|
|
pg265
Front Runner
Posts: 221
|
Post by pg265 on Nov 13, 2020 15:03:31 GMT -5
Hi,
I really apologize for the veeeeeeeery late reply...
Thank you so much Mates for all the kind comments.
I’m really happy you enjoyed the build along this long WIP.
Pascal
|
|