|
|
Post by racingforever on Jun 5, 2014 0:59:02 GMT -5
In addition, I don't suppose you'd be able, with your 3D printer, to rearrange the 1/18 Minichamps Sauber BMW F1.08 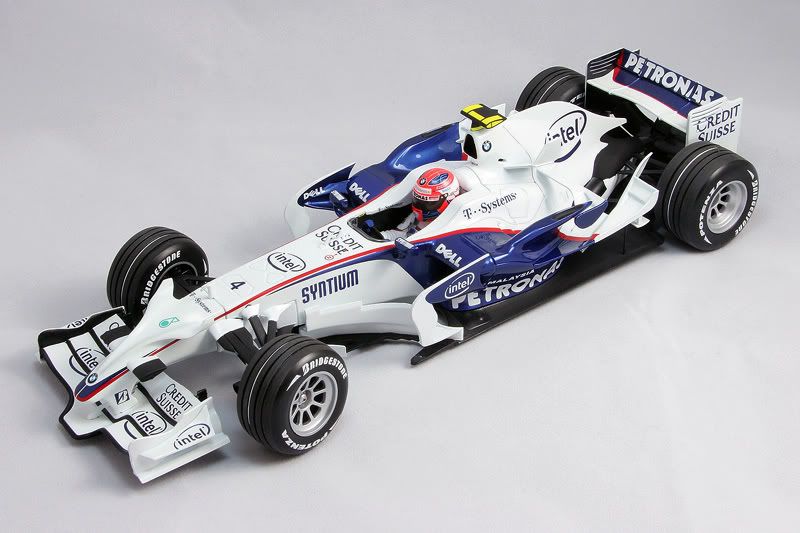 to look more like this? 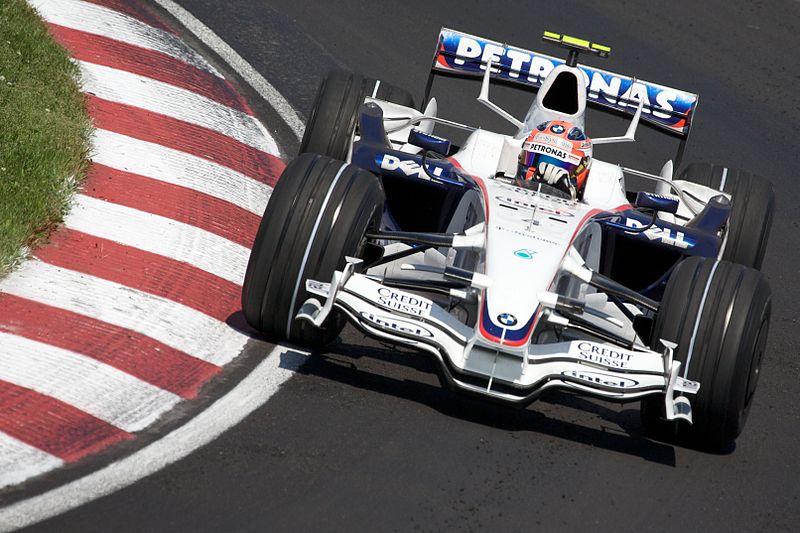 Ha, I think even I can handle that conversion!  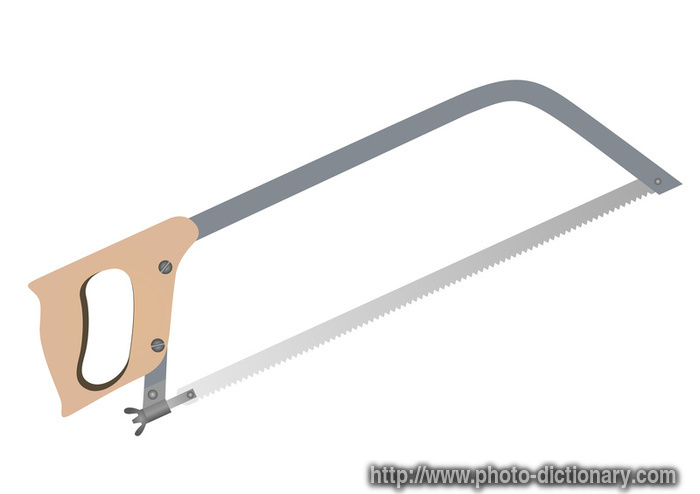 +  HAHAHAHAHAHA!!! That would be a hoot. At least it gets rid of those obnoxious nose horns. That's why I thought of such in the first place. It's a shame Minichamps didn't just do it themselves so I wouldn't be talking about it. Not to mention, it's a great nod to a man's maiden victory. |
|
|
|
Post by indy on Aug 26, 2014 10:18:57 GMT -5
After being asked to supply the Handford Device previously shown to a forum member in 1/18, I decided to finish up the part for printing. I am not sure the shape is perfect but the more that I keep looking at the references, the more that I accept that the shape is more accurate than what I gave it credit for previously. Michael from IndyCals had recommended making the endplates separate to ease painting. I went through several iterations before settling on what I finally had printed: a small triangular-ish extrusion on the sides of the wing and a matching recess on the endplates. I wasn't sure if it would make resin casting the pieces easier this way but it allows the builder flat surfaces on which to sand, prep, and paint. These pieces will not get resin copied but maybe a future version could, but that is for a later discussion. I, also, made an extension to the bottom of the back piece to give the builder a choice: (1) leave it as is to build a car from Fontana or Michigan in 2001 or (2) put a razor saw in a groove I built into the piece which allows for just the extension to be cut off to do a car from all other Handford Device MkI races from 1998 to 2002, including the canceled 2001 race at TMS and Nigel Mansell's test at Rockingham UK. I am not sure what configuration the ChampCars were going to run at for the 2003 finale at Fontana that was canceled due to wildfires, but I would guess it would have been the shortened MkI!? Got my first prints yesterday from Shapeways, a Handford Device MkI in both 1/18 and 1/25 scales. I used dish soap to clean them up but there is still a bunch of wax trapped in the interior of the main wing pieces. Not sure it is worth getting it out, but at least I was allowed to save some money by hollowing out the middle of the wing for printing. As a test on this initial print, I made the extrusion on the wing and the recess in the endplates with no gap in the fitting. I was happy that with the 1/18 endplates they were just held in place for the pictures by pushing the pieces together. However, three of the four endplates are warped and one of the 1/25 endplates was warped inward were the recess couldn't catch onto the extruded part so I had to tape it on for these pics. Do you guys with FUD experience think I could place these warped endplates under some books to see if they can be flattened? My only other complaint was on the 1/25 part where it has a rough line of printing overhanging at the top and bottom of the backside of wing. Probably will sand out but it was very noticeable when cleaning up the parts. Here are some pics of 1/18 wing placed behind an Action 1999 Reynard positioned as close as to where the wing sit on the race car, or at least as I could eyeball it from memory. There is the stock road course wing beside for reference. The wing looked weird at first with the brake duct snorkels sticking up next to it. However, it struck me that they never ran brake ducts at superspeedway events, so maybe that is why it looked off.
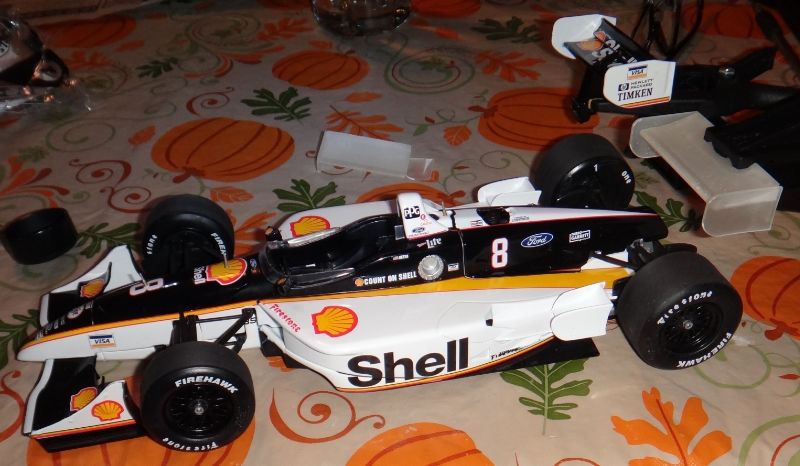 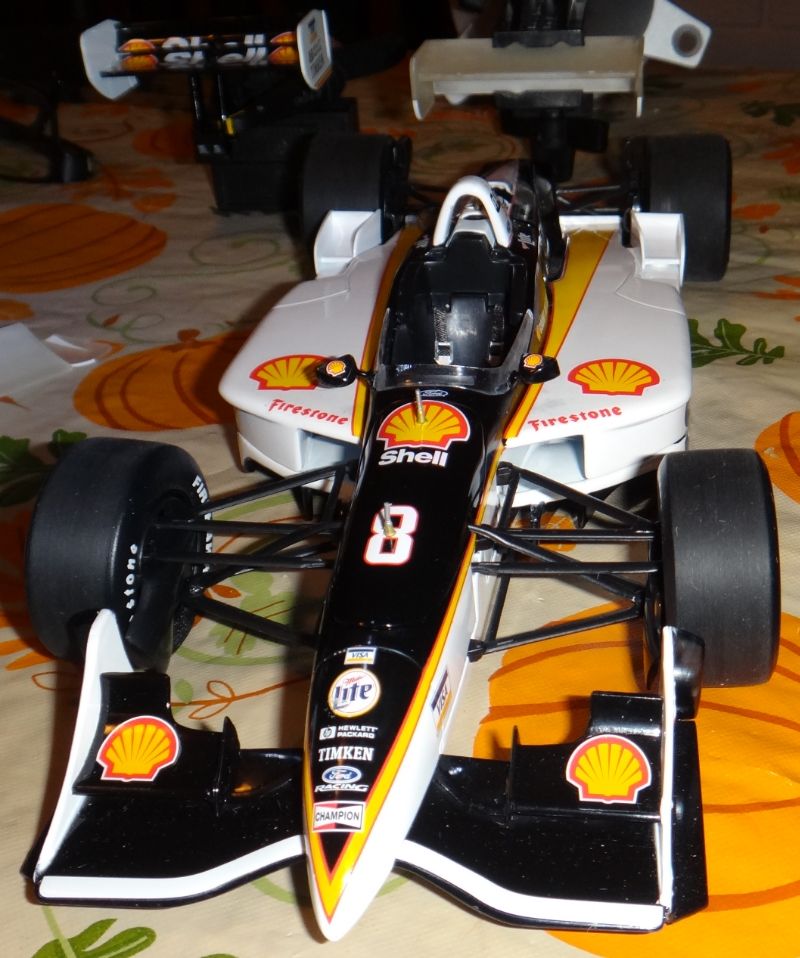 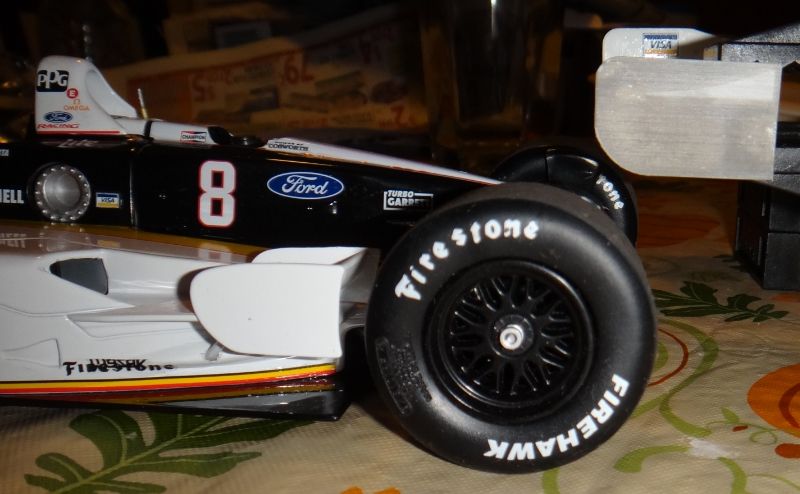 And here is the 1/25 wing positioned behind a Revell 1998 Reynard and resin 1999 Eagle.  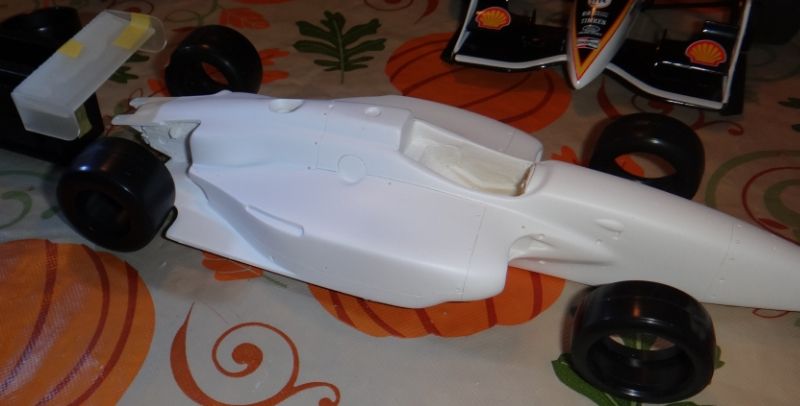 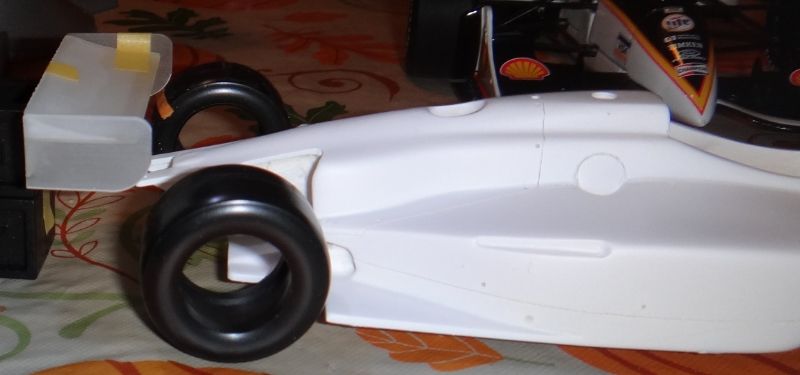 Sorry about the crappy lighting - my dining table is pretty dark. Jordan |
|
|
|
Post by IndyCarModels on Aug 26, 2014 11:15:24 GMT -5
Very Nice!
|
|
|
|
Post by GrandPrecision on Aug 26, 2014 11:18:51 GMT -5
As a test on this initial print, I made the extrusion on the wing and the recess in the endplates with no gap in the fitting. I was happy that with the 1/18 endplates they were just held in place for the pictures by pushing the pieces together. However, three of the four endplates are warped and one of the 1/25 endplates was warped inward were the recess couldn't catch onto the extruded part so I had to tape it on for these pics. Do you guys with FUD experience think I could place these warped endplates under some books to see if they can be flattened? Shapeways QC is pretty poor, and as such you get warped parts when you really shouldn't. In this case, the endplate. You can try soaking it in near-boiling water and try to flatten it, but if it is massively warped, take photos and tell them that it is warped more than their tolerances. I had a part that was warped by 10-15% when they claimed their tolerances were only 1-2%. The reprint came back warped just as badly. In the end, I ended up contacting cIdeas (Buildparts.com), who posted the 3d Printed roadster here last year. They printed the part for cheaper than Shapeways, it wasn't warped, and had a better finish. On smaller stuff like this, the print price will probably be slightly more expensive if you are printing the 3 parts (mainplane & 2x endplates) as separate pieces (regardless of being in "1 model"). What I would actually question Jordan, is what about making "pegs" on the mainplane, and providing a template for people to make the endplates themselves out of styrene? You could place the bolts in similar location as the real car, and after mounting, just paint them similar color as the bolts. |
|
|
|
Post by indycals on Aug 26, 2014 14:42:58 GMT -5
I had a part that was warped by 10-15% when they claimed their tolerances were only 1-2%. The reprint came back warped just as badly. In the end, I ended up contacting cIdeas (Buildparts.com), who posted the 3d Printed roadster here last year. They printed the part for cheaper than Shapeways, it wasn't warped, and had a better finish. On smaller stuff like this, the print price will probably be slightly more expensive if you are printing the 3 parts (mainplane & 2x endplates) as separate pieces (regardless of being in "1 model"). Interesting. I called cideas last year and spoke to what was one of the worst salesmen I've ever spoken to - he was more interested in badmouthing Shapeways and gave me ridiculously high prices (like 10-20 times more than Shapeways) telling me how expensive it was just to turn their machines on. |
|
|
|
Post by GrandPrecision on Aug 26, 2014 15:49:20 GMT -5
Interesting. I called cideas last year and spoke to what was one of the worst salesmen I've ever spoken to - he was more interested in badmouthing Shapeways and gave me ridiculously high prices (like 10-20 times more than Shapeways) telling me how expensive it was just to turn their machines on. I would assume someone else than whom I have dealt with. For single-part prints, I have found their pricing to be less than Shapeways FUD. If there are multiple parts though, the pricing does increase substantially. For example, my 1/18 Speedway Bumpers on Shapeways cost is like $36.36, c ideas came out at ~$30 per bumper. Once you get into individual small parts though, pricing appears to be higher. For example, my 1/18 Road Course front wing is about $27.50 for FUD. They came back at around ~$20 for the mainplane with ~$30 for the pair of endplates, so at that point its about double the price of Shapeways. Depending on the project though, and knowing that I will not have a warped piece? Depending on the item, that's a great advantage. All of my RC endplates have arrived warped in some fashion by Shapeways, some worse than others. My favorite part of cideas though? For me, they're local. I was able to order something on Wednesday before Mid-Ohio weekend, pick it up Thursday on my way to Ohio and meet-up to deliver the piece to someone on Saturday. Some Shapeways orders only took a week to ship, but some took almost a month to ship. If you're dealing with 1/18 or smaller, I think you're right at that fringe point where Shapeways is similarly priced, but doing some larger unrelated stuff, I've found as your model gets larger, the print quality at Shapeways gets iffier, at least in FUD/FD. |
|
|
|
Post by Calvin on Aug 26, 2014 19:10:39 GMT -5
Very cool Jordan! I was wondering about these!
|
|
|
|
Post by INDY22IAM on Aug 26, 2014 20:51:25 GMT -5
We ought to start our own 3-d club. We could all pitch in a certain amount and by a printer and sell parts at cost to the club members and anything sold to the non-members goes back into the printing designs and materials. I know this is easier said than done proposition but than again may bee not.
I bought 3 speedway bumpers from Shapeways and they arrived in about three weeks but were very nice. I would say the only problem is I had to sand them down to get a nice smooth paint finish. They are not cheap though. Technology never is until others start doing it better and at more reasonable prices.
|
|
|
|
Post by racingforever on Aug 26, 2014 22:02:46 GMT -5
When that kind of technology is smoothed out so anyone can do it without an expensive hitch or glitch, that'll be the day.
|
|
|
|
Post by indycals on Aug 27, 2014 2:12:54 GMT -5
'affordable' printers that generate the quality we need are not out there yet.
And even when they are, they might not be 'more affordable'. A great example is home photo printers. The printers may be cheap, but ink, paper and paper are expensive, especially when you have nozzles clog up and have to reprint photos. I haven't had an inkjet printer in at least 7 years. It is cheaper to send my pics to a lab and you get better quality and don't pay for screw ups.
|
|
|
|
Post by GrandPrecision on Aug 27, 2014 6:48:36 GMT -5
Given a choice, I'd rather invest in a professional grade printer that can print white rather than a 3d printer. With ALPS stuff disappearing, eventually there will need to be a change to a replacement of some sort...
Like Michael said, the time & materials to "learn" to 3D print, plus the initial costs, I rather just pay someone else to do it than spent the same amount of money printing stuff wrong!
|
|
|
|
Post by indy on Aug 27, 2014 7:30:34 GMT -5
Using a professional printer is a great option if you can wait a week or more for your parts. You get access to some of the highest resolution industrial printers out there (resolution which home printers can't touch) and when technology changes (as it is rapidly now) the professional outfit buys new printers/upgrades, not me. The only draw back is the lead time to get parts and I can be very patient.  Shapeways QC is pretty poor, and as such you get warped parts when you really shouldn't. In this case, the endplate. You can try soaking it in near-boiling water and try to flatten it, but if it is massively warped, take photos and tell them that it is warped more than their tolerances. I had a part that was warped by 10-15% when they claimed their tolerances were only 1-2%. The reprint came back warped just as badly. In the end, I ended up contacting cIdeas (Buildparts.com), who posted the 3d Printed roadster here last year. They printed the part for cheaper than Shapeways, it wasn't warped, and had a better finish. On smaller stuff like this, the print price will probably be slightly more expensive if you are printing the 3 parts (mainplane & 2x endplates) as separate pieces (regardless of being in "1 model"). What I would actually question Jordan, is what about making "pegs" on the mainplane, and providing a template for people to make the endplates themselves out of styrene? You could place the bolts in similar location as the real car, and after mounting, just paint them similar color as the bolts. How are you measuring the warp? For example, if the piece is 10 mils thick all the way through but when you caliper the piece it measures 11 mils then that is 10% warp by your calculations, right? I was measuring the end of the piece (to get thickness without warp) and then measuring the piece across the warp (trying not to squeeze it in the calipers). Am I on the right track? The peg thought is not bad at all. I will consider it on the next redraw of the part. I did avoid pegs on this print because I did not want anything that would break off. One thing I liked about this layout that I printed is all the painting surfaces could be easily sanded, the endplates have to be properly positioned to be installed, and if someone wanted to do their own endplates then it can be done pretty easy. All the builder would have to do to sub in their endplates is cut/sand the extrusion flush with the side of the wing and the endplates can be a template to trace out scratch-built pieces out of plastic or metal. If I need to go the cIdeas route, I'll be hitting you up for tips. I already have figured out a few ways to combo the pieces into 1 that can be split up by me post-production. Jordan |
|
|
|
Post by indy on Aug 27, 2014 12:51:49 GMT -5
Contacted customer service about the warp, we will see. As pointed out previously, this is another benefit of using a professional printer.
Jordan
|
|
|
|
Post by indy on Sept 5, 2014 14:42:53 GMT -5
Replacement for the warp pieces are on the docket to be (re)printed   Jordan |
|
|
|
Post by GrandPrecision on Sept 5, 2014 15:40:48 GMT -5
Replacement for the warp pieces are on the docket to be (re)printed   Jordan Great! Now the hope is that you actually receive an unwarped piece this time.  |
|
|
|
Post by Chris on Sept 6, 2014 10:49:33 GMT -5
Jordan, I had a similar problem with some 1/16 Weber IDF48 Carbs I had printed, the thickness of the Air Horns wouldnt print without severe warping so I spoke to Tim Floyd, one of the owners of TDR , and after a few emails we worked it out, he changed the design enough to get what I wanted. and I was very happy with the product I received. Should you have additional concerns contact him at TDR Innovations. I know you are currently working with Shapeways but Tim seems always up to help solve a 3D Print problem.. Chris
|
|
|
|
Post by methanol on Dec 20, 2014 19:16:19 GMT -5
The 2003 Lola RC wings in 1/18 would be really nice. So would the 2005.
|
|