|
|
Post by Calvin on Jan 2, 2014 13:59:30 GMT -5
Can I start another WIP for my 1965 Winner? Craig sent me this awesome kit a few weeks ago, but I still need to pay him back in a big way....any ideas what I should pay him back with?  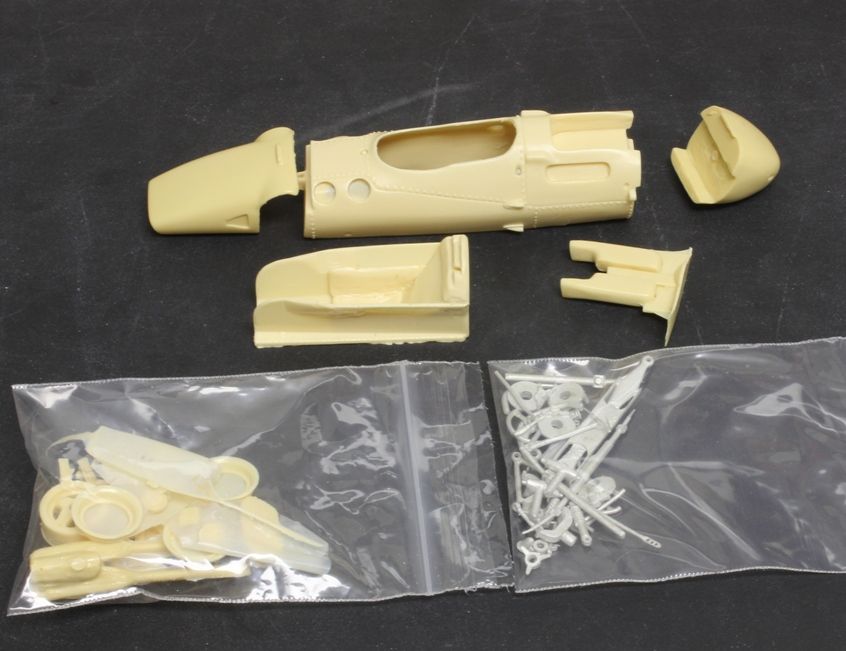 |
|
|
|
Post by Michael Chriss on Jan 2, 2014 19:41:51 GMT -5
I have never seen this. Is it a Lance kit?
|
|
|
|
Post by Calvin on Jan 2, 2014 20:19:47 GMT -5
Yep, I think he did it about 5 years ago.....
|
|
|
|
Post by indy on Jan 2, 2014 22:55:31 GMT -5
Yep, I think he did it about 5 years ago..... Yeah, that was a cool moment here. The guys here kept talking about wanting to see it released and Lance took the initiative to release it again. Jordan |
|
|
|
Post by Calvin on Jan 3, 2014 1:08:44 GMT -5
I recommend test fitting and familiarize yourself with the rear suspension before gluing on the tail. Plan it out in your head how it will go together when the tail is on. I also drilled out the holes were the lower A-arms go for extra strength. 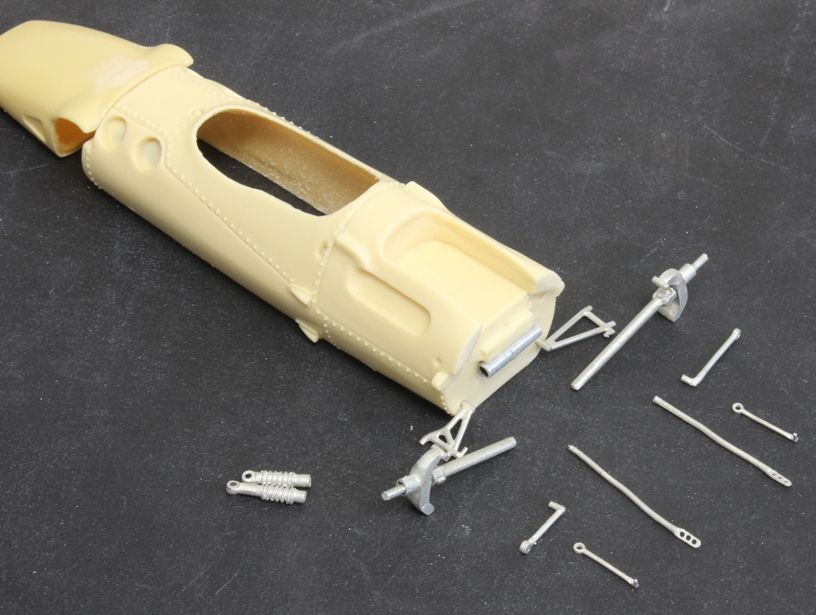 I already glued on the nose, and I also added a strip of styrene under for extra strength as well. Whenever I can I always focus on strength! |
|
sam198
Front Runner
 
Posts: 217
|
Post by sam198 on Jan 3, 2014 2:23:02 GMT -5
So pretty much the exact opposite of an actual Lotus 
|
|
|
|
Post by Calvin on Jan 3, 2014 2:40:00 GMT -5
^^^^^ Good Point! LOL!  |
|
|
|
Post by clm1545 on Jan 3, 2014 9:34:45 GMT -5
I glued the nose and tail on last, Calvin as you can see in my Yamaha Spl WIP. For me, it made the suspension work easier. I don't think there is a "right" or "wrong" way to build most kits.
Take Care
Craig
|
|
|
|
Post by Calvin on Jan 3, 2014 9:57:27 GMT -5
I agree Craig, its all about personal building style. I dry fitted most of the critical parts before gluing on the tail. The reason why I glued on the nose and tail already is to make sure I get that "traditional Lotus Strength" and that it makes for a cleaner/less possible mistake paint job......since I'll have to be painting that yellow stripe.
It eliminates the possibility of a super glue disaster around the contact points.
|
|
|
|
Post by Calvin on Feb 23, 2014 15:37:16 GMT -5
While waiting thru the rain delay of the super bowl Indy 500 of stock car racing the Daytona 500 I decided to work on the Lotus 38 a little.....originally I was going to glue in the cockpit in after the paint job but my animal like instincts told me to go ahead and glue it in to avoid huge problems later....well I'm glad I did because for the first time I managed to glue the body to my desk (see black paint on bottom) So another reason to get the potential messy jobs out of the way first..... 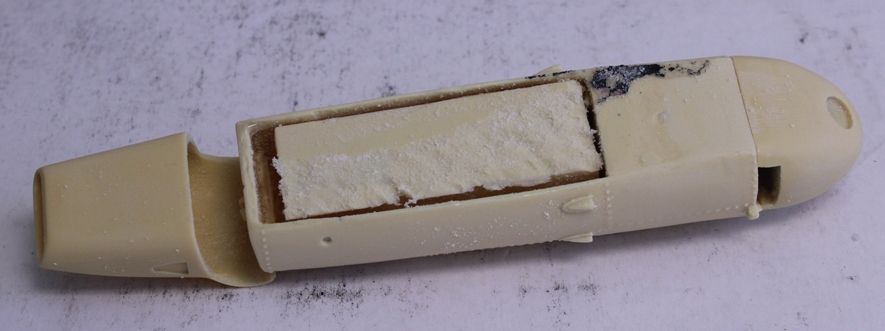 |
|
|
|
Post by indy on Feb 27, 2014 15:26:13 GMT -5
If it weren't for rain delays causing driver to actually race the whole distance, I don't think Gen6 plate racing could be much worse.
The Lotus 38 has always been one of my favorite Lotuses.... or Loti..... or.... ahhhh forget it, one of my favorite Lotus race cars - in both the '65 green and yellow and later flo red STP liveries.
How are you going to get that black paint off, Calvin?
Jordan
|
|
|
|
Post by mjjracer on Feb 27, 2014 15:54:32 GMT -5
I truly hope Lance does this one again - truly the most iconic rear-engined Indy car, IMHO. Jimmy was my hero as a kid, that was my first 500, and it is truly a gorgeous car. All good reasons to want this one.
Calvin, your building style is, in a word, unique. I'm such a lousy builder I may just try it to shake things up. I know this will come out fantastic.
MJ
|
|
|
|
Post by Calvin on Feb 27, 2014 16:33:58 GMT -5
How are you going to get that black paint off, Calvin? Just sand it off. |
|
|
|
Post by Calvin on Oct 25, 2014 15:56:02 GMT -5
In other news I started on the 65 winner once again....I feel really bad I haven't got this done yet as Craig gave me this kit......I feel bad because I sense that Craig is loosing sleep over me not getting it done.....I mean HOW RUDE of me not to pay more attention and not get it done!  But I'm going to get it done here soon and make him proud - I hope! I got it in White Tamiya Primer then sprayed the Tamiya Yellow on for the future Yellow Stripe. 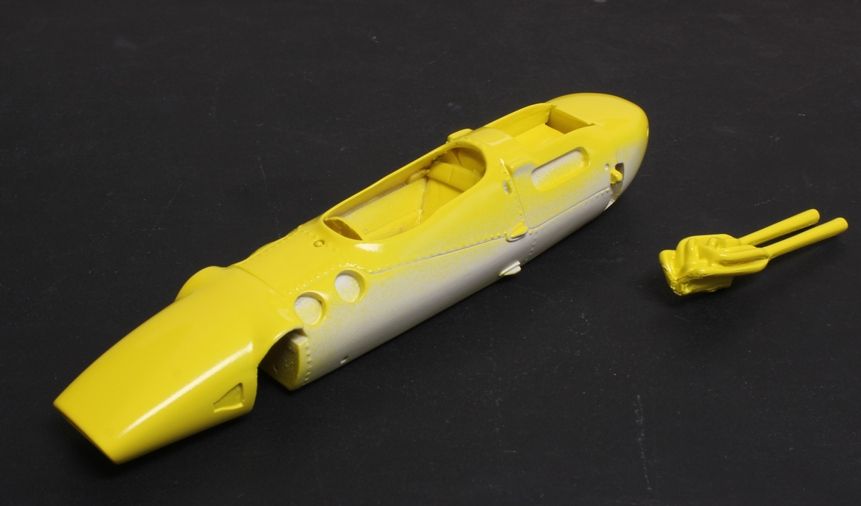 Then I masked it which is very easy, the only part that needs attention is the curve on the nose to make sure its equal on both sides - to be honest with you its kinda hard to tell since its yellow tape on yellow paint!  |
|
|
|
Post by clm1545 on Oct 25, 2014 16:53:00 GMT -5
I actually sleep very well, Calvin. You just might want to take a close look at that nose, just sayin. I am a little concerned about a Lotus 34, but I do have about 75 unbuilt kits to take up the slack.  |
|
|
|
Post by Calvin on Oct 25, 2014 17:06:16 GMT -5
You just might want to take a close look at that nose, just sayin. You just made my heart sink! Em I missing something? Did I screw up?  |
|
|
|
Post by Calvin on Oct 25, 2014 19:54:43 GMT -5
Everyone takes notice of a Lotus! Even Freddie Agabashian as he runs the other direction - Freddie hated GREEN! he thought it was very bad luck! 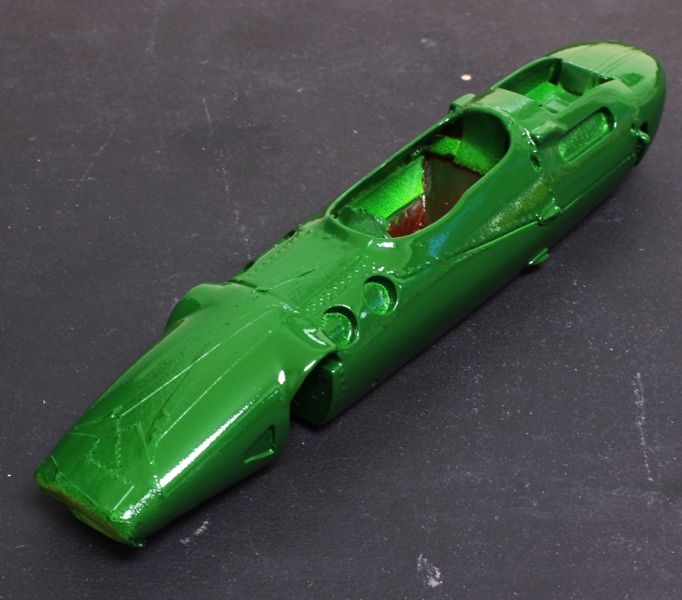 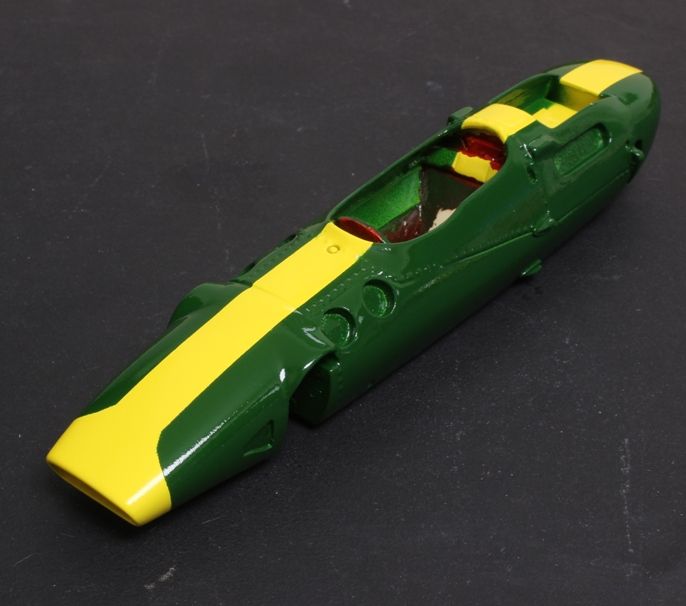 I imagine somewhere in Colorado at about 6K feet a decal maker is proud I actually mask my yellow off on my Lotus.....  . |
|
Deleted
Deleted Member
Posts: 0
|
Post by Deleted on Oct 26, 2014 21:04:47 GMT -5
Where is the scoop? How did you remove it? Are you going to put it back on?
IIRC Lance put a second scoop in the kit? I know the car has a very prominent air scoop on top of the nose. My kit is stacked away (it is painted yellow already) and I kind of lost interest in it rather than mutilate and fill the aforementioned appendage.
I get stopped a lot on kits
|
|
|
|
Post by billj on Oct 26, 2014 23:59:17 GMT -5
The Lotus is looking really good. What yellow did you use, I like the results.  |
|
|
|
Post by indy on Oct 27, 2014 7:57:50 GMT -5
Nice seeing this one being worked on again, Calvin. Still one of my favorite Indy winners. Where is the scoop? How did you remove it? Are you going to put it back on? Good catch, I missed that detail. You can see it in the Jan 2nd post of the kit starting out but by the Jan 3rd post it looks filled/sanded down. Jordan |
|
|
|
Post by pje on Oct 27, 2014 10:21:54 GMT -5
Since the scoop is green I get the feeling that crafty Calvin has removed it for ease in painting. Hopefully he has recast it and will be offering it for sale in his parts department.  Paul Erlendson |
|
|
|
Post by Calvin on Oct 27, 2014 11:12:18 GMT -5
Crafty Calvin almost forgot about that darn scoop! Yes I did remove the one already cast into the nose and Lance has an extra one for easy painting to glue on afterwards.
|
|
|
|
Post by Calvin on Oct 27, 2014 11:13:29 GMT -5
The Lotus is looking really good. What yellow did you use, I like the results.  Tamiya TS-16 Yellow and TS-43 Racing Green. |
|
|
|
Post by Calvin on Oct 27, 2014 12:10:51 GMT -5
When dealing with a masking line I usually like to wet sand it down and clear coat over it to get rid of the abrupt edge. If I didn't, the decal will have a line bump on both sides. 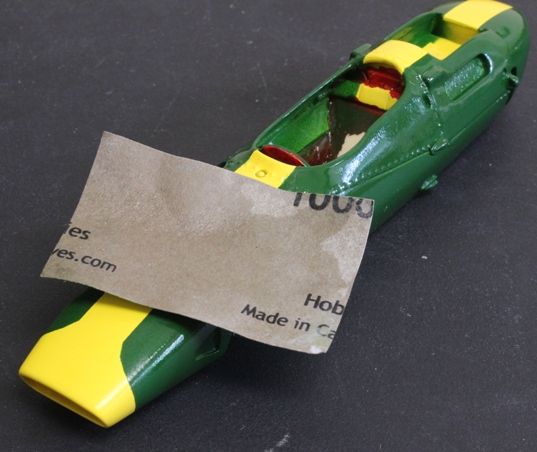 1,000 grit 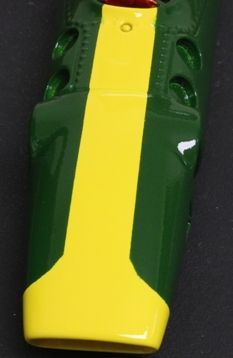 Tamiya Clear mostly over the yellow and green edges. 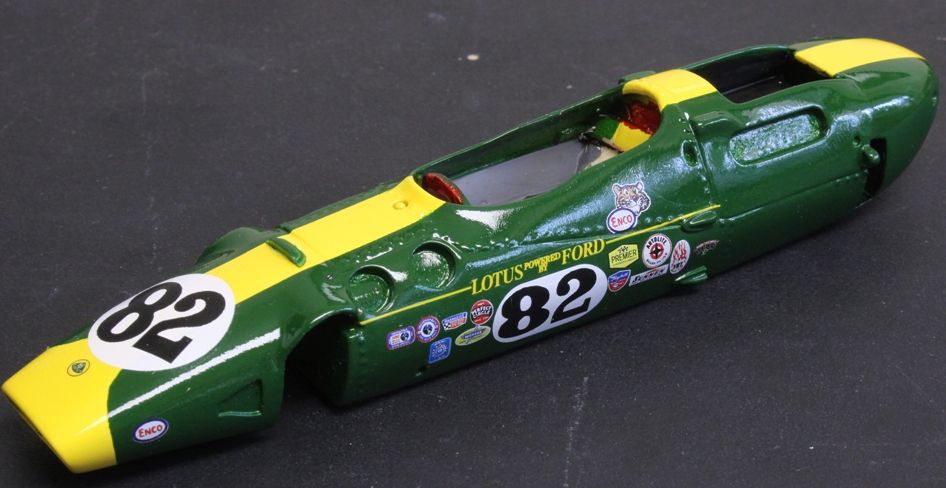 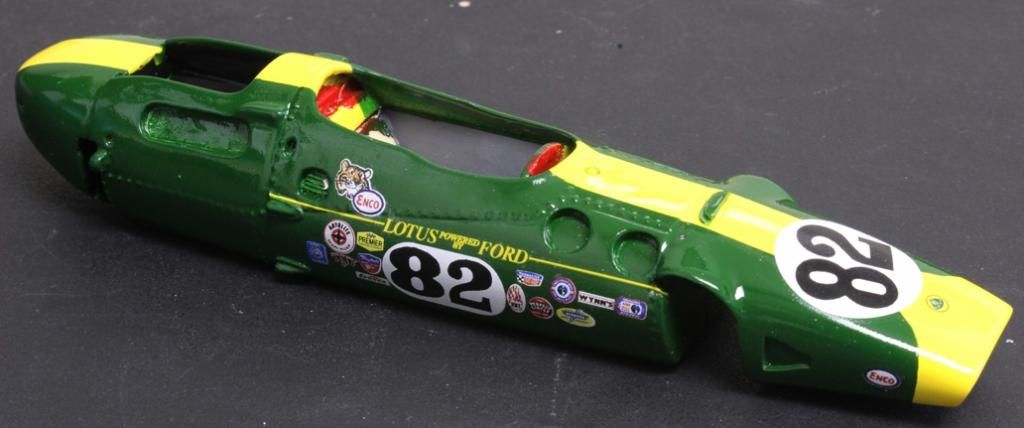 Indycals are all on! and the famous nose scoop! |
|
|
|
Post by Michael Chriss on Oct 27, 2014 13:10:27 GMT -5
Looking great Calvin!
|
|
|
|
Post by professor on Oct 27, 2014 20:06:42 GMT -5
Not to be picky but I don't think the stripe extended into the cockpit being the seat.
|
|
|
|
Post by Calvin on Oct 27, 2014 20:54:10 GMT -5
Not to be picky but I don't think the stripe extended into the cockpit being the seat. I know I'll paint it red later..... Some people are amused by my strange building style. I prolly should have painted the cockpit area before hand and just mask it off, but I can paint it up just as well later anyway.... |
|
|
|
Post by IndyCarModels on Oct 27, 2014 21:38:47 GMT -5
Another great project.
|
|
|
|
Post by jamesharvey on Oct 29, 2014 8:12:20 GMT -5
I always paint the cockpit inside after the outside since I am using flat paint most of the time. I can't seem to mask well enough to keep the exterior paint or glosscote from getting inside. If what you do, works for you, the, go for it. We all do the same. Your productivity is amazing. I finish two or three a year and you do that in a month.
Jim
|
|
|
|
Post by Calvin on Oct 30, 2014 0:47:53 GMT -5
Its been clear coated 5 times with Testors lacquer. Then some assembly going on here this "rear engine job"! I hear these "rear engine jobs" are the wave of the future.   |
|