|
|
Post by Calvin on Oct 11, 2009 2:02:08 GMT -5
A few days ago I was looking though my junky old AMT decals and notice That both of my Sinmast decal sheets were not to bad, Then I got one of those crazy ideas to build Wally Dallenbach's 1975 #40 Wildcat! That he almost won Indy with that year.... 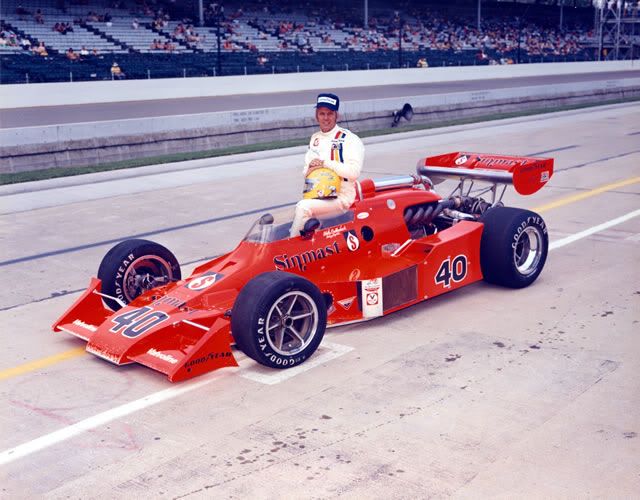 Most of the decals will work, I will have to search for some... I have lots of plastic.......... I have a lot of 70's AMT parts laying around I have a can of Bright Red I have the dumbness to take on these scratch build projects  This was all done today so far..... 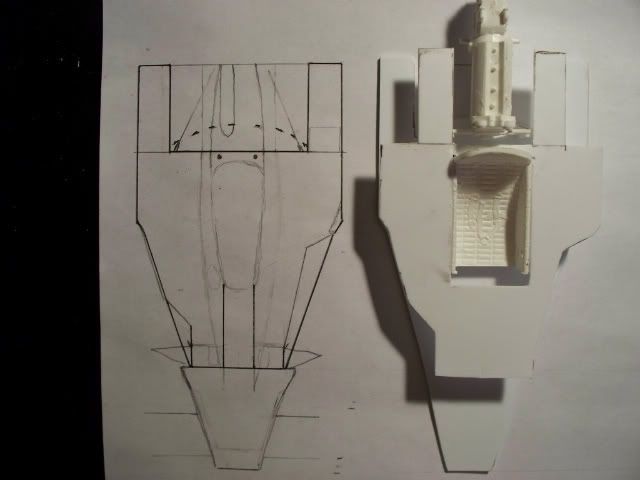 First I scaled the pictures of the car the best I could....Then drew out the full scale lines of the car. -Cut out the floor pan with 0.06 thick plastic....Note the side pods are different from right to left. -Then cut the top sheet with thinner plastic....The top has a little different route than the floor pan. -I pulled out the good old AMT Eagle seat and glued it in (I'm might be having 2nd thoughts on that? Its not tall enough.) 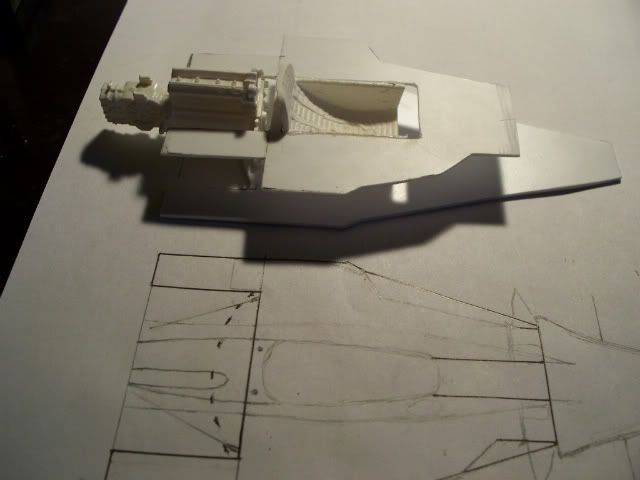 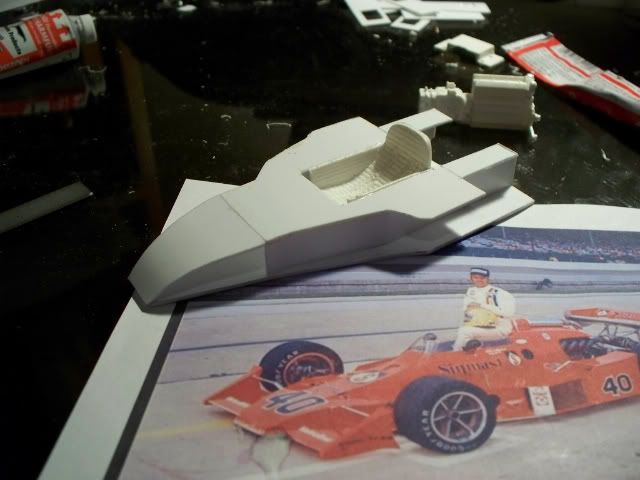 The side peaces go on, along with the nose, i messed up on the nose a little were the black marks are, I need to grind a little out.(shown below) 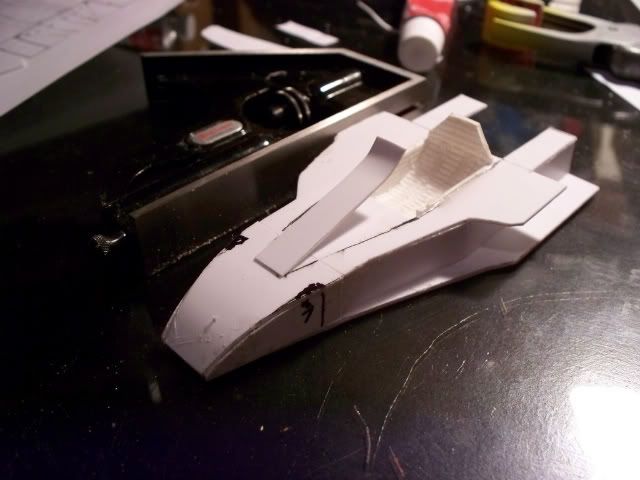 Then the cover is starting to go on. Now this next part separates the men from the boys, The radius's of the top cover.  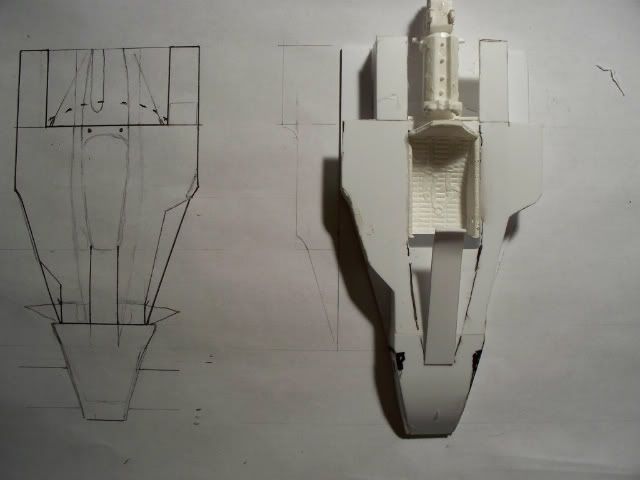 If I screw up or not I will show you more....later |
|
|
|
Post by herk56 on Oct 11, 2009 8:02:42 GMT -5
Nothing dumb about that idea! Keep us posted on your progress and also on what decals you need.
Brian
|
|
|
|
Post by kurzheck on Oct 11, 2009 9:08:08 GMT -5
Looking good so far. Happy scratch building.
Trevor
|
|
russd
Race Winner
  
Posts: 482
|
Post by russd on Oct 11, 2009 10:07:57 GMT -5
I agree. Thats not such dumb idea at all. Your much better at scratch building then I am. It would take me about a month to get as far as you did in one day. I'm in the process of Scratch building the indy 78 winner. I'll try to post some pictures of that soon.
RussD
|
|
|
|
Post by Calvin on Oct 11, 2009 10:55:55 GMT -5
Its a great idea but a dummby working on it LOL  |
|
|
|
Post by Calvin on Oct 11, 2009 14:43:02 GMT -5
Coming along a little more....I got the basic structure of the top cover on... 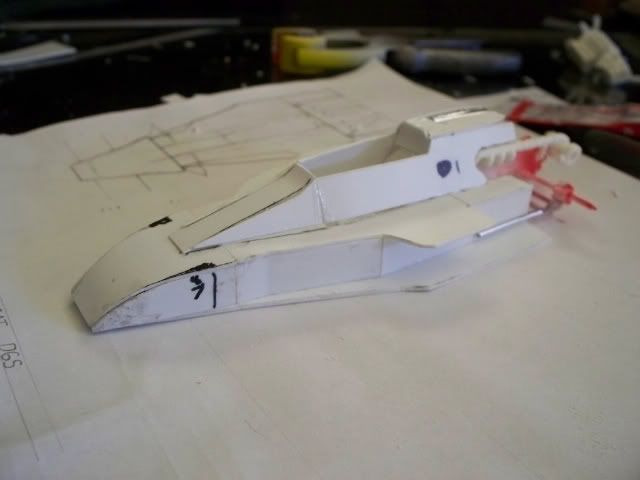 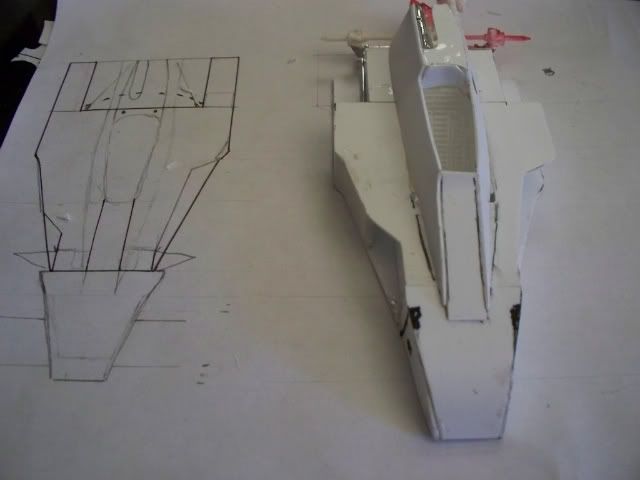 |
|
|
|
Post by indy on Oct 11, 2009 19:16:40 GMT -5
A great job on this one - a real inspiration to us all!
Jordan
|
|
|
|
Post by Patrick on Oct 11, 2009 20:50:00 GMT -5
I love it! I know it will come along nicely!!!
Patrick
|
|
|
|
Post by Calvin on Oct 11, 2009 21:44:14 GMT -5
I guess I should show you the rear Wing, actually I did all of this first before starting on the whole project, just in-case the decals were not going to work  But they did  which gave me the green flag to do the rest.... 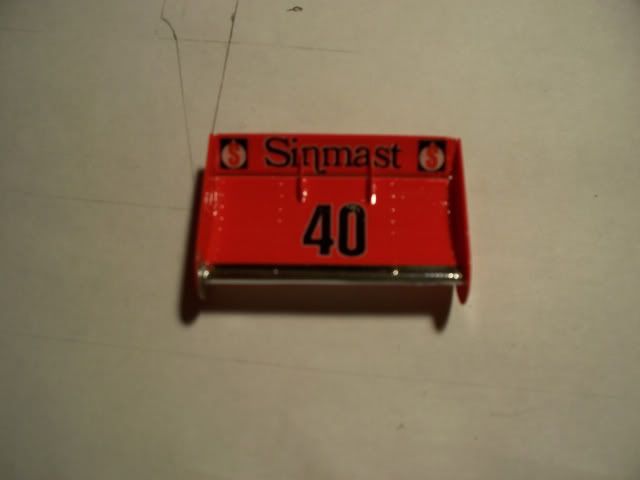 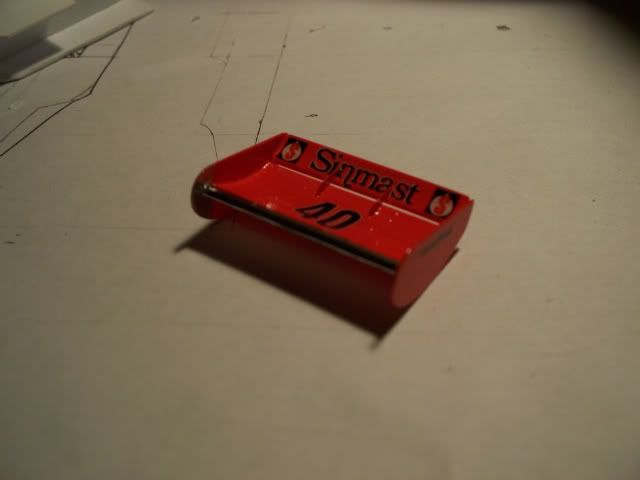 All I did was use an AMT eagle wing and cut the top part off and re-glued it at more of an angle......this same method can be used in building a 1975 AMT Jorgenson Eagle. |
|
Deleted
Deleted Member
Posts: 0
|
Post by Deleted on Nov 22, 2009 18:49:35 GMT -5
Hi Chaparral. Any news about this projet? Any new pictures?
Cheers.
Alexandre
|
|
|
|
Post by Calvin on Nov 22, 2009 19:26:15 GMT -5
No...still the same as of now...haven't been in the mood for this one lately but i'll get going on it when I'm ready  |
|
Deleted
Deleted Member
Posts: 0
|
Post by Deleted on Nov 26, 2009 13:37:39 GMT -5
A great looking scratch building project! Looking forward to the progress.
Mongo
|
|
"500 LEGENDS"
Hot Shoe
  "500 LEGENDS"...ART IN MOTION...Racing's Most Spectacular Memorabilia www.500legends.com
Posts: 150
|
Post by "500 LEGENDS" on Feb 19, 2010 14:14:33 GMT -5
How is your work on this car coming along? What a great looking car!! Any new pictures? Have you ever considered casting this car in resin? I would love to have a model of this one!!
|
|
|
|
Post by Calvin on Feb 19, 2010 14:40:13 GMT -5
How is your work on this car coming along? Nothing new, I need to get going on it again. Its my best scratch build thus far.... Yes. I dont know anything about casting resin, I will try..... Id be dumb not to.  I know once I did learn I will be one "Casting Machine" LOL ;D I would do this one..(75 wildcat) an 81 winner, 82,83,84........late 70's Lightning......a 84 lola......what else 82 Longhorn .....maybe?......aaaa.........Mclaren cosworth.....Oh yeah a 1978 Parnelli But thats all a dream, as of now  |
|
|
|
Post by Patrick on Feb 19, 2010 17:49:24 GMT -5
2K,
You are a fearless scratch builder...nice to have you around so I can watch what you do.
Patrick
|
|
Deleted
Deleted Member
Posts: 0
|
Post by Deleted on Feb 20, 2010 0:09:24 GMT -5
2k- id recomend miliput superfine when puttying contours etc...
|
|
Deleted
Deleted Member
Posts: 0
|
Post by Deleted on Feb 20, 2010 0:48:14 GMT -5
May I suggest what I'm using for the Maserati 8CLT. I'm using a product that you can get at any swimming pool supply place. It's
A+B Epoxy Putty by Rezolin, LLC...thier phone number is (386) 667-8238. Its a two part epoxy putty that cures over night to the point of being able to sand on it. I then use Evercoat to spot putty and clean up. Good luck to you!
Russ
|
|
|
|
Post by Calvin on Feb 20, 2010 2:08:54 GMT -5
Thanks for the input, guys  I have a lot to learn with scratch building. I guess I need to get back going on it.....  |
|
|
|
Post by Patrick on Feb 20, 2010 23:35:49 GMT -5
2K,
You're doin' a killer job! The hard part to learn is already past you, you believed it could be done!
Patrick
|
|
|
|
Post by Calvin on Feb 21, 2010 0:34:50 GMT -5
Thanks for the motivation guys!  I pulled it out today and spent a good 1/2 hr on it..... I know it looks rough, but I'm not worried about that yet, I'm mostly worried about the basic shape (Blocking it out) Clean up is later  I've noticed I've been getting my builds cleaner and cleaner every time.  You guys were talking about using fine filler I had some fine Red Bondo chip filler that seems to work great?   I also need to add those flairs on the nose (shown above with arrows) As you can see this Wildcat was totally built to be on an Oval. Note the Side pods and rear Wheel Flairs...or what ever they call them?.....Rear Wheel Air Foil?.......Anyway, as you can see one has a intake, my guess for the oil cooler? and the other just curves up. EDIT: I have no idea what I did with these pics - if I knew I'd fix the broken link.... |
|
|
|
Post by indy on Feb 21, 2010 12:51:28 GMT -5
The only long-term problem with Bondo red putty is it shrinks and cracks over time where a higher quality two-part putty like Evercoat or Milliput won't. Great job on this one!
Jordan
|
|
|
|
Post by Calvin on Feb 21, 2010 14:14:07 GMT -5
The only long-term problem with Bondo red putty is it shrinks and cracks over time where a higher quality two-part putty like Evercoat or Milliput won't. Great job on this one! Jordan Oh, I guess I will get some, I just thought it would of worked since it was fine and easy to work with. I've used it a few times on minor stuff with good results.....but what do I know? LOL ;D |
|
Deleted
Deleted Member
Posts: 0
|
Post by Deleted on Feb 21, 2010 17:23:18 GMT -5
The only long-term problem with Bondo red putty is it shrinks and cracks over time where a higher quality two-part putty like Evercoat or Milliput won't. Great job on this one! Jordan AMEN JORDAN!!!!!!!!!!!! One of the many reasons I use, Evercoat and A+B Epoxy Putty...they don' shrink. I have has major league troubles with Milliput on resin, but not on plastic....Wierd, huh? I will always use Evercoat and A+B....great stuff! Russ |
|
|
|
Post by indy on Feb 21, 2010 19:17:49 GMT -5
Not trying to discourage you 2K but rather I'd like to see your work stand the test of time. In 5-10+ years, I want your builds to look as good as new!
Jordan
|
|
|
|
Post by lance on Feb 21, 2010 20:05:25 GMT -5
If you use it as a glazing putty or to fill seams( not to big of seams) you should be fine , if you try to build up an area with any thickness you will find the putty does not want to dry and it will shrink and crack when it does. Sqaudron putties will do the same , sculpting and glazing putties work well when used as they are intended. Use the sculpting putty (milliputy or a&b) for building up larger areas. Lance
|
|
|
|
Post by Calvin on Feb 25, 2010 17:53:49 GMT -5
Does anyone by chance have a picture of the DGS engine?
So I can see the difference between a normal Offy and the DGS?
|
|
|
|
Post by Calvin on May 16, 2010 23:39:31 GMT -5
I thought I would give an updated on this scratch build project... Its coming together, there is still alot to be done. Applying the primer helps my eyes out instead of looking at all off those crazy shades of multiple colors...it helps when trying to focus on the shape of the car. If you see anything wrong feel free to chime in....because it might be something I haven't picked up on yet  ......Im an easy going person and I want to know the truth  Who cares about my feelings we want a perfect model....right?  ;D 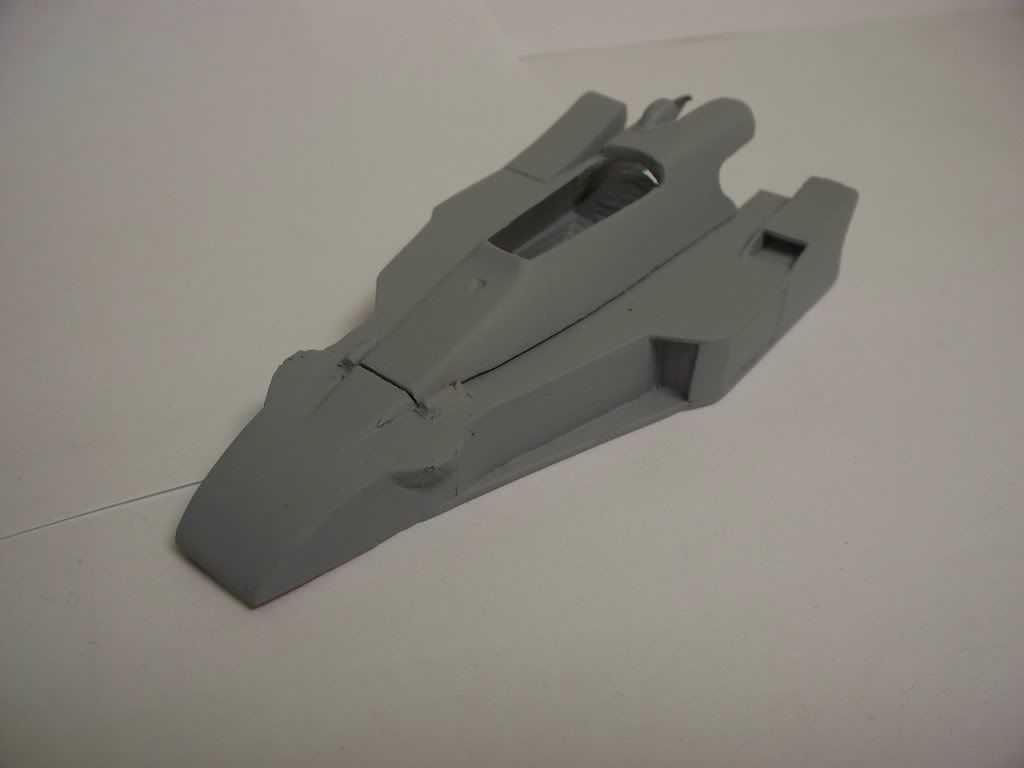 I know the top of the cowling right in front of the windscreen needs some more "up sweep" or a higher angle 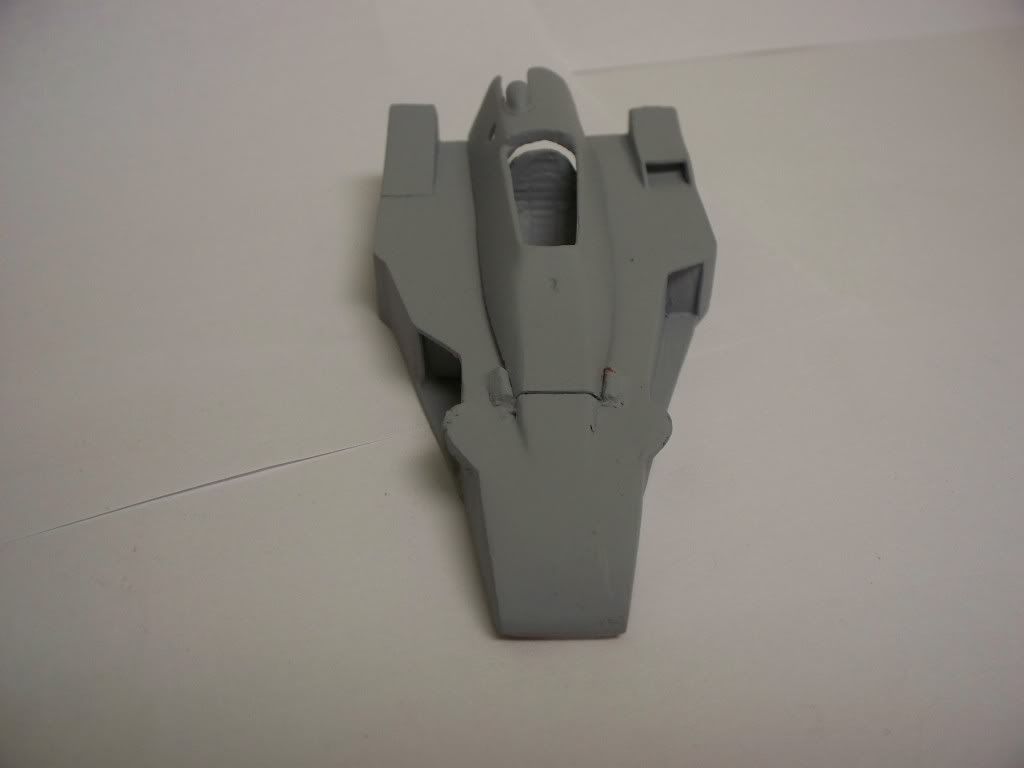 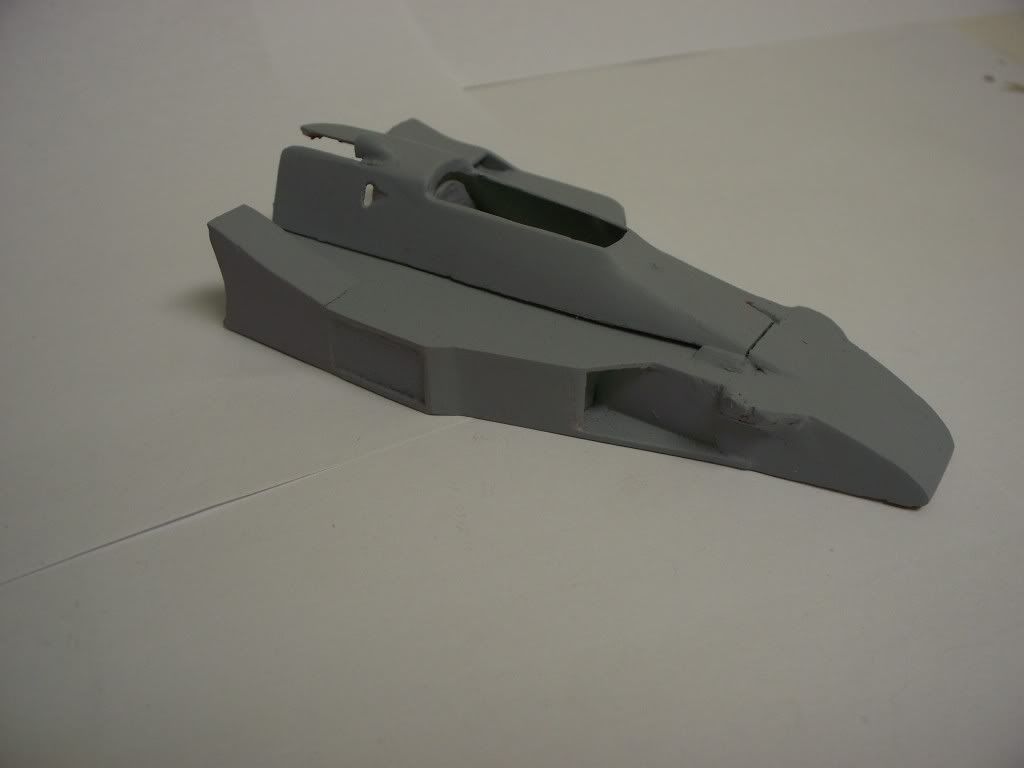 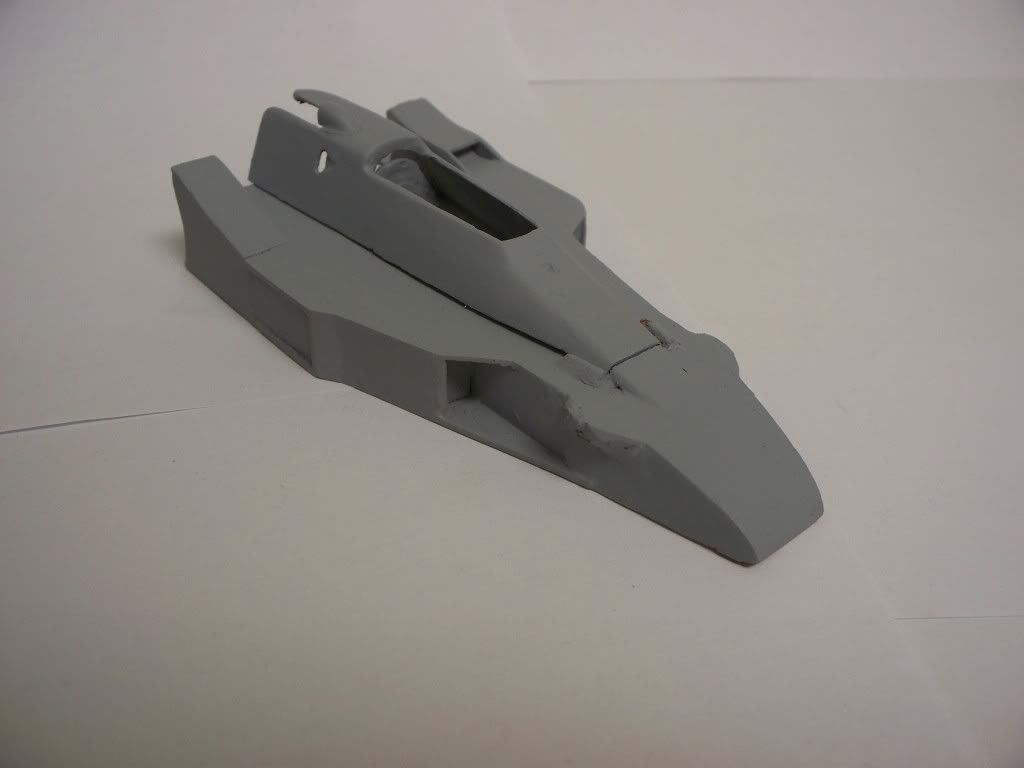 |
|
|
|
Post by Patrick on May 16, 2010 23:43:40 GMT -5
This work is what I mean as to your prowess as a scratch builder Calvin. Great stuff my friend.
Patrick
|
|
|
|
Post by Calvin on May 24, 2011 14:30:01 GMT -5
After watching the 1975 race broadcast for the first time it has really got me into a 70's mood. All I can say is: I need to redo this Wildcat! This one I did is too far wrong - its like half 1/23rd scale and half 1/25 scale  LOL |
|
Deleted
Deleted Member
Posts: 0
|
Post by Deleted on May 24, 2011 16:41:21 GMT -5
Calvin, looking the photos, there's a fuel tank behind the driver, a space more or less 0,8mm that you need to create, or i'm wrong ? Nice project.
Cheers.
alex
|
|